Many people have pets and most choose cats or dogs; there are also those who choose exotic birds, ferrets, and so on as pets. However, a certain type of people prefers peace and quiet at home, and the most they can afford is aquarium fish. It is precisely this type of people that this article will come in handy.
Before choosing the fish you like, you need a place to keep them, that is, you need an aquarium. At the moment, aquariums and accessories for them require significant financial investments.
There is also a possibility that the aquarium manufacturer is not entirely clear of conscience and supplies defective goods or goods that are made of low-quality materials.
This leads to the question of how to make an aquarium with your own hands, and at home.
Preparation and selection of glass
The first step is to purchase the appropriate materials, as well as prepare the necessary tools. So, if you are determined to make an aquarium yourself, you need to choose glass for the aquarium. Here you need to immediately determine the volume of your aquarium, because this factor is fundamental when choosing the thickness of the glass.
If you need a small aquarium with a volume of up to 30 liters, then 4mm thick glass is suitable. For aquariums with a large volume, thicker glass is needed, that is, for an 80 liter aquarium, the glass should be 5mm thick.
And if you need a large aquarium with a volume of 80-150 liters, then the thickness of the glass for such an aquarium should be at least 6 mm. And finally, for aquariums with a volume of 150-220 liters you need glass 8 mm thick.
It’s worth noting right away that you shouldn’t use glass that has been lying somewhere in bins for a long time, because everything has its own service life and the glass could simply dry out.
It is best to purchase new silicate glass of the M1 brand, without irregularities, bubbles and with perfectly smooth edges.
Selection of adhesive
The choice of the adhesive component is almost the main task, since it is used to assemble the aquarium. It is important to observe certain nuances here. The adhesive should not be toxic, as the inhabitants of the aquarium will simply be poisoned.
In addition, the glue must have such qualities as elasticity, high service life, ease of application, and also quickly set the glass. The best candidate that meets all these requirements is silicone sealant.
DIY fan: how to make a homemade powerful fan. Basic parameters and properties of fans (130 photos)
Do-it-yourself bait - composition, application features and storage methods (115 photos and videos)
DIY sliding gates - how to build simple and automatic gates. Schemes, drawings and review of the best ideas (90 photos)
Aquariums up to 100 liters can be assembled using transparent sealant. If the volume is greater than this value, it is worth using black sealant, as it is more durable.
Decorating with stones
Many fish, such as African cichlids, like to hide and need places to hide. For these purposes, decorations are made from stones in the aquarium. But one should take into account the fact that some stones, such as limestone, marble, tuff, sandstone, release calcium salts into the water and make it hard.
The stones in the aquarium are either simply arranged beautifully, or they are used to make various slides and grottoes.
If you decide to place stones using the aquascape technique, then it is better to choose uneven, textured and preferably dark ones. Stones without marks and with smooth smooth edges look unnatural. The porous texture of the stones will create unnecessary shadows.
The stones should not be the same size on the ground, otherwise they will merge.
In order for the aquarium to imitate a corner of the waters of the wild, you should avoid too flat, even ground. It can only be level at the front wall, so as not to draw attention away from the decoration.
Pebble house
Rounded pebbles do not affect the quality of water in any way, therefore they are very popular among aquarists who make decorations for their aquariums with their own hands.
Any work begins with measurements. The size of the grotto should be such that there is a distance from it to the front and rear windows, then the fish that are fleeing persecution will be able to swim out of the grotto from both sides.
You should never make one entrance to the house so that the fish are locked there.
Step-by-step instruction:
- Tubes are rolled out of landscape paper, which will be the openings of the grotto.
- The foundation is being formed. To do this, the flattest and widest stones are laid out in a row with a gradual rounding. It is better that the stones are the same in height.
- Paper tubes are placed between the stones to mark the entrance to the grotto.
- To create an empty space inside the grotto, a wad of paper or cellophane wrapped with tape is placed in the center of the circle of stones.
- The second level of stones and all subsequent ones are placed on glue (silicone sealant) to the desired height.
- After the walls of the slide are ready, a flat pebble is placed on a ball of paper - this is the base of the roof from the inside.
- The stones connecting the walls and the base of the roof are glued.
The grotto is ready.
You can insert small snags into the resulting holes between the pebbles or, after drying, plant plants, for example, Thai fern. This will make the grotto in the aquarium more natural.
Silicone on the slide can be masked with small pebbles or sand.
The grotto is kept for two days, then the tubes can be removed from it.
It is better to place heavy grottoes not on the ground itself, but on a plexiglass substrate; for this you may even need to clear a place at the bottom. If a pebble of aquarium soil gets under a heavy mainsail, it can cause a point stress in the bottom glass and it will crack.
Universal mainsail (simple option)
Before starting work, you need to have a clear idea of what the finished decoration will look like. It’s better to draw it to know exactly how many and what shapes of planes will be needed.
To make it you will need:
- expanded clay;
- water;
- cement;
- sand;
- polyethylene.
Manufacturing stages:
- Cement and sand are mixed in a ratio of 3:1.
- Expanded clay is covered with a cement-sand mixture, filled with water and mixed. The consistency should be such that each granule is in the cement, but does not sink in it. This is necessary so that the homemade decoration has a pronounced relief.
- Cellophane (cling film) is spread on a flat surface, the resulting mass is laid out on it, and blanks are formed: a base with two columns (2 pieces) and a separate flat part in the shape of an oval or rectangle, which will be attached to the columns.
- The blanks must be covered with cellophane on top, otherwise the cement will be brittle.
- After the figures have dried, a fresh solution of cement and sand is prepared in the same proportions. It is applied to the tops of the dried columns of one of the blanks and the flat part is placed on them. The second workpiece is already attached to the resulting platform with columns down. The joints are secured with cement.
The result is a relief textured grotto in three tiers. The structure should be placed in water for a week to remove excess alkali from the cement.
Such blanks can be of any shape and size. And due to the fact that the bottom is smooth, they can be used as a background by pasting over the back wall.
See how to make a small aquarium grower:
Tools
Before you start creating an aquarium, you need to prepare the appropriate tools. We will need metal corners, backing to create a gap, a utility knife, gloves, a couple of small spatulas, a “skeleton” (a gun for silicone sealant), masking tape, and finally small clamps.
By the way, you need to purchase a lid for your aquarium, but you can make it yourself.
An old aquarium and its new purpose
Almost any old aquarium can be turned into a wonderful interior decoration. It all depends on the style of the apartment itself, the imagination of its owners, as well as the size and shape of the fish tank. You can take the following examples as a basis for your work with an old aquarium:
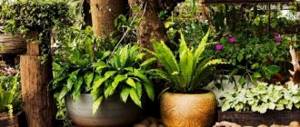
- Mini-greenhouse from an aquarium in the room. You can grow heat- and moisture-loving exotic plants in it. For example, orchids.
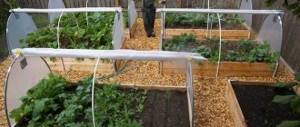
- A greenhouse for growing a small vegetable garden on the balcony. It can have not only a utilitarian function, but also an aesthetic one.
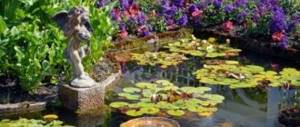
- Decorative installation for a room. It can be made permanent or the contents can be changed depending on the time of year and the upcoming holiday: New Year, Christmas or Easter.
- You can make an original coffee table from an old aquarium.
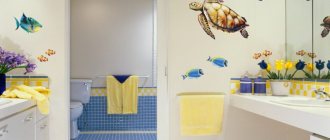
- An old small aquarium can be used to decorate a bathroom. You can store soap and small bath accessories in it.
Mini-greenhouse from an old aquarium
Assembly
Degrease the surface to apply the sealant. Apply a thin bead of sealant around the edges of the glass. After this, join the glass using a metal corner, but do not press too hard.
Make small spacers from cardboard or a block of wood and clamp the whole thing with clamps. In total you will need 4 profiles and 8 clamps for all corners of the aquarium.
Do-it-yourself computer repair - practical recommendations and diagnosis of the main types of faults (90 photos)
Do-it-yourself woodworking machine - tips for building a simple lathe and CNC machines (110 photos and videos)
- Do-it-yourself countertop: instructions for making a homemade kitchen countertop from wood and stone (125 photos)
Do not forget that for normal living conditions for fish, it will be necessary to install an external filter for the aquarium and a pump so that the water does not stagnate.
Installation and arrangement
If you don’t have any ideas for arrangement, you can look online for a photo of a DIY aquarium. Overall, a home aquarium is a great way to add some color to your home and also find some peace in it.
After the structure has dried, it is necessary to carry out a couple of tests to ensure the integrity and tightness of the aquarium. Fill the aquarium with water in a place where you won't have to worry about flooding, such as a bathroom.
Leave the aquarium in this state for several days. If the “prank was a success” and the structure is airtight, it can be installed in the intended location.
Line the bottom of the aquarium with pebbles or decorative stones, add algae to the aquarium, having previously selected them for the type of fish that will live in this aquarium. You also need an aerator to saturate the water with oxygen, as well as an ultraviolet lamp.
By the way, this kind of aquarium made by yourself is suitable not only for fish, it can be used to keep red-eared turtles.
Do-it-yourself parallel bars - a step-by-step master class on making sports equipment at home (110 photos)
- DIY lamp - 130 photos of original and stylish ideas on how to make a homemade lamp from improvised materials
Do-it-yourself boiler - the main types of boilers and the features of their manufacture. 75 photos and video instructions for beginners
Terrarium and aquaterrarium
In principle, an aquarium can be converted into either a terrarium or an aquaterrarium. First of all, the lid is redone. However, such designs are better suited for not very large volumes, because access inside will be through the top (and not through the front wall, as in classic terrariums). In addition, large containers are difficult to ventilate only through the top. When converting an aquarium into a terrarium or aquaterrarium, remember that caring for reptiles and amphibians has certain specifics, and these animals themselves are very different in behavior and conditions from the fish you are used to.
And yet, do not be afraid of experiments, do not get tired of discovering new horizons for yourself and, although seemingly outdated, the aquarium will delight you for many years to come!!!