Laying laminate flooring is one of the most popular surface finishing methods in recent times. The material is light, warm and, with the proper knowledge, easy to install. Such qualities, combined with a variety of textures and shades, make laminate a universal finishing product. With its help, both cozy bedrooms and children's rooms, as well as presentable living rooms or offices are decorated.
Features of laying laminate
The instructions for laying laminate flooring are so simple that hiring specialists to carry out this procedure seems like a waste of money.
At the same time, when starting independent installation, it is worth understanding all the features of the material. Otherwise, instead of a smooth surface, you may end up with damaged laminate panels and swelling throughout the entire floor area.
Preparing the subfloor
The main requirement for the process of installing lamellas is a perfectly flat surface. In this case, it is necessary to pay attention to what type of base the coating will still be laid. Acceptable options include concrete, wood, linoleum. It is important to understand that installing laminate flooring on an uneven, soft floor is strictly prohibited; this can lead to breakdowns of the locking system, and as a result will lead to complete deformation of the base in the shortest possible time.
When laying laminate flooring on a concrete floor, you should make sure there are no cracks, holes, or other deformations. To do this, experts use a rule of 2 meters long. Having placed it edge-on on the floor surface, you should pass it with a wide spatula between the rule and the base, thanks to which you will be able to find out the level of difference, if any. More accurate information can be obtained using a laser or hydraulic level. The maximum possible difference per 1 m² is no more than 2 mm, otherwise it is necessary to start leveling the base with special building mixtures and wait for them to dry completely.
When laying on a wooden floor, it is also important to pay attention to evenness. If differences are detected, they are eliminated with a grinding machine. It is also worth making sure that there are no creaks, and checking all the elements of the base for strength under the weight of the human body. If during the inspection creaky places or weak boards are found, they should be replaced or strengthened. In modern practice, craftsmen often level a wooden base by attaching OSB boards or plywood.
See also: Substrate for linoleum
Basic requirements for the procedure
The first points in the rules for laying laminate flooring are always preparatory work. Namely:
- complete removal of old flooring;
- leveling the surface (removing chips, damage, bulges);
- substrate device.
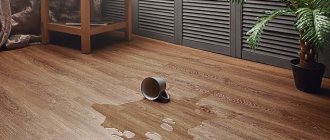
The substrate in this case performs several functions at once. First of all, a layer of moisture-resistant material does not allow condensation from the base to settle on the inner surface of the laminate.
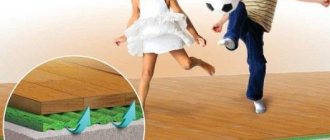
In addition, the substrate plays the role of a soundproofing layer, which is necessary when laying laminate flooring (especially in multi-story buildings).
It is also important to leave a gap between the covering and the wall when installing vinyl (and other types) laminate flooring. The gap dimensions can be in the range of 7-10mm. Such a buffer is necessary in case of expansion of the material under the influence of temperatures, humidity or mechanical factors.
Tools and materials
Not many tools are required to mark, trim and lay laminate flooring. Most devices are either readily available or inexpensive. In addition to tools, you will need some consumables. Here's the full list:
- roulette;
- pencil;
- carpenter's square;
- sharp knife;
- jigsaw;
- hammer or mallet;
- chisel;
- feather drills;
- screwdriver;
- perforator;
- nail puller;
- tamping block and wedges (can be replaced with pieces of laminate);
- laminate;
- substrate;
- vapor barriers (if necessary);
- plinth with fittings;
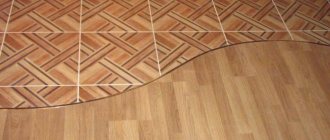
- transition thresholds;
- glue;
- scotch;
- masking tape.
Remember - laminate flooring should only be laid on a flat base.
Step-by-step instruction
The first row of laminate is laid along the wall, taking into account the required gap. The panels are connected to each other only in the end lock. The further algorithm of actions may have several scenarios.
Option one:
- A new panel is applied to the finished row at an angle of 45°.
- Its longitudinal ridge is inserted into the lock of the completed flooring and snaps into place.
- The next panel is laid in the same way, maintaining a small gap (2-3mm).
- Using a wooden block and a hammer, the end lock is latched.
- The procedure is repeated until the floor is completely covered.
- The finishing touch is laying the skirting boards.
Option two. The first row is assembled in the same way. Then:
- The second row of panels is completely assembled using end-lock joints.
- The entire row is installed with a ridge into the longitudinal lock of the laid flooring at an angle of 45°.
- It is necessary to apply even pressure on the new row of panels, lowering it until the longitudinal lock clicks.
- Repeat the procedure until a complete flooring is formed.
- Lay the baseboards.
To consolidate the result, you can tap the layers along the seams with a hammer (through a wooden block) or coat the seams with glue.
Do-it-yourself self-leveling floor - tips and tricks on how to build a self-leveling floor correctly, quickly and easily
- DIY decorative putty - tips and tricks on how to make and apply decorative plaster yourself (120 photos)
Do-it-yourself toilet installation - step-by-step instructions and recommendations from experts in installing floor-standing toilet models (115 photos and videos)
Do-it-yourself laminate installation: step-by-step instructions
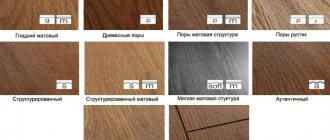
Flooring covered with laminate has recently become very popular, as it has an advantageous combination of price and quality. It is easy to care for and durable. This coating is distinguished by wear resistance classes, so it is suitable for both living rooms and public spaces. There is also a huge choice in color and texture: imitation stone, wood, mat, plain matte or bright glossy surface. And the most important and valuable thing about it is that laying laminate flooring can be done without the help of professionals, with your own hands.
Preparation of materials and tools
To work you will need the following materials:
| Material | Options |
| Laminate | Any one you liked |
| Substrate | Foamed polypropylene - 2mm for wooden floors, 3mm for concrete |
| Spacers or plastic inserts | |
| Construction tape | |
| PVA glue | |
| Pipe plugs |
Tip: The required amount of laminate is calculated in the following way: for diagonal laying, multiply the width of the room by the length and add 20%; for the traditional, rectangular method, add 10%. We set aside a margin of 10 and 20 percent for trimming the material.
We will prepare the following tools:
- Roulette;
- Bulgarian;
- Level;
- Rubber hammer;
- A simple pencil.
Choosing a laminate
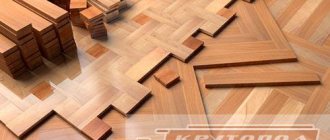
A laminate board consists of several layers. The top covering is a laminating film. It protects the product from mechanical damage and moisture. The class of a laminate depends on the quality of its top layer. The next layer, located under the top film, is made of compressed paper. It has texture and color applied to it. Under the compressed paper there is a wood fiber layer (it is load-bearing), which ensures the rigidity of the board. The final layer is made of tarred paper. This layer protects the board from moisture.
Laminate boards are connected in different ways. The most common option is the Click locking system (double lock). This system makes it much easier to assemble the floor; it simply and conveniently snaps into place, resulting in good adhesion between the connected boards. Floors with this type of connection are very easy to disassemble if necessary. The Lock locking system (it includes grooves and tenons) is a cheaper option, but the quality of the clutch is poor here. When laying laminate flooring with this locking system, use a rubber hammer to achieve adhesion. The adhesive method of attaching laminate flooring is almost never used today.
Preparatory work
After the laminate has been purchased and delivered home, remove it from the packaging and let it sit indoors for 2 - 3 days. During this time, the laminate will completely “rest” and adapt to room temperature, which will ensure its correct installation.
The next step is to inspect the boards for defects; if products with defects are identified, we set them aside and use them for trimming.
Next, we’ll prepare the floor – it should be perfectly flat. If you have linoleum and the floor is flat, then laminate flooring can be laid on such a surface without laying a backing. In the case of wooden floors, it is necessary to carefully sand the surface level, and repair chips and cracks with a special compound. For uneven concrete floors, pour screed; for smooth ones, it is enough to sand the surface and seal the recesses. For concrete and wood floors, underlayment is required. Before installation, the floor must be degreased and dried.
The next step is determining the direction of assembly. Usually, installation begins from the window, assembling the coating along the direction of the light source (this does not apply to a square-shaped laminate; in a situation with windows located on different walls, this rule is also ignored).
Paste a VALID AdSense code in Ads Elite Plugin options before activating it.
Laying laminate
Step 1 . Before installation begins, a substrate must be laid. The substrate is laid along the main covering, and the joints are taped with construction tape.
Step 2 . We begin assembling the laminate from the far left corner of the room. The locks must be cut off from the planks that we lay in the first row. When performing installation, remember that you must leave a gap of 15 millimeters between the wall and the covering, inserting wooden spacers or plastic inserts into it; the gap is needed to compensate for linear expansions.
Step 3 . We place the first lamella in the corner, insert spacers between the walls, insert the second board into the fastening groove at an angle of 30 degrees, and click the fastening with a slight downward pressure.
Important: If you need to trim the last board in a row, and this is usually required, but its length turns out to be less than 30cm, then the best option in this situation would be to trim the first lamella, so that the length of the first and last boards would be more than 35 - 40cm. For high-quality cutting, it is best to use carbide cutting discs.
Step 4 . The second row begins with laying the last cut board of the first row (but only if it is not shorter than 30 cm). This method is called “runaway” laying and provides better traction between the rows. After completing the assembly of the second row, it is “brought” to the side fastening of the first, inserted into the groove at an angle of 30 degrees and snapped into place. All subsequent rows are assembled in the same way. The will most likely require trimming; cut the laminate with a carbide disc, taking into account the gap left between the wall and the covering.
Step 5 . If there are water supply or heating pipes in the room where the laminate is being installed, then you will have to somehow bypass them, now I will tell you how to do this.
- We measure the distance from the wall to the center of the pipe and make a mark on the lamella where the cutout will be located;
- We measure the diameter of the pipe and cut out a circle on the board 15mm larger than the diameter of the pipe:
- Next, we cut the lamella crosswise exactly in the center of the cut out circle, connect the two parts around the pipe and place the scrap that is against the wall on PVA glue.
- We attach special plugs around the pipe and complete the work.
As you can see, there is nothing complicated about laying laminate flooring yourself. The main thing is to have the desire and everything will work out for you, good luck with the repair!
Video on the topic “Step-by-step installation of laminate flooring”:
Paste a VALID AdSense code in Ads Elite Plugin options before activating it.
Additional uses of laminate
Recently, laying laminate flooring on the wall has become popular, which is easy to do with your own hands. The material is cheaper than wooden panels and is more environmentally friendly than plastic or metal lining.
The main thing in this case is to take into account the characteristics of the surface and take care of proper fastening of the layer. With this finishing, the adhesive method or flooring on the frame is used.
The sequence of actions will look like:
- Surface preparation. If the laminate is to be glued, the wall must be leveled and treated with a primer. If we are talking about fixing to a frame, preparation only includes the construction of a structure from wooden or iron slats.
- The starting point. If you plan to cover the entire wall with laminate, work begins from the floor. If only the upper part is from the ceiling.
- Creating a layer. When working with glue, the inner surface of the panels is lubricated with an adhesive composition, then a strip of laminate is attached to the wall and fixed.
- Fastening to the frame occurs using nails or clamps, which are used to stitch the panel in the ridge area at the intersection with the planks of the structure.
Laminate on the floor or wall allows you to emphasize the chosen color scheme in the interior, as well as create a warm atmosphere. Depending on the cost of the material, such a coating will last at least 7-10 years.