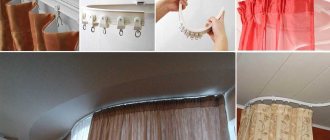
Due to the design features of a stretch ceiling, the installation of a chandelier is carried out differently than with traditional types of finishing. In addition, you will need thermal rings to protect the PVC film, and if the lighting fixture is attached through a bar, then also mortgages. Let's look at how to choose the right chandelier so as not to damage the material and look at several ways to install it on a suspended ceiling. Additionally, we will tell you what to do if the canvas is already stretched, but fastening was not provided.
Limitations when choosing a chandelier
Most often, the canvas for a stretch ceiling is made from PVC film, which does not withstand high temperatures. When heated, the material becomes stained and gradually deteriorates. Therefore, chandeliers with a heated metal base are not suitable.
When installing incandescent lamps, the lampshades must be directed downward, and the distance to the canvas must be at least 20 cm.
Unlike PVC film, fabric stretch ceilings tolerate temperatures up to +80°C. But in any case, it is better to choose energy-saving or LED lamps; they emit much less heat and last much longer.
The film can be easily damaged by sharp objects. Before purchasing, you need to make sure that there are no protruding edges, casting marks, etc. on the base of the lamp.
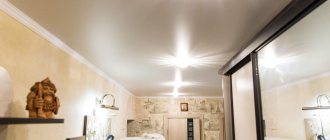
If the canvas is glossy, it is recommended to choose closed shades. Otherwise, a lot of glare will be reflected on the surface of the ceiling, unpleasant for the eyes.
There are no restrictions on weight or type of fastening. Any lamps are mounted not on the canvas, but on the base.
Read more: Requirements for chandeliers for suspended ceilings
Fastening systems
To figure out how to fix a chandelier on a suspended ceiling, and to do it competently and reliably, you first need to determine the type of fixation. There are different types of lamp installation.
Methods for installing chandeliers:
- To the hook. This method is one of the most reliable and proven. Installation can be done using conventional fasteners. During installation, the lamp is fixed through the ceilings. In some cases, a chandelier is attached to the hook on a special piece for installation in the cavities of a concrete channel. The hook can also be welded onto the plate and fixed on the lid.
- On the mounting plate. This technique is suitable for securely attaching compact chandeliers. As a rule, the plate is included additionally in the model and is secured using special fasteners, screw fasteners and side parts.
- On fixed panels. This fixture is also usually included in the chandelier. Suitable for installing various mid-size models.
After clarifying the installation issue, which chandeliers are suitable for such ceilings, and choosing the type of fixation, you can continue installing the device. Work should begin at the stage of installation of profiles.
Methods of attaching a chandelier to a suspended ceiling
Lighting fixtures are available with fixation on a hook or mounting plate. How exactly the work goes depends on this.
On the hook
When installing a chandelier on a suspended ceiling in this way, the fastening is reliable, but there is a risk that the base of the lamp will not be positioned completely evenly. The hook is attached directly to the rough ceiling, and a hole is made in the canvas through which the lighting device is suspended.
The following types of hooks are available:
- anchor - installed in a drilled hole and fixed by surprise;
- through - fastened through the ceiling, convenient for installation during the construction of a house;
- embedded - suitable if there are hollow channels in the slab.
The size of the mount is selected depending on the weight of the lighting fixture.
Through the mounting plate
Chandeliers with a strip are installed without a hook; for this purpose, a mortgage is attached to the base ceiling. It is made from wooden beams or plywood, or you can buy a ready-made plastic platform. The platform is attached to the floor slab using flexible steel hangers so that the base is located at the same level as the future ceiling. Then the fabric is stretched, holes are made and the mounting strip is screwed to the mortgage, and the lighting fixture is attached to it. Thus, the load falls on the floor slab.
Several types of strips are used for chandeliers:
- small longitudinal ones - for small devices;
- cross-shaped (composed of 2 long ones) - for heavier ones;
- I-beams - for the largest ones.
Installing a chandelier with a strip on a suspended ceiling is more difficult. But it is easier to ensure that the lighting fixture hangs evenly.
Choosing a chandelier for a stretch ceiling
It is better to select lamps for a tensile structure at the design project preparation stage, because to securely fasten the chandelier you will need to attach a hook or mounting platform to the rough base. The distance between the film and the ceiling may depend on the shape of the lamp; in addition, certain requirements are imposed on chandeliers.
- PVC-based fabric, from which stretch ceilings are most often made, can be easily damaged by sharp edges and protruding elements of the chandelier. When choosing a lamp, this must be taken into account. Run your hand over the elements adjacent to the ceiling - nothing should protrude or scratch. Otherwise, the base will need to be modified.
- The second danger that awaits PVC films is high temperature. With constant heating to 45-50°C, the material gradually hardens, becomes brittle, and subsequently may change color and crack. For this reason, when choosing a chandelier, you should give preference to lamps with LED lamps - they hardly heat up. You can also use chandeliers with several shades and low-power lamps, while the room will be quite light, but at the same time the heating from the lamps will be moderate.
- The aesthetic component is also important. If you are planning to install a chandelier on a glossy ceiling, which reflects objects no worse than a mirror, be sure to look at how the lamp you like looks from above - this is exactly how its reflection will look on the gloss. If wiring elements, the inside of lampshades and lamps are reflected, it is better to look at another model.
Chandelier on a glossy green stretch ceiling
- Figure out how to attach the chandelier, there are two of them - on a hook or on a mounting platform. Ceilings in typical apartments are usually equipped with a hook located at the intersection of the diagonals of the room. If, according to the ceiling design project, the chandelier will be installed there, and you do not want to overpay for the installation of the installation platform, it is better to choose a lamp with a hook. When installing the chandelier in another place, the mounting method does not matter much.
- The dimensions of the lamp must correspond to the area of the room and the height of the finished ceiling. Thus, a large chandelier on a long rod installed in a small room with low ceilings will look too bulky, just as the adjacent lampshade is not very appropriate in the center of a large living room four meters high.
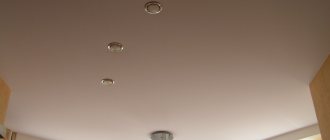
- To achieve good illumination, it is not necessary to buy a chandelier with powerful lamps. It is better to additionally install spotlights in those places where bright light is needed; fortunately, wiring and other elements can be hidden under suspended ceilings. LED strips around the perimeter of the room also provide a good visual effect.
When ordering a stretch ceiling, you can consult with a designer about the design and shape of the lamp - a specialist will tell you which lighting fixtures are best suited for your room. You can also see photos of finished ceiling lighting design projects.
Chandelier prices
chandelier
Chandeliers on suspended ceilings
Which chandelier will suit your ceiling?
For a standard-sized room in a typical apartment, decorated in a classic style and subdued colors, a matte or satin ceiling in a light shade and a small chandelier with several small shades are perfect. The light created in this way will be soft and diffused, without shadows or glare, which will create a feeling of spaciousness.
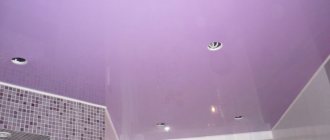
For a glossy ceiling or a mirror insert in a multi-tiered structure, LED chandeliers with many lamps are perfect; when reflected, they create a feeling of depth. Thanks to this technique, you can visually raise low ceilings and zone the room. Lighting can be supplemented with built-in spotlights.
Chandeliers on a glossy stretch ceiling
Such chandeliers look no less impressive on dark mirrored ceilings. It is important to choose the right color scheme and shape of the lamps. You should not choose lampshades that are too large and pretentious; the effect is achieved thanks to the play of light on the ceiling.
Lampshades in the form of balls of different sizes look advantageous on a dark satin ceiling; the reflected light is soft and warm, and a cozy atmosphere is created in the room.
Matte lampshades in the shape of a ball in combination with dark satin fabric
When choosing colored lampshades, you need to make sure that their shade matches the color of the ceiling, otherwise they will look inharmonious.
Colored lampshades match the overall tone of the room
Chandeliers with glass pendants are great for a bedroom or nursery in pastel colors.
LEDs of complex shapes or original lampshades create a play of light and shadow on the ceiling; such chandeliers will decorate the living room. They look better on a colored or dark ceiling.
Original lampshades create a play of shadows on the ceiling
Whatever chandelier you choose, it must be fastened correctly and securely. To do this, during the process of stretching the ceiling, you need to install a mounting or support platform. Ceiling stretchers usually do this work themselves. If you decide to mount the suspended ceiling yourself, our tips will help you secure the chandelier to the suspended ceiling.
How to hang a chandelier on a hook
The preliminary stage begins before the canvas is stretched. The method of attachment depends on the type of hook. Let's consider the installation principle of the four most common types of fasteners:
- The anchor one is the easiest to hang. A hole of a suitable diameter is drilled in the concrete floor using a hammer drill. Drive in the anchor and tighten the fastening nut so that the base is fixed in the ceiling.
- The through hook must be installed across the entire ceiling. A hole is made in the slab, then two metal plates are taken and placed on the rod. One of them is placed on the ceiling, and the other on the floor of the upper floor. The hook is inserted into the holes, and then the plates are pressed tightly with nuts to the ceiling.
- The spring version is available with a built-in holder. It consists of two parts, between which there is a spring. The rod has a screw thread. The moving parts are pressed and inserted into the hole. They pass through the ceiling and straighten out. Then tighten the nut to firmly fix the rod in the ceiling.
- hook is placed on a metal rod with a bend in the middle. Turn it so that it is adjacent to one of the ends. The structure is inserted into a hole in the ceiling and rotated. In this case, the hook falls into the central bend. It is pulled out and threaded into the hole of the decorative plug.
After installing the chandelier mount, power is supplied to this place. To prevent the cable from interfering with the installation of the stretch ceiling, the ends are secured to a hook.
Then the film is stretched. When the canvas is installed, a thermal ring is glued in the place where the chandelier will be attached. It will prevent the material from dispersing and will further protect against overheating. The size is selected so that the diameter is smaller than the decorative lampshade.
Take Cosmofen CA-12 glue and carefully coat the tread ring, leaving no empty spaces. The thermal ring is applied to the ceiling and pressed lightly.
When the glue sets, use a stationery knife to cut out the film inside the ring. They pull out the wire and connect the device, and then hang it on a hook; it will be hidden by a decorative lampshade.
Preparing to install chandeliers on a suspended ceiling
At the very beginning, preparatory work is carried out for the installation of the chandelier. It is mounted on the ceiling using the type of mounting that you have chosen. Here are some ways to attach the hook:
- For an anchor hook, a hole corresponding to the diameter of the anchor is drilled in the concrete floor. Hammer the anchor into the hole and tighten the nut or hook. The anchor size is calculated relative to the selected luminaire. Commonly used sizes range from 6 to 14 mm.
- At the beginning of planning the placement of electricians and lamps, if the house is just being built, they use another method - the through-type fastening method. A through hole is drilled at the location where the chandelier is installed. Take two square steel plates with holes in the center, corresponding to the diameter of the hook shank. One plate is placed on the floor of the upper floor, the other is attached to the ceiling and both are connected by a special device with threads. The plate is fixed on the bottom side with a nut, tightened until it stops. From the top side, the nut is screwed onto the shank, pressing the plates to the ceiling on both sides.
- The following type of fastening is installed using a mounting rod. A hole measuring from 30 to 50 mm is prepared in the ceiling. The hook itself is usually made from a wire rod with a diameter of 6-8 mm, folding a ring of approximately 14-16 mm from one end of the rod, and bending the hook itself at the other end. This fastener is inserted as a ring into the hole and an embedded rod is threaded into the ring.
- For the next fastening option, you only need one steel plate, a fastening element with a thread along the entire length and a shank, and also two nuts. Using the installation technique for this mount, holes up to 8 mm in size are made diagonally. The first nut is screwed to the end of the thread, the plate is put on and clamped until it stops with another nut. The remaining end of the shank is cut off. In order for the plate to fit tightly on the ceiling, a recess for the nut is made in it ahead of time. Having marked the place for fastening, special anchor pins with a diameter of 6 mm are taken. This fastening design can also be used for mounting lamps on wooden surfaces.
Mounting plates
They have the same characteristics and are standard in size. The screw clamps of the lamps are placed on the side, and the mounting holes are on the main surface. A plank is attached to a wooden beam, 5-10 mm less than the height of the suspended ceiling.
Cross mounting plate
can be securely mounted on a supporting platform made of plywood, 10-12 mm thick. A hole with a diameter of 50 mm is made in the center for the cable outlet. To secure the structure to the ceiling, a plate of suitable size is used and secured with self-tapping screws. Such a platform is attached to the ceiling using concrete anchor dowels.
I-beam mounting plate,
the method of its fastening is similar to the previous version, the only slight difference is in the technology of fastening to the base of the platform.
It must be remembered that plasterboard cannot be used as a base ceiling, since it is not designed for heavy loads. First, the old ceiling covering is removed, then a fastening device for a chandelier or other lamp is installed, and after that the fastening device itself is installed.
All work on the installation of the fastening, all its embedded elements, fastening beam, hook and platform for the strips, is carried out before the installation of the tension web begins.
Attaching the chandelier to the mounting plate
Before stretching the canvas onto the ceiling, a mortgage is installed, to which the plank is subsequently attached. Ready-made platforms of several types are produced: round, oval, square, cross-shaped. The product is selected depending on the size of the base of the lighting fixture. The platforms are made of high-strength plastic and have holes for self-tapping screws for convenient fastening of the plank and hangers.
You can also make a mortgage with your own hands. To do this, use timber or plywood according to the size of the base of the chandelier. The edges are carefully polished so that there are no burrs that could damage the blade.
Let's consider the option of mounting a chandelier with a small longitudinal strip using a universal round platform. Such platforms are suitable for devices of relatively light weight, up to 10-12 kg.
Before installation, determine the mounting location of the chandelier and apply markings to the ceiling. Next, you need to screw flexible steel hangers or punched tape to the platform. Small “bug” self-tapping screws (3.5x9.5 mm) are used as fasteners. For a small chandelier, four pendants are enough. The legs are then slightly bent into an accordion shape so that the height of the support can be adjusted.
Holes are drilled in the ceiling, plastic dowels are hammered in and the mortgage is secured with long self-tapping screws (5x50 mm). The platform should be on the same level as the suspended ceiling frame. This can be checked by pulling a thread attached to baguettes on opposite walls. Then the electrical cable is connected. The ends are inserted into the terminal block and fixed on the site so that they do not interfere with further installation.
When the canvas is stretched, find the location of the mortgage. A tread ring is glued in the center and the internal space is cut out.
In places where the chandelier strip will be attached to the mortgage, you need to strengthen the film so that it does not come apart. To do this, reinforced tape or small tread rings for self-tapping screws are glued to it.
Then screw the bar to the platform. After which the chandelier is connected to the wiring. It is more convenient when a second person holds it. If there is no assistant, the device is suspended on a rope. The final stage is to attach the chandelier to a metal strip, install shades and screw in the light bulbs.
Note! Large lighting devices with a cross-shaped strip and a base of about 40-50 cm are mounted on a cross-shaped mortgage. The principle remains the same, but 8 hangers are required to attach the platform.
Installing a chandelier on a suspended ceiling
[reclam]
The next stage is the installation of the ceiling chandelier, it is done after installing the stretch ceiling and after a certain time required for cooling, according to the technology. Different types of lamps have their own specific installation nuances.
Let's look at the main points for all types.
You need to install a chandelier on a suspended ceiling.
To do this, let's take several basic options for attaching a chandelier:
Hook. Using glue, a thermal ring is glued to the canvas at the place where the lamp is attached. We cut a hole along the inner diameter of the thermal ring into which the cable is pulled out.
When choosing a thermal ring, you need to ensure that its outer diameter does not exceed the diameter of the lamp glass.
Plank. Fastening a chandelier using a strip is similar to fastening it using a hook. But there is a difference: the thermal ring for this installation option has a larger internal diameter to secure the strip through the hole and into the base.
Cross-shaped and I-beams. In this option, the thermal ring is glued to the area where the cable is brought out and the strip is installed on the platform. The plank is attached to the base.
Connecting the mounted chandelier to the network
After installing the selected fasteners for the chandelier, after carrying out all the electrical work, with the ends of the wires brought out in the calculated locations, the time comes to connect the lamp to the main electrical wiring.
This requires:
- Turn off the circuit breaker on the main panel.
- Using an indicator screwdriver, check the presence or absence of voltage in the electrical wiring conductors.
- Strip the ends of the wires of the lamp and network and connect them.
- Install and secure the chandelier to the load-bearing ceiling.
- Turn on the switch on the panel and check the operation of the chandelier.
Read in more detail, with diagrams of how to connect a chandelier.
The location of the chandelier and its design
When all the work on installing a fixture on the ceiling for a lamp is behind us, a suspended ceiling is installed, a chandelier is hung, in some cases it is necessary to beautifully design and decorate the mounting location. What can be done about this?
There are several simple decoration options:
- If the design of the room allows the use of beautiful plaster openwork rosettes for this, we choose them, but not from plaster, but from polyurethane, which is lightweight and practical.
- There is an option to use leftover material after installing the ceiling. A circle is cut out, larger than the hole for attaching the chandelier, and glued with good glue.
- A very good decoration option is to use special stickers. The modern construction market offers a huge number of options for decorative materials.
For those who decide to install a chandelier on a suspended ceiling themselves, our recommendations will be very useful. But since this still requires certain skills and experience, especially regarding electrical installation work, we still recommend turning to specialists.
How to “drown” a chandelier in a suspended ceiling
Some lamp models have a large base diameter (40-60 cm) and a high side that covers the transformer. Such a chandelier looks more aesthetically pleasing if you “recess” it a little into the ceiling.
For installation you will need a large diameter tread ring to match the size of the base. But such thermal rings are not sold in stores, so you will have to make them yourself. You will need a PVC sheet about 2 cm thick. This is an inexpensive material that is sold in many construction stores. A ring with a diameter slightly larger than the base of the chandelier is cut out of the panel. Then they place the lamp on the ceiling and trace it around with a marker. A homemade ring is glued to this outline. To make it smoother, you can apply the composition not immediately to the entire surface. First, opposite points are glued, then between them, etc.
Note! In this case, you can attach the embedding platform after stretching the canvas, since the hole will be quite large. The installation procedure is the same as in the previous method. But the platform must be located above the ceiling level so that the side of the chandelier is completely hidden behind the canvas.
When the ring is fixed, the film inside is cut out and removed. But not flush with the tread, but leave about 2 cm. Then the inner edge of the canvas is cut, folded inward and glued to the ring. Next, a plank is screwed to the mortgage and a chandelier is attached to it, but the base will be recessed into the plane of the ceiling. Thus, thanks to homemade protection, the PVC film will not be damaged.
Hook mount
The simplest and most convenient type of installation, it is reliable. But it can only be used when installing hanging chandeliers. Initially, you need to secure the mounting hook and connect the wiring to it. You can do this yourself or (if we are talking about a reinforced concrete ceiling slab) call a professional.
Photo: Chandelier hook
If the location of the hook is satisfactory, you need to check its height (the hook should be slightly lower than the height of the suspended ceiling) and strength. If it needs to be replaced or additional ones installed, new holes for anchors and dowels are made with a hammer drill. Or they fix a wooden mortgage on the base ceiling. This will serve as the basis for installing the hook.
Once the preparatory work is done, check again the ratio of the height of the hook to the expected height of the suspended ceiling. Then the electrical wiring is brought to the installation site.
The power supply must be turned off!!! If there is voltage in the network, you can accidentally cause a short circuit. It can cause fire in suspended ceiling elements and also injure a worker.
The suspended ceiling film is stretched, and then a plastic thermal ring is attached to it in the hook area. A hole is cut inside it to bring the wires and hook out through it.
Photo: Mounting hole arrangement
The chandelier is hung on a hook and all the wires are connected. Then all connections are covered with a decorative cap and the lamp is finally attached to the ceiling.
How to choose a stretch ceiling
How to hang a chandelier if the ceiling is already stretched
There will be no problems with the hook; it can be installed through a hole in the canvas; the decorative lampshade will still cover the hole. But in order to hang the chandelier on the bar, you will need to attach a mortgage, and for this you need to remove and re-tension the ceiling. Dismantling and subsequent installation is expensive and inconvenient, so let’s consider another method.
Place the plank against the ceiling and mark where the attachment points are. Thermal rings are glued around them and in the center. The film inside is cut out and holes are drilled through the rings in the ceiling. To secure a chandelier to a suspended ceiling without a mortgage, select self-tapping screws or dowels of sufficient length.
To prevent the bar from wobbling after installation, take a plastic pipe (smaller in diameter than the rings). It is inserted into the hole, resting against the ceiling, the required length is measured and cut off. The distance to the ceiling will differ at different points, so it is better to sign the pieces. The bar is fixed through tubes inserted into the holes. The base will rest against the ceiling through the pipes, so it will become more stable. Then the lighting fixture is screwed to the bar. A connection to the network is first made.
In this way, it is possible to attach the chandelier to the suspended ceiling after its installation. In this case, the device is installed without a mortgage. But this method has its own nuances and difficulties. It is better to think about lighting before installing a stretch ceiling.
Mounting methods
Depending on the weight of the chandelier, you can choose one of three options for attaching the chandelier to a suspended ceiling.
- A hook is a hanging from one point. The simplest and most reliable way. If the hook attached by the builders fits, you can leave that too. Or replace it with a hook, now more suitable in length - taking into account the stretch ceiling. However, chandeliers made in the form of a wide structure cannot always be positioned sufficiently symmetrically or balanced, hanging only from one ceiling hook. In addition, the design of the chandelier may require hanging from several points. In this case, the chandelier kit includes a bar or cross for hanging, which takes into account all the geometric features of the chandelier design. Chandelier hook
- Metal strip - two (or more) hanging points located on the same line. It will help secure the compact chandelier to the bar quite firmly and symmetrically.
Metal strip
- Two plates arranged crosswise are the most rigid method in terms of balancing the suspension and distributing the weight of the chandelier. The weight is distributed over a fairly large area, which guarantees absolute reliability of the suspension. Two plates arranged crosswise
Instructions for installing the lighting fixture
The ceiling chandelier must be installed in accordance with certain standards , otherwise you will not be able to achieve the desired result. An incorrectly installed chandelier to this type of ceiling can cause damage to it, which will lead to a loss of quality and attractiveness of the entire structure. It is these factors that should be considered before proceeding with the installation and selection of the lighting product itself.
Do-it-yourself work may not provide the level of quality required for this complex activity. This is due to the fact that installing a chandelier on a suspended ceiling is not as easy as it seems, so professional workers with the necessary experience are often necessary. Thanks to their work, all processes will go through as quickly as possible and the end result will satisfy even the most demanding clients. In any case, installing a chandelier on the ceiling requires compliance with certain rules.
As a result, it is possible to provide high-quality lighting in any room , and the organic use of all elements creates the most attractive interior that meets all the individual preferences of the customer.
Regardless of the type of lighting device purchased, its installation begins with the installation of a profile for fixing the suspended ceiling cover. Then two lines are stretched between the profiles, at the intersection of which the chandelier will be located. After this, the fastening element is installed in the concrete base. As noted earlier, the product can be suspended using different fasteners. Below are step-by-step instructions for installing the chandelier with each installation option.