The starry sky on the ceiling helps you relax. Children fall asleep faster, and adults can enjoy a romantic atmosphere. This imitation is created in different ways. Some are easy to repeat with your own hands, while others will require a team of professionals. The options also differ in realism and costs. Let's consider each method in detail.
What a “starry sky” ceiling might look like
There are several options. They are used individually or in combination.
Galaxies and nebulae
Images obtained from powerful telescopes are taken as a basis. The main background is usually dark, but there are bright and pastel colors. Various shapes, round, spiral, etc.
Stars
They are depicted as dots or symbolic drawings, distributed randomly or in the form of some kind of figure. The night sky looks more natural if you make dots of different sizes and colors (not only white, but also yellow, light green, pinkish, blue), because in reality the intensity of the glow and the hue of the stars differ. The child will prefer the option with bright multi-colored stars in the style of hand-drawn five-pointed figures.
Planets
The dark background with flickering dots is complemented by images of solar system bodies. You can select one planet or place them all at once, in order.
Realistic constellations
To recreate realistic constellations, the location, brightness and color of the stars are taken into account. To do this, select some part of the night sky map and transfer it to the ceiling. The image is copied into AutoCAD or another similar program with a background, and a room plan is superimposed on top. Then the scale and rotation of the map is adjusted so that a beautiful picture is obtained. After this, the points are transferred to the ceiling, observing the scale, distance, color and brightness class.
This option is chosen for the bedroom. With the lights off, it gives the impression of spending the night in nature.
Zodiac signs
Such drawings will appeal to astrology lovers. Usually one or two pictures are drawn corresponding to the inhabitants of the room, or all 12 symbols are depicted. The picture is complemented with flickering dots or lighting.
Starry sky on a white ceiling
A picture that is constantly visible becomes boring over time, and changing it is not easy. A good option is space, visible only at night. The stars become visible at night thanks to the internal lighting; during the day it is just a regular white ceiling.
Now let's look at ways to implement the starry sky. We will analyze in detail all the options, from the simplest and most budgetary to complex and expensive technical solutions.
Installation of suspended ceilings with the effect of a starry night sky
Anyone who has an idea of how a suspended stretch ceiling is installed can create a starry sky on the ceiling. However, in this case there are subtleties and nuances that must be observed.
If we are talking about stickers and wallpaper with a luminescent effect, then no difficulties should arise. Such elements are glued to the finished ceiling structure. You can use ready-made PVC film, which depicts a starry sky with a flickering effect.
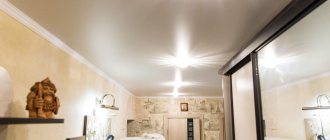
Much more complex, but more effective, is lighting equipment installed in the inter-ceiling space. A light generator or projector provides shine on the stretched canvas. Each star in your sky is a section of LED fiber optic threads connected to the device. By placing the threads at the required radius over the entire area of the stretch ceiling, you can get any pattern or design - a composition in the form of an entire galaxy.
LED technology allows you to make the stars shine at different intensities, simulating the real position of stars in the sky.
Note: in some cases, on premium ceilings, Swarovski crystals are used for the shimmering effect, a stylish and expensive decoration. Thanks to the properties of artificial crystals, it is possible to achieve greater attractiveness and variety in the design of ceilings in this way.
Performance technique
There are two types of design of the ceiling surface with the effect of “stars in the sky” - with a puncture and without a puncture. Both types differ in technological design features. It is based on the work of fiber optic luminous threads, the glow of which is provided by a working projector.
The drawings and diagrams show the design of a suspended ceiling structure with and without a puncture. The main difference is in the design of both systems.
- The first type is suitable for situations where the stretched fabric has a thick base. Optical filaments come out through puncture holes. A sheet of considerable thickness successfully masks sections of fiber optic threads when the projector is turned off.
- The second type is used in cases where the fabric has a thin base, for example, satin. The absence of punctures hides thread cuts when the lighting is off. The entire surface of the starry sky in daylight remains solid and monochromatic, without visible flaws.
PVC film is used as the basis for this ceiling design. Installation of profiles and stretching of the film is carried out as usual, using a gapless harpoon system and a heat gun for this purpose. Lighting equipment is installed in the inter-ceiling space. With single-level suspended ceiling systems, a false ceiling is installed for these purposes, hiding the working projector.
In some cases, the light projector is installed in a plasterboard box, which is mounted around the perimeter of the room in its upper part. This option is traditional and most often used in everyday life.
The light source can be light generators, halogen or LED. Each of them is used in one situation or another. Halogen devices are usually monochrome, while LED devices can be monochrome or polychrome. To create a stretch ceiling in the shape of a shimmering galaxy, an LED projector is usually used.
Painted stars on the ceiling
This method is best chosen for relatively simple drawings, and it is advisable to use stencils. Realistic images (for example, galaxies, a scattering of stars on a dark background, zodiac signs) require artistic ability; an amateur will not be able to cope. You can invite a professional, but it will be quite expensive. If you want something similar, it is better to choose photo wallpaper or printing on stretched fabric, which we will discuss in detail below.
Paint selection
For such drawings, they use compositions that glow in the dark, because you want to admire the starry ceiling at night. Such modern paints do not contain phosphorus and are completely safe. Depending on the pigment, they are divided into three types:
- Luminescent.
- Fluorescent.
- Reflective.
The latter type does not emit radiance, but only returns the rays that hit it. In the interior, such compositions are not very convenient, as they require a night light or other lighting to be turned on.
Fluorescent colors are very bright. The glow appears under ultraviolet rays. When painting the ceiling, you have to supplement them with black light (or Wood) lamps. The devices are located, for example, behind the cornice.
The fluorescent image must be protected from sunlight, otherwise the effect will disappear over time.
Luminescent paints absorb light during the day and emit light at night, gradually fading. Such compositions are more convenient, since no additional equipment is needed.
Pigments are added to different bases. The physical properties of the paint depend on it: how well it adheres, what type of surface it is suitable for, etc. For finishing the ceiling, universal latex and acrylic compositions are usually used. There are specialized paints for concrete, wood, PVC, foam or polystyrene that adhere well to the corresponding type of coating.
The color scheme is represented by cold blue-green tones and warm ones (red, yellow, orange, pink, purple). The colors can be translucent, so during the day the images are less noticeable. Gold (glows yellow-green) and silver (turquoise) are also available.
Preparing star templates
The images are printed on a printer or drawn by hand, then the middle is cut out. It is more convenient to use self-adhesive paper, but film with a sticky layer will also work. If this is not the case, take plain paper, cardboard or a thick plastic folder.
Peculiarities! The stars in the sky are of different sizes, so the templates are prepared in several sizes. Three options are enough. Moreover, large and medium ones are made in the shape of stylized stars, and for small ones, round punctures are sufficient.
Drawing
Markings are applied in advance. You can first sketch out a diagram on paper or create an image of a ceiling with stars in a computer program on a room plan, and then transfer it, respecting the proportions.
Templates are glued to the places where the stars should be located. It is best to secure with paper tape. The paint is applied with a sponge or soft brush, using short poking movements, perpendicular to the surface. Excess should first be removed on an unnecessary rag or paper.
Advice! It is advisable to use different shades, so the sky looks more realistic.
When the composition hardens a little (this takes an average of 5 to 20 minutes), the template is carefully removed. It will take about a day to dry completely.
Fluorescent and luminescent stickers
This is the easiest way to make a starry sky on the ceiling with your own hands. But the design doesn't look very realistic. This design option is mainly used in children's rooms.
Stickers are made from plastic, vinyl or paper. I cover the top with a layer of luminous paint. Fluorescent requires directed UV rays. Luminescent stars are charged by sunlight or a light bulb. In good light, 30 minutes is enough for 4 hours of glow. They are bright for the first half hour, then gradually fade away.
To attach, take a piece of double-sided tape, apply it to the ceiling in the right place, and then stick on the star. Some options are made self-adhesive. Then simply remove the protective layer and apply it to the surface. In the future, neon stars can be re-glued to another place.
Such stickers are sold in sets at markets and in hardware stores in the decor departments. Can be ordered online.
Painting with fluorescent paints
With the help of luminous paints you can create not just a starry sky on the ceiling, but the whole cosmos! True, for this task you will need some kind of artistic ability or a guest artist. Any beginner in drawing can handle simple stars.
There are several options for implementing this idea:
- Paint with regular fluorescent paints. Then the pattern will be visible even during the day or under the light of ordinary lamps, and at night it will become luminous and acid-bright under the light of a UV lamp.
- Paint with invisible fluorescent paints. During the day, the ceiling will be as white as usual, and when the UV lamp is turned on, the pattern will appear in all its glory.
- Paint with phosphor paints. During the day, this pattern will be barely noticeable, since the paint is almost transparent. It absorbs daylight and artificial light, after which it glows in the dark without a UV lamp. The more light the drawing receives, the brighter and longer it will shine in the dark, so the idea is only suitable for sunny or constantly lit rooms. The downside is the reduced brightness of the light and only two colors (blue and yellow-green).
To simplify your task, you can first print out a map of the starry sky or a drawing of the cosmos you like on self-adhesive film and apply it to the ceiling, and then separately add luminous paint to the stars and comets. Instead of film, you can use a stretch ceiling with a photo print of the night sky.
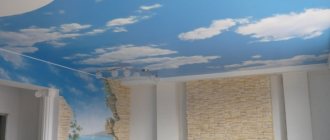
Photo wallpaper “starry sky”
Panoramic pictures of space are printed on wallpaper with a paper or non-woven base. Thanks to the selection of composition and image quality, a 3D effect is obtained. Drawings are often produced in rolls or printed in separate fragments that are glued end to end. The parts are made up when gluing.
Ceiling wallpaper with a starry sky effect comes in regular and luminous versions. The latter are sometimes called phosphorus, but this is incorrect, since other compounds are used. Phosphor wallpaper glows softly in the dark, fading after a few hours. To activate fluorescent lights, you need a lamp with ultraviolet rays. This way you can turn on the night light only when desired.
The material is sold in specialized wallpaper stores and large construction hypermarkets. You can choose the appropriate size or print to order. The usual paper-based option costs from 400 rubles per m². Textured non-woven wallpaper is more expensive - from 1000 rubles. Glowing ones will cost 1,500 rubles and more.
Types of ceilings with starry skies
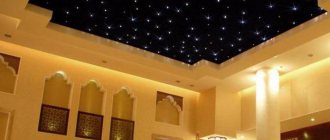
The most common material to work with is fiber optics. The principle of operation of such ceiling surfaces is the operation of a special device - a projector. Hundreds of fiber optic threads radiate from it along a stretched canvas, each of which forms stars in your sky. As a result of the operation of the device, a projection of the starry night sky is created in the upper part of the bedroom or any other room.
The main advantages of this method are as follows:
- no ultraviolet radiation is emitted during operation of the device;
- when the projector is operating, there is no possibility of breakdown of the ceiling surface by electric current;
- a working projector does not heat up;
- low power consumption (10-50W);
- long service life.
In order to make such a design on the ceilings in your home, you can use almost any type of ceiling design, from plasterboard to suspended ceilings made of PVC film.
Before you start working at home, you should know about the technological properties of fiber optic threads.
Important! Fiber optic strands should not be kinked. The maximum radius is the diameter of one thread x 10. For example, the maximum bending radius for a thread with a diameter of 0.85 mm is 8.5 mm.
Optical fiber is afraid of overheating (not higher than 700C) and mechanical damage. For successful work, it is better to use a template on which a drawing of the starry sky is previously created. To begin, draw a starry sky on a sheet of ordinary Whatman paper. After that, the drawn shape is cut out and glued to the ceiling structure using tape. The contour obtained as a result of our manipulations is painted over.
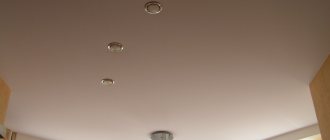
You can purchase ready-made ceiling surfaces with a “starry sky” effect without or with the use of lighting devices. It is necessary to know the footage of the upper part of the room. Standard sets can offer you 50 or more bright stars. Usually in practice it is recommended to obtain a night sky where in one square. There are 100-150 bright dots per meter. LED systems that convey the effect of shining stars are installed in plasterboard suspended structures.
Numerous holes are made in the finished surface into which LED bulbs are placed. By changing the direction of light, brightness and number of light bulbs, you can create the most intricate star landscapes. Such a system is controlled using a controller equipped with a control panel. This type of ceiling design has the following advantages:
- change of color scheme;
- low power consumption;
- lack of equipment heating;
- long-term operation;
- the ability to use for color accompaniment of playing music.
Such sets are sold in different versions. As a rule, these are discs on which fragments of the starry night sky are photographically printed. An analogy with a cloudy, blue sky. There are punctures in the discs, from which small light bulbs peek out. The diameter of such elements is 120-150 cm. The products are distinguished by simple installation, which is no more difficult than installing a regular chandelier at home.
The simplest and most affordable options for finishing the ceiling surface with a star effect are fluorescent stickers. Today, various finished products, paper or film stickers, are produced. This option is quite suitable for creating the illusion of the night sky. The surface of the ceilings accumulates light during daylight hours and in the dark, at night or at dusk, provides the necessary glow.
Note: stickers, wallpaper or painted stars that have a fluorescent effect should only be used in rooms with good natural light.
Luminescent paints, which are applied pointwise to the ceiling part, operate on a similar principle. A simple and at the same time quite painstaking way to achieve the desired effect is to paint the ceiling with acrylic paints using an airbrush. This technology requires high skill and endurance. You can get stars on the ceiling using glowing wallpaper. This consumable material is similar in properties and characteristics to stickers.
Stretch ceilings “starry sky”
Tension fabrics allow you to implement different options for stars on the ceiling. They differ in the complexity of execution and the final effect. Let's look at each in detail.
Photo printing
First, an image is applied to the canvas. Both film and fabric stretch ceilings are suitable for photo printing. If regular ink is used, then the result is a picture that is visible only during the day, with luminescent ink it glows in the dark.
You choose an image from a catalog or bring your own; technology allows you to print any photo. It is better to take a canvas with a glossy texture that reflects light. Due to the depth effect, space will look more realistic.
There is a ready-made version of stretched fabric called “Galaxy” - this is a glossy film with sparkles reminiscent of stars. Available in different colors. In addition to white, black and several shades of blue, you can purchase bright colors (orange, red, green, etc.).
A stretch ceiling with an image of a starry sky is installed as usual. A baguette is installed around the perimeter of the room to secure the canvas. The PVC film is heated using a heat gun and gradually tucked into the groove of the baguette. There is no need to warm up the fabric.
Sometimes they use New Vision technology, or light ceiling. LED strips are fixed to the ceiling, and then a translucent film with photo printing is stretched. In the dark, the image of space with internal lighting looks even more impressive.
Starpings pins
To create the star effect, special plastic needles are used. They are available in several colors (transparent, red, yellow, green, blue and orange) and three sizes, making space more realistic.
Installation is carried out in the following order:
- First, LED strips are installed on the ceiling.
- Then the fabric is stretched. Plain, black, dark blue or purple will do. But it looks more interesting in combination with photo printing.
- After this, punctures are made in the material at the site of future stars and Starpins needles are inserted flush with the surface. When turned on, light passes through the pins to simulate the night sky.
This option is not without its drawbacks. Due to holes in the canvas, the warranty is not valid. The waterproof properties of the material are also lost. In addition, it will not be possible to remove the ceiling and then return it to its place, that is, the coating is disposable.
With this method, light passes through all the pins. It is not possible to adjust the flickering using sequential activation. But the implementation is much cheaper than analogues.
Optical fiber
This method is more complicated and more expensive. But the result is impressive: the ceiling looks like a real night sky.
Two technologies are used: with and without punctures. For both you will need a light generator. The device is hidden under the ceiling, but it is better to provide access to it. A niche with a hatch in the wall or in a plasterboard box of a two-level ceiling is suitable.
A painting mesh is fixed to the ceiling. Fiber optic threads are threaded through it and lowered where the stars should be. When everything is ready, carefully combine them into a bundle and connect them to the light generator. At this stage it is better to make sure that everything works.
The film is fixed in two corners diagonally. The threads are threaded starting from the middle. A needle or awl is used for puncture. The ends hang 15 cm or more from the surface. Then they continue to stretch the film and remove the threads.
When installation is completed, the fibers are trimmed. This is done flush with the surface or a few centimeters below, then the threads hang and swing in the air.
With punctures, the glow is brighter, but the integrity of the canvas is compromised. When the light is off, black dots are visible. Therefore, it is better to choose dark colors or photo printing in the form of a starry sky.
The second method is more complex, and the glow is dimmer. But the ceiling looks smooth during the day, and the film can be removed and installed again if necessary.
First, a false ceiling is made from plasterboard, plywood or simple stretch film. The optical fiber is pulled through the holes in it. The threads are cut at such a distance as to rest against the lower (main) ceiling.
The effect depends greatly on the choice of projector. In a mechanical one, a small built-in motor rotates the filter, which changes the color of the light output. The stars go out, light up and take on a different shade simultaneously or one by one. Noise is heard during operation. The electronic projector contains programs that control the flickering of fiber optic threads and the change of shades. Manufacturers are developing many modes that reproduce the flight of comets and other effects. Operation is controlled from the remote control.
Swarovski crystals
Sometimes optical fiber is supplemented with Swarovski rhinestones. This is how large stars are created. Light passes through the crystals and falls on the ceiling in the form of rays.
Attention! This method is only used with tension fabric or plasterboard structures.
Special reinforced rings are inserted into the punctures. One or more strands of optical fiber are connected to each. At the final stage, after trimming, rhinestones are inserted.
Sometimes they use LEDs. They are connected to wires and hung in the same way as threads. The elements are larger, so the shine is brighter.
Ceilings
55 votes
+
Vote for!
—
Vote against!
Vacation, sea, beach - the scorching sun has long set behind the sky, a pleasant light breeze brings with it coolness, and stars from different galaxies scattered in bright myriads right above your head. You won’t see such sparkling in the city, but here, it seems that you just need to reach out and touch Venus. Fascinating calming atmosphere. How I want to take all this with me to the city, apartment or house, and enjoy every day, without waiting for the next vacation. And something similar can really be achieved by creating a star ceiling in your bedroom, living room, bathroom or even kitchen with your own hands. There are many options for implementing this idea: for different budgets, wishes and possibilities. There are very simple, inexpensive solutions, and there are complex and expensive ones with flying comets, supernovas and other special effects. We will tell you below how to implement all this and how much it will cost to create a starry sky on the ceiling.
- How to make a star ceiling using oracal and fluorescent varnish
- How to make a Starry Sky ceiling based on a stretch ceiling
- What stretch ceilings can be used for the Starry Sky
- Stretch ceiling and luminescent paint
- Stretch ceiling, fiber optic and light generator
- Stretch ceiling, fiber optics, light generator and LEDs
- Stretch ceiling, optical fiber, light generator and Swarovski crystals
- Stretch ceiling Starry sky: cost of implementation
- Stretch ceiling Starry sky: video - example
How to make a star ceiling using oracal and fluorescent varnish
The easiest and cheapest way to create scatterings of stars shining at night on the ceiling, without using a stretch fabric or false ceiling, is to simply paint them with luminous paint or varnish on the main ceiling. This option is especially relevant in cases where the ceiling is low and it is not possible to lower it to install a more serious structure.
To prevent the ceiling from appearing so depressingly white during the day, you can create some kind of pattern . It could be a starry sky, an ordinary sky with peeping stars, or any other non-space theme. You can make the drawing yourself in any graphics editor. Then contact a company that prints on Oracal film, which is used in advertising. This film is quite durable, self-adhesive, conveys colors well and is easy to install. Since the maximum width of the oracal is 2 m, the resulting drawing will have to be divided into fragments so that the joint is not visible.
Before printing the canvas, it is necessary to make a test print, since the color palette may not match, or you simply do not like the color rendering. If you are satisfied with the result, print the canvas for the ceiling and begin preparations for installation.
One of the significant features of this technology is that the main ceiling must first be perfectly leveled with plaster or putty . When the leveling layer has dried, you can begin gluing the film. It is simply glued: the protection of the adhesive layer is torn off from below and the film is applied to the base, and then pressed down and rolled with something to remove air bubbles. It is better to join the canvases with an overlap, so that there are no white gaps accidentally.
The hardest part of the job is done. Now all that remains is to draw the stars that will glow at night. To do this, you will need luminescent varnish (for nails) or paint. Dots and blots of different diameters must be applied to the finished ceiling in a chaotic manner or according to a certain pattern. During the day, only the image that was printed on the film will be visible. At night, the dots will sparkle like stars in the sky.
The costs for all materials will be insignificant, only about 80 - 100 USD. The cost of installation is not taken into account, since all the work can be done independently by inviting several friends or relatives to help.
How to make a Starry Sky ceiling based on a stretch ceiling
More complex special effects and the shining of stars, provided not by the reflective ability of the paint, but created with the help of light-conducting threads, can be realized using stretched fabric. For some reason, when they say “I want to make a Starry Sky ceiling,” everyone imagines a stretch ceiling. Although in fact the same thing can be done with a suspended plasterboard ceiling. In this case, the canvas or plasterboard surface acts not only as a base on which the stars shine, but also as a screen behind which communications are hidden.
The price for the starry sky ceiling includes the following items:
- Cost of the canvas.
- Photo printing on canvas, if necessary.
- Installation of fiber optic threads. The most expensive, so if you do this work yourself, you can save a lot.
- Projector.
- LED controller if needed. It's also not a cheap pleasure.
- Creation of special effects “Milky Way”, “Flight of the Comet”, etc.
- Installation of stretch ceiling.
You don't have to use all of the above. You can do many of the jobs yourself, then you only have to pay for materials and equipment. Next, we will tell you various ways on how you can make a Starry Sky ceiling with your own hands.
What stretch ceilings can be used for the Starry Sky
Stretch ceilings made of PVC film are used more often than others. Mainly due to the fact that photo printing with water-based paints and airbrushing is easier and better quality. The texture is suitable for both glossy and matte films. The most popular are satin and matte canvases with space objects printed using photo printing.
Fabric stretch ceilings from various manufacturers, such as Descor and Clipso, are convenient because the pattern printed on them can be used as a template for placing optical fibers in the right place. The actual application of the Starry Sky pattern is done using interior printing. A nice bonus is that you can put on the canvas an image that was photographed by a real telescope. Another undeniable advantage of fabric is that there is no need to warm it up before installation.
Stretch ceiling and luminescent paint
This method is an analogue of the very first one, which used Oracal and fluorescent varnish. The only difference is that instead of gluing the film to the surface of the ceiling, you need to stretch the canvas onto the frame.
There is no need to level the ceiling, but to install a stretch ceiling you will have to move at least 3 cm down. The canvas itself can depict any design, not necessarily the starry sky. It could be the ocean, nature, an ordinary sky with clouds. But with luminescent paint, dots and blots are chaotically applied on top, which will glow at night like stars.
But you can do it differently. Apply an image of the starry sky to the canvas, and then paint over all the stars and space objects in light shades with luminescent paint. Then it turns out that the drawn stars are shining.
Installation of stretch ceiling:
- Using a level, we find the lowest corner in the room, step back 3 cm from the highest point and put a mark.
- We transfer the mark to all other corners and walls. We hit the zero level along the perimeter and check its horizontal position.
- Along the line marked on the walls, we attach the profile/baguette for the stretch ceiling. We fix it using self-tapping screws and dowels in increments of 15 cm.
It is extremely important to align the profiles evenly and accurately with each other in the corners, so we measure the corners with a protractor, then divide the resulting value in half and trim the edge of the baguette strictly to the size of half the corner.
- We warm up the room with a heat gun to 40 – 50 °C.
- After warming up the room, we unwind the stretch ceiling fabric from PVC film.
- Heat the film to 60 °C.
- We fix one of the corners of the canvas in the baguette, snapping the harpoon into the baguette, and stretch the canvas diagonally.
- We fix the diagonally opposite corner.
- Then we stretch the fabric and fasten the other closest corner and the opposite one behind it.
- When the corners are tucked in, we stretch and secure the sides of the canvas into a baguette. To do this, we use a construction spatula, thread it into the harpoon of the canvas and push it into the baguette.
When the suspended ceiling is fixed, paint stars, planets, and galaxies. The dots can be placed in a chaotic order, or you can prepare a template in advance, attach it to the surface of the canvas and use it as a stencil, marking the required elements with luminescent paint.
During the day there will be no noticeable traces of paint, but at dusk and in complete darkness the stars will begin to shine on the ceiling.
Stretch ceiling, fiber optic and light generator
The implementation of this method is much more complicated than the previous one, installation is very labor-intensive and responsible, and the cost of materials is high. If you order the installation of a starry sky stretch ceiling using this technology from a specialized organization, it will cost 5 times more than the materials.
The light generator or projector will act as a light source; the projector box must be hidden behind a suspended ceiling or in a plasterboard niche, behind a cabinet, in a closet, or even in another room. If the projector is installed behind a stretched canvas, then the light rays must be directed parallel to the canvas and perpendicular to the light fibers, i.e. fiber optic strands.
Halogen projectors are equipped with a 50 to 100 W halogen lamp. The service life of such a lamp is very short - 3500 - 4000 hours, so the projector must be installed in an easily accessible place to easily replace the lamp. Up to 765 threads with a diameter of 0.75 mm can be inserted into the connecting head. Using a halogen projector, you can create an even glow at the end parts of fiber optic threads and create a flickering effect, which is achieved using a perforated filter. There are two types of halogen projectors: monochrome - illuminated only with white light, and with a color filter - illuminated in several colors.
LED projectors are single-color and full-color, smoothly changing color and statically lit. The LED lifespan is about 50,000 hours, which is much longer than halogen. There are models of LED projectors into which you can connect two sets of “Starry Sky” fibers: one will flicker, and the other will simply glow.
Additional projectors for special effects are not part of the installation structure. Most often these are laser projectors that are installed separately.
What special effects can be done using a laser projector?:
- Falling stars.
- Flight of a comet.
- Rotation of the galaxy.
- Supernova explosion.
- Highlighting certain constellations.
- Rotation of planets with rings surrounding them (Saturn, for example).
- Northern lights.
Optical fiber is the next important element of the system. A bundle of fibers is connected to a light source, a projector. The ends of the fibers on the reverse side are threaded into the stretch ceiling fabric. To create the effect of a starry sky, up to 100 - 150 holes are made in 1 m2 of canvas into which the threads are threaded. Although the number of holes varies depending on the wishes of the owner and the idea that needs to be implemented. Each hole can contain from 1 to 700 threads, their number determines the brightness of a star or other space object. For example, stars can have 1, 3, 15 fibers. The diameter of each thread is also important.
After you have chosen a projector, purchased fiber optics and a suspended ceiling, you can begin installation.
Installation of stretch ceiling Starry sky:
- First of all, install the projector in a convenient place. For example, behind a plasterboard frame framing a suspended ceiling (for two-level ceilings). There is a hatch in the drywall through which the projector can be removed.
- Next, we mark the place for the baguette and fasten it 15 cm below the ceiling.
- We stretch the mesh just above the fastening profile. You can use a fishing or painting tool. The mesh should be on the same plane as the ceiling and located slightly above the future stretch ceiling. The mesh cells must be small enough so that it is convenient to stretch the optical fiber threads through them. Focusing on the future drawing of the Starry Sky, we stretch threads through the cells, as if outlining where certain space objects will be located.
- Next, we warm up the room, then the canvas, and secure one corner. Warm up diagonally. We make holes in the canvas for the fiber optic threads. To do this, you can use a soldering iron with a thin knitting needle at the end or a needle. One or more fiber optic threads are pulled into the resulting hole, as the figure suggests. The threads stretch out at least 15 cm, but they can hang longer.
- Then we fasten the canvas at the corners and continue making holes and inserting fibers.
- When all the fibers have been threaded through the fabric, we finally secure it.
Important! Do not pull the threads too much so that they are stretched. It is necessary to make a margin in length so that the bundle of fibers can be easily removed from the projector without damaging anything. It is also necessary to bend the fibers carefully, no more than 7.5 mm in diameter (for threads 0.75 mm).
- When the suspended ceiling is installed, you can secure all the threads in their holes. To do this, use quick-setting glue. But this is optional.
- The fiber optic strands are then cut flush with the web or 2mm lower.
Fiber optic threads can be used in various diameters. For example, for 1 m2 there are a couple of large stars of 2 mm each, 10 pieces of 1 mm each, and all the rest are 0.75 mm each.
Instead of a mesh, you can create a structure from any sheet material, even drywall. But in this case, installation will become more complicated due to the laboriousness of making holes in the drywall.
The second option for illuminating a stretch ceiling : do not thread the threads through the fabric, but secure their ends to the wrong side of the fabric. The shine will not be so bright, but rather diffused, but the surface of the canvas will not be damaged, and protruding threads will not be visible during the day. And for greater brightness, you can install threads not of 0.75 mm, but of 1 - 2 mm. Or attach LEDs to the ends, but this is a completely different method.
Installation of the Starry Sky without threading fibers through a suspended ceiling is more difficult than the previous one. Experienced craftsmen have come up with a cunning way. They make a false ceiling from tension fabric, plasterboard or other sheet material, make holes in it, and stretch threads. A self-tapping screw is fixed next to the hole, to which a thread or a bundle of threads is tied. Then, when the suspended ceiling is installed, the ends of the threads will simply rest against the canvas, but will not be able to move.
Stretch ceiling, fiber optics, light generator and LEDs
This method is a logical continuation of the previous one. In addition to all mounting points, LEDs of various powers are attached to the ends of the fiber optic strands. This is especially true for highlighting large shining objects: supernovae, comets, etc. The glow is more saturated and sharp. The LEDs sticking out from the front side of the canvas look relatively aesthetically pleasing.
If you use installation technology without threading fibers through the fabric, the glow will be muted and diffused, but in any case brighter than without LEDs.
You can also use RGB filament controllers with LEDs to change colors and create special effects.
Stretch ceiling, optical fiber, light generator and Swarovski crystals
For those who like to do everything extra-thoroughly and luxuriously, the option is to use Swarovski crystals, which are ideal diffusers of light from fiber optic threads.
The crystals are attached to the stretch ceiling fabric using reinforced rings. Then one or more fiber optic strands with LEDs are inserted into the crystal itself. The rays are beautiful and the shimmer is natural.
During the day, Swarovski crystals sparkle with sunlight, which looks even better on the suede fabric of the stretch ceiling. In addition, fiber optic threads cannot be seen through this texture.
Each crystal has an individual cut, due to which the light is scattered and displayed differently on the ceiling canvas. The average diameter of the light spot from the crystal is 10 – 30 cm. Such a Starry Sky ceiling is controlled from a remote control.
Stretch ceiling Starry sky: cost of implementation
If you monitor the prices for Starry Sky ceiling kits, you can understand one important thing: everyone sets a price that he is not ashamed of. Sometimes you can find identical sets, but in one place they cost 150 USD, and in another they cost 350 - 400 USD. This kit includes a projector and a bundle of fiber optics, cut to the required size.
So how much does a starry sky ceiling cost?
- PVC stretch ceiling – 15 USD m2.
- Fabric stretch ceiling – 25 USD m2.
- Photo printing of a drawing – 45 USD m2.
- Light generator – 150 – 1000 USD It all depends on your wishes. The average cost of a monochrome projector is 150-250 USD, with a color filter 250-550 USD. For special special effects, there are models for 700 – 1500 USD.
- Installation of fiber optic threads in a suspended ceiling: up to 100 pieces per 1 m2 – 350 USD, up to 150 pieces per 1 m2 – 500 USD
- Special effects “Flight of the Comet”, “Saturn”, “Milky Way”, etc. – 500 – 1000 USD
- LED controller for flickering effect – 150 – 320 USD
- Remote control – 50 USD
If you don’t want to select the projector and fiber optics yourself, you can look for ready-made kits. Many companies offer a choice of kits with LED projectors of various powers and a set of fiber optic threads of 50 - 150 pieces per 1 m2.
Sets with Swarovski crystals represent entire constellations: Orion for 36 stars - 1500 USD, constellation for 70 stars - 2500 USD, for 100 pieces - 3150 USD. etc.
Creating a Starry Sky ceiling takes from one day to a week, depending on the complexity of the design. Installing a suspended ceiling with fiber optic threads is no different from installing a stretch ceiling. Well, except for the fact that the canvas needs to be heated and holes drilled in the drywall. In some ways, using a suspended ceiling is even more convenient, since you can make all the holes and stretch the fiber optic threads on the floor, and not with outstretched arms near the ceiling itself. During operation, stretch ceilings with threads released are cleaned of dust only by brushing them off with a light broom.
Stretch ceiling Starry sky: video - example
Plasterboard ceiling with stars
Optical fiber or Swarovski crystals are used with this material. But the technology is somewhat different from a stretch ceiling.
First, the slabs are laid roughly, without filling the cracks. The sheets are numbered so as not to get confused in the future. Mark where the stars will be. Drill holes (larger for rhinestones, to match the diameter of the reinforcing ring).
After this, the drywall is removed, noting where the profile goes. Fiber optic threads are threaded through holes and connected into bundles, wrapped with tape. To prevent the ends from breaking, you need to place a small support under the sheets (for example, a piece of drywall or a wooden block). Long bundles are rolled into coils - this way they will not interfere with installation. In places where they pass through the holes, the threads are glued.
After drying, the ceiling is put back together. The optical fiber is carefully pulled over the profiles in the direction where the generator will be located. The ends hanging from the ceiling are cut off.
Seal the seams between the slabs. All beams are combined into one and connected to a light generator. The surface is primed and painted. If desired, crystals are inserted.
Hanging panels “Starry sky”
Ready-made products are produced that only need to be installed on the ceiling and connected to power. These are flat round disks with a diameter of 1-1.5 meters (but any sizes are made to order). An image of space is applied to the surface, which begins to shine when turned on. You can complement the panel with side contour lighting, usually colored.
The discs are made of plastic, aluminum composite or fabric for suspended ceilings, covering the frame. They are turned on and controlled by a touch remote control.
The design of the panels resembles LED lamps. They are mounted according to the same principle, the nuances depend on the type of finish (stretch, suspended or painted ceiling). LED panels will look more impressive if you install them on a ceiling with photo wallpaper.
For the Armstrong system, special plates coated with black velvety material are produced. Fiber optic threads are brought out between the villi. A light generator with the ability to change color is installed on top.
The points are located randomly or form the shapes of celestial bodies. Flickering creates an imitation of movement: meteorites fall, distant galaxies or rings around planets rotate. Panels are sold individually or as a set of several pieces.
Projectors for suspended ceilings Starry sky
- Halogen projector - consists of a bright halogen lamp, as well as a color inaudibly rotating filter. It can be set to a certain rotation speed, which, in turn, will affect the intensity, saturation and color of the illumination of the fiber optic threads. It is for this reason that a star ceiling will give the impression of mobility.
- An LED projector costs much more. But thanks to it, you can easily create an even more realistic starry sky effect. This happens thanks to the built-in special controller, which controls the LEDs and connects various types of lighting according to the specified program. Thanks to this, on a stretch ceiling you can watch a flying comet, meteor shower or admire the twinkling of stars.
Projector starry sky
A small device illuminates images of stars, planets and other cosmic bodies on the ceiling and walls. It’s convenient that you don’t need to mount anything. All you need is a white surface. The device can be moved to another room, and some (lightweight and battery-powered) can even be taken on a trip.
The simplest ones show stylized stars. These are placed in children's rooms.
More complex ones project a realistic night sky. These are real home planetariums that can be used as a teaching tool. They are chosen for schoolchildren and adults.
Sometimes there are additional functions: night light mode, rotation around an axis, timer, player that plays music or sounds of nature. Some include additional images, such as marine life or the northern lights.
Peculiarities! A useful combination is a watch with a projection of the starry sky. Standard features include a calendar, alarm clock, timer, and audio playback. These include “Eureka 94672”.
Simple children's projectors made in China cost from 300-400 rubles. For example, Bradex Starry Sky is a compact device that runs on mains or batteries. "Purple 93359" and "Pink ZC-00018" have an additional night light function.
Mid-segment products create a realistic picture of space. Price - about 1-8 thousand rubles. Among them are projectors of Russian (“Starry Sky Planetarium”) and foreign production (“World of Space and Ocean” from National Geographic, Japanese “Edu-Toys Star” with increased image clarity). A compartment for aroma oil has been added to the HomeStar Aroma model. The case is waterproof and suitable for the bathroom. This planetarium is designed for complete relaxation.
Elite models not only project real constellations. The images unfold, the position of the luminaries changes depending on the daily rotation of the Earth. The picture is distinguished by increased clarity and detail. Often complemented by films about space and nature. Cost - from 10 thousand rubles and above.
These planetariums include HomeStar Classic and Bresser Junior. Fans of the Star Wars films will love the HomeStar R2-D2 EX projector, designed in the shape of one of the main robot characters. In addition to the constellations, the model shows spaceships and the main characters of the famous saga.
"Starry sky" on the ceiling
Since ancient times, the completely unknown Universe has amazed people with its beauty and infinity. Therefore, it is not surprising that images of the starry sky are found not only in planetariums, but also in the interior decoration of premises. The greatest convenience for a flight of fancy is the ceiling. Stickers have become a huge help for those people who do not want to overpay extra money for tension structures or waste time on mounting and installing a suspended frame.
The most common types of these decorative elements include luminous stars on the ceiling of various sizes. They can be found in the form of entire sets, including up to several dozen space objects. You can also find much more interesting options. Such sets, in addition to a large number of stars, may include planets (usually the Moon or Saturn).
Such sets will help create the image of a starry sky in a children's room. When the lights are turned off, space objects begin to glow, gradually fading away. And the children also begin to fall asleep as the artificial lighting fades. And the next evening the phosphorus stars will light up again to please their little owner.
As a rule, the light-emitting abilities of “charged” elements remain for half an hour. This time is quite enough for the child to fall asleep. And if the baby wakes up again, the dim sky will not wake him up with bright light.
Photo gallery of ideas
A starry sky ceiling is created in various ways. But in any case, it remains an interesting decor, bringing the spirit of nature and the boundlessness of space into the house.