Repair
0
2 059
Share
The ceiling surface in the kitchen is different from other rooms. The kitchen area requires finishing materials with special properties. The finishing is exposed to different temperatures, steam and high humidity, so facing materials must be resistant to moisture and other influences.
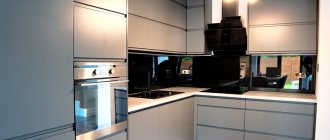
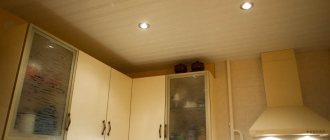
The white ceiling goes great with light-colored furniture in the kitchen
- Features of the kitchen area
- Vapor and moisture
- Temperature changes
- Settlement of soot and fat
- What material to choose for finishing the ceiling: the best options
- Properties of lime
- Advantages of water-based paint
- Features of acrylic paint
- Tips for painting the ceiling: how to do it beautifully and correctly
- Features of painting with water-based paint of different colors: painting drywall and other surfaces
To paint the ceiling in the kitchen with your own hands, you need to choose high-quality paint. Let's find out what you can use to paint the ceiling in the kitchen, and what you should be wary of.
Features of the kitchen area
Understanding which paint is best to paint the ceiling in the kitchen will come after we understand the features of this room. The severe contamination of kitchen surfaces is due to the fact that the cooking process involves cooking, which releases large amounts of water vapor, frying, which leads to the formation of a greasy coating, and other types of heat treatment.
When deciding what paint to paint the ceiling in the kitchen, consider the following nuances:
- During frying, a lot of fat and soot are released, which settle not only on the surfaces adjacent to the stove, but also on the ceiling. Moreover, it is problematic to wash such stains even with warm water, which is why the finish must withstand intensive washing using detergents.
- Since water vapor is generated during any thermal processing of food, there is increased humidity in this room and the formation of condensation on all surfaces. That is why the best paint for a kitchen ceiling is one that is resistant to high humidity and direct contact with water.
- In winter, it is quite hot in the kitchen while cooking, so housewives often open the window or set the windows to ventilation mode. As a result, sharp temperature changes are observed in the room. In this regard, painting the ceiling in the kitchen should be done with compounds that can withstand temperature changes without peeling or cracking.
- When trying to figure out which paint is best to paint the ceiling in the kitchen, do not forget about the ease of repair. Often the ceiling surface in this room needs local repairs. It is important that after painting a certain area there are no discrepancies in color or visible layers.
Choosing paint for the kitchen
Now let's talk about the best way to paint the ceiling in the kitchen. Despite some advantages of whitewashing (snow-white surface, protection from mold and rot), this finish is short-lived. Due to the settling of grease and soot and constant humidity, the whitewashed ceiling will have to be renewed within a year.
Modern interior paints offer many benefits. They have all the characteristics needed for a paint mixture suitable for painting a kitchen ceiling. Among a large assortment of paints, you can easily choose a composition that suits its characteristics and price.
Water-based
Water emulsions based on polymer components are affordable and environmentally friendly.
The advantages of this paint for painting the ceiling in the kitchen include the following:
- by adding pigments, the desired shade is obtained;
- the composition is completely harmless (it has no odor and does not emit harmful substances);
- the paint layer dries quickly, regardless of the room temperature;
- water-based emulsion is used to paint surfaces made of concrete, plasterboard, brick, wood, plaster (it is not suitable only for metal products because it causes corrosion);
- the paint does not interfere with the natural ventilation of the surface;
- If necessary, the coating is simply washed off with water.
Important! A ceiling painted with water-based emulsion cannot be washed with water, various detergents and soap solutions. But even such a ceiling in the kitchen will last at least 4 years.
Acrylic
When deciding what to paint the ceiling in the kitchen with, pay attention to acrylic paints. This is a water-based acrylic emulsion.
How and how to paint a plasterboard ceiling with your own hands
Its positive qualities include the following:
- Due to its good hiding power, the base ceiling does not need to be carefully prepared, because the paint layer will hide minor defects.
- Acrylic emulsion is comfortable and easy to apply.
- Fast drying is an additional advantage.
- The composition is completely harmless, it does not smell and does not emit harmful components.
- Among the large assortment of color options, you can easily choose the desired shade.
- Colors can be mixed if necessary.
- The painted surface is resistant to high temperature conditions.
The disadvantages of acrylic compositions include the impossibility of intensive washing. The ceiling is wiped with a slightly damp cloth. The downside is the price of the material, which is higher than that of water-based emulsion. Although the paint layer is wear-resistant, its final strength is gained over several weeks.
Alkyd
Paints based on alkyd varnishes with a solvent of white spirit or kerosene have the following advantages:
- This paint for the ceiling in the kitchen is highly wear-resistant, so the surface can be intensively rubbed and washed;
- the paint layer is not afraid of conditions of high humidity and temperature changes;
- the surface can be washed with detergents;
- the alkyd composition is convenient and easy to apply;
- Any base is suitable for work (metal and wood are no exception);
- large selection of colors and textures.
The disadvantages of alkyd paints are the pungent odor that appears during the painting process, as well as the high cost of the paint and varnish mixture. In addition, to clean the surface of old paint you will have to use a special solvent.
Latex
These coloring compositions are made on a water base with the addition of synthetic rubber and pigments.
Their advantages include the following:
- The paint layer is quite durable and wear-resistant, so the surface can be rubbed intensively.
- Due to its good hiding power, the paint hides minor defects in the base.
- The surface is stain-resistant and easy to clean.
- The composition does not smell during the dyeing process and does not emit harmful fumes.
- An extensive color palette and many textures are the undeniable advantages of the material.
- The surface can be washed with detergents and soaked with plenty of water.
Important! The only drawback of latex compounds lies in their high cost.
Painting a plasterboard ceiling
The conversation about how to paint a plasterboard ceiling is special. For this case, according to experts, water-based and water-dispersion paints are suitable. Close attention must be paid to priming the joints of plasterboard sheets. When puttingtying surface seams, additional materials will be required, for example, serpyanka - tape for reinforcing the seams.
Important! If you are using non-solid parts of the serpyanka, glue them overlapping.
The putty is applied with a large spatula. Then, if necessary, the surface is treated with sandpaper and a primer is applied. The field of activity has been prepared. How to paint a plasterboard ceiling? Start with the areas where the suspended ceiling meets the walls and corners. To do this, use a brush. Paint not “back and forth”, but with pokes. This method will not leave streaks or streaks.
Selecting paint colors for the kitchen
To achieve a harmonious interior, it is equally important to know what color to paint the ceiling in the kitchen.
When choosing a shade, follow the advice of designers:
How and with what to paint the ceiling in the bathroom with your own hands
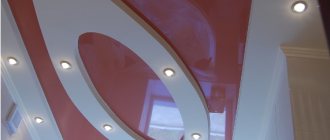
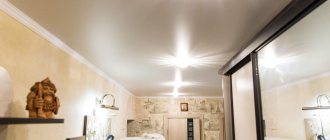
- It is better to paint a low ceiling in a small room with light paint with a glossy texture. This will visually expand the space and make the kitchen seem higher.
- To achieve a harmonious interior, do not make the ceiling too dark. The ideal option is a ceiling shade that is 3-4 shades lighter than the color of the wall surface.
- If the interior requires it, you can make a dark matte ceiling. But keep in mind that the ceiling surface will visually drop lower, so this option is only suitable for spacious kitchens.
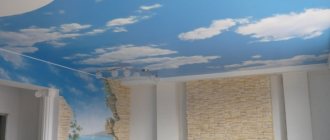
- If you need to zone the kitchen-dining room, then the ceiling surface is painted in two different colors that harmoniously combine with each other.
- When choosing a color scheme for the ceiling, take into account the colors of the walls, furniture, textiles and other interior items.
Ceiling painting technology
After you have decided what paint to paint the ceiling in the kitchen, we move on to studying the painting technology.
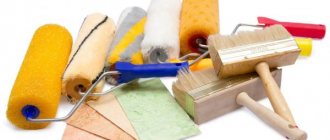
Tools and necessary materials
Before you paint the ceiling in the kitchen with your own hands, prepare everything you need for work:
- spatulas;
- ladder;
- brush;
- roller with long handle;
- brush;
- kitchen sponges;
- rags;
- putty;
- masking tape;
- dye;
- paint tray;
- primer;
- grout mesh;
- container for the primer solution;
- polyethylene film;
- glasses, gloves.
Preparation
Remove the old coating from the ceiling. Water-based paint and whitewash are washed off with water. After soaking, remove the lime whitewash using a spatula. Remove stubborn paints with a suitable solvent. We moisten the old wallpaper with water and clean it with a spatula. We also remove the foam tiles with a spatula, and thoroughly clean the base from any remaining glue.
Using putty we remove defects in the base - holes, crevices, cracks and irregularities. Significant depressions (more than 1 cm) are first primed and then filled with plaster mixture. Small irregularities are eliminated with starting putty. After this, we level the ceiling with finishing putty. When the solution dries, grind the surface and treat it with a primer.
Dyeing technique
Painting the ceiling in the kitchen with your own hands is done in the following sequence:
- Cover the floor and furniture with plastic wrap. We use masking tape to cover the surfaces adjacent to the ceiling that will not be painted.
- Next, we paint all hard-to-reach places and the junction of the flow and walls. It is better to work with a brush.
- After this, we paint the main area of the ceiling using a spray gun or roller. We paint the first layer perpendicular to the window in the kitchen.
- When the paint is completely dry, we paint the ceiling again, only now we make movements with the tool parallel to the window.
Work on mistakes
You learned how to paint a ceiling with your own hands, and became familiar with many of the “ceiling” subtleties. You even painted your ceiling yourself, but... It didn’t turn out quite as you would like. How to correct defects in a painted ceiling? How to eliminate dark spots?
You can apply another thin layer of paint or sand the ceiling, clean off any dust and paint the “corrected” surface. If it helps, it means you're lucky. Stains and stains are not eliminated - you will have to start work from the very beginning. Once again, learn in practice how to paint a ceiling without streaks.
Expert advice
Even when choosing the right paint and following the painting technology during the work, it will be useful to observe some subtleties that only professional craftsmen know:
- Do not take long breaks from working, because there will be visible streaks on the surface where the paint has had time to dry.
- To hide minor defects in the base, use matte paint. If you use a glossy composition, then the base must be perfectly even and smooth, because such mixtures highlight all the imperfections.
- For better adhesion of the coating to the base, when choosing a primer mixture and interior paint, give preference to products from the same manufacturer based on the same components.
- Dilute the paint only according to the instructions on the can.
- To see small defects in the work, take breaks and inspect the ceiling with the carrier on from different angles.
To obtain a high-quality coating, it is very important that the previous layer is completely dry before applying the next one. Observe the temperature and humidity conditions in the room, which are indicated on the paint container, and also take into account the drying time stated by the manufacturer.
Rules and features of the procedure
If the main tool is selected according to all the recommendations, you can start purchasing additional equipment:
- plastic tray for convenient use of paint and roller;
- wide brush for painting;
- masking tape.
This type of work requires some skill, so if you have never used a roller, it is better to practice a little on any surface. For example, you can use drywall or a section of the wall that will later be covered with wallpaper.
Sequencing:
- First, you need to pour the paint into a container (in our case, a tray), and if necessary, dilute it with liquid.
- After this, you can dip the roller into the paint.
- To get rid of excess material, you can use the ribbed side of the tray, otherwise there is a risk of smudges on the ceiling. In case of good preparation, the coat of the instrument should be soaked evenly, and no dry spots should be visible. If the paint is difficult to wash off, you can help yourself with a brush.
- Next you need to attach the extension handle.
- Now you can start painting. You should press the tool with paint to the ceiling and move it back and forth, being sure to rub it thoroughly.
Related article: Features of painting gates and choice of paint