A traditional screen for dividing space in a room is created from a wooden frame and fabric stretched between slats. But thanks to modern technologies, there are much more materials and ways to make a screen partition for a room with your own hands.
What is needed for making
Lightweight screen partitions, made using a wooden frame, paper or fabric, are suitable for visual zoning of a room. When using a durable screen, you can achieve functionality: install small shelves for accessories, and, if necessary, hang clothes and bags on the top of the structure.
In order for the partition screen to serve for a long time and not cause trouble, at the project planning stage you need to take care of the availability of all materials. Necessary tools for a small screen partition of 3 sections with paper and fabric filler:
- dense textiles with a width of at least 0.5 m - to fill the gap in the structure;
- paper and tea leaves for aging - calculate the number of sheets based on their size, and take at least 5 tbsp of tea leaves. l. for 3 liters of water;
- timber for the frame with a section of 4 x 4 cm – 6 pcs. 2 m long and 6 pcs. short elements (0.5 – 1 m);
- nails and screws of different sizes;
- accompanying elements: PVA glue, wood varnish, paint brush, scissors;
- construction stapler, tape measure, screwdrivers, hammer, square to determine the accuracy of the design;
- door canopies – 4 pcs. small size for fastening sections;
- braid for decorating the joints of fabric and wood.
You can do without the help of a drill, but if you have a tool, it’s easy to screw the screws into the partition screen.
Instead of wood, bamboo rods, plastic profiles or aluminum are used, but working with them is somewhat more complicated than making a screen partition from bars.
The fabric-paper web will be replaced by sheets of drywall, which can be attached to the profile with small nails and self-tapping screws.
How to make a screen partition for a room with your own hands
Making a screen partition with your own hands using fabric is a simple process even for a person who has recently started creating homemade things for the home.
Moreover, a lightweight changing partition is an excellent opportunity to practice making simple furniture for your home.
When preparing materials for a partition screen, check the dimensions of the planned frame, fabrics and other components for filling the openings, take 3-4 cm more in width and height. It is best to cut the fabric from a common roll and try it on the made frame.
Before designing your own screen plan, explore a few ideas for creating functional and durable screens.
Frame making
After drawing up a sketch of the partition screen and calculating the dimensions, they begin to manufacture the frame:
- Adjustment of bars to size. The wood is sawn, the accuracy of the coincidence of the parallel and vertical slats of the screen-partition is checked.
- Wood processing. It is necessary to coat parts of the frame with primer and impregnation before joining the frame, so that the sides also absorb the protective substances.
- Connection of elements. You can use spikes by making grooves in each bar, like on zippers for clothes (suitable holes are sawn through each element). When the grooves are stuck into each other, they are coated with adhesive. The second option is to use nails and screws.
- Processing of the finished partition screen. Treat the wooden frame with stain and leave until completely dry.
You can make a screen-partition with legs, then the horizontal bars from below are attached 7-10 higher from the vertical wooden slats. In this way, 2 more sections of the partition screen are made if the structure consists of 3 parts.
Screen cloth
While the frame for the screen is drying, prepare the main canvas to fill the structure:
- Calculation. Calculate the width and length of the fabric pieces for the partition screen, add 4-5 cm in the areas of attachment to the partition frame. Choose the color of the fabric so that it matches the interior design, but does not show through the paper too much.
- Marking. Cut out 3 pieces to insert into the screen, decorate with paper pages or other elements. The pages are pre-soaked in tea for 2-3 hours, taken out and dried well. Iron the sheets.
- Gluing pages. Apply PVA glue to the paper, apply it to the textile and smooth it out. Make sure that the glue does not leak onto the fabric; it is very convenient to use a paint brush for this.
- Fabric fastening. Use a staple gun to secure the fabric to the screen. Both parts of the partition should dry well. The distance between brackets should be 4-5 cm.
How to make: necessary tools and materials
To prepare for work, you need to stock up on the necessary supplies.
- After thinking through the design, you need to purchase the required number of wooden frames of the same size, which is selected according to the number of sashes and the height of the planned screen.
- You will also need dense material to cover the stretchers, the calculation of which is made taking into account allowances, that is, at least 3 centimeters are added to each side. It is advisable to select fabric with a pleasant pattern and color. It is important that the screen is also beautiful in light.
- You will also need thick decorative braid of such a width that will allow you to close the ends on the stretchers. Its length must be calculated so that it is sufficient to cover all the sashes around the perimeter.
- It is convenient to fasten the tape and fabric with a construction stapler, which can be purchased at a hardware store or at the market.
- The sashes can be connected using piano or card hinges, for mounting which you will need a screwdriver with a set of screws.
- Fastening the subframes in each section is done with bolts, nuts and an electric drill, which you will also have to acquire in advance.
- You will also need glue to attach the braid, and to paint the underside of the stretchers you need to prepare acrylic or oil paint.
On topic: Pink nursery for a little princess
To make such screens, you only need door halves, fasteners and paint
After the preparatory work, you need to once again check the project on how to make a screen with your own hands
, and you can get to work.
- The adjacent sides of the stretchers must be drilled, bolts must be inserted into the holes and the stretchers must be firmly tightened with them, which form a single sash for the screen. The long sides of the sections need to be reinforced with longitudinal strips.
- It would not be superfluous to cover each of the doors on the front side with fabric. This part of the stretcher is easily identified: its slats are slightly beveled inward, forming a three-dimensional shape. It is important to adhere to a strict order in your work in order to obtain uniform tension in the fabric and prevent it from sagging. The first paperclip is driven into the middle part of each of the longer sides. After this, a paper clip is driven into the edge of each side. The same actions are performed on the opposite side. It is important not to forget to constantly tighten the fabric. Then the short sides are attached alternately. After finishing the rough stretching of the fabric, 3 staples are placed on each side, which are driven in all the way. Gradually, the remaining staples are fastened to the end while simultaneously stretching and smoothing the fabric as much as possible. As a result, the gap between each two paper clips should not exceed five centimeters. To make each corner of the sash look aesthetically pleasing, you need to place a neat fold of fabric on it. Excess fabric protruding beyond the edge of the stretcher should be trimmed with scissors.
- Next, a braid is stretched around the perimeter of all the doors, which is fixed with glue. The tape hides the uneven edge of the fabric and hides the paper clips, which protects the floor from scratching when unfolding the screen.
- All visible wooden parts need to be painted. The paint is matched to the tone of the covering fabric to give the screen a beautiful look on each side: front, back and end.
- All that remains is to fasten all the prepared sashes with hinges, after which the screen will be ready for use.
On topic: Flowers made of polymer clay: you can’t tell them from real ones
These door leaves can be purchased at a hardware store.
And the fastenings are right there
All that remains is to connect the sashes and paint them in the desired color
An interesting DIY screen, a master class for which is offered on many websites, is made using electricity. Based on the previous idea, you can design a backlight for a screen. Then it will turn out to be not just a piece of decor and furniture, but a full-fledged portable lighting device. The essence of the craft is that the backlight should be closed from the inside of the subframe. The backlight should correspond to the size of the screen and be covered with material that matches the color of the entire product. The winding can be, for example, hardboard sheets. And in the resulting voids, a light bulb or, better yet, a safer LED is mounted from inside the screen. In the evenings, a screen will help create an atmosphere of comfort and successfully transform the space.
According to many versions, the screen, which today serves as a simply charming element of the interior, was borrowed from Japan. Since ancient times, the Japanese visually divided their homes with screens and used them to create a place of solitude. Today, the screen again serves not only as an original decorative element, but also as a practical means of zoning rooms. You can make a beautiful, elegant screen yourself in a fashionable vintage style.
If desired, a homemade screen can be decorated, for example, using the decoupage technique
To work, you will need 6 wooden blocks of 1.8 meters in length, 6 blocks of shorter length, which depends on the expected width of the screen, which in turn depends on the size of the room. To determine the appropriate size, measure the width of the room and divide the resulting number by three. You also need to stock up on a piece of opaque material in your favorite color, a paint brush, 4-door hinges, a furniture stapler, old letters, notes and pages from books. You will also have to work with strong tea leaves, an iron, PVA glue, self-tapping screws, nails, a hammer, braid or decorative strip.
Do-it-yourself screen partitions are made on the basis of a frame made of wooden blocks. After assembling three wooden frames from blocks fastened with screws, the finished frames are secured with door hinges and varnished. A piece of fabric is cut into three rectangles of appropriate sizes. All that remains is to start creative work. Photocopies are made from the title pages of favorite books, old letters or love notes, essays, poems and other memorial sheets. They are artificially aged by strong tea brewing, after which the paper is absorbed and ironed. This creates the effect of antique sheets. The next step is gluing the aged sheets to the fabric. After the glue has completely dried, the fabric is carefully stretched over one of the frames and nailed with a furniture stapler. After this, the fabric is stretched tightly and nailed to the other side of the frame. You need to ensure that the folds are smoothed out and the fabric is glued as evenly as possible. The cut edges of the fabric and the paper clips on it are sealed with tape or covered with a decorative strip. The loose frame bars are sanded to give them a vintage look. After this, the screen is ready for use!
Alternative option from cardboard tubes
When making screen partitions, any available means are used: plastic pipes, acrylic panels, bamboo branches and even CDs or records.
A screen-partition made of cardboard tubes, which is very similar to bamboo, only smoother, but just as environmentally friendly, looks original.
Take 16 to 20 pipes, decorative rope and paint to cover the frame. The tools you will need are a tape measure, scissors and a drill.
It’s easy to make a screen partition out of cardboard yourself:
- Pipe fitting. Cut the cardboard using scissors or a construction knife (you can alternate it to achieve a non-uniform effect). Lay out the structure in a row, fitting the bottom along one line.
- Marking. Make marks for holes on each pipe 20 cm from the bottom of the future screen-partition. Do the same 1 m from the top of the structure, focusing on the highest pipe (mark point B).
Make another point in the center of the partition and call it C.
- Make holes. Using a drill at low speeds, drill holes strictly according to the markings on the partition screen.
- Connecting parts. Pass through points A, then B and C along the rope, slide the screen and tie the decorative thread securely.
The final stage is the processing of the partition screen with a coloring material. You can choose a light brown shade, and additionally draw “eyes”, like those of trees, imitating bamboo.
Video on how to make a screen partition
To understand how to make a screen, watch a video from a professional. Detailed recommendations and some secrets will help you create the ideal decorative partition for your apartment! A beautiful hand-made screen-partition is a source of pride for the owner and an excellent element of the interior, zoning the space and performing other functions.
One of the mandatory rules for a quality interior is zoning. A simple partition will help divide the room into functional zones. Even a novice craftsman can make a screen from scrap materials with his own hands. It is enough to use the tips for making a decorative element.
The easiest way
You can make a screen in just an hour if you use a ready-made wooden shield as its base. You can buy it at a furniture store.
- furniture panel - 3 pcs.;
- loops - 4 pcs.;
- screws - quantity depending on the design of the hinges;
- tools.
- The accessory is painted, varnished or aged.
- The screen is assembled starting from identifying the front side of the sashes.
- The two parts are folded with their right sides facing each other and the locations of the loops are marked.
- The hinges are secured with screws.
- The third door is placed so that when the craft is turned like an accordion, all the doors are facing the viewer.
- Screw in the hinges. The simplest screen is ready!
Frame screen
This option looks impressive and will fit into various interior styles. If you use light fabric, the partition will perfectly decorate the Provencal atmosphere; dark and steely shades will complement the loft.
To make a partition you will need:
- wooden slats;
- corners;
- screws;
- roulette;
- pencil;
- textile;
- double-sided hard Velcro;
- stapler;
- tools.
- The slats are cut in accordance with the dimensions of the future partition. Assemble windows using corners.
- Screw on the hinges. The number of sashes can be any. It all depends on the size of the resulting frame and the dimensions of the room.
- The fabric is cut to fit the windows, adding two centimeters on each side. The soft part of the Velcro is sewn along the perimeter of the cuts.
- The other half is stapled to the inside of the frame. If the Velcro is fairly stiff, the fabric will hold tightly.
- The finished product is decorated with acrylic paints on fabric, and the frame itself is coated with matte varnish.
You can make an excellent interior partition with your own hands. For this, simple materials at hand and a little inspiration will come in handy.
A few centuries ago, the screen was a classic attribute of any interior that aspires to pretentiousness and taste.
Nowadays, screens can be used to regulate the space in the house.
Over time, fashion “pushed aside” the screen, turning it into an antique of interest only to fashion historians. Now, when the concept of zoning space is returning to the interior, the screen has again become necessary.
A screen is not just a decorative element, but a completely functional detail.
With its help, you can hide something that is not intended for prying eyes, complicate or make a space more comfortable, and also turn it into an art object, add theatricality and decorativeness, etc.
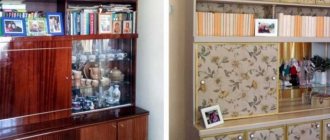
In the living room, a screen can be made the main decoration of the room.
Let's try it in practice
In order for our conversation with you about how to make a screen with your own hands to take on a concrete character, you can write down the “recipe” for its “cooking”. So, you will need 6 pieces of wood, each about 2 meters long, and 6 shorter pieces that will make up the width of the screen. You will also need to purchase fabric of any color you like. In this case, you should start from the place where this screen will be located. For example, for a children's room you can choose a more cheerful and bright fabric that will create a playful mood in the baby.
In addition, to create a screen with your own hands, you will need to prepare 4 door hinges: if your accessory has three doors. Also, don’t forget about a paint brush and varnish, which you will use to put the frames for the screen in order. It is worth noting that when performing this work you also cannot do without nails and a hammer or self-tapping screws. At the same time, some specialists use a stapler for furniture and various elements of decorative finishing.
The technique for doing the work will be as follows:
- You need to create a frame from bars. To do this, we make 3 wooden frames and then fasten them together with screws.
- We fasten the frames together using door hinges. To ensure that the base for the screen is completely ready, coat it with varnish and let it dry thoroughly.
- We cut the fabric to the required dimensions, leaving 2 cm from each edge for the hem. Then we carefully stretch the resulting blanks onto the frames and nail them with a furniture stapler. It is very important that the fabric is stretched tightly and evenly. If desired, you can decorate the resulting screen with any decorative elements.
Otherwise, the hand-made screen is ready and you can put it in its place and enjoy its beauty and privacy.
________________________
Screen - partition is quite an interesting and versatile decorative element, thanks to which you can easily zone a room. Therefore, if you would like to create separate zones in different rooms, then feel free to start making a screen - partition.
This kind of home screen - partition is quite simple to make, just prepare all the necessary materials and tools. • Wooden blocks 2 m long, 6 pcs; • Wooden blocks along the width of the room (measure the width of the room, dividing by 3) – 6 pcs; • A piece of thick fabric (choose colors to suit your taste or to match the interior); • Brush; • Door hinges – 4 pcs; • Varnish; • Furniture stapler; • Glue; • Self-tapping screws – screws; • Nails; • Hammer; • Decorative braid Instructions for making a screen - partition 1. First, you need to make a frame for the screen. We use prepared wooden blocks. From the prepared bars you need to prepare 3 wooden frames, connecting the bars together with screws. 2. We connect the frames with door hinges. 3. Using a brush, open the frames with varnish to add shine. 4. Cut 3 cuts from the prepared fabric for each frame in accordance with the dimensions of the frames. 5. Glue each piece of fabric with glue to one side of the frames, and then secure it with staples using a furniture stapler. Next, stretch the fabric and secure with staples on the other side of the frame. Make sure that the fabric is stuffed evenly and symmetrically. 6. The front side of the screen - partition is ready, now it is necessary to aesthetically design the inside of the screen. To do this, use prepared braid, which you carefully stick to the cut edges of the fabric. After this, all the main work is completed and your screen - partition is ready for use. If you wish, you can easily further decorate the screen by decorating it with appliqués, original inserts and photographs. We are confident that a hand-made screen or partition will become a wonderful decoration for your home. Creative success and good mood!
___________________________
The topic of this article is DIY screen .
As I already said in my article, you can zone a room in various ways. Including using a screen.
This is a very convenient option that allows you to change your space at the speed of light! Especially if you have several screens of different designs (or the base of the screen is the same, but the panels (filling) are different). After all, moods can also be different - and the world around should change accordingly!
Panels can be made from fabric, wood, plastic, stained glass.
The design of a screen should be based not only on the style and color of the interior, but also on the functions that our screen should perform. If you need to tightly fence off some part of the room, then you need to choose less transparent materials. It could be wood, opaque plastic, opaque fabric (or light, but very tightly gathered), possibly stained glass.
If you only want to visually separate part of the space, then you can limit yourself to transparent materials, or even make a screen with decorative holes.
And if necessary, you can safely put the screen in a corner and free up space, for example, for a party!
You can easily make a screen with your own hands. In addition, you will know for sure that no one else has a screen like yours! Thanks to this guide, you will make it quite simple!
If you have children, this is a great opportunity to involve your child in the creative process of creation! Everyone will have fun and interesting! The main thing is to use a little imagination!
You can safely use almost everything you find at hand: bright scraps of colored fabric, old broken hairpins, pieces of leather (can be cut from an old bag), beads, beads, paints, various ropes, child’s drawings, photographs, etc.
And if you feel the strength to do it, go ahead!
So, to make a wooden frame we will need the following tools and materials:
- The wooden planks themselves (we recommend using pine planks 6 cm wide and about 2 cm thick). There should be 24 pieces: 1.70 m long - 12 pieces, 0.6 m long - 12 pieces. (or take 6 pieces of 1.2 m each).
- Designed for a screen with three doors.
- A simple pencil with a square.
- Wood glue with a paint brush.
- Varnish for wood.
- Sandpaper.
- The chisel is thin.
- Carpenter's vice – 4 pcs. (you can do less, but then the process itself will take longer).
- Hammer.
- Hacksaw.
- Wood screws (D = 3 mm, length can be 1.5 cm). Approximately 100 pcs.
- Screwdriver (if available).
- Steel corners – 12 pcs.
- Loops – 6 pcs. or 9 pcs. (depending on the type of loops)
First.
So, we take our wooden planks, retreat about 6 cm of edge on each side on both sides, mark a line parallel to the edge of the plank.
Note: These lines should be on one side of the plank.
Second.
Along these lines we make a notch with a hacksaw to the middle of the thickness of the plank.
Third.
We take a hammer and a thin chisel and make cuts (remove the wood by about half the thickness of the plank) to the line and the cut we marked.
Fourth.
We take two long strips and two short ones, apply glue to the inside of the notches and assemble the frame. We clamp the gluing areas with a carpenter's vice and wait until the glue dries.
We do the same with the rest of the planks.
Fifth.
It is necessary to sand the resulting frames with sandpaper. Then coat them with wood varnish.
Types of screens
Modern screens are divided into various types depending on the structure, materials used and purpose.
The original glossy screen serves as a decorative element.
And if the purpose of a screen can be very diverse and depends only on the imagination of its owner, then the most popular types by design are the following.
Until recently, this was the only possible type of screen. A rigid sash frame with fabric stretched over it (paper, glass inserted into the frame, etc.), the sash is connected to each other like an accordion.
A screen along the entire length of the room along the wall acts as a decorative element.
The fastening is made with furniture or piano hinges, in some cases with strong soft material (leather, thick fabric, artificial leather). Initially, the frame was made of wood, but later it was replaced with lighter aluminum.
Currently, the main material for folding screens is plastic.
- Single screen.
This is the main type of office screens. It is used when it is necessary to divide a large space into smaller, individual “offices”.
An unusual single-screen screen in a relaxation corner.
- Composite.
Recently, this type has become especially popular among those who like dramatic changes in their interior. This screen is assembled like a puzzle from several elements. The material is usually plastic, but a textile option is also possible.
In this case, you can choose the number of elements, the material for them and in what order they will go in yourself.
- Flexible.
This type of screen is the latest invention of designers. The structure does not consist of separate doors, but is a single wall made of flexible material.
The screen can be easily rolled up if necessary, can take fancy shapes and be used in various situations.
It can be bent at almost any angle, creating not only small zones in space, but even labyrinths. If necessary, the screen is folded and removed.
A new product in the world of partitions is a flexible screen.
If you are faced with the question of how to make a screen with your own hands, then you need to proceed from the design features. For example, it is not possible to make a flexible screen yourself, because it’s all about the material. Such a screen can be subjected to design changes or assembled independently.
DIY screen
Until recently, the screen was perceived as simply a very outdated piece of furniture. But many of our compatriots are still nostalgic for it. Moreover, the screen has recently been popularized to a much greater extent than the notorious ottomans and chaise longues.
Modern designers give this piece of furniture new life for a reason: a screen allows you to divide the space into separate sections, while creating a small secluded corner. To get such a practical, cute thing, you don’t have to spend a lot of money on luxurious antique samples.
Don’t rush to throw away your old doors - they will make an excellent decorative element for your home
You can make a screen from smooth boards...
...or from ready-made door leaves, which are sold in hardware stores
Making a decorative screen is quite simple and you can do it yourself. For example, even if you do not have perfect carpentry skills, you can make frames that will serve as the basis for the manufacture of individual sashes without resorting to sophisticated technologies. Of course, they must clearly match in size, be perfectly even, and not warp, which only true professional carpenters can do. But current capabilities make it possible to avoid such difficulties. Simply, instead of the basis of the future frame of the screen, you can take ready-made frames from any art and creative work store. These durable stretchers are made quite professionally and with high quality, and therefore they are well suited for making screens. And since they are produced in a variety of sizes, they can easily be selected to make the most optimal screens for our conditions.
You don’t even have to modify the doors if they are in good condition
The screen will divide the house into zones if necessary
So, for example, to obtain a three-leaf screen with a height of 210 centimeters, you will need 9 standard stretchers 50x70 centimeters. They need to be grouped into three frames for each sash. From 6 frames measuring 60x90 centimeters, you can fold a screen of 180 centimeters with doors of two elements, and so on.
On the subject: How to survive a divorce from your husband
We make a screen from 4 doors. You will need 4 smooth boards
You will also need wallpaper to suit your taste.
The boards need to be painted on all sides. But, if you don’t have enough paint, you can paint only the ends
Then wallpaper is glued onto the boards (after the paint has completely dried)
The result is such a beautiful DIY screen
When choosing a stretcher, you need to proceed not only from the desired proportions and planned dimensions of the screen, but also from the assortment offered by stores. By choosing from the available frames, you can significantly save time and simplify the task you have set yourself. Using the same principle, you can make a children’s screen with your own hands
. The only difference is that it is much easier to do, because the size itself is at least a third smaller. In addition, the cost of funds is also significantly reduced. But such a screen cannot do without decent decor. After all, if its “adult” analogue can be done without any decorations at all, then the children's interior predisposes to fabulous toy details.
Materials and tools needed to make a screen
Making a screen with your own hands is not a difficult process at all. Having done this for the first time, in the future, having the necessary tools and experience, you can independently improve the technology and develop unique design solutions. But for the first screen you will need a minimum set of tools and materials. Namely:
- Screwdriver and drill;
- Construction stapler;
- Furniture hinges;
- Hacksaw;
- Screws;
- Paint, varnish;
- Wood blocks of the required length;
- Fabric for the internal filling of the sashes (if glass is used, additional glazing beads will be needed);
- Suitable decor.
If everything you need is available, you can begin production.
The manufacturing process, in turn, is divided into the production of frames for the sashes, decoration and fastening of the sashes.
Sliding screen made of MDF boards
The easiest way to make a decorative sliding screen with your own hands is to simply fasten together ready-made MDF boards that already have decorative door hinges. In order to connect 2 fairly high doors, you will need 3 door hinges. Once the base of the screen is ready, you can start decorating it. Such a screen can suit any stylistic design of the room. To make the screen lighter, you can use plate doors as a basis. In order to give the screen functionality, you can attach wheels to it. You can make the screen original by covering it with stickers, painting it in your favorite color, decorating it with photographs, mirror elements, or covering it with a beautiful fabric. You can make such a screen for the bathroom with your own hands.
Screen made of MDF boards
Step-by-step instructions for making a screen frame
The main element in the design of the screen is the frame of the sash. Therefore, frame screens are most popular when made independently. The wooden frame is a regular frame. It is made in several stages.
If the sash is planned to be solid, the material chosen is as light as possible.
DIY screen (step by step instructions)
We mark the timber (4x4) with the calculation of six bars of one hundred eighty centimeters and six bars of fifty centimeters each.
Next, to make the screen, we cut the block according to the markings.
We process the wooden blanks with sandpaper or a grinding machine until smooth.
It is necessary to carry out preliminary work to cover all irregularities and cracks.
This connection is the most durable.
After making sure that the grooves match exactly, coat them with glue and connect them using spikes of suitable size. The bars can also be connected with screws. When creating a frame, you can leave space for the legs when attaching the bars.
We fasten all three doors in a similar way.
After completing the preparation of the surface of the future screen for the house, we paint the wood with the paint we like.
We connect the individual sashes using hinges.
To complicate the task, the frame can be woven from wicker, made from openwork metal (forging), decorate the corners of the frame with forged metal, or use the craquelure technique on wood.
Ordinary and children's screen in oriental style
A bamboo screen is perfect for an oriental-style interior. In order to make such a screen with your own hands, you first need to make a frame from thick bamboo stems. The screen doors can be made from thin bamboo stems and connected with jute cord. You can make a wooden screen for a children's room with your own hands.
Oriental style screen made of bamboo
If desired, you can build a frame for a screen of any shape and decorate the doors in the way you like. In addition, the decor of the doors can be updated at any time, thereby slightly updating the boring interior.
Did you like the article? Share on social networks!
WoodTextilesScreen
Decorating the screen
Based on the method of decoration, structures are divided into solid and transparent. Based on this, the material to fill the frame is selected. If the final product is planned to be transparent or translucent, choose glass. It can be corrugated, matte, mosaic, painted, etc.
For glass, recesses are made in wooden blocks, then it is secured with glazing beads.
Another material suitable for translucent screens is sisoflor. But it is difficult to work with; it is quite fragile. Sometimes, when creating a multifaceted decor, transparent sections of the screen are combined with non-transparent ones. For the latter, cardboard is used.
Cardboard is combined with floral mesh, paper, and foil.
The most used material is fabric. And here the scope of designer imagination is simply limitless: chintz, exquisite silk, embroidery, organza, tapestry, fabric painting, etc.
There are practically no restrictions in decor.
There are also quite a few types of fastening fabric to a block frame:
- Using a construction stapler;
- Pull onto the slats;
- Using decorative loops;
- “Plant” on glue with a rubber base;
- Using specialized pins.
Over time, when making a screen with your own hands, each craftsman develops his own secrets, methods of fastening and decoration.