Let's talk about how you can make a bas-relief with your own hands. This issue worries many property owners, and therefore deserves detailed study. Many people nowadays try to add some zest to the interior they create.
For example, bas-relief in the interior is gradually gaining new fans. It makes it possible to implement interesting ideas for decorating the interior of a living space into reality.
How to make a bas-relief on the wall with your own hands? Stylists often use this design technique when decorating mansions that have a real fireplace.
Original plaster ornaments can surround the fireplace, as well as decorate window and door openings.
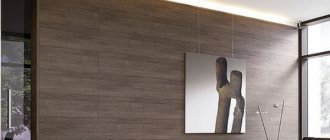
Attention! The highest aerobatics in the interior world is considered to be a decorative design that includes additional lighting. With its help, you can give images the volume of 3D graphics.
How to make a bas-relief on the wall with your own hands? We offer step-by-step instructions, following which you will be able to create an original relief on the wall with your own hands.
What is meant by the word bas-relief?
This technique can be said to be an art that allows you to get three-dimensional images on the wall. These can be creations in the form of a separate wall panel, or the entire wall can be decorated in the form of such a bas-relief.
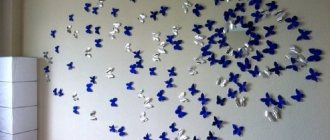
Flowers, trees, birds, animals and more are most often depicted; for avant-garde interiors or modern fashionable designs, some abstractions or entire compositions and scenes are created on the walls.
In general, if we approach the concept of “bas-relief” more professionally, then it is understood as a three-dimensional pattern protruding beyond the composition of less than half the thickness of its volume; professionals classify it as low relief.
Bas-relief photo
Most often, the bas-relief is applied to the wall in the form of ready-made slabs, which are ordered in the appropriate workshops, where they will be made by professional artists using special equipment.
But to make a bas-relief with your own hands, there are other techniques that allow you to create a similar volume directly on the wall.
Bas-relief on the wall photo
What can be decorated with bas-relief
For many people, when they think about bas-relief, photos of works by famous masters decorating the facades of buildings or the pedestals of statues immediately come to mind. However, even in the most ordinary apartment you can find many places and surfaces on which the bas-relief will look good.
- A small bas-relief will be an excellent decoration for the surface of various objects such as photo frames, mirrors, decorative panels and boxes. This type of finish can also be placed on cabinet doors, dresser drawers, and desks.
- Larger bas-reliefs can decorate doorways and the doors themselves, fireplaces, and the ends of large furniture.
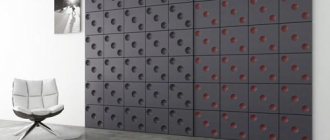
- A wall is a suitable place even for a medium to large bas-relief. Daisies, galloping horses, a snow-covered tree or a flowing waterfall - incredibly beautiful compositions can look harmonious on the wall in any room, be it a dining room or a bedroom.
In addition to its decorative role, the bas-relief can also perform a practical function, for example, successfully mask uneven walls, utility lines, create a smooth transition from one functional area to another, or simply advantageously distort the space.
The bas-reliefs on the wall do not need additional painting - they are beautiful in themselves. However, sometimes after creation they are varnished or painted in order to emphasize individual elements of the picture or fit into a certain interior style.
USEFUL INFORMATION: Bathroom: budget renovation options
DIY bas-relief
This technique requires the use of high-quality materials, patience and certain skills, as well as knowledge of technology. Without these components it is impossible to get a good result.
From the materials you need to select a high-quality primer and putty, you will also need sandpaper, water-based paint, as well as a bucket, spatula, and brush.
At the first step, the entire wall on the surface of which it is planned to apply a bas-relief is completely cleared of old finishing materials - wallpaper, paint, plaster, etc. Then it is leveled with high-quality materials, primed and dried.
Bas-relief photo
At the next stage, the required image is selected; it is worth noting that this image should display some general idea related to the rest of the room’s design. Or it could be an accent in the form of a future volumetric panel.
The selected drawing or composition is transferred to the wall using a pencil; the better you do this, the better and more realistic the future wall decoration will be. If you are not very good at drawing, then you can make a stencil of the desired design and use it to transfer the image to the wall.
DIY bas-relief photo
The next stage involves preparing the mixture and applying it. This step is complicated by the fact that it is necessary not only to apply putty on the wall, but also to give the necessary volume-relief and indentations in the right places. The goal is to give the main features. Then the future composition is given time to dry and in further steps adjustments are made to the required aesthetic standards, by grinding off or applying the next layer of putty.
Bas-relief photo
After giving the required shape, the bas-relief on the wall is given time to dry completely. Then, using fine sandpaper, all protruding corners, protrusions and sharp edges are sanded with fine sandpaper, so to speak, the picture is brought to perfection. The main thing here is not to overdo it, so caution won’t hurt here. Otherwise, the sharpened relief will have to be restored, and all the last steps will need to be repeated.
After sanding, the composition is cleaned of dust; for this you can use a brush and a vacuum cleaner.
Then the entire surface of the bas-relief is primed for future painting.
Painting, as already mentioned, will be done with water-based paint. Depending on the purpose, several colors can be used (if the composition requires it), or you can get by with one - white, gilding, bronze paint, etc. For painting, you can use both brushes and special sponges, the latter are better in that they do not create paint smudges.
Bas-relief on the wall photo
In fact, when the paint had dried, we made a bas-relief on the wall with our own hands. This will be an excellent reason for your own pride for many years. Below we invite you to look at more photos of finished compositions made in a similar way.
How to create a three-dimensional drawing with your own hands
Those owners of country houses whose profession is not related to repairs believe that such a decorative element as a bas-relief is a prefabricated structure cast from plaster. In reality, this decorative element is made by hand, so it can be considered an original work of modern art.
Any elements made of gypsum and putty are unique decorative elements; when creating them, a sketch is first drawn up.
Advice! In order to create a three-dimensional drawing on the wall, you need some skills and abilities, compliance with technological features.
Before creating bas-reliefs on the wall, it is first important to choose materials. Currently, alabaster, gypsum, plaster, and clay are used to make bas-reliefs.
For beginners, professionals recommend choosing plaster or gypsum-based plaster to make decorative three-dimensional images.
Having chosen the material for making the decor, you can proceed to making the base, which will be the basis for the future bas-relief. For work you will need a wooden box with low sides.
Attention! The bottom of the box being created will be plywood.
The dimensions of such a box will correspond to the dimensions of the bas-relief being created. Instead of a box, you can use a box that has a rigid base and walls. The base of the box is carefully covered with a polymer film, making sure that no folds form. Next, you can proceed to the process of preparing the solution, fully observing all the manufacturer’s recommendations.
After the solution is ready, it is carefully poured into the mold.
Attention! When making bas-reliefs with high patterns, wire will be required for the reinforcement process.
The poured mixture remains in the box until it dries completely; the drying time depends on the composition of the solution.
Then you can proceed to the actual production of the future bas-relief. The main condition is to create a certain outline of the intended ornament and then fill it with the mixture. The decor is built up gradually, and the previous layer must dry completely before a new layer can be created.
Advice! You can use film to draw contours on the finished surface. After all the contours have been drawn, the film can be removed.
Interior stylists consider plaster to be a good material for making an original bas-relief. Among the many advantages of this material, we highlight the ease of working with it in a wet state. This material is quite pliable, so you can remove excess plaster and adjust the shape of the created pattern.
Plaster that is not completely dry can be sanded, giving the finished bas-relief a sophisticated look.
As a prerequisite for creating a high-quality and beautiful bas-relief, professionals note the complete hardening of each fragment.
In order to create recesses in a wall panel, you can use several methods:
- cut through the material and remove some parts of the created bas-relief with a chisel;
- build up the background around a certain point, which will be lower after finishing.
Basically, a flower is used as the basis for images on the created bas-relief: a tulip or a lily. Not everyone will be able to make such a complex design on their own, so many owners of country houses try to order bas-relief from professional craftsmen.
In order to simplify the process of creating a lily from plaster or plaster, you can immediately apply it to the wall surface.
In such situations, all other interior elements should be covered with special masking tape to prevent damage. Then the base of the pattern being created is covered with putty, and after complete drying, a primer is applied.
Advice! Professionals recommend choosing paint for priming - a primer whose properties make it possible to create excellent adhesion to the decorative elements of the created bas-relief. It takes three to four hours for the finished mixture to dry completely.
Using a trowel, Marseilles wax, which is a quick-drying material, is applied to the bas-relief. By attaching a film to the surface of the bas-relief being created, it will be possible to draw small details.
Attention! The film must be secured so that one edge can be folded back if necessary.
You can draw the outlines of the planned design on the film using a colored marker. Next, having peeled back the polymer film, you can draw a lily along the marks made using Marseilles wax. The painting is carried out on the wall, so there is no need to use a special substrate.
Many interior designers choose white wax for work related to the production of bas-reliefs. The main task of the master is to give the created bas-relief optimal realism.
Advice! Acrylic paints are suitable for making the finishing layer of the created composition.