What housewife doesn’t want to transform the look of her room with the bright colors of blooming violets, begonias or geraniums? It's aesthetically pleasing, a little refreshing, and overall beautiful. But it is inevitably necessary to decide where to place these flowers in pots? Not on the floor. Need shelves. You can’t always find what you need in the store, and you want to save money. There is only one way out - to do it yourself, so that all this colored aesthetics, as they say, is sorted into shelves.
In this article we will tell you how to make shelves for flowers with your own hands from wood and chipboard, consider options for wall and floor shelves, and also demonstrate photo and video instructions.
Board for making shelves
What material can shelves be made from? It can be plywood, chipboard, wood, metal, glass, drywall, etc. If you have wooden planks lying around your household, and you have not yet found a proper use for them, make a flower shelf out of wood.
Let's start assembling the wooden structure
Wood shelf
It will be very good if you have about 6 of these wooden planks, at least two meters high and measuring 35x5 mm at the end. You will also need two 20x20 mm bars, also 2 meters high.
Arm yourself with a pencil, a screwdriver (Phillips) or a screwdriver, a tape measure, a saw and a jigsaw, as well as 25 and 40 mm self-tapping screws. Also, you cannot do without an assistant who will simply support the structure when mounting the shelves to the racks. Now you can start manufacturing.
- Wooden planks for shelves are cut into 60 cm (12 pcs.) and 64 cm (6 pcs.) and, in general, we get 18 small planks - these are future shelves.
- The bars are cut into 70 cm lengths and you get 4 pieces - these will be the side posts.
- From the remains of the bars we cut out six more small bars: four 23 cm each and two 19 cm each. This is the future mount for the shelves.
- On the bars that will serve as racks, we use a pencil to make markings for the two lower shelves. The marking is done by calculating the height of the flowers themselves in the pots that we plan to place on them.
- Using four bars (23 cm) we make two shelves. The bars are attached to both ends of the planks with 25 mm self-tapping screws, which in turn connect the planks to each other.
- Using 70 mm self-tapping screws, we attach the shelves to the vertical posts.
- Using the same screws, we attach internal bars measuring 19 cm to the upper parts of the rack between each pair of vertical posts.
- The third shelf is made locally by attaching each strip to the top of the product with 25 mm self-tapping screws.
This is how a small floor shelf or flower rack turned out.
From chipboard
Chipboard shelves
If you prefer a chipboard shelf, then you probably have experience working with this material. Here you will have to tinker not so much with the manufacture of the structure itself, but with the preparatory work before assembly. You will need:
- Chipboard: blanks measuring 140x200 mm (the best is waste of pieces from one sheet, although not essential)
- Fasteners (confirmations, self-tapping screws - 2 pcs. by 45 mm and 6 pcs. by 16 mm).
- Confirmation drill and regular drill.
- Hanging slats or awnings.
- Edge.
- Wooden dowels (dowels).
- PVA glue.
From the tools:
- Iron.
- Hammer.
- A device for gluing with edges (a regular block with a groove slightly larger than 16 mm).
- A block of wood wrapped in sandpaper.
- Clamp.
As you can see, the list is quite large, and all this is necessary to prepare for assembly.
First of all, we decide which ends of the parts will be visible, after which we begin to paste over them with an edge. For this we use a regular household iron and a shoe knife to trim off the excess edge. Using a special device, we tightly smooth the glued melamine edge and grind the end corners with an emery block. Those places that will be joined to each other should not be pasted over.
Gluing the workpiece with an edge
We prepare the elements of the back base for future shelves, which we did not cover with a paper edge, for joining together. We drill two shallow holes and pour glue into them. We hammer the pins (dowels) into the holes, and in the joining part of the adjacent element we also drill two holes and fill them with glue.
Installing dowels
To ensure that the chopsticks coincide with the holes of the adjacent element, use special “conductors” or furniture taps for dowels. “Conductors” are put on dowels and pressed against the mating part; sharp taps will inevitably leave small indentations. Drill there.
Connection method
We connect the parts together and press firmly. For this, a clamp will be an indispensable tool for us. Press the parts tightly with a clamp and leave until completely dry.
Clamp with a clamp
The back of the shelves is done. Now our task is to secure the shelves. To do this, we first make markings for confirmations.
Confirmat drill and confirmat
We drill holes with a special confirmation drill, after which we proceed to attach the shelves, alternating them on the right and left.
It is best to attach hanging strips at the top and bottom so that the shelf hangs strictly vertically on the wall, even if someone accidentally touches it.
Chipboard shelves
All that remains is to arrange the flowers beautifully and you can enjoy the work of your own hands.
You can get creative and make the shelves colorful. Or another option: round the free corners of the shelves and cover them with a T-shaped plastic edge. It will be much more beautiful.
Option No. 2. Material – chipboard.
For lovers of chipboard furniture, this option is most suitable. This material is lighter and more comfortable than pure wood.
To make it you need to prepare:
- Chipboard sheet blanks 140 by 200 mm.
- Fasteners (screws – 2 pcs. by 45 mm, 6 pcs. by 16 mm).
- Drill.
- Hanging strips.
- Edge.
- Dowels made of wood.
- PVA glue.
Tools:
- iron;
- hammer;
- special tool for gluing edges;
- a block wrapped in sandpaper;
- clamp.
First you need to figure out what kind of ends you want to have.
Now we take the edge and glue it onto the sheets using a home iron, and carefully trim off the excess with a stationery knife. Afterwards, use a heavy straight object to smooth out the glued edge, then sand the end corners with sandpaper. We prepare the rear parts of the future shelf, which were not covered with an edge, for future joining. To do this, you need to drill two small holes and fill them with PVA glue, after which dowels should be inserted into the holes. And similar holes are drilled in the joining parts of the other board and filled with glue. In order for the dowels to accurately fit into the hole of the adjacent panel, it is necessary to put “conductors” on the chopstick itself. Next, the two elements are folded exactly into the holes (the main thing is that they fit and are even).
It is necessary to squeeze them firmly with a clamp and wait until they are completely dry. After drying, the back part is completely finished. Now let's start building the shelves. First of all, you need to make markings for the screw tie. After drilling, we begin to attach the finished shelves, alternating them left and right. The main thing is to know that it is best to fasten this furniture from above and below, so that an accidentally touched shelf does not fall on someone’s head. You can also get creative with the color or type of this design.
It will work out well if you cover all the boards with a multi-colored edge.
Corner
Wall mounted corner shelf for flowers
Now is the time to talk about corner flower shelves.
Sometimes the place for flowers is only in the corner, therefore we need a corner shelf. This can be either a bookcase or a hanging shelf. Everything is simple here, as mentioned above, the main thing is to prepare everything correctly. For example, if we want to make a corner shelf from chipboard with elements of chrome pipes, then we will need:
- 4 squares of chipboard, the size we need.
- T-shaped edge (can be matched to the color of the product, although this is not so important).
- Chromed pipe Ø 25 mm (usually three-meter ones are on sale, so it will be better and cheaper to get leftovers somewhere), 18 flanges for pipes.
- Three plastic, chrome-plated legs.
- Melamine edge.
From the tool:
- Drill with attachment.
- Iron.
- Shoe knife.
- Device for gluing edges.
- Sander.
- Jigsaw.
- Router with cutter.
- Pipe cutter
- Rubber hammer.
- Wood screws (4×16) up to 70 pieces.
- Screwdriver.
Marking
We pre-prepare the shelves, making them radius. We can do this using a jigsaw and a grinding machine. We cut off the excess with a jigsaw, and sand the cut area with a grinder. It is worth noting that a tool such as a jigsaw mercilessly chips the laminate when cutting. After sanding, these chips are practically removed. The next stage is gluing the even ends of the shelves with melamine edge. Then we’ll take care of the radius areas of future shelves. We will need a router and a cutter, which cuts a small groove at the end of the chipboard sheet, into which we subsequently need to hammer the T-shaped profile with a rubber hammer. Next, we make marks with a marker and drill 3 holes in the chipboard for the 25th pipe.
There are no holes drilled in the top and bottom shelves at all.
Using a special pipe cutter, we cut the parts of the chrome pipe we need to size. We screw the legs to the bottom of the shelf in advance. Then we screw flanges onto the holes of the two shelves on both sides (it is better to do this before installing the shelves in the product) and thread the tubes. We fix them with special screws on the flanges and, one might say, the bookcase is ready. This corner piece with flowers will be a wonderful decoration for your corner.
Hanging
Hanging shelf
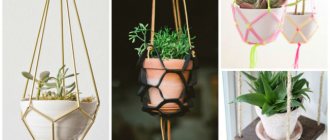
Now it’s worth talking about light-loving plants that need to be installed closer to the window or even on the window. Naturally, we will not talk about flowers, but about window shelves for flowers. Of course, your desire to place flowers on the window may be caused not only by the light-loving nature of the plant, but also by the growth structure of its shoots. They can be, for example, flowing or curly. In this case, it would be better to think about how to place these flowers higher. How to make shelves for flowers in this case? For this you can use different materials.
Flowers on the window
You can also arrange for hanging potted plants on the window. All we need for this is some 8x60 hook anchors.
- Drill a hole in the upper part of the window with a hammer drill.
- Insert the anchor hook and screw it clockwise until it stops.
- We tie the strings to the pots. It is better if it is an ordinary fishing line. It is not so visible and quite durable. However, there is no limit to imagination.
Anchor bolt with hook
The anchor mechanism is designed in such a way that when screwed in, its spacer part expands and, thus, sits quite firmly in the concrete.
Nuances of work
Stands for indoor flowers are most often made of wood - boards and plywood. This is a comfortable natural material that can be processed well. Also, stands can be made of metal, plastic, wire.
You can place the stands in almost any part of the room - on the wall, in the corner, on the window. If light-loving plants do not fit on the window sill, it can be “expanded” with numerous hanging or shelving shelves built into the window walls. If you need to save space and at the same time place numerous flowers with pots, you can fix the shelves on the walls. Also, beautiful stands on the floor will decorate the interior.
In the photo you can see what models of plant stands can be and choose the right model for yourself.
Simple but elegant wooden stands are quite easy to make yourself, especially for those craftsmen who love and know how to work with wood.
As an example, we will give a master class of a wooden stand that can be placed either by the window or on the floor. For this craft you will need the following materials and tools:
- board (preferably pine);
- slats;
- sample;
- stencil for side drawings;
- pencil;
- jigsaw;
- milling cutter;
- screwdriver and thin screws or hammer and nails;
- skin;
- wood paints and brushes or aerosol;
- varnish (parquet).
Boards must be selected taking into account the size of all parts. For the craft you need two side walls and three tabletops. The walls can be about a meter long. The diameter of the tabletop is 16-20 cm.
You can draw the template by hand or use a ready-made one. It must be taken into account that the walls are the main support of the stand, so they must touch the surface in at least three places.
Related article: Do-it-yourself felt toys: master class with photos and videos
How to do:
- Transfer the prepared templates with a pencil onto the boards;
- Using a jigsaw, cut out the parts along the contours and sand them;
- Use a router to decoratively process the edges of all parts;
- Connect the two walls using slats of equal length, cut to the diameter of the table tops or slightly narrower;
- Paint the workpiece with an aerosol or brush;
- Screw the tabletops onto the back side of the stand (it is better to place pre-prepared round pieces of plywood under them);
- Cover the stand with varnish and wait until it dries.
At this point you can complete the craft and start using the stand for its intended purpose. However, to give the stand an aesthetic and interesting look, you can decorate it with artificial roses. For this you will need:
- wire;
- artificial leaves;
- sharpener;
- fresh branches (ash, linden, rowan);
- candle;
- dye.
While the varnish is drying, you can do the following:
- Grind fresh twigs on a sharpener to make round shavings (rose corollas);
- Insert the whisk into the wire bent at one end;
- Melt the candle and dip the flower blank into it;
- Paint the rose, attach artificial leaves to the wire;
- Drill small holes in the slats and insert the resulting roses into them.
Stands made of metal, especially forged ones, also look beautiful. They can stand alone on the floor, decorating the interior, or be suspended, for example, by a window. They are easiest to buy or order from blacksmiths. However, you can try to repeat the forging patterns using thick wire and a soldering iron.
Glass shelf on the window
Flowers on glass shelves
And if we talk about literal window shelves, then the next option is especially suitable for those who want to do everything, firstly, quickly, secondly, reliably and, thirdly, beautifully. It is clear that we are not talking about placing flower pots on the windowsill. It is cumbersome, inconvenient, and in some cases not particularly beautiful.
These shelves can be mounted provided that the window itself is wooden.
Arched bracket (concave)
In any furniture store that sells fittings, you buy a chrome-plated bracket for shelves (it’s called an arched, concave bracket). At the hardware market you can buy a one and a half meter strip about 3.5 cm wide and about 1.5 cm thick. As a rule, there is a glass store next to the market and if you know the exact dimensions of your future shelf, then order glass with a thickness of 3 cm along the way. mm with circular grinding. For beauty, you can choose any tint, and if you have children, it will be important that the glass be tempered. When such glass falls to the ground, it shatters into small pieces with non-sharp ends, and your child will not be injured by them.
Next, measure the depth of the shelf holder and cut small strips according to these dimensions. We screw these strips to the brackets from below using small self-tapping screws. In this case, wood will serve as a lining material between glass and iron. Just be sure to make sure that the screws do not come out on the other side. Therefore, your fasteners must be of appropriate sizes. All that's left to do is attach the brackets to the window frame. After this, you can put the shelves on top and make sure that we have done everything correctly and the plane is strictly horizontal (use a building level for this). The shelves are not attached to brackets, but will be pressed against flower pots. The convenience is that this entire glass structure can be easily dismantled in case of general cleaning, when it is necessary to wash the windows.
Shelf options
As you noticed, there are quite a lot of variations on the theme of flower shelves. Which one you prefer depends on your taste and your capabilities. The main thing is different: beautiful flowers will decorate your home, and beautiful original shelves made by yourself will say a lot about the owner and mistress of this house. Therefore, let there be many flowers in your home.
Features and difficulties
Perhaps the most difficult thing is to make floor flower stands with your own hands. For a home with large rooms, this is an excellent option, but quite labor-intensive. First you need to construct a frame on which the shelves will be supported. It can be shaped like the letter “A” or “L” or be rectangular like a rack.
The frame must be strong and stable. Wood blocks or metal or polypropylene pipes are well suited for it (depending on the expected weight of the shelves and pots).
Wall stands are racks or individual shelves attached to the wall. The shelves do not have to be located strictly below each other. They can be secured in a checkerboard or other pattern to make it easier to place pots and easily reach them while watering.
Article on the topic: “Corn” pattern with knitting needles with a diagram: master class with description and video
Very convenient corner stands - this way you can save room space. However, you should not make such a stand in a corner far from the light source.
An original shelf for flowers and small items can be made from boards and belts. To do this you need to do the following:
- Prepare tools and materials;
- Step back 4-5 cm from the edges and mark the places for the belts with lines;
- Approximately in the middle, hammer the belts on both sides along the marked lines (this is the lowest shelf);
- Secure the straps with nails on the sides;
- Stepping back approximately 20 cm from the bottom shelf, attach the second shelf to the belts on the sides;
- Fasten the belts to the required length.
