Making wallpaper from vinyl
To better understand the properties and composition of such coatings, it is necessary to consider the entire process of their manufacture. Vinyl is used on paper prepared in a special way. It is usually used multiple times because the multiple layers of vinyl make for a more durable trellis.
Vinyl is applied using special printers, which immediately create original compositions on the surface. In some cases, to give originality to the painting, gold or silver shades are used, then such tapestries are covered with a layer of varnish. After completing the procedures, the process of treatment with special substances begins, thanks to which they can be rubbed and cleaned.
Many consumers who want to decorate their rooms based on considerations of safety and environmental friendliness of materials choose vinyl wallpaper with a paper base. Thanks to natural ingredients, such trellises are not only harmless, but are also treated with special substances that prevent the formation of mold - this is a big plus, because this provides good protection against various dangerous diseases and allergic reactions. So, vinyl wallpaper has a number of advantages :
- reliability and durability;
- protection from moisture, light, temperature;
- Possibility of cleaning with detergents;
- dense structure at the top layer.
Many buyers believe that vinyl trellises on paper and non-woven vinyl are almost the same. This is not entirely true, so before purchasing wallpaper you should familiarize yourself with the main differences between these types. Unlike simple wallpaper, in vinyl wallpaper with a non-woven base, the layer inside consists of a lighter and more compacted material, so that it does not tear or wrinkle when glued and used.
The process of gluing vinyl wallpaper on paper
In order to understand how to glue vinyl wallpaper on a paper base, you need to start with the simplest thing. Compared to non-woven wallpaper, this wallpaper is lighter, and therefore somewhat easier to glue. As with any other type of wallpaper, the surface of the walls for this material should be prepared. The aesthetics and overall appearance of the finished room depend on how smooth and even the walls are.
If there is old coating on the walls, it should be dismantled and the walls thoroughly cleaned. After this, the wall should be puttied, preferably in several layers, since it is quite possible that the wall may be slightly illuminated through the paper-based wallpaper. After the putty has dried, the walls need to be well primed and allowed to dry.
Next, you should dilute the glue and it is advisable to immediately coat the entire room with the resulting composition, or rather, the walls and ceiling on which the paper-based vinyl wallpaper will be glued. This is necessary so that the walls absorb the glue and the wallpaper sticks more firmly.
Before you start pasting, you need to draw an even vertical line along the entire height of the wall. It will serve as a guide for making even gluing. Then you need to cut the wallpaper sheets and match them according to the pattern. Despite the fact that this type of wallpaper is not as dense as non-woven wallpaper, when pasting it is necessary to coat not only the walls, but also the stripes. Immediately before gluing the canvas, the wall must be coated with adhesive again. After this, you can adjust the strip and smooth it using a special roller. You need to smooth out paper-based wallpaper very carefully, as it can stretch .
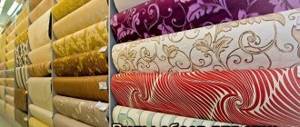
Variety of surfaces and textures
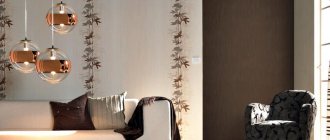
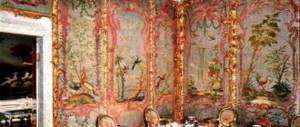
One of the most common materials for wall decoration is vinyl corrugated wallpaper with paper. The base of such coatings consists of paper, and the top layer includes polyvinyl chloride, designed to perform protective functions, making the wallpaper resistant to moisture, sunlight and damage. In addition, these wallpapers come in different designs and are suitable for any interior style. That is why today such trellises are so common.
There are quite a few types and types of vinyl trellises. They can be classified according to different parameters.
On the surface:
- smooth;
- corrugated;
- embossed, etc.
Any vinyl trellis is obtained by applying a layer of vinyl to a substrate - by spraying or in the form of a film. Their further processing depends on the type - the vinyl layer can be foamed, the design can be drawn or printed.
Varieties:
- Embossing. A thin layer of polyvinyl chloride is applied to the paper, on which various types of textures are created by hot stamping. The tapestries are thin and smooth, reminiscent of beautiful silk fabrics.
- Screen printing has a wide variety of textures. The vinyl layer imitates natural stone, various types of plaster, and fabric.
- Heavy vinyl has the thickest top layer. This type is characterized by increased strength and relief. Creates the effect of leather, three-dimensional embroidery. Thanks to its thickness, it helps to hide small unevenness in the wall.
- Trellis with chemical embossing have a smooth, glossy surface, from which dirt is most easily removed. Their difference is increased strength, resistance to light, humidity and detergents.
- Relief trellises are obtained as a result of special processing. When they are produced on a printed vinyl layer, inhibitors are applied to specific areas of the substance that foams the paint.
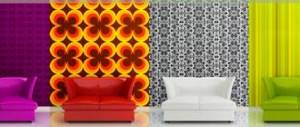
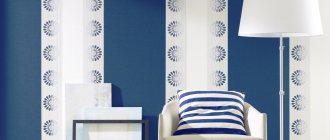
The choice of a specific type depends on the purpose of decorating the room, the desired style, as well as the quality of the walls. Embossed and matte trellises help hide small unevenness, and a smooth glossy pattern is better for smooth walls .
Types of vinyl wallpaper
When making the material, vinyl is applied to a base, which can be paper or non-woven. In this case, a special printer is used. With its help, a certain pattern is applied.
After this, the embossing surface is covered with gold or silver color, and then with a layer of varnish. The final stage is the application of impregnation, thanks to which the surface can be washed.
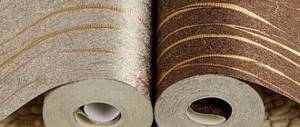
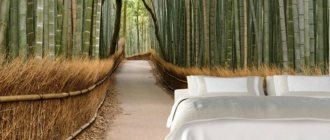
Vinyl wallpaper on paper comes in hot stamping and without embossing.
Photo:
Hot stamping coatings are divided into the following types:
- with chemical embossing - look great in the hallway or office space. The surface of such wallpaper is resistant to moisture and all kinds of radiation;
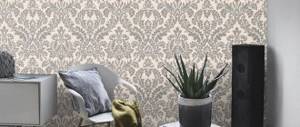
- compact vinyl - wallpaper is smooth to the touch, suitable for decorating any room, and dries quickly. They often imitate natural materials - brick, leather, stone, plaster. There are wallpapers with classic patterns - monograms, flowers, stripes, etc.;
- with silk-screen printing - such wallpaper is suitable for decorating a room, as its surface is light and aesthetically pleasing. Before sticking them to the wall, it is recommended to carefully level the surface. Otherwise, all hot-stamped wallpaper with silk-screen printing will only highlight the defects;
- heavy vinyl - suitable for rooms where the walls have defects and unevenness. Such wallpaper will disguise problem areas, and will only highlight all the advantages of the room. The material may have the texture of natural materials, and therefore will look good in a commercial space or hallway.
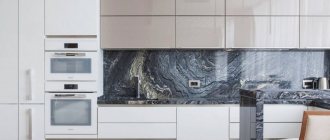
There is wallpaper without embossing. Their homogeneous structure can hide any surface defects. The material can be washed and cleaned, so this wallpaper is perfect for decorating a kitchen or office space.
Preparing walls for gluing
Before you proceed directly to wallpapering, you need to perform some steps. You should measure the room and draw a plan, not forgetting the length, width and height of the room, and also taking into account window and door openings. Before calculating, it is worth indicating the length of the roll - it can be 10 or 20 meters. Then divide this length by the height of the wall, the resulting integer will determine the number of whole strips per roll.
To get the entire number of strips, you need to divide the perimeter of the enclosed space with the opening of windows and doors by the width of the roll. That is, divide the total number of strips by the number of strips in one roll and get the number of rolls needed for the job. If the roll is divided into strips with practically no residue, it is advisable to buy another one to cover the surface above the door and windows. When purchasing wallpaper with a large pattern that requires selection, it is advised to pay attention to the possibility of choosing an image.
List of required tools
When preparing for repairs, you should stock up on all the necessary equipment in advance, this will help to avoid unnecessary hassle in the future. In order to paste wallpaper you will need the following accessories :
- plumb line;
- ladder;
- scissors or knife;
- ruler for cutting wallpaper;
- glue bucket;
- a bucket and sponge for washing walls and removing residual glue;
- rag;
- putty knife;
- roller;
- brush;
- wallpaper smoothing brush;
- glue for trellises;
- brush for processing corners.
So, the first thing to do is to remove the old trellises, especially if they have a dark or bright pattern. To do this, you need to moisten them with water or a very weak solution to remove the glue, wait for absorption and remove the paper using a wide spatula. If the finish does not disintegrate, you can remove only the top layer without touching the substrate. If necessary, level the walls using putty, smooth out uneven areas with sandpaper and seal chips in the plaster.
If you want to paste over plasterboard slabs, you need to remember that in the places where they are connected there are white areas from the putty, which will also glow. Waterproof walls (concrete, plasterboard and painted) must be primed and then dried.
After preparing the walls, you can start cutting the trellises. Before this, it is important to determine the length of the cut pieces - measure the height of the ceiling and add a tolerance of about 10 centimeters to it. This is necessary to compensate for the uneven height of the walls and match the pattern. Scissors are used for cutting, but it is preferable to do this with a sharp utility knife. The top of each piece should be marked with a sign to prevent later gluing upside down. When the preparation is complete, you can begin gluing the trellises.
Wallpapering with vinyl
The process of gluing vinyl wallpaper is similar to gluing simple paper wallpaper. But due to the unique properties of vinyl, there are still differences. The step-by-step algorithm will look like this:
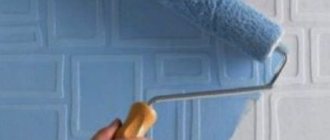
- Primer of walls. First of all, everything must be primed. To do this, you can buy a special primer or use glue that will be used. It is diluted in a lower concentration than when gluing. The exact proportions are indicated on the packaging.
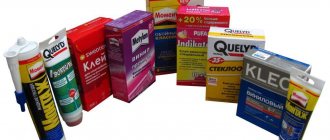
- Choice of glue. You will need a special product, more durable than for paper coatings. In addition, for vinyl it is better to use glue with antifungal additives. When purchasing, make sure that it is suitable for such wallpaper. Sometimes PVA glue is used. In this case, durability is ensured, but removing wallpaper from the wall will subsequently be very difficult.
- Preparation. Before gluing, it is more convenient to immediately cut the paper to the required length. If you have wallpaper with a pattern or embossing, you need to remember to combine the pattern on the pieces. In order not to confuse the parts during the work process, we recommend numbering them first. When gluing paper-based wallpaper, the adhesive is often spread onto the wall. Before you start gluing wallpaper, mark the wall with a plumb line or draw a strictly vertical line along which to align the first panel. Foamed vinyl, especially on paper, tends to stretch slightly when wet and shrink when dry, making it difficult to line up the pieces without them moving when dry. Therefore, straightening and aligning the panel on the wall is done carefully. You can get a uniform connection this way: after gluing panels with a small overlap, you need to wait until they dry completely, then make a vertical cut in the middle of the overlap strip along the entire height of the wall, and then remove the edge cut and align the parts.
- Smoothing the paper base After leveling the panel, it is smoothed, air bubbles are squeezed out from under it with a roller or a special soft spatula. Movements should be directed from top to bottom and from the middle of the panel to the edges. Excess glue, which is squeezed out along the edges, is removed with a spatula or a piece of soft cloth.
How to glue vinyl wallpaper on a paper base - should you coat the wall or not?
Now we will look at the main stages of preparation and actual gluing of PVC wallpaper on a paper base. So let's get started.
Preparatory work:
- We remove the old coating. We moisten it with water using a rag, brush or roller - whatever suits you.
- We give the material time to soak, and then remove the old wallpaper with a knife or metal spatula.
- We cover up dark spots on the wall, as they can be seen through the paper.
Important! This applies only to light colors; it will not be noticeable on dark ones.
- If necessary, level the surface with construction plaster or putty. Vinyl hides many defects well, but for silk-screen printing the wall must be perfectly flat.
Important! If you have walls with obvious flaws, we recommend using embossed or matte wallpaper, which will mask this problem well. Plain and glossy coatings are only suitable for smooth walls.
- After the previously applied mixture has dried, sweep the wall with a hard-bristled brush, thereby removing dust and dirt.
- Prime the surface. The primer can be purchased at a hardware store and prepared according to the instructions on the package. Ideally, it will include ingredients that prevent the formation of mold and mildew.
Important! To prime the wall, you can also use wallpaper glue, diluted to a liquid state.
How to glue vinyl wallpaper on paper?
Of course, you can’t do it without outside help, since it’s better to do the gluing together: one person holds the smeared strip at the bottom, and the other picks it up and glues it on the stepladder at the top.
Important! You can cover the walls yourself, but you will often have to jump up and down, and this is extremely inconvenient.
Step-by-step master class on gluing paper-based vinyl wallpaper:
- We close the windows and doors, turn off air conditioners and other ventilation in the room where such work will be carried out. This is necessary so that the glued strips do not come off and air bubbles do not form on the wallpaper.
- We cut the necessary strips, combining the pattern with each other (if one is available). Leave a 5 cm allowance at the top and bottom.
- Place the wallpaper face down on the clean floor.
- Coat the material with a suitable glue using a wide brush. We wait a few minutes for the composition to be absorbed into the coating. This time depends on the density of the selected material.
Important! It is very important to maintain the same interval between applying glue to the next strip so that the “impregnation” of the canvases is the same.
- While the wallpaper is swelling, fold the strip in half with the wrong side inward, trying to avoid creases. While we glue one strip, two swell and wait their turn. They glued one canvas, they glued the next one, which was left to swell, and so on.
- We start gluing from the corner of the room. Level the first strip using a plumb line. You will simplify your task by marking vertical lines on the surface of the walls. We apply the wallpaper on top, align it vertically, and then press it with our hand or a roller in the very center along the entire length of the canvas.
- Now we smooth the entire surface well with a roller, thereby expelling excess air and glue. Press the edges, moving from the center to the sides.
- Remove excess glue with a dry and clean cloth. Apply glue to the poorly glued edges with a thin brush.
- Apply the next strip to the first, making sure that the wallpaper does not stretch, which could create an irreparable gap after it dries. If, however, this could not be avoided, then separate the edge of the canvas from the wall, coat it with glue again, give the paper time to swell, and then stretch the canvas and close the visible gap.
- We maintain the glued vinyl wallpaper for two, observing room temperature conditions and the absence of drafts.
Important! Glue is applied only to paper-based vinyl wallpaper, and in the case of non-woven wallpaper, only to the wall. Here is the answer to the question of how to glue vinyl wallpaper on a paper base - should you coat the wall or not?
Wallpaper on the ceiling
The technology for gluing trellises to the ceiling with your own hands is similar to gluing it to the wall. The surface must be dry . Work should be carried out in a tightly closed room without a fan or air conditioner. Prepared walls should be treated with an antifungal compound and primed. Use weak wallpaper glue as a primer.
Vinyl wallpaper on a paper base is cut into strips taking into account the length. If they are with an image, the canvas must be further customized to match the template. It is better to take light and light wallpaper based on paper, this will reduce the load and the wallpaper will last longer.
In general, there is no difference in gluing trellises to a wall or to a ceiling, except that you need to keep your hands up at all times. Since this is physically difficult, frequent breaks should be taken. Even though there is a starting line in the form of a wall, you will have to draw a new line for the indentation. Everything else is the same as when wallpapering a wall.
There is nothing difficult about gluing vinyl trellises. The main thing is to carefully prepare the base and follow the instructions. If difficulties still arise, it is better to contact specialists.
Preparatory work
Before you begin gluing paper-based vinyl wallpaper, surface preparation is necessary. It must be leveled in order to get rid of defects using putty and clean from old wallpaper using a spatula and ordinary water. In this case, the wall must not only be absolutely flat, but also dry. When working, there should be no drafts, the windows should be closed, and the air conditioning should be turned off. To prevent fungus from appearing under the wallpaper later, it is recommended to treat the wall with a special substance. First of all, you need to prepare the glue. It is diluted with water in the amount indicated on the package. While the glue is being prepared, you can begin cutting the roll of wallpaper into strips with an allowance of at least 10 centimeters. This is important and must be remembered!The glue is applied to the vinyl wallpaper, not to the wall! After which the canvas is folded in half for 5-10 minutes. Now you know how to glue vinyl wallpaper on paper .
Now the wallpaper needs some time to swell. In this case, the fibrous parts of the paper are impregnated, and the wallpaper material becomes more pliable and stretches.Difficulties in working with the material
The most common difficulties arise when working in the corners of a room . Often when preparing walls it is difficult to get a completely flat angle. However, it is quite easy to correct the situation. The next strip should be aligned strictly vertically and overlap the previous panel. Then, when the wallpaper is dry, make a straight, vertical cut across the overlapping section. Pull back the bottom strip and carefully coat the top with glue and press the paper against the wall.
Attachments of glued trellises under the ceiling and near the floor are cut with a sharp knife, if necessary, using a long metal ruler. You also need to cut holes for switches and sockets with a knife. These actions can only be performed after the wallpaper has completely dried, otherwise there will be a high probability that the knife will not cut, but will break the newly glued edge of the canvas.
When hanging wallpaper, you need to know that the vinyl coating is practically impervious to air, so it takes about 2 days for the wallpaper to dry completely. Otherwise, all efforts will be in vain.