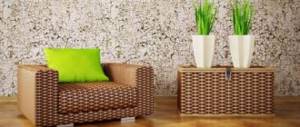
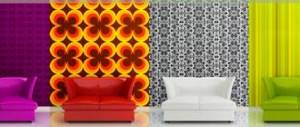
There are many materials for wall decoration. The combination of vinyl and non-woven fabric is one of the most popular types. They look good in residential areas and offices. Modern coatings are made in different textures and colors. Everyone will choose a good option for themselves. Before gluing vinyl wallpaper on a non-woven backing, it is worth understanding the characteristics of the material.
Advantages and disadvantages
Wallpaper is a relatively new raw material. It was developed relatively recently.
They have many advantages, the main ones of which are:
- attractiveness;
- high density of the product, which helps hide minor surface defects;
- strength;
- elasticity;
- wear resistance;
- durability;
- the material absorbs extraneous noise well;
- The adhesive composition is applied only to the surface of the wall.
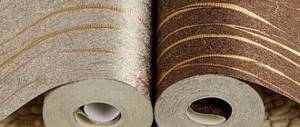
The finishing material has a two-layer structure. Due to this, it is endowed with unique qualities. The wall covering consists of:
- Facial layer. It determines the appearance, ensures the strength and moisture resistance of the material. The layer is made from vinyl.
- Base. Non-woven fabric is used here. It refers to sheets formed from the interweaving of fabric fibers and cellulose, to which special dyes are added. The main properties of the wallpaper directly depend on the type of non-woven material.
Many people still do not know how practical and durable this material is in life, and how to glue it correctly.
Wallpapers have the following strengths:
- provide ease of gluing the material to the surface;
- do not deform after applying glue;
- do not become flimsy;
- eliminate the risk of rupture of the canvas coated with glue during finishing work;
- extend the service life of the material;
- increase the level of heat and sound insulation.
Non-woven fabric and vinyl create an excellent tandem. The first is available in a small variety of colors and shades, but is highly durable, ensuring the stability of the canvas shape. The front layer is responsible for its attractive appearance, guarantees moisture resistance and ease of care. Each type perfectly complements each other's properties. Therefore, the finishing material is of better quality than other types of wallpaper.
Like every finishing material, vinyl and non-woven fabric have their drawbacks. The composition of the paintings contains a small amount of chemical compounds that can be harmful to health. Therefore, they are not recommended for use in bedrooms and children's playrooms. This type does not allow air to pass through well, which is why the room must be constantly ventilated to remove condensation and prevent the formation of fungus.
How to glue wallpaper to the ceiling
Pasting the ceiling requires special skill. The markings are not done like on the walls, and it is more difficult to align the pattern.
The intricacies of this process are easy to master and are covered in detail in the video. Using these tips, you will be able to create a flat surface even above your head. You just need to follow simple rules, do everything step by step and take your time.
Corners in a room are the most difficult area to glue.
Walls are rarely strictly perpendicular, so in this area you have to adjust the design, coming up with many tricks. An overlap is allowed for alignment, but to do it perfectly, watch the video for detailed instructions. A step-by-step demonstration will help you avoid mistakes.
Currently, almost all wallpaper is made from vinyl. This synthetic material has proven itself to be excellent: it is durable, resistant to damage, non-hygroscopic, and easy to clean. Vinyl coverings can be used for more than ten years without losing their excellent appearance and aesthetics.
Types of wallpaper with vinyl coating
Before you start gluing the walls, you need to fully study the finishing material. This will allow you to learn about its strengths and weaknesses, which will lead to better results.
Vinyl wallpapers differ in the type of base:
- Paper. This is a cheaper option for wall hangings. Therefore, many choose it to decorate the living rooms of an apartment;
- Non-woven.
The non-woven base has the following advantages:
- Strength;
- Elasticity;
- Sustainability;
- Good adhesion to different finishing materials of walls and ceilings.
The combination of vinyl and non-woven fabric is used in apartments or offices. The main thing is to be able to properly glue the materials so that the room looks organic after renovation.
Preparatory work
An important factor during installation is the correct adhesive. The composition is selected according to the type of wallpaper.
Non-woven fabrics are heavy, so the glue for them should be thicker. Pour the dry mixture into a container of water, stirring constantly. After five minutes the composition is ready for use.
Equally important is the condition of the surface of the walls and ceiling. At the preparation stage, it is necessary to remove the old coating; it is moistened with water or a weak glue solution. Remove swollen wallpaper with a metal spatula.
The walls and ceiling are inspected for cracks and irregularities.
All defects are repaired with starting putty. After drying, it is sanded with sandpaper. It is better to treat all walls with a thin layer of finishing putty - the smoother the surface to be pasted, the neater the new coating will look.
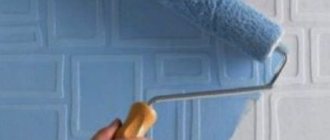
Any moisture-intensive wall material (concrete, plaster, drywall) must be coated with a primer.
Tip! You can use the same glue that will be used to stick the wallpaper as a primer.
It is dissolved according to the instructions and applied to the walls with a fur roller. The surface must dry thoroughly before subsequent gluing.
If light-colored wallpaper is chosen for finishing, it is better to paint the primer with a color of the corresponding color. Vinyl coverings on a non-woven base are transparent. Unlike paper ones, stains may appear on them.
The prepared room is left until the soil dries completely.
Materials and tools
There are several important tools you need to hang wallpaper.
These include:
- adhesive composition;
- dishes in which the glue will be mixed;
- several spatulas of different sizes. It is best if at least one of them is rubber;
- roller for working with wallpaper and a wide brush;
- metal ruler. It is desirable that it be long enough;
- scissors;
- regular or stationery knife. The main thing is to sharpen it well before starting work;
- rags or unnecessary towels.
To make it easier to reach the ceiling or section of the wall above the window and door while finishing the room, you need to get a stepladder.
Many people use a regular table for these purposes, but for safety it is better to carry out all work using a ladder.
Video tutorials on gluing vinyl wallpaper on non-woven backing
There are many nuances in wallpapering.
For example, what glue should I use to glue non-woven vinyl wallpaper, how to dilute it and for how long to use it? Questions also arise about decorating difficult areas: corners, the space behind the radiator, above windows or doors. These features can be easily understood with the help of a video that shows in detail how such problems are solved.
How to measure the height of the wall, foam the glue, quickly cut the canvases and place them on the wall? This video will tell you about little tricks that will reduce the time it takes to create a new interior and allow you to do renovations in a matter of hours, even alone. Working with non-woven wallpaper is shown in as much detail as possible, and reviews of this lesson say that it has helped dozens of people cope with repairs without outside help.
Surface preparation
To maintain the impeccable appearance of the wall paintings, you need to properly prepare the walls for non-woven wallpaper.
This is done according to the following scheme:
- Removing old coating. If it doesn’t come off well, you should try to wet the material with water from a spray bottle. After this procedure, even tightly stuck wallpaper can be quickly removed with a spatula.
- Puttying surfaces. Thanks to this, all cracks, unevenness and other defects of the walls or ceiling, which are very noticeable after finishing, will disappear. After applying the putty, you need to go over all surfaces with fine sandpaper, which will make them smooth.
- Primer. All moisture-intensive materials, which include concrete, plaster and drywall, are coated with a special compound. If there is no primer, then it can be replaced with an adhesive composition used for further work. Subsequent work can be started only after the surface has completely dried.
In order for vinyl in combination with non-woven fabric to look perfect in the room, you need to make sure that the chosen type of finishing material is not transparent. To do this, you need to turn on the light, attach the canvas to the wall and see from the side whether it is visible or not.
If wall defects, remnants of old finishing, or putty areas appear through the sheet, then the surface needs more thorough preparatory measures.
Pasting a room: main steps
The procedure is quite simple. It includes following the following sequence of actions:
- Remove all switches and sockets in the room. The process of pasting the walls will be much easier and faster.
- Prepare the floor. For complete cutting and cutting of sheets in an apartment or house, only this surface is suitable. It is washed thoroughly so that the wall paintings do not get dirty and maintain an impeccable appearance.
- Pasting. Wallpaper of this type does not undergo additional treatment with an adhesive composition. This protects against getting wet, which eliminates the risk of deformation or tearing of the canvas.
It is better to glue wide wallpaper on a non-woven backing using a rubber roller, and a brush for treating the corners of the room and areas near the baseboards. It is important to ensure that the composition is applied evenly and that the stripes run without visible gaps.
How to choose glue
Many people consider the adhesive compositions displayed in hardware stores for different types of wallpaper to be a carefully thought-out marketing ploy. But this is a very serious mistake, which leads to damage to wall paintings or poor quality repairs. Choosing the right glue is one of the main links in competent finishing work.
Non-woven vinyl wallpaper is heavier than paper wallpaper. Therefore, they are glued to walls or ceilings only using special glue.
Preparation of glue
Detailed instructions for mixing the optimal adhesive composition are indicated on the manufacturer's packaging.
Most often it is prepared as follows:
- Clean water is poured into a separate container, basin or bucket. Its quantity is taken based on the volume of work.
- Stirring the liquid with one hand until a funnel forms, slowly and carefully pour in the glue with the other.
- Constantly stirring the composition, wait until the powder is completely dissolved.
- The mixture is left for 20-30 minutes to swell thoroughly.
Immediately before gluing the wallpaper to the walls or ceiling, the adhesive composition is mixed again. The main thing is not to violate the strict proportions of powder and liquid at the very beginning of mixing the glue. This will lead to a violation of the correct consistency of the composition, due to which it will lose its adhesive properties.
Marking walls and cutting wallpaper
The technology for gluing vinyl wallpaper on a non-woven base is practically no different from working with conventional canvases.
The difference is that glue does not have to be applied to the canvas, with the exception of finishing the ceiling or repair work carried out on a hot summer day.
To make gluing the material easier, you need to mark the walls and cut the wallpaper in advance. This is done as follows:
- Determine the direction of the stripes. This is done in accordance with the angle of light falling on the wall.
- If the wallpaper has an ornament, then it is cut to match the pattern. The pattern should be continuously repeated over the entire surface.
- To make the canvases look organic, it is better to glue them using the butt method. The wallpaper is quite thick. The overlaps will immediately catch the eye, attracting attention.
- It is better to start installing wallpaper from the corner of the room, which is in plain sight. Due to this, you can hide unwanted joints of the canvases from prying eyes.
- A control line is drawn on the wall using a plumb line or building level. It should be applied to the wall 1.5-2 cm narrower than the width of the roll. According to this line, further fixation of the sheet will be carried out, the edge of which is turned at an angle.
- Apply a layer of adhesive evenly and carefully onto the wall with a roller. The main thing is not to leave a single centimeter untreated. For corners and under the ceiling it is better to use a brush.
- Each canvas begins to smooth out from the center to the edges. This will make the surface smooth and expel all the air between the wallpaper and the wall or ceiling. Excess glue should be removed with a rag or clean towel.
- If the canvas lays unevenly on the wall or ceiling the first time, you can carefully peel it off to correct it, and then return it to its place.
- It is better to cut the sheets so that a little excess material remains. Usually a margin of 2-3 cm is taken. After gluing and smoothing the canvas, it is carefully trimmed with a sharp knife.
Do not open windows or doors during work. After wallpapering, drafts should not be allowed. This will cause the heavy material to peel off.
Pasting in corners
Installing wallpaper on flat walls will not be difficult for anyone. The difficulty begins when working with corners.
To make the task easier, you need to remember a few simple rules:
- Wall canvases are glued to a corner that is in plain view using the butt method. One sheet is launched onto the wall at a distance of 1.5-2 cm, and the second is brought to it without overlap. The main thing is to prepare the surfaces well in advance so that they are smooth.
- For uneven walls, it is better to use a small overlap of a couple of millimeters.
In order to properly and effectively hang wallpaper, it is recommended that you familiarize yourself with different installation methods. One effective way is to trim the corner. The canvases are carefully compacted into the corner and joined with an overlap of 3 to 5 cm. Then a long metal ruler is taken and applied to the center of the corner. A straight line is drawn along it with a sharp knife. All that remains is to carefully remove the remnants of the wallpaper, and grease the edges of the canvases with glue and press with a roller. This results in an even angle that visually looks easy and perfect.
Wall decoration in hard-to-reach places
In addition to the corners, there are several more difficult areas in the room for wallpapering. Typically these include niches, arches, window and door openings. They are pasted over as the very last of the remaining fragments. Plain wallpaper is much easier to glue than finishing material with a pronounced pattern. In this case, the picture is selected immediately. It is important to measure everything so that the ornament matches perfectly. Each room has sockets and switches. During finishing work, the canvases are glued in these areas in the usual way. The main thing is to mark on the sheet the location of the electrical device. When the strip is fixed, an incision is made with sharp scissors or a knife. The edges of the wallpaper are folded inward. After the glue has completely dried and the wallpaper on the non-woven fabric is securely adhered to the wall, all switches and sockets are installed in their places.
Step-by-step technique for doing the job
Wallpaper plan:
Initially, the height of the wall is measured. Strips are cut with an allowance of 5-7 cm.
The strips should fit perfectly together, so it’s easier to cut them from 2 different rolls one by one. It is necessary to prepare at least 4 vertical stripes before gluing. Sometimes it is appropriate to cut off all the necessary strips at once. How to properly glue vinyl wallpaper on a non-woven backing?
It is important to start from the window. The first strip is glued exactly vertically; if there is even a slight displacement, its angle will increase in the future, so this should be avoided. To make it perfect, draw a vertical line to help align the starting strip.
The glue is applied to the wall surface in an even layer.
Every centimeter is coated, the area being slightly larger than the size of the strip. It is recommended to apply the glue with a roller or brush in a thin layer. Additionally, glue is placed on the edges of the wallpaper to make the joints more even.
There is no need to add a fixing compound to the entire canvas. After this, the first strip is applied to the wall, the reference point is the vertical line drawn earlier. When the wallpaper is on the wall, you need to smooth the surface with a roller or soft rag. There should be no bubbles, compactions or unevenness.
In this case, it is possible to easily adjust the design so that it looks perfect. Sometimes glue appears at the joints; it is removed with a damp sponge. It is prohibited to smear it on the surface of the wallpaper.
The canvases are glued end-to-end without overlap. Excess parts formed at the bottom or top are cut off. If there are sockets on the wall, it is recommended to remove them, turn off the electricity, stick the cloth, and then carefully cut a hole for the wires and return the structure to its place.
All manipulations must be done carefully. And lastly, seal the space near the window. Above and below the window opening, small pieces of wallpaper are fixed, which are cut out from the remains.
Painting
Vinyl wallpaper is used as a base for painting.
The main thing to consider is a few simple features:
- You can only buy paint of the type approved by the wallpaper manufacturer. This data must be in the instructions or written on the packaging of the material;
- paint is used only that which is suitable for interior work;
- the entire volume is tinted at once, so that in the future there will be no differences in tones on the walls;
- the resulting coloring composition must be thoroughly mixed before starting work;
- It is recommended to apply paint with a roller, squeezing it out first.
High-quality vinyl combined with non-woven fabric can be repainted about 10 times. But with each new image, the level of vapor permeability decreases. Therefore, manufacturers recommend changing the color of the paintings in the room no more than 3 times.
How to properly cover walls
The walls in houses and apartments differ in materials, evenness and color.
But the principle of wallpapering is the same for everyone. A detailed tutorial on decorating a room with modern wallpaper shows how to transform the walls of a room in a short time. Using the example of two masters, it is clear not only how to choose wallpaper and place the first strip, but also how to make perfect joints, carefully fit sockets and adjust the design.
Ceiling finishing
For a beginner, the work seems too difficult. With some skill and a little experience, finishing will not take much effort and time. It is better if 2 people are engaged in repairs at the same time.
This type of wallpaper is quite heavy. Therefore, before purchasing, you need to pay attention to their weight. The recommended value should not exceed 110 g/m2.
The ceiling is finished following the following steps:
- Marking. For gluing, the first sheet is applied parallel to the solar flow so that the joints are not visible during the daytime. To apply markings from the 2 ends of the room, the width of the roll is set aside, which for this wallpaper is 1.06 or 0.53 cm, minus 2 cm. A straight line is drawn along this point.
- Cutting cloths. Each sheet is left with a margin of 8 to 10 cm. If a single pattern is visible on the surface, then they are cut according to the fit of the image. In order not to confuse the correct sequence of gluing the canvases, they can be numbered.
- Finishing. Pre-prepared glue is applied first to the canvas, which is folded in half for better impregnation, and then to the ceiling. The sheet is applied to the surface according to the marked lines. Using a roller, the material is smoothed from the center to the edges. All excess glue is carefully removed with a clean towel. At the end, the excess is trimmed off.
If 1 or more lighting fixtures are attached to the ceiling, then small cuts are made in these places, after which the wires are brought out. In order for the canvas to reliably adhere to the surface, without the formation of air bubbles, you should not open windows or create a draft in the room.
Vinyl wallpaper is a high-quality and durable material. The main thing is to follow the manufacturer's instructions indicated on the product packaging. This will allow you to achieve an ideal surface that pleases the eye and becomes the decoration of the room.
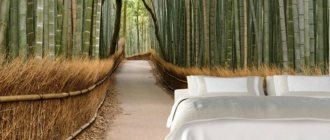
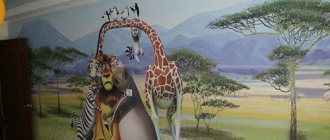
Selection of pattern and its dimensions
- Ideally, the area of the canvas should match the area of the wall.
- Custom photo wallpaper does not require customization.
- If the surface of the wall is larger than the area of the selected picture, then place the picture in the center, retreating an equal distance from the corners.
- If the canvas is larger, then it is better to trim it in the most inconspicuous place, or on the side that least spoils the overall composition.
- Photo wallpapers are available in 8 pieces and 12 pieces. The more elements there are, the more carefully you need to pay attention to the assembly. Lay out the pieces of the design on the floor so you can get an idea of the final result.
- Take care of the markings on the wall by measuring with a plumb line the lines beyond which the first row of elements will not protrude. Next, glue the next rows exactly along the line, adjusting the first one to the reference one.
Read more: Pump “Baby” (50 photos): technical characteristics of submersible products, vibration version, water design, details of repair