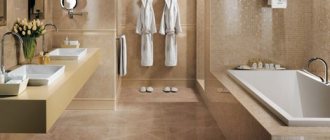
Increasingly used instead of a bathtub, the shower corner has become increasingly popular in recent years. Nowadays it is quite easy to buy a convenient and technologically advanced factory product - the range in many stores is wide and varied.
However, moving parts, a steam generator, pressure pipes or electronic controls may seem unnecessary to some in an otherwise simple household device. For this category of users, a shower cabin equipped with your own hands is suitable. The idea of using a wall or corner of the room for a shower is a good one. It's simple, practical, and most importantly - inexpensive. Such a shower can be found in gyms, baths, and swimming pools. Among its advantages are reliability and durability, ease of cleaning.
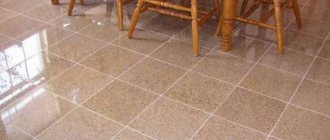
Option with purchased corner
We will not consider installing a one-piece shower cabin, because anyone can adjust the legs and connect the water supply. But there are times when a person builds a pallet himself, and then is too lazy to assemble the corner, because it is difficult and sometimes expensive. For such a case, the process looks much more complicated.
If the corner is purchased separately, then the pallet is already ready. Two situations arise:
- The pallet is purchased.
- The pallet is made by hand from tiles and bricks.
And now about how to install a shower enclosure (enclosure).
Purchased pallet
Only the corner that strictly fits the shape is installed on the purchased pallet. The slightest discrepancy and the product will not fit. Therefore, the installation process is quick, but it is preceded by painstaking selection on the counter. Pay special attention to products with rounded outer corners. The radius in this case may be different. It is a typical misconception to think that any rounded corner will do.
The store sells complete fencing (of four walls) and incomplete (of two walls). The first option is simply placed on a pallet, and the mixer is mounted on the back surface using liners. The purchased corner is good for its ease of installation. Even an incomplete one can be installed quickly by attaching the sections to the bathroom wall with dowel nails.
In the latter case, you need to take care of creating a tiled apron to protect the slabs from moisture. In addition, the question arises of where the mixer will be mounted. An incomplete corner does not provide any means for this. Therefore, there is only one option left - the bathroom wall. But installing a mixer here is not always possible.
Shower tray from the store
DIY pallet
The advantage of this case is that you can adjust the perimeter to a purchased corner of any shape. A step to the left, a step to the right - everything is possible for a master. Problems, again, arise with the installation of the mixer. The fact is that the cheapest shower enclosures are made of polycarbonate and consist of two sections. It is in this case that the cost of the product drops significantly. Which allows you to save money.
But the problem arises where to put the mixer. As one of the options, it is possible to install a plasterboard false wall and then finish it with tiles. In this case, the water supply pipes pass between it and the bathroom wall. If the cost is not scary, take a ready-made solid sheet of polycarbonate 8-10 mm thick. This is a strong and durable product that is not afraid of moisture and will allow you to mount the mixer without any problems. The only advantage in this case is that any design can be implemented. Because the cost of the sheet will be very high (thousands of rubles per square meter).
Factory pallets
Purchasing a ready-made tray for a shower enclosure is the most obvious and simple solution to the problem, and you will not need to waterproof the floor and will not require a lot of effort and time for installation. However, ready-made pallets have one very significant drawback: a high-quality pallet will cost much more than a home-made one, and there is no point in buying a cheap (and therefore low-quality) one.
The most popular nowadays are earthenware and acrylic trays, which not only look good, but also reliably retain heat. The disadvantages of such pallets include their fragility.
Do-it-yourself acrylic pallet repair
Cast iron pallets are more durable, but their heavy weight hinders their popularity.
The best option can be considered pallets made of artificial marble and quarry, which are comparable to cast iron in terms of wear resistance, but at the same time their thermal conductivity and aesthetics can compete with faience and acrylic. But such consumer characteristics cannot be cheap and therefore such pallets are not available to everyone.
How to make a foundation
There are several completely different designs. Although traditionally the foundation is assembled from concrete, both the cost of the work and additional qualities can be obtained more advantageously by other ways of solving the problem.
Traditional brick
Builders use traditional bricks of any formation for this work. Including the façade. We believe that if used skillfully, even a large bottle would be suitable. The foundation is made only for low (shallow) pallets with a flat bottom. In all other cases, standard legs are used. But! There are times when the height of the pallet needs to be increased. A flat podium foundation is also suitable for this.
In the latter case, there is not much room to philosophize. Simply lay out the required size brick podium in one layer. Depending on the installation height requirements, the pallet can be placed on a spoon, butt or bed edge.
For reference:
- The bed face of the brick is the largest in area.
- The butt edge of the brick is located at the end. The area is the smallest.
- The spoon edge of the brick is lateral and long.
For a pallet with legs, there is no need to leave space in the foundation for a siphon. It's just a flat podium. It looks completely different when a shallow tray is devoid of legs (this happens very, very rarely with deep ones). In this case, the podium looks more like the underground floor of a stove. Because there must be a passage inside for a sewer pipe or siphon. To properly arrange this communication, the easiest way is to create a two-row foundation.
To make way for a sewer or siphon, the brick is broken in the required direction and proportions. The top row is made of solid stone. Sometimes it is easier to use moisture-resistant foam concrete because it is larger in size. Due to this, installation is completed faster, and in some cases the cost decreases.
How to waterproof walls and floors
When you have decided what type of tray your cabin will have, you need to cover the walls and floor with waterproofing . This is done like this:
- First, remove the old screed from the floor;
- Using a special mixture, make the primary waterproofing of the coatings. Here you can use mastic or powder, which must be diluted with water, or ready-made waterproofing in liquid form;
- for waterproofness, apply a thin layer of the product with a wide paint brush to the place where the future floor will be installed;
- Apply it in the same way to walls at a height at the level where the pallet adjoins them.
DIY pallet
It should be noted that it is difficult to save money on the manufacture of a tray, because it contributes a specific weight of about 15-20% to the cost of the shower cabin. You can undoubtedly find expensive products. For example, a pallet made of artificial stone can cost twenty or thirty thousand rubles. This is where the desire arises to do the entire installation yourself.
The finishing coat will be key. If it is an artificial stone, then an imitation of granite is formed, if the tile is something like a swimming pool. You can find different mixtures on sale. It is possible that at a reasonable cost it will be possible to create something like a pallet made of marble (and this is already a significant breakthrough in savings).
The pallet can be made single-row or double-row. In the first case, the center-bowl is placed on the bed edges, and the rim on the butt or spoon edges. Depending on what depth you need to achieve for the pallet. Some people prefer a two-row foundation without any frills. But in all cases, the height is chosen so as to ensure excellent drainage of waste into the sewer. It is believed that for every meter of pipe from the riser there should be an increase of 3 centimeters in level.
Homemade shower tray
Under the pallet, measures are taken to waterproof the floor. The fact is that any brand of concrete (except, perhaps, very high ones) filters moisture little by little. This will lead to the ceiling in the neighboring apartment starting to get wet. The foundation itself cannot support this. Waterproofing is carried out in two layers:
- Under the bottom layer of brick.
- Under the tiles.
The construction mixture also covers the section of the wall under the tiled apron and adjacent to the base of the shower stall. Most tile grouts have waterproofing properties.
Classification of shower cabins by type of pallet
The difference between shower cabins that are made of tiles is the principle by which water is collected. So, there are three types of pallets for cabins:
- classic steel, acrylic or cast iron pallets up to 45 cm high from floor level. They are equipped with all the elements that help drain the water and drain it into the sewer. In this case, tiles are used as cladding. The pallets themselves are installed in the mounting legs, then they need to be tiled, similar to small bathtubs;
- flat and shallow pallets with a height of up to 15 cm. Sometimes you need to make a recess under them if you use molded factory products. You can also make such pallets with your own hands if you take bricks as sides. The entire structure must first be covered with concrete, and then with tiles;
- sloping floor coverings. Thanks to this solution, in terms of style, you can successfully combine the flooring of the bathroom as a whole with the floor of the shower.
However, when creating a water outlet, you do not need to go too deep into the concrete floor , since the coating has a limited thickness, and if it is reduced, it will weaken. This can cause problems such as roof collapse, and if you do not live on the first floor, then not only you, but also your neighbors below will suffer.
DIY fencing
Before making a shower corner, the feasibility of this event is assessed. Today, a two-wall fence can be purchased for 4-6 thousand rubles. Typically the material is cellular polycarbonate (see DIY polycarbonate shower cabin). But there is one point in this case that may really be of interest. Cost has nothing to do with this.
Modern apartments often have a combined bathroom. So you won't be able to install the faucet on the wall. This means that installation on a corner is necessary. But how to do that? For the most part, people plan to make one, maximum two walls, and the rest is already there due to what the builders erected when the house was commissioned. They choose cheap polycarbonate, put it on a U-profile or corners, attaching it to the ceiling and pallet, and that’s where the process ends. The door is also made of polycarbonate, with plastic washers and fits perfectly on any hinges at hand.
But the question with the mixer remains hanging in the air. The problem can be solved as follows:
- A thin side wall made of brick (on the spoon part) is erected to a height of 1-1.5 meters.
- The mixer is mounted on the newly created fence.
- A sheet of plasterboard is placed on top of the frame or “crabs” to disguise the unsightly fittings.
- This needs to be covered with tiles or another type of moisture-resistant cladding.
Cellular polycarbonate for walls
This solves the problem of installing a mixer when the riser is located in the same room. At the same time, the cost of work falls. The side wall can then be covered with a curtain, and the door will rest on a strong brick.
Shower doors
Once the bottom and corner walls are complete, fiberglass is often used for the other two exterior walls. Under them, guide bases are installed in the ceiling and floor, and a special profile is attached to the corner walls already tiled.
Thus, fiberglass walls are installed in four bases at once, ensuring the rigidity of the structure. After this, the box for the front door or screen is fixed. For entry, you can purchase special sliding shower doors. They are convenient because they save space by opening and closing in the same plane as the wall. If the shower is located in a niche, then you can only get by with these doors.
Waterproofing shower cabin
In addition to waterproofing the foundation and walls, you need to make sure that water will not seep out anywhere. This is especially true for the perimeters of polycarbonate sheets and doors. Fixed joints are sealed with silicone adhesive-sealant. Regarding the door threshold, we can recommend the following:
- Make a swing door that opens inward.
- Equip the threshold with a small stop that limits the movement of the sash.
This slight rise will trap all the moisture from below. But you can arrange the entire perimeter in the same way. So that moisture will not get out. To secure the door in the closed position, use latches or special clamping loops.
Ceiling and lighting
It is recommended to make homemade shower cabins without a ceiling. If necessary, stretch the polycarbonate sheets all the way to the ceiling between floors. Regarding lighting, you need to know one thing: according to GOST R 50571.11, installation of 220 V voltage lamps in zones 0 and 1 is not carried out:
- The zero zone is the immediate capacity of the pallet itself.
- Zone one is limited by planes rising along the perimeter of the height of zone 0 to a height of 2.25 meters from the floor of the bathroom (not the shower stall).
In the second zone it is allowed to install only luminaires with double or equivalent insulation. But we won’t illuminate the cabin there. Few people want to bother with installing 12 V converters in the panel, the presence of which is required by the standard, and it is extremely difficult to buy light bulbs for this voltage. The solution is to install an ordinary lamp at a height of over 2.25 meters. Just in case, all exposed metal parts that are under voltage should be insulated with silicone adhesive-sealant (this, to a first approximation, is double insulation).
DIY repair
In some cases, it is not profitable to buy a new shower stall due to a minor malfunction. Here's what you can do with your own hands...
Pallet
Most pallets are made of plastic. How to make repairs? Acrylic can be welded perfectly using standard means. Therefore, it is possible to repair the pallet using standard methods. But how much will it cost? For a small piece of acrylic rod in the store they charge many thousands of rubles. Cooking without an additive is not an option. In this case, knowledge from chemistry will help. Let us remember that mainly thermoplastics are used for pallets.
This is the same (but not in chemical composition, in physical properties) from which polyethylene and polypropylene pipes are made. Therefore, it is enough to take out a piece of the ABS plastic window frame to solve the problem. Moreover, most plastics have excellent mutual adhesion. Before starting leak welding, try the method on an area of the pallet that is not visible from the outside.
Corner
Most often, the rollers holding the door break. Carry out repairs by replacing damaged ones with purchased ones. To reduce the likelihood of breakage, use silicone lubricant. It can be bought in most stores. Repairs can be reduced if you use even ordinary waterproof Litol. Lubrication not only reduces friction, but also protects the surfaces of parts from corrosion.
The corner often starts to leak. Repair comes down to treating all cracks with sealant. If necessary, plumbing corners are used around the perimeter of the pallet and fence, in areas adjacent to the wall, and at joints. Additionally, we recommend reading the review about sealing the shower stall.
If the glass breaks. Replace the sheet with cellular polycarbonate, or look for a new one. However, the repair can be done with your own hands by cutting out glass of suitable size. A lot depends on skill here. And most importantly, the master is afraid of repairs!