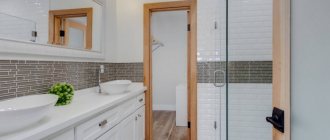
Increasingly, recently, ceilings are finished by applying whitewash, paint or gluing photo wallpaper. These options are used in apartments, while in private and country houses, ceiling boards are used. This gives the room warmth and comfort. In addition, wood is a natural material, which means it creates a good microclimate. Before lining the ceiling with boards, you must select the wood. It should be smooth. Otherwise, alignment will be required.
Which board to choose
Quite often, consumers wonder what kind of ceiling boards to use. The most popular today are tongue and groove boards and lining, the latter of which is also called eurolining. Ordinary lining is narrow and has a relatively weakly expressed texture. Its surface can be painted, achieving an interesting effect of alternating stripes. The material will have different tones.
Choice of material and design
To frame the ceiling with boards, a beam frame is constructed
The most popular of the wood-plank set are tongue-and-groove boards for the ceiling and lining (eurolining). The clapboard board is narrow, with a relatively weakly expressed texture. They paint it in different ways, which allows you to achieve an interesting effect by alternating stripes of different tones. In beam-lined structures, deck boards for the ceiling or façade boards appear. There are also options with parquet/laminate.
Wooden floor beams are not always hidden: they are quite aesthetically pleasing
When looking for a semi-finished product suitable for decorating the interior space, it is worth familiarizing yourself in advance with the existing methods of laying out the components of the future “dome” and critically assessing your capabilities - material and physical. You can get down to business on your own only if you know how to properly hem the ceiling with a board.
The deck board is strong, impressive and has a well-developed texture
If there is no experience, it is better to entrust the fate of the repair to the builders. They know which elements will be most suitable for the hemming/padding system you have chosen and what should be added to this set. Most likely, a cycle of preparatory work will be required on the ceiling, wood (if it is not impregnated with bio- and fire-resistant substances), and the load-bearing profile.
A coffered wood ceiling is beautiful and modern, but it won’t be cheap
Types of wooden structures
A ceiling lined with parquet boards can become the “highlight” of a design project
There are many construction and finishing technologies. Let's dwell on the most mastered methods of how to line a ceiling with a board or planks/boards that imitate it. Here are the final ceilings:
- Hemmed - made of lining, boards, panels. Easy to manufacture, beautiful, mounted on a pre-assembled frame. Among the current tree species are linden, oak, plus common conifers (pine, larch and some others).
- Relief - most often this is a ceiling made of unedged boards or timber (chipped). Provides a unique pattern. Imitation of logs/beams with a block house is also attractive - quality, simplicity and speed of assembly operations.
- Caisson (slat) is the pinnacle of skill and sophistication in the art of decoration. The result is a harmonious combination of box-shaped caisson modules with alternating slats and flat depressions.
Preparation for work
At the first stage, you need to take care of the availability of tools, namely:
- square;
- screwdriver;
- hacksaws;
- cord;
- pencil;
- with a hammer.
A hacksaw can be replaced with a chainsaw if you have one in your arsenal. You can even rent such an instrument. When hemming, the most commonly used lumber is a planed tongue-and-groove board. Its width should be 100 mm, while the thickness can vary from 16 to 22 mm. A wider board is easier to install. Usually the base is coniferous wood. The ceiling is thermally insulated only if the house has an attic without heating. The ceiling should be insulated. If the attic is planned to be insulated, sound insulation is laid on the floor between the room and the attic. To do this, the sheathing is nailed to the laid attic floor beams.
If you plan to install a ceiling made of boards, then you need to take care of preserving the cladding after installation. To do this, paint or colorless varnish is applied to the material. When arranging a rough ceiling, the first step is to attach a vapor barrier to the floor beams. An unedged board is attached on top, maintaining a certain distance between layers. Thermal insulation should be laid on top of the boards. Afterwards you can start processing the overlap on both sides.
Features of work when creating different designs of wooden ceilings
If you want to create a ceiling from boards, you should choose one of the existing options for its construction. The first involves the creation of false ceilings. This technology is the most reliable, but is expensive. To lay finishing materials, floor beams with thick bars or hewn logs should be installed. These items are expensive. They are installed on the crown, and depending on the type of roof, they can be attached to the walls. Boards are nailed to the beams. This design looks quite massive and durable.
You can stuff lumber from above, as a result of which movement along the roof or ceiling area will be safe. When filing the ceiling, steam, heat and waterproofing should be installed.
The ceiling made of boards can be arranged according to the principle of laying a panel system. This technology involves the assembly of shields from two bars, which are installed in parallel. The boards must be packed transversely. The shields should be raised to the ceiling and reinforced. Outside, if desired, you can lay heat and waterproofing. If beams are used to create the base, this option will be the most preferable, because it has the required strength.
Panel ceilings, however, have a disadvantage. It lies in the fact that the structure will have significant weight. In order to raise the shield, you should enlist the help of several people. The structure will need to be held for some time until it is strengthened. The ceiling made of boards can be arranged according to the principle of a flooring system. This method is the simplest when using a board. The technology is relevant if the span length is no more than 2.5 m. In this case, lumber is fastened simultaneously at both ends. It will be impossible to move on such flooring.
According to experts, when performing ceiling repairs, it is better to prefer the third option, since it is less labor-intensive and does not require significant financial costs. If a house is being built, saving is not recommended. In this case, it is better to stick to the first method. The floor beams will also serve as the base of the roof.
Thermal board for ceiling finishing
Buying a ceiling board made of thermowood is a great idea. The material has all the advantages needed for this type of finishing:
- excellent aesthetics and shades of expensive types of wood;
- low weight even for large parts;
- a minimum of external treatments to preserve the texture;
- high density and durability of raw materials.
Such advantages, unusual for standard wood, appeared in thermowood after processing using a special technology. At maximum permissible temperatures in an oxygen-free environment and under pressure, the timber was subjected to heating, which completely transformed the raw material in the structure. The nature of the molecular bonds of wood has changed, its strength has increased, and its natural moisture content has decreased to 5%.
Such global changes have become the reason that thermowood can be used everywhere - without coating with paints and protective compounds, in rooms with any humidity. Thermal wood ceiling looks great in a bathhouse, sauna, kitchen, corridors and halls, as well as in rooms with a corresponding interior.
Application of floor board
If you want to finish the ceiling with boards, you can use flooring material. This option is an original solution and involves the use of tongue and groove boards. This technology has a great advantage, because the floor boards have mounting grooves. Thanks to this, during changes in humidity and temperature, cracks and cracks will not appear at the joints. When using a tongue and groove board, you will get a smooth surface. If differences are present, they will be completely unnoticeable.
If you want to cover the ceiling with floorboards, then you should take into account some nuances. For example, you should not purchase too thick lumber for the ceiling. A thickness of 20 mm is sufficient; in some cases, the board should have smaller dimensions. As an alternative solution, you can use durable parquet boards, because such material will give the room a special atmosphere.
You can also choose parquet, this allows you to achieve original solutions. When purchasing a board, you should pay attention to the quality of processing of the building material. Wood must be protected from mold and parasites. When processing has not been carried out at the production stage, you must take care of it yourself.
Types of ceiling systems
Maintaining the existing interior is also important when choosing a future coating.
Each type of wood has its own characteristics, not only mechanical, but also visual. Thus, pine has a yellowish tint with a weakly expressed ornament, and maple is characterized by a light color and a relief structure. Based on this, you can determine which board you need to line the ceiling based on the existing interior and the types of coatings used in it.
Today, there are several types of systems aimed at creating a strong and monolithic ceiling.
They look like this:
- Hemmed. Easy to build and quite quick to assemble. In this case, it is installed on a pre-assembled frame. To create it, lining, block house or profiled timber is most often used.
- Raised. It is a ceiling made of unedged boards or split timber, which provides a unique colorful pattern on it.
- Caisson or rack. The most difficult to create, but in finished form it represents the pinnacle of artistic skill, combining harmonious images from coffered modules and alternating flat depressions.
All these options make it possible to finish the ceiling, giving it unusual shapes and emphasizing its individuality. At the same time, the hemmed version is the easiest to create, since it contains the least number of processes and can be assembled by one person.
Using unedged boards
A ceiling made of unedged boards is relevant in the utility room. This material does not have an attractive appearance and is intended for decorating the ceiling surface of special-purpose premises. When choosing lumber for a poultry house, barn and similar objects, you can get by with unedged boards. When laying, you should follow some rules, since the material has an irregular shape.
To avoid the appearance of cracks on the ceiling surface, it is necessary to select the boards so that they match in shape. There is a technology according to which unedged material is processed and then varnished. In this case, the boards can be used for finishing. A ceiling made of unedged boards can look very attractive if decorated in an antique style.
Types of wooden ceilings
If we talk about the design of wooden ceilings, then the most popular ceiling made of boards is undoubtedly the hemmed one . It is called hemmed because the boards or wooden panels are attached to the ceiling base (or frame) from below and seem to be hemmed to it.
More often than others, plank ceilings are used when cladding houses with wooden floors, less often in houses with concrete floors.
The materials for making wooden ceilings are as follows:
- Lining, eurolining or tongue-and-groove boards for the ceiling are the most common option for installing a hemmed wooden ceiling. This choice is largely due to the ease of installation of the material and the beautiful surface obtained as a result . To produce such materials, various types of natural wood are used - linden, pine, oak and others. The ceiling board is hemmed using a frame mounted on the ceiling base . The finishing elements are connected to each other using a tongue-and-groove system.
A ceiling made of parquet boards in the interior of a house can look very original
- Panel false ceiling made of wood. It differs from the previous version in that it uses not individual boards, but wide ceiling panels assembled from wooden panels and covered with veneer on the outside.
- Relief false ceiling. This can be a ceiling made of unedged boards, chipped timber, house block and other types of wooden materials characterized by a figured, uneven surface . Each of them allows you to achieve a unique pattern, texture and shape of the ceiling surface.
- Coffered ceilings. Ceilings of this type are assembled from special box-shaped modules called caissons. Coffered structures are complex in design, but at the same time they look very impressive.
Exterior view of a wooden coffered ceiling
Sheathing technology
Covering the ceiling with light boards is a fairly simple process. But this may take a long time. Firstly, you will have to work with your arms raised above your head. Secondly, usually the boards have a small width from 4 to 10 cm. The connections between the elements should be on beams or rafters. Their location should be marked with a chalk cord.
Wooden ceiling installation
One of the most common materials used for ceiling cladding is clapboard. A ceiling made of this material has high aesthetic values, and the cost of lumber will be significantly lower compared to parquet boards.
Installation of clapboard boards is carried out in several stages:
- Preparing the base.
- Ceiling markings.
- Installation of the frame.
- Fastening the lining.
Each stage must be carried out in accordance with the technical requirements for installing wood flooring.
If a wooden ceiling made from edged boards is installed on a concrete base, then before starting installation work it is necessary to thoroughly clean the surface. If there is an old finish, it must be dismantled, and if there are cracks on the surface of the base, the ceiling must be puttied.
The surface, leveled and free of dirt and dust, must be treated with antiseptic compounds. This treatment helps prevent damage to wood by various bacteria and fungi.
Correct marking of the ceiling surface allows you to make the ceiling perfectly flat. Marking is carried out using a building level and a painting cord, which is installed in perfectly even parallel lines at a distance of up to 10 cm from the concrete floor.
The ceiling is finished with lining using metal or wooden profiles, which are installed along the marking lines. The optimal distance between profiles for finishing the ceiling with boards is 30 cm. This arrangement of the frame completely eliminates sagging of the finishing material. Fastening to the base is carried out using dowels or screws.
Regardless of the level of humidity in the room, it is recommended to use a galvanized metal profile, and when installing wooden support structures, the material must be treated with antiseptics.
Installation of the lining can be done in different ways, but the most aesthetic and practical way is to use special clamping brackets that are attached to the underside of the board and sheathing.
Installation of the lining begins from one of the corners of the ceiling. When installing a wooden ceiling, be sure to leave a technological gap between the end board and the wall, which should be about 10 mm.
The first ceiling board is installed using a furniture stapler, the next one is attached to the grooves of the previous one and fixed to the sheathing using staple clamps. In this way, the entire ceiling is hemmed, and one should not forget about the placement of lamps and the installation of electrical wiring, for which it is necessary to make holes in the ceiling.
Upon completion of the installation of a wooden ceiling, it is recommended to treat the entire surface with special compounds that give a matte tint to the wood and protect it from damage by fungi and weevils.
Work methodology
The groove of the first board is cut out using a circular saw. In order for the cut to be accurate, work must be carried out from the bottom of the board. The blade should be installed deeper than the width of the board by 1.25 cm. The first board is pressed quite tightly against the wall. Then it is moved back 2 mm to create a gap for the expansion of the wood.
Near the wall, drive a nail into the surface of the board. On the opposite side, a nail is driven into the tongue and groove. When building a board ceiling with your own hands, you must measure the distance from the end of the tongue of the last board to the wall. This will ensure that the boards are parallel. These measurements should be taken at a minimum of three locations. The butt joints between the boards are located under the rafters or beams. Holes are pre-drilled into the boards to prevent the material from splitting when nails are driven into it.
Sheathing board
In general, there is no such thing as “ceiling boards”. The concepts of modern design have gone so far that today almost all types of boards are installed: facade, floor, and even unedged.
Note: The last option is used by designers to decorate interiors in a specific theme of various ethnic styles: country, hunting, Russian village, chalet. It would seem that it couldn’t be simpler - you take a board and do the sheathing. But this simplicity is apparent: in fact, making such a ceiling with your own hands is not so easy.
In the photo below you see an example of such a design. If you look closely, it becomes clear that the board is stuffed in two layers - so that the gaps between the sheathing elements of one row are covered by the second.
Unedged material for hemming is used quite rarely - well, unless someone wants to decorate their country house in a rustic style. Therefore, we will talk about more traditional options for plank ceilings.
Lining
Probably everyone knows what clapboard boards are. Once upon a time, freight cars were lined with it, which is why it got its name, and today this material is used for finishing walls and ceilings. Like any lumber, lining is sorted by the manufacturer according to quality.
- The “extra” class includes wood of the highest category, as they say, without a hitch. Its price is the highest, but this is exactly the kind of board needed for finishing. This is not the case when you can save money, because any flaws and irregularities are clearly visible on the ceiling.
tongue and groove board
- On one longitudinal edge of the clapboard board there is a spike, or, as it is also called, a tongue and groove. A groove is cut into the second rib, which allows the boards to be connected to each other during installation with virtually no gap. If there is a gap, it is only due to the profile of the board, or a chamfer specially cut along one edge.
- There are many options for lining profiles, but most of them are not suitable for ceiling design. Imitations of timber and logs are only good for walls. For the ceiling, it is better to take a board without a figured relief and without a chamfer. Although, a lot depends on the design: in some cases, the gap will only decorate the skin.
- Sometimes the cladding is done so that the ceiling boards are like a continuation of the wall. In order to make it possible to make internal lighting, the installation of the ceiling cladding is carried out with a large indentation.
- It, of course, somewhat reduces the height of the room, but the vertical placement of the board on the wall, and even with a gap, visually restores the imbalance that has arisen.
- For such a design, a narrow board is usually used, which in certain cases looks the most harmonious. For example, when the ceiling has a non-standard shape - like in an attic.
- The fact is that a ceiling covered with a narrow board takes on a certain monotony. To get away from it, various techniques are used: partial ceiling cladding; installation of boards with a gap or in different directions; the use of several shades in decorative wood finishing; installation on the plank surface of ceiling beams.
As a result, it turns out very beautiful and non-standard, as you can see in the examples we have given. Wider cladding elements make it possible to avoid all these difficulties. It is quite difficult to find linings wider than 15 cm, and without relief, so designers turned their attention to other types of boards.
Floor board
As strange as it may seem, floor boards for the ceiling - meaning its design - are much better suited. They are also tongue-and-groove, and therefore are mounted similarly to lining.
The main criterion for choosing a floor board for finishing the ceiling is the absence of relief on it, which allows you to obtain a smooth surface.
- The floorboard must be durable, and therefore can be quite thick. This is not relevant for the ceiling, since its surface does not experience any loads, and you can choose a material of the smallest thickness - no more than 2 cm.
- The variety of wood species used to make floorboards is much greater than that of lining. So, if desired, you can even choose from exotic species for lining the ceiling.
- The ceiling cladding looks even more interesting when it is made using parquet boards. You will ask why?
Note: First of all, it works out cheaper, since it is veneered with valuable wood, and is not made from the entire mass. In addition, it has a ready-made decorative coating, and after installation you will not have to think about finishing.
- In the front finishing of parquet boards, not only dyeing is used, but also processing methods such as bleaching, brushing, and staining. You can also do all this yourself, and on our website you can even find instructions on this topic. But all this is very labor-intensive and takes a lot of time.
- It is much easier to take a finished board - even if it costs more. The parquet board can also have a tongue-and-groove connection. But it is gradually being replaced by another design solution: rotary-angle locks.
Laminate ceiling cladding
There are options with an end clamp. This type of connection simplifies the installation technology and speeds up the entire process, while ensuring maximum accuracy of joining the ends of the parquet board.
If it turns out to be beyond your means, you can easily use laminate. Believe me, such cladding will look no worse.
Planken
You can’t ignore such a wonderful option as planken. This name was given to a board that has undergone three-phase processing: drying, heat treatment and hardening. In this case, the wood is under high pressure and a temperature of +200 degrees for 15-20 hours. What does this give?
Straight ash plank after heat treatment
- After such treatment, the structure of the wood, as well as its physical and mechanical properties, change.
- It practically stops absorbing moisture and is not susceptible to microorganisms, not to mention rodents.
- Naturally, the service life of such wood increases many times, and therefore, it has become an excellent option for finishing facades.
Ceiling design with plank
- In addition to mechanical indicators, other aesthetics appear after heat treatment. The surface of the wood becomes very smooth, and the texture becomes more pronounced. So, such high-quality material has the right place in the design of ceilings.
- Due to planken's resistance to high humidity, it can be used for ceiling lining in the bathroom and kitchen. And also veneer the ceiling of an open veranda or terrace. The cross-section of thermowood can be straight or beveled, in the form of a parallelogram.
Planken ceiling in the bathroom
- The second option is mounted mainly on walls, using a special technology, with an overlap. But straight plank is what you need for the ceiling. It can be mounted end-to-end, and even with a real gap, which is obtained not due to the profile of the product or chamfer, but due to the method.
This results in a perforated ceiling, which improves ventilation of the wood. In rooms with high heights, this installation method looks very good.
In general, planken has its own system of hidden fastenings, different from all other materials. Their design depends on the cross-section and installation method, as well as the manufacturer of the material.
Ceiling in the apartment
Before you start filling the boards, you should prepare the base. The old finish is removed from the floor slab. If there are cracks or obvious differences, they need to be leveled. A primer should be applied to the surface. In addition to the impregnating composition, the ceiling in the kitchen should be treated with antiseptics and fire retardants. Before installing a board ceiling in an apartment, you should strengthen the vapor barrier. This layer is mandatory if you want to install insulation. The material itself and the rough ceiling are wrapped in film. Laying of sheets is carried out with overlap and longitudinal gluing of joints. You must use double-sided tape. Before the procedure, you should determine the outer and back sides of the vapor barrier.
Now you can start marking the base. In this case, the location of the frame made of beams is indicated. Square bars with a side of 30 cm are well suited for this. Before installing them, the material is treated with a primer or drying oil to prevent deformation and rotting. Dowels are used to fasten the bars. It is important to position the frame as accurately as possible. It should be parallel to the floor. The check should be carried out at the building level. Individual planks, if necessary, need to be adjusted using wooden or plastic pads.
Looking at photos of board ceilings, you can choose the appropriate material. It could be a lining. After making the sheathing, you can proceed to cutting it to the size of the surface to be finished. The boards must be dry and clean. Nails are used to secure them. The screw heads are immersed in the wood and masked. Butt and corner areas must be equipped with a wooden frieze.
Ceiling arrangement with boards
There are many materials and technologies for arranging ceilings:
- plasterboard structures;
- board ceiling;
- stretch ceiling;
- and hanging.
A ceiling made of wood has a number of advantages:
- good heat and sound insulation;
- strength;
- environmental friendliness;
- convenience and ease of installation;
- aesthetics.
What board should I use for the ceiling? To cover a board ceiling with your own hands, you can choose one of the following common lumber:
- planed board;
- tongue and groove board;
- unedged - it is necessary to remove any remaining bark and thoroughly treat it with antiseptic compounds;
- edged board;
- lining;
- planken - the edges of such a board are beveled at an angle.
Planed board ceiling
The purchased lumber must be dry and treated with an antiseptic composition, the recommended thickness of the board should be in the range of 20 - 25 mm, and the length can be selected according to your wishes - from 2 to 6 meters.
In order to find out how many boards are needed for the ceiling and calculate the volume of lumber, you can use the table - lumber cube.
The boards are attached to a wooden sheathing made of 20x40 mm or 50x50 mm slats, depending on the height of the ceiling. They are fixed at an equal distance from each other at 30 cm and should be located perpendicular to the direction of the boards. The joining of boards when covering the ceiling, if it is laid along the room, is usually done in one of two ways, either in a checkerboard pattern or butt jointing.
A technological gap of 1 - 1.5 cm must be left around the perimeter, which will later be hidden under the baseboard. It is also recommended to leave a gap between the boards for ventilation of the under-ceiling space; the gap should be equal to the entire length of the board within 3 mm.
To fasten the boards, screws are used, which are hidden in the undertight of the boards, or special decorative screws are used. To prevent the board from bursting, a through hole is made in the places where it is attached using a drill of a smaller diameter screw, and a hole is made under the cap. If necessary, the ceiling can be insulated and/or a layer of vapor barrier can be laid, for example, when arranging an attic. Then when choosing slats for sheathing, it is important to take this nuance into account. Upon completion of installation, the wood is coated with varnish, paint or special decorative impregnation. It is important not to use glossy compounds; choosing matte shades will be an advantage for your ceiling.
Why you should abandon the ceiling made of boards
Some disadvantages of the described design may stop you from choosing a similar design. This is due to the fact that wood is not resistant to moisture. If water is constantly exposed to it, the lumber will begin to rot. Such a ceiling is difficult to cope with the effects of temperature changes, and special products will be required to care for it.
When purchasing material made from expensive wood species, you will have to pay a high price. Repairs will be very expensive. After a certain time, the ceiling surface may lose its original appearance, which will entail the need to replace the structure.
Source