Wallpapering has been and remains the cheapest and most beautiful way to decorate walls. Beginners can master it on their own; it is also used by masters with pleasure. This is a simple and easy process that takes little time. But, as in any repair work, you should have a minimum of knowledge and master some skills, without which the result may disappoint a diligent worker. The question of how to properly paste wallpaper in the corners of a room is of concern already at the initial stage of work and requires careful preliminary preparation.
We glue wallpaper in the corners of the apartment
Preparing corners
Even if visually the corners seem even, upon closer examination the picture turns out to be not so rosy. The slightest irregularities on the walls and a crooked corner line will cause the canvas applied to the surface to lie crookedly on the adjacent wall and cause the wallpaper to rip and unsightly creases. The next strip of wallpaper, glued end-to-end, will not lie strictly vertically, the pattern will shift - as a result, the wallpaper will have to be torn off the wall and work started again. To prevent this from happening, you must:
- Before pasting wallpaper in the corner, you need to clean the walls from dust and dirt.
- If the corners are uneven, crooked, or have voids, then putty will be needed to level them.
Preparing the corners of the room for wallpapering - Areas where the putty has dried should be treated with sandpaper.
- To keep the wallpaper firmly in place, a deep penetration primer is first applied to the walls. After the first layer has dried, it is advisable to apply a second one to ensure higher adhesion strength of the wallpaper material to the working surface. For these purposes, many craftsmen also apply wallpaper glue to the primer layers 4-5 hours before directly wallpapering the walls.
- Covers must be removed from sockets and switches that have previously been de-energized. They are returned to their place when the wallpaper is dry.
Pasting corners, as well as the walls themselves, should not be done “by eye”.
In order not to rack your brains once again about how to glue wallpaper in the corners of a room, you need to prepare the tools:
- spatula (it should not be wide, the optimal width is 15cm);
- plumb line (allows you to maintain a strictly vertical level of the glued strips);
- construction knife (with its help, excess pieces of wallpaper are removed quickly and accurately);
- roulette;
- pencil;
- brush;
- roller;
- scissors.
A large number of wallpapers offered for sale have to be glued end-to-end, rather than overlapping, therefore, when deciding from which angle to glue the wallpaper, it is better to focus on strict vertical lines. Since there are practically no perfectly straight corners in modern rooms, you can start gluing wallpaper from the door or window.
Finishing corners in an apartment, design options
2014-09-22 Author: Vera Category: Interior wall decoration Views: 90373
Finishing corners in an apartment has various options for its implementation. There are also two types of corners that can be finished. For this, a huge amount of modern materials are currently used. Let's take a closer look at how the corners are covered.
Options for decorating corners in an apartment
Types of corners in the room that can be finished
The methods for finishing corners are quite varied. They are based on what kind of corner is formed and what material the walls are decorated with (see Wall finishing options).
All corners in the room can be:
- Internal.
- External.
Most often, decorative finishing is performed on the outer corners, as they are most susceptible to rubbing. This is a kind of protection of the main finishing material from deformation at the edges of the finish. Internal corners in the decoration of an entire room do not require special decoration.
Advice. It is necessary to design internal corners in a room only if this is required by the design of the room from www.24siding.ru.
For example, two entire walls are treated with decorative plaster, and the inner corner is decorated with decorative stone or ceramic tiles. The photo shows examples of the design of internal corners according to interior design.
How to design external corners indoors
Design of external corners
How to decorate corners in an apartment? Everything is very simple; today there are a large number of modern materials. You can use ready-made devices for this or make the facing of the corner surface yourself.
Ready-made devices are presented as:
- Plastic profiles with right corner radius.
- Plastic corners.
- Polystyrene foam or wooden corners.
All of them are quite easy to install and can decorate any decoration.
Plastic profiles and corners for finishing external corners
Plastic profiles for finishing wall corners can be used on both external and internal structures. They are universal, as they can be mounted on the surface of any finishing material.
Advice. For facing internal corners, profiles and corners should be used only if using plaster or other means cannot make the corner perfectly even.
They are moisture resistant and are not able to respond to temperature changes by deformation. They are very practical and reliable. Dirt and dust are not absorbed by their surface, due to which quick and easy cleaning occurs.
The sizes and external design of such devices are quite varied. The following surfaces of corners and profiles are available:
- Smooth or rough.
- Glossy or matte.
More details:
- The color range of the material is also quite large and it will not be difficult to choose the necessary shade to decorate the surface of the corners.
- The length of the profile or corner is at least 250 cm. The width starts from 1 cm and ends at 10 cm.
- They do not burn, but can only melt under the influence of a temperature of at least 150 degrees. Can be used freely in damp areas and where there are temperature changes.
They are considered environmentally friendly, since various harmful chemicals are not used in the production process of profiles and angles.
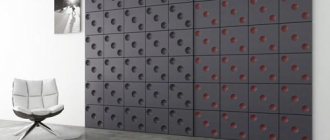
Expanded polystyrene corners
Decorating a room using polystyrene foam corners
Very often, the corners of walls in an apartment are finished with polystyrene foam corners. They are quite practical and durable. The surface of the material is represented by various reliefs. They are very light and will not create additional stress on the entire finish.
So:
- The material does not absorb moisture and dirt.
- They do not burn and can be used in any room with any temperature regime, since they are not afraid of temperature fluctuations.
- Made from expanded polystyrene by pressing under high temperatures. They have a wide range of shades.
- The main advantage of polystyrene foam corners is that they can be painted.
Advice. If there is a lot of traffic in the room or if its square footage is very small, such corners are not recommended for use in decoration, since they are not resistant to abrasion and deformation. If you turn it carelessly, the structure of the corner breaks quite quickly and easily, thereby spoiling the appearance of the corner.
Finishing corners in an apartment with polystyrene foam corners is simple and liquid nails are used for this.
Wooden corners for finishing
Designer decoration of a corner using a wooden plinth
The method of decorating corners using wooden structures is quite common in the wooden decoration of a room. There are both internal and external wood corners. They have a very attractive appearance. Their surface may have carvings or other designs.
Advice. Since such elements are sold ready-made and their surface is not varnished, it will definitely need to be painted before installation. Such actions are also carried out after installation of the element, but only if the main decoration of the room is incomplete.
The price for them is quite high. All this is due to the environmental friendliness of the material. They are very durable and reliable. The color range is limited only to shades of natural wood.
Note. To darken the shade of the material, special means are used that not only change the color of the material, but also give it special strength and moisture resistance.
It is not recommended to use wooden corners in rooms where there is high air humidity and sudden temperature changes. The structure of wood is designed in such a way that it is capable of absorbing moisture and at the same time deforming (shrinking and shrinking).
How to install plastic, polystyrene foam and wooden decorative corners
Instructions for installing and decorating corners
All work can be easily done with your own hands, and for this you will need to carry out preparatory work on the surface of the corner. They include leveling the corners before the main finishing of the room.
This is done in two ways:
- Using drywall.
- Application of plaster.
Let's take a closer look:
- There are instructions for using plaster on the corners. In this case, not only the main types of plaster are used, but also metal corners, which are pre-mounted on the surface of the corner and help make the corner even. The process is quite lengthy and labor-intensive.
- The use of drywall to level any surface is characterized by the speed of work. The material is used for both external and internal corners.
How to straighten corners using drywall
Finishing external corners with plasterboard is particularly popular at the moment.
There are two ways to install such material on the surface:
- On the frame.
- Without him.
Advice. Finishing external corners from plasterboard should be done in the same way as leveling the walls in the room. That is, if the frame method is used, then the angle should also be using a frame. This will make the surface around the perimeter of the room in one plane.
Carrying out work:
- If you choose the frame method of fastening the material, then initially the sheathing is made using special metal profiles. It is secured with dowels to ensure a secure fit.
- The sheets are mounted to the frame with self-tapping screws. The joints of the material are puttied with a small layer and processed after complete drying with sandpaper. The plasterboard surface can now be finished with a finishing touch.
Advice. For such work, it is better to prime the drywall sheets for a more durable bond of the finish to the surface.
- Finishing external corners with plasterboard without using a frame is considered simpler and more practical. Special glue is used to install sheets of material. It is applied to the back side of the GLK, and the material is pressed tightly.
Advice. Before such work, the surface of the corner must be prepared: cleaned and primed.
- Sheet joints or open cuts should also be puttied. The surface of such a corner is also primed.
- Drywall has one drawback - its surface does not have an attractive appearance and is used only for rough finishing.
Advice. It is imperative to cover the plasterboard surface with another finishing material.
Methods for finishing plasterboard corners
How to properly design a plasterboard corner
The options for finishing plasterboard corners are quite varied. Here you can use various modern finishing materials:
- Ceramic tile.
- Plastic panels.
- Natural or decorative stone and other materials.
Finishing corners with ceramic tiles is done using:
- A tile cutter that cuts material very quickly.
- Construction level, which ensures smooth installation of each finishing element.
- Special glue or concrete solution.
- Ceramic corners, which serve as the basis for installing tiles at the corners.
Execution of work:
- Decorative putty is used to mask the seams of ceramic tiles. If the tiles are laid unevenly, you can use decorative corners on top of this finish. They are attached to the surface of ceramic tiles using sealant or special glue. Foam or polystyrene corners are most often used.
- Finishing corners from PVC (plastic) panels is also quite simple. Only here can you use liquid nails, which can firmly secure any material to the surface.
The only thing that needs to be taken into account is that finishing the corners with PVC panels requires additional decoration, since the plastic cuts will be visible on the surface of the corner. Small plastic corners are used for such camouflage. They are glued to PVC panels using special glue or liquid nails. Watch the video to see how you can decorate corners using decorative stone.
How to cover an outer corner?
Before gluing wallpaper with a pattern in the corners, you need to prepare a canvas of such width that it goes around the edge of the outer corner and rests a few centimeters on the wall adjacent to it. To do this, you need to measure the distance from the edge of the previous strip to the corner and add 2-3 cm to the resulting value, transfer the measurements to the wallpaper, cut off the excess, and only then start gluing the corners. An edge that has been turned around a corner may cause creases. In these places, cuts are made with a construction knife. The canvas is carefully smoothed and pressed tightly against the wall.
Advice! When using heavy wallpaper (for example, vinyl), glue is applied to both the wall and the wallpaper. To stick light (for example, non-woven) wallpaper, it is enough to grease only the wall. But in both cases, dried areas of walls and wallpaper need additional lubrication with glue.
A vertical line is drawn on the adjacent wall using a plumb line. The width of this section is determined from the corner and is equal to the width of the next panel with an addition of 0.6-1 cm. The second strip lies with its right side strictly along a vertically drawn line, and its left side overlaps the edge of the previous strip. It is necessary to carefully ensure that the motifs of the drawing on both canvases coincide. You must not only know how to glue wallpaper on the outer corner and use it skillfully, but also prevent the elements of the ornament from becoming chaotic. After the canvas is glued, you need to dip the brush in glue, coat the dried edges and press them tightly with a roller.
Pasting the outer corner
But, it’s one thing to figure out how to quickly stick wallpaper, another thing is to ensure that in the outer corners they don’t lift up or come off over time. It looks, to put it mildly, unaesthetic. To solve this problem, wallpaper corners are used. Long strips, reaching a length of 3 m, are quite easy to adjust to size. To do this, you can use a hacksaw. The following question arises: how to properly glue plastic corners to wallpaper? They will not stick to wallpaper glue, and after using liquid nails, unsightly marks on the wallpaper cannot be avoided. Silicone sealant is ideal for these purposes.
How to cover an inner corner?
The work process is in full swing, and the vertical canvases lie flat on the wall, but the adjacent wall is getting closer and closer and you have to wonder: what does it take to hang wallpaper yourself in the inner corners? This is not as difficult as it seems at first glance, and certainly no more difficult than pasting external corners.
Measurement for the missing wallpaper element in the corner
After the next strip is glued in front of the inner corner, you need to measure the distance from its edge on the right to the corner, add 1-2 cm to this value.
Trimming excess wallpaper in the corner
The dimensions are transferred to the next strip, it is carefully cut vertically (by eye). And for confident movement, use a spatula.
A canvas is placed on a wall carefully coated with glue. A strip of small width will also appear on the adjacent wall. You can get rid of creases using a construction knife. In the corner the canvas is very carefully pressed against the wall. A spatula is applied to the wall. The flat part is pressed against the wall and directed towards the corner. The construction knife follows the direction of the spatula. The narrow strip that ends up on the adjacent wall is carefully trimmed.
Advice! The dull parts of the construction knife must be broken off in a timely manner to avoid tears and inaccurate cutting of the wallpaper.
The part of the strip that was cut off can be used further. It is necessary to measure its width, subtract 1-2 cm from this value, transfer the dimensions to the wall, draw a vertical line. The ideally flat side of the wallpaper should lie strictly along a vertical line, and its left edge will overlap the previous strip. Using a sharp blade of a construction knife, carefully trim off the excess, as in the previous stage of work.
If novice craftsmen, when thinking about how to glue wallpaper in the corners of a room, begin to worry and rack their brains, then people who have mastered a simple technique with any wallpaper - be it heavy vinyl or light non-woven - cope with the same ease and speed. You only have to do the job correctly once, and then it starts to go wrong.
vseprikleim.ru
Architectural finishing of corners
In order to decorate the outer corners of walls as reliably as possible, durable substances such as metal, plastic, wood, stone, and polystyrene foam are suitable. As a rule, special corners are made from them, which are attached to already plastered corners using mounting mixtures.
Let's consider the most suitable materials.
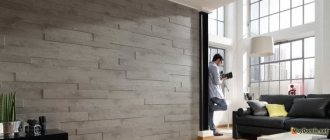
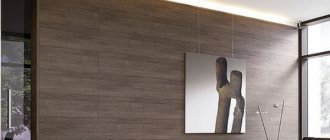
Tree
This is a rather capricious material that cannot withstand high humidity and temperature changes. However, it has a number of advantages: environmental safety, visual appeal, and the possibility of carving. In general, wood is a very stylish decorative element.
Plastic
In addition to strength, plastic has fairly good flexibility and by choosing it, you will have the opportunity to adjust such an important parameter as surface roughness. Plastic corners with a standard length of 250 cm have different widths. It should be chosen based on the degree of curvature of your corners. If it is large, then it is better to choose wide corners, and vice versa.
There are two ways to attach plastic corners. The first involves preliminary leveling the corner with putty, onto which the corner is then glued. After this, a final layer of putty mixture should be applied to the structure and, after drying, sanded.
For the second method, we will need liquid nails or colorless silicone. The glue must be applied to the inside of the corner and applied to the corner that has been cleared of old coatings. Then the corner should be secured with special construction tape.
Expanded polystyrene
This substance is weakly affected by moisture and dirt and can be used at different temperature ranges. Products made from this material can be painted and used to decorate the joints of ceilings and walls.
Stone
It is better to give preference to artificial stone, since it is an order of magnitude lighter and has less roughness, which makes it easier to care for.
Stone is usually used to finish external corners. In this case, you don’t have to worry about the corners not being perfectly straight. This material can be fixed with special glue or liquid nails.
For the ceiling joint it is better to use lighter materials.
Before laying the stone, you will need to clean the surface, and if it is too dry, add moisture to it for better penetration of the glue. The finished solution is applied to the stone itself, including the edges, as well as to the wall. Next, you need to press the stone tightly against the wall and check whether it is installed evenly using a plumb line and a spirit level.
And most importantly: after gluing 3 rows of stones, you must wait two hours for the glue to completely set and only then continue working. If a break is not taken, there is a high risk of the entire structure collapsing.
Drywall
Drywall sheets are used when working with the most crooked corners. For the frameless installation of plasterboard corners you will need:
- clean the surface;
- attach plasterboard sheets to both sides of the corner and mark for cutting out the corners;
- cut out the finished corners and adjust them by attaching them to the corners;
- apply construction glue to the corners and, applying to the wall, press;
- remove the corners (this leaves glue on the wall);
- reapply glue;
- hold the glue in the air a little and return the sheets to the corners;
- straighten the corners using a strip and level.
There is also a frame method, which is associated with certain difficulties. It is used when there is a large level of corner curvature and when increased noise and heat insulation is required.
Frame finishing stages:
- determine the level of angle curvature;
- install the metal frame (profiles) with self-tapping screws;
- Next, you need to install the drywall itself and also secure it with self-tapping screws;
- Cover the installed sheets with putty and sand them.
Criteria for choosing wallpaper for uneven walls and corners
If there is no desire or opportunity to level the base, you need to be more careful in selecting wallpaper.
- The material for curved surfaces should be loose, so that those joints at which the overlapping strips will have to be glued are not noticeable. Non-woven fabrics work well.
- The pattern should be small and frequent or completely absent.
- The unevenness of the walls will help hide the material with a relief structure.
- For heavily damaged surfaces, paintable fiberglass wallpaper is suitable.
Finishing the corners of the ceiling
Ceiling joints require lighter material than walls. Commonly used are polyurethane and polystyrene skirting boards, which are quite cheap, easy to cut and have an attractive appearance. To cut foam baseboards, use a thin, well-sharpened stationery knife.
If the room has smooth corner lines, then for cutting it is best to use a miter box - a special tool with templates for cutting at 90° and 45°. Before applying glue, carefully measure the correct cut of the baseboard. The ceiling is an element of the house that will definitely be noticed, and shortcomings will be visible. In this case, it is better to simply putty the microscopic deviations.
If you don’t have a miter box, it doesn’t matter. To correctly cut the corners, follow the instructions:
- Take a small strip of plinth, a hard, well-sharpened pencil, a ruler and a stationery knife or saw, depending on the material used.
- Attach the prepared piece of plinth to one of the corners of the ceiling and mark a line along the edge on the ceiling, do the same in the opposite corner, marking the point where the corners meet.
- Further, based on the calculations obtained, it will not be difficult for you to trim the corners evenly and join them. This works on both outside and inside corners.
Work order
It is best to start gluing wallpaper from the least visible point. Using a plumb line and a pencil, we mark a gluing line perpendicular to the floor. We set the first strip as accurately as possible, because most modern materials are attached end-to-end, without overlap. If you glue the first sheet unevenly, all subsequent sheets will lie skewed. To avoid mistakes, it is recommended to draw guide lines for each strip on the walls.
Advice: do not start gluing wallpaper from the corner; to begin work, select a flat part of the wall.
Experts have their own secrets for gluing corner elements.
- We glue with an overlap. When gluing wallpaper end-to-end in a corner, there is a risk that the sheets will diverge after drying and a gap will appear that cannot be eliminated unnoticed.
- We do not glue the whole canvas, even if the corner is perfectly even. Otherwise, after drying, folds and distortions will almost inevitably form.
- Coat the wall with glue. It is in the corners that the probability of material falling behind is especially high, so this rule applies to all types of canvases: paper, non-woven, vinyl.
Finishing corners and arched openings with decorative corners
Arched plastic profiles stand out from the general range due to their different side sizes and flexibility. They are glued onto openings with smooth lines without cutting. Available in colored and decorative ones. To protect the corners, use a tone darker than the wallpaper or paint on the wall. The arch line appears more clearly, emphasizing the style of the interior. If the room has wooden floors and laminate flooring that imitates boards in its pattern, it is appropriate to choose decorative arched profiles imitating wood. Polyurethane corners receive their design and color during manufacturing. Dyes are part of the material. Additionally, laminated products are available to protect corners.
I choose the width of the plastic colored elements depending on the size:
- the arch itself;
- premises;
- ceiling height;
- the thickness of the wall in which the opening is made.
The larger the listed interior parameters, the wider the finishing of the corners should be. A narrow one can get lost among large elements. A wide one will look unnatural in a small hallway with a narrow opening and a thin partition.
Arched plastic profiles stand out from the general range due to their different side sizes and flexibility
Wallpapering the inner corners
To paste the inner corner, follow the following procedure.
- We measure the distance from the edge of the strip that was last glued to the wall to the corner. Add 2 cm to the resulting value. Cut the canvas, bend it according to the added allowance and transfer it to a wall coated with glue. The excess should go to the adjacent side. The pasted sheet must be smoothed with a roller or rag so that all the air comes out from under it.
- We also bend the second sheet by 2 cm and glue it on the other side of the corner so that the allowance overlaps the previously glued sheet. The correctness of gluing of this canvas must be checked using a plumb line. When smoothing the sheet, we try not to press those same few centimeters of allowance.
- We don’t need two layers of wallpaper, they will stand out, so we apply a long ruler to the corner and cut the layers along it with a construction knife. Then remove the excess topcoat.
- Having lifted the top layer, remove the lower sections, coat its edge with glue again and press it firmly against the wall, squeezing out the air. This method allows you to get a very smooth joining seam.
mr-build.ru
Recommendations from professionals
Questions from the topic “how to hang wallpaper” puzzle amateur craftsmen and sometimes give rise to doubts in them about the speedy and successful completion of the undertaking repairs.
Not too right angles are found not only in old apartments: they are also common in new buildings.
Uneven walls also often make it difficult to carry out repairs quickly and easily. Let's look at some recommendations that will help us cope with the task. 1. Avoid folds
When gluing wallpaper to the corner outer protrusions, you should try to do it in such a way that the wallpaper sheets fit as tightly as possible to the wall.
Professionals do not recommend gluing the entire length of the strip to the corner at once. If the joint is not very smooth (and this often happens), then the paper may bunch up in sloppy folds.
2. Maintain overhang
It is not advisable for the wallpaper to end in the very corner. It is advisable to leave a three-centimeter protrusion, which can then be carefully cut off with a knife.
This way you can achieve a more even pasting. If you purchased heavy and dense wallpaper, then when decorating the walls with it, you should use a plumb line.
3. Remove electrical accessories
Switches or sockets are often located near the joints. Remembering to turn off the electricity, remove the outer casings.
After this, you can begin the process of directly gluing the wallpaper. Then, when the glue has dried, circles with a diameter slightly smaller than the casing itself are cut out on the dry canvas with a sharp knife. After completion of the work, the fittings are returned to their place.
Pasting process
Preparation
The old covering from the walls is thoroughly cleaned , all irregularities and defects are removed. To align the joints, you can use special plastic corners, which are fixed with putty. Then, using a roller or brush, apply a special primer to the wall.
Next, select the angle from which we will start working. We prepare a piece of wallpaper of the required size, spread it with glue, and if necessary, cover the piece of wall for which it is intended. When using plastic corners, they are also coated with the compound. By smearing the wall, you can go a few centimeters beyond the boundaries of the future sheet.
We glue the first strip . If the work is carried out from left to right, then the left side of the strip of wallpaper is applied in the corner. It should be placed perfectly even along its entire length. Using a clean cloth or a special device (plastic spatula or roller), the coating is smoothed over the entire area, moving carefully and gradually, expelling air and removing bubbles. The wall is completely covered up to the nearest corner.
How to glue wallpaper in inner corners
This type of corner is usually found in rooms. For competent and even pasting, you must adhere to the listed recommendations.
Then, on the adjacent wall, using a ruler, the width of the canvas minus the mentioned 3-4 cm is laid off from the upper corner. This is done in order to paste the next strip in relation to the previous one with an overlap.
Using a plumb line or level, a line is drawn down along the entire wall that will serve as a guide. The strip will have to be glued strictly vertically along it.
After this, you can move to the adjacent wall. As already mentioned, the next strip is glued along the line marked on the wall, overlapping the previous one. Just like everyone else, it is carefully smoothed and pressed, especially at the junction of the walls. Then, using a sharp knife, ruler and level, both layers of wallpaper are cut in the corner, and unnecessary trimmings are removed.
This must be done carefully so as not to accidentally remove the desired piece of wallpaper. Then we coat the edges of the canvas with glue, smooth it and press it. Make sure no air bubbles form. If you use this technique to finish corners, you can make the corner joint almost invisible visually.
How to glue wallpaper on outside corners
To make it easier and more accurate to paste them over, it is advisable to first level them with plaster. Unfortunately, this is not possible in every case. Then you will have to use the overlapping method.
What is the most convenient way to do this?
As when working with internal corners, first a layer of material is glued to the adjacent wall, to the distance of the previously mentioned 3-4 centimeters.
To ensure that the wallpaper adheres evenly to the surfaces, it is possible to carefully trim it in several places. When the canvas is smoothed, use a blade or sharp knife to cut off the excess along the vertical edge, with the exception of the thin edge.
Then, using a large ruler or construction tape measure on the wall, measure a distance equal to the width of the roll plus five millimeters. Using a plumb line from this point, draw a vertical line down.
We will paste the next strip of wallpaper, focusing on it. When gluing two adjacent strips, there will be a slight overlap, which will mask all possible defects formed when cutting the first piece.
How to glue wallpaper with a pattern in the corners
If we have to work with a coating that has a clear and distinct pattern, it is important to make sure that wallpapering in the corners does not distort the existing pattern.
This is not as difficult to do as it might seem. The main thing is not to forget about the need for some overlap. In addition, the canvas must be glued in such a way that the edge exactly matches the plumb line. Then, along the edge of the corner (edge), the second edge is trimmed.
It is quite difficult to prevent the pattern from shifting completely, and slight distortion may occur. But it will be so insignificant that most likely only you will know about it. Only a careful study of the lines of intersection and connection will allow us to notice it. If you follow all the recommendations for gluing internal and external corners, the individual sheets of material will lie exactly vertically, and a slight distortion of the pattern will not be noticeable.
domsdelat.ru
Glue the corners
Plastic corners can be glued to emphasize the shape of a door or window opening, to protect wallpaper on the outer corners of walls from damage, especially in hallways or rooms where there is heavy traffic. To join the corners in the corners, as in the case of ceiling plinths, you will have to cut the edge at an angle of 45°.
In the future, applying acrylic sealant to the corner shelves is no different from that on the ceiling plinth. A glued corner, like a plinth, does not require additional fixation or retention. The shape of the corner is different from the shape of the baseboard. Its shelves are slightly curved inward at the edges. Therefore, gaps usually do not form between the wall and the shelf of the corner.
But if the wall is very uneven and gaps have nevertheless formed, they are eliminated in the same way as when working with ceiling plinths - masking tape is glued along the edge of the corner with an indentation of 1-2 mm. sealant is applied. Apply with your finger and remove excess with a damp cloth. Immediately remove the masking tape.
Before fixing the corner, it is necessary to carry out certain preparatory work. To begin with, the plastic material must be cut and adjusted. This can be done with a sharp knife or durable metal cutting scissors, since their household counterparts can be easily damaged during the cutting process.
In addition, pruning work can be performed using a grinder. Please note that in this case it is recommended to use a metal carving disc. Take into account the fact that the overall quality of the work depends on how smoothly and efficiently the trimming was done.
Think for yourself: it’s better to have a small but even gap along the entire length of the corner than a dirty one that is not always neatly covered with silicone or acrylic sealant. The point is also that this fastening element can have different colors and be colored.
We suggest you familiarize yourself with How to properly install wall panels in the bathroom
Types of corners
At the moment, the construction market offers a wide selection of these decorative elements. You can always choose exactly the type that suits your interior (find out here how to glue cork wallpaper).
What do manufacturers offer?
- If the corner is located in a section of the wall that is most susceptible to wear (for example, there is high traffic there), it is advisable to choose planks with a width from 20x20 to 50x50 millimeters.
- When the corner experiences irregular and not strong mechanical impacts, you can use analogues with smaller side sizes - 10x10 or 15x15 millimeters. They will give the coating a more aesthetic and neat appearance.
It should be immediately noted that decorative corners can have sides of equal or different widths.
Note! If it is necessary to protect arched openings that have a round or curved shape, special versatile “arched” strips should be used. Their most common sizes are 5 × 17, 7 × 17, 10 × 20 and 15 × 25 millimeters.
Due to the different widths of the shelves, such corners are easily deformed when bent. Therefore, it is convenient to glue them to external radius arched corners.
The color of the corners may also vary.
- Manufacturers produce a wide range of solid colors - white, black, blue, red, etc. corners. There are planks that imitate the pattern and texture of different materials - wood, metal, stone. Therefore, you can easily select a plastic corner for wallpaper that is in maximum harmony with the interior.
What glue to use
- On areas of walls that experience light loads, you can use ordinary silicone sealant (transparent). It has good adhesive properties. If the composition accidentally gets on the wallpaper, it can be easily removed with a damp cloth.
- Usually, to fix decorative corners with your own hands, use construction adhesive, for example, “liquid nails”. When the planks are light, it is better to buy a colorless composition. Glue of any color will suit dark corners. The best option is to purchase “liquid nails” specifically designed for PVC, for example “Panneling”.
Note! The instructions do not recommend using high-strength construction adhesive. This composition can corrode plastic, as it is intended for metal and glass.
Installation of corner strips
Before gluing the corners, count the required number.
Some moments
- This is quite simple to do, since decorative corners are sold in the form of strips, their length ranges from 7 to 3 meters. As a rule, one such strip is used for each of the vertical corners. During installation, it is cut to the required length.
- Immediately decide on what composition you will glue the plastic slats to. If they are narrow, then there is a high probability that excess glue will come out on the wallpaper. If it is “liquid nails” or a similar composition, it is almost impossible to remove it without ruining the finish.
- Based on this, before gluing the corners, it is best to choose silicone plumbing sealant for the job. If it is still damp, it can be easily removed from any surface with a damp cloth.
- When adjusting the planks, they often have to be trimmed. Some experts use a painting knife for this. If you do not have sufficient skill in handling it, it is better to cut the corners with a hacksaw.
- Sometimes it becomes necessary to join planks at angles of 90 or 45 degrees to each other. For example, when decorating the upper and side outer corners of an opening. This job requires precision cutting to fit the planks. Therefore, use a device for it with slots at the desired angles - a “miter box”.
Installation of corners
- Before gluing the plastic slats, be sure to remove the wallpaper from the area to be treated so that it is fixed to the wall itself . Trimming can be done with a paint knife. The removed strips of wallpaper should have a width slightly less than the size of the corner.
- On the inside of the plank, at the junction of its shelves, spread silicone sealant with a mounting gun.
- Next, attach the rail to the installation area . Using a napkin, press it against the outer corner of the wall. Next, do the same, moving your hand along the length of the bar.
- Remove the squeezed out glue with a damp cloth.
- After sticking the corners to all the desired areas, wait until the sealant dries.
How to glue a corner to a wall
Before you start attaching the corners to the surface, prepare it. If installation will be carried out on surfaces finished with panels, then it is simply wiped and degreased, if required.
Brick and concrete surfaces with plaster applied to them must first be leveled. To do this, plaster, putty and primer solutions are applied to the wall. The primer will create enhanced adhesion to the adhesive.
Then they move on to measuring in order to cut the corners based on the results obtained. 5-10 millimeters are added to the size of the overlap to leave space for applying the adhesive. A cut is made along the length, taking into account the angle of the part to be trimmed, usually cut at a 45-degree angle. It is more advisable to use a hacksaw or miter box.
5-10 millimeters are added to the size of the overlap to leave space for applying the adhesive.
To work you will also need the following tools:
- a stationery knife for cutting small parts on products, or cutting off tape;
- metal scissors. They will help you make an even cut with the required angle;
- a ninety-degree square;
- ruler;
- plumb line;
- roulette.
We suggest you read: Is it possible to glue wallpaper onto washable wallpaper?
Materials you will need:
- It is easier to glue corners for shelves onto a plasterboard or plastered wall using liquid nails or alcohol-based glue, which are used to secure baseboards;
- It is better to attach it to a plastic base using glue that dries quickly;
- tape, which makes it easier to fix the glue; there is no need to hold the product yourself while the glue is sticking.
After cutting the corners, adhesive solutions are applied to the surface vertically. And then all that remains is to wait until the glue sets and the product is firmly fixed to the surface. In the case of ordinary adhesive solutions, this will take several hours, which is why tape is used.
You will also need certain tools for the job.
We will separately describe how to glue a corner in the bathroom between the wall and the bathtub. There are two types of bathroom corners; these are products that are fixed under the tiles, but their installation requires special skills, and it is difficult to install them yourself. Therefore, we will talk about the type attached to the top of the tile:
- the corner product is applied to the installation site, the size is measured and cut out, then it is also left at the surface;
- so along its contour you should cover the tile with tape to protect it from glue;
- parts of the corners are cut at an angle of 45 degrees;
- the surface is cleaned and dried before gluing;
- if the gap is too wide, then it is sealed with polyurethane foam;
- Afterwards you can glue the corners, it is better to seal the joints with silicone solution.
The surface is cleaned and dried before gluing.