Thanks to modern technologies, the choice of floor coverings on the construction market is presented in a huge assortment, as they say, for every taste. However, the most practical of them is the most in demand - linoleum. In addition, it has a long service life and a simple installation method that even an inexperienced person can handle.
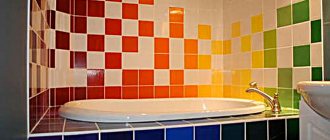
In addition, you can use options for beautifully laying linoleum in the interior, as in the photo.
Preparation of tools and materials
Before you begin laying linoleum, you should make the necessary measurements of the area of the room and calculate the required number of sheets with certain dimensions. This will help determine the amount of material needed.
When purchasing material in a store, it is worth adding a small margin (20-30 cm) to the calculated amount of material received, in case during the work it becomes necessary to trim an edge here or there or cut out a piece.
How to lay linoleum with your own hands? To do this, first of all, you need to acquire faithful assistants in the form of tools, devices or means:
- with a regular vacuum cleaner,
- means for removing various types of stains,
- sharp construction knives with straight and hook-shaped blades,
- wooden slats or rulers used in construction,
- marking devices,
- glue or double-sided tape,
- construction spatula,
- adhesive-based mixture for caulking joints.
How to properly lay linoleum in an apartment without using glue
A simpler, but less reliable way to lay linoleum is to lay it without using glue. This option is acceptable if you are using solid linoleum to finish the floor. However, if you decide to cover the floor with such material without the help of glue, then you should know that in any case there remains a risk of wrinkles appearing on the covering.
Related article: Choosing wallpaper for the walls in the living room: tips, ideas, options (30 photos)
You can lay linoleum without using glue using double-sided tape
When installing linoleum on the floor, the room temperature should not fall below 18 degrees. It is also necessary that the air humidity does not exceed 68%.
If you decide to lay linoleum without using glue, then you need to mark and cut the linoleum as accurately as possible. Only in this case can the canvas be placed correctly.
How to cut linoleum correctly:
- It is necessary to spread the linoleum sheet and let it rest for several days.
- Linoleum is laid in the room in such a way that a uniform overlap is formed on each wall.
- If the room in which you are renovating has external corners, then you need to start cutting the linoleum from them. The first thing you need to do is cut out the linoleum in this place so that the overlap on each side of the corner is equal to the overlap on the wall, in order for the canvas to lay down at the junction of the sides of the corner, you need to make an incision. You should not cut the corner, as they say, “by eye”, so that the material lies evenly in such corners, you need to draw two parallel lines: the first - from the beginning of the wall to the beginning of the corner, and the second - from the outer part of the corner to the perpendicular wall. The same must be done on the other side.
- Now you can begin the final cutting of the linoleum. To do this, you need to bend the canvas at the wall and, using a ruler, measure such a distance from it that when you cut off the excess, there will be a gap of 0.5 cm between the edge of the linoleum and the wall. Place a dot in this place, continue to measure the same distance further around the room. Connect all the dots with a line and cut off the excess strips of material.
After completing all the above steps, you will be able to cut the linoleum perfectly evenly. If you are going to put several strips of linoleum in the room, then we advise you to abandon the glueless method. However, it is possible to join pieces of material using cold welding. For this purpose, special glue is used; instructions for its use are usually written on the packaging.
Covering heated floors with linoleum
Qualified experts do not recommend covering heated floors with linoleum, but it’s up to you to decide.
It contains synthetics, which at elevated temperatures begin to release substances hazardous to human health. In addition, temperature fluctuations may cause surface deformation.
Covering linoleum with tiles
This process includes a technology similar to laying tiles on a concrete base, since a mesh for reinforcement is laid on top of the linoleum and a concrete screed is made, after which the tiles are laid.
But it is better to resort to this method in the case when it is impossible to remove the PVC flooring.
Material cutting
When the base has already been selected, you can begin cutting the material and aligning it between the walls. When planning a non-standard shape, the material should be leveled, taking into account the factory cut, and only on one side. Then the second corner is cut with a sharp knife under a ruler.
After processing the corner, move the linoleum away from the wall by 1 cm and move to the corner opposite (diagonally). Mark the material in advance so as not to cut off excess. A fabric that is not stretched may swell, so immediately apply the necessary tension.
Floor painting - painting technology for wooden and concrete floors (80 photos)
- Marmoleum - installation basics and rules for laying natural linoleum (70 photos)
Cork flooring - features of coating application and installation rules (100 photos)
Glueless laying of linoleum
If the room is less than 25 sq. m., then it is not necessary to glue the canvas, provided that 1-2 stripes are laid. Along the edges of the linoleum they will press the baseboards, and in the middle, if there are two strips, they will be secured with tape.
Operating procedure:
- Trim the edges of the material, taking into account a 6-10 cm overlap on the walls.
- Cover the edges of the floor with double-sided tape and cover with linoleum.
- Smooth the linoleum from the middle of the room, moving towards the edges, making cuts in the corners.
- Cut off the material folded onto the walls, leaving 1-2 cm.
- Fold back the edges of the covering and remove the protective film from the tape.
- Glue the lightly stretched linoleum and cut off the protruding edges.
- Press and secure the baseboards.
To connect two pieces evenly in the middle, you should draw a line and stick tape evenly along it.
In the corridor, trimming begins from the entrance side, bending the linoleum to the depth of the threshold niche. Then it remains to cut off the pieces on the right and left. The areas under the windows are cut out in the same way.
More: Reliable solid wood flooring
If there is a protrusion, then measure how far it protrudes and measure it on the coating, then cut out the required one.
Installation instructions
Having adjusted the dimensions of the canvas correctly, securely fix it in some way:
- without using fasteners,
- using double-sided tape,
- using glue.
Each installation method has its own characteristics, although in principle the process itself is identical:
The free method is a regular linoleum flooring. Suitable for small area. The material is fixed using skirting boards, pieces of furniture or household appliances. But before that it is necessary for him to rest.
The method using double-sided tape is more complex. It is glued to the linoleum from below near the sheet joints, while the other side of the tape should be protected with a film, which is removed during the installation of the sheet.
The method using glue is used in rooms with large crowds of people. The prepared canvas is folded in half on one side, then the other is smeared with glue. Afterwards the canvas turns away and straightens. Do the same with the other part.
To summarize, we can say that laying linoleum is not a complicated process at all. Moreover, you can use step-by-step photos of how to lay linoleum. But if you doubt your own abilities, then it is better to entrust this matter to professional craftsmen.
Floor preparation procedure
Linoleum is laid on a clean, flat floor - on concrete, on wood, on top of old linoleum and tiles. If you follow the installation technology, the material will lie flat and will not fray in certain places:
- Check the evenness of the floor surface. The soft material stretches on protrusions and bumps, and sags in the pits, which leads to abrasion or cracks.
- Start dismantling the baseboards. Remove the usable strips and mark them with numbers, throw away the old ones.
- Level the floor.
- The leveled surface is thoroughly cleaned, removing even sand, and dried, otherwise fungus or mold will appear under the linoleum.
A level surface is provided by a self-leveling floor made from a leveling compound.
Concrete floor preparation
To prepare the concrete base, get rid of the old coating. Crumbling concrete with potholes is replaced with a new screed. After drying, the surface is primed.
For small cracks and unevenness, level with a self-leveling mixture.
If desired, the floor is covered with sheets of plywood, OSB, MDF or other material. In this case, it is worth making sure that the seams go as in brickwork, and elastic (non-hardening) mastic is placed in the gaps.
More: Gray color in the interior: how and with what to combine
Preparing a Wooden Floor
If the wooden floor is dry, but not squeaky, then there is no need to dismantle it. It is scraped, puttied, and covered on top with moisture-resistant plywood or other sheet material. Install self-tapping screws hidden.
Floors with visible cracks are covered with plywood sheets or wood boards.
Important: where the humidity is high, it is not recommended to lay particle boards or fibreboards. Chipboards can swell, and the latter can ripple, which is reflected in the linoleum.
The floor covered with parquet is first repaired and then sanded.
The linoleum floor in the bathroom is first treated with protective compounds.
A floor with sagging boards is dismantled, if necessary, the joists are replaced or leveled, and where necessary, bars are placed under the boards. Floorboards with mold or mildew are replaced with new ones, and the floor is treated with an antiseptic. Then they are also scraped, puttied and secured with sheet material.