Craft: DIY house. Seven houses made of branches, cardboard, paper, pumpkins, chestnuts, and natural materials.
You already know how to make a playhouse for children out of cardboard from the article with Vera Higlod’s master class “How to make a house with your own hands”, and today in the article - houses from a variety of materials: boxes, clothespins, natural materials - chestnuts, pumpkins. All these houses were made by readers of the “Native Path” website together with children and sent to our children’s crafts competition.
In this article you will find a variety of houses with a description of their manufacture:
- Baba Yaga’s house, made with your own hands from clothespins,
- Lesovichka’s house made of waste material,
- a house decorated with chestnuts,
— craft forester’s house made from natural and waste materials,
- DIY pumpkin house (two options),
- a house - a mansion made of twigs.
DIY Baba's House - Yagi
This craft was made by children of the middle group of MGBOU kindergarten No. 75 “Fairy Tale” together with an adult. Teacher - Olga Nikolaevna Tegaeva (Moscow region, Sergiev Posad district, Shemetovo village).
To make a house - Baba Yaga's hut you will need:
- moss (dry in advance),
- cones (dry at home until they open),
- leaves (iron, read more about how to prepare leaves in the article about applique),
- berries (dry).
- wooden clothespins, Liquid Nails glue.
How to make a house - Baba Yaga's hut with your own hands.
Step 1. The clothespins need to be disassembled (pull out the metal spring) and glued into a house (liquid nails are used - quickly and reliably). This part of the work is done by an adult.
Step 2. Place the hut on the cardboard base, put or glue moss around it.
Step 3. Glue moss, leaves, and berries onto the roof of the hut.
Step 4. We paint the cones with spray paint - you get blue spruce trees.
Step 5. We make animals from plasticine and pine cones.
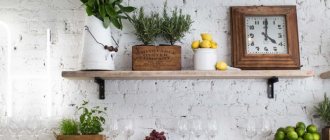
Flowerpot
To tidy up your flower pots or flowerpots, achieving a unified style, you also need to use twigs and channel your inspiration into creating the product.
For everything to work out as it should, place on your workspace:
- twigs, dried and ready for use;
- saw;
- jute threads;
- a piece of burlap.
Let's get started:
1. Using a saw, make all the branches the same length.
2. Place a piece of burlap on a flower pot or flowerpot and glue its edges.
3. Carefully tie the branches with a thin strong thread in 2 places: closer to the top and closer to the bottom.
4. Wrap the tied branches around the target item. To keep everything in place and have an aesthetic appearance, use a ribbon or thread with a bow.
Do-it-yourself forester's house
This house was sent to our competition by the Potapov family (Tatyana Valentinovna Potapova and Andrey Potapov, 4 years old, Irkutsk).
Making the craft will take several evenings. In this case, the child will not get tired and will
they will be interested in participating at all stages.
How to make this forest house with your own hands:
Step 1. First, we took a box of cookies from a candy store. We covered it with scraps of wallpaper in the “autumn tone” and left it to dry.
Step 2. From cones, acorns, and matches they made the inhabitants of the forest - Lesovich and his friend the hedgehog.
Step 3. Lesovichok settled in a house for which a yogurt box came in handy. And the logs on the house were made from dill sticks and secured with double-sided tape. The roof was painted with gouache.
Step 4. The hedgehog settled not far from his friend under the stumps. The stumps are saw cuts from branches that dad helped make.
Step 5. A path leads from the house to the pond. For the path, we painted semolina and glued it with PVA glue. They surrounded it with pebbles and beans. The pond was made of colored paper, the pebbles were plum pits.
Step 6. A small forest and a clearing were made from dry leaves, twigs, moss, dried flowers and rowan berries.
Photo frame
Such a necessary thing in any family, like a photo frame, can be made from dry twigs.
You will need:
- many branches;
- wooden rectangle for the base;
- glue gun;
- various decorative elements to choose from.
How to do?
1. Glue the pre-dried twigs to a wooden base with a glue gun. First fill the parallel sides, then the other two parallel sides, following the shape of the frame. The branches should be glued close to each other;
2. Take all the elements that you have prepared for decoration (we chose moss) and stick them in any corner of the frame. You can distribute it in other places at your discretion. Now insert the photo into this unusual frame.
Advice!
You can also involve children in the preparation and creation of such a craft by giving them very simple tasks - collecting twigs, spreading glue and applying.
You can make a photo frame with this arrangement of branches:
And someone will like the following natural frame:
Do-it-yourself chestnut house “Hut on the edge”
This craft was made by Ryzhkina Svetlana Aleksandrovna and Chesonis Daniil (6 years old), from Bataysk, kindergarten “Rainbow”.
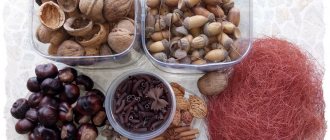
To make this house we will need: - Cardboard box - Colored paper - Glue - pencil - Glue - gun - Pen - Scissors - A piece of wire - Needles - Foliage of autumn trees of different colors - Berries - Dry twigs - Chestnuts, about 2 kg. - Scotch
How to make a house - a hut on the edge
Step 1. Making the base. We take an ordinary cardboard box, cut out a base measuring 40 x 40 cm on which our hut will stand. We cover it with colored paper in the color of any foliage used further.
Step 2. Making a house. We make a house out of cardboard, approximately 25 x 30 cm in size. We connect its sides with tape, attach the bottom of the house to the base - the platform, using thin flexible wire.
Step 3. We make windows and doors in the house. We cut out rectangles from white paper for two windows and a door. We drew curtains on the windows with a pen. We glue them onto the house with glue. Using a glue gun, glue thin branches of the same size and a handle onto the door of the house.
Step 4. Cover the walls with chestnuts.
Step 5. Decorate the roof and ground (the basis of the craft). Lastly, we cover the roof and the remaining part of the ground with autumn leaves (or leaves cut out of paper). We alternate the leaves by color to add diversity and volume.
Step 6. Decorate the composition with pine needles and dried berries.
Wreath
Crafts in the form of a decorative wreath made of branches can be made in different ways. The most popular is a dense wreath. To make it, first a circle of the required diameter is made from steel wire. Next, several branches are connected in a bundle and fastened with thin copper wire. Several bunches are woven into a wreath around a steel hoop. The wreath blank can be varnished or painted in the color you like (most often green).
The wreath is decorated depending on the event to which it is dedicated. A spruce insert attached to a blank looks natural on a New Year’s craft. A large bow, sparkles, pine cones and Christmas tree decorations add to the appeal. On an autumn wreath it is appropriate to place multi-colored tree leaves and rowan brushes. A wreath decorated with bright flowers will decorate the interior.
A fluffy wreath looks impressive. As in the first case, its frame is made in the shape of a ring of thick wire. Bunches of branches are short in length and are held together only at the bottom. After fastening to the frame, the upper end of the beam unravels and is directed upward and slightly to the side. The wreath is decorated similarly to the previous version. An elegant, lush wreath is made from willow branches. Thin branches are fluffed to a considerable length, and foam or cotton balls are strung on them.
DIY “Forester's House” craft
This craft was made by Maria Nikolaevna Bykova together with her son Roma (Arkhangelsk region, Mirny). Roma is 2 years 8 months old.
To make such a house we will need the following material: - a shoe box, - a 0.5 liter kefir box, - beans, - plasticine, - leaves, - pine cones, - spruce branches, - moss, - pine needles, - larch leaves.
How to make a forester's house with your own hands
Step 1. Making the base of the house. To do this, coat the kefir box on all sides with plasticine. Place beans on plasticine. Let's make a window out of plasticine.
Step 2. Making the roof of the house. We make the roof from leaves. We also glue them onto plasticine.
Step 3. Making a deer.
Take 2 cones. We connect them together so that we get the body and neck of a deer. Then we glue the head from plasticine to the neck, make eyes and a nose. Pine needles make beautiful antlers. We glue matches as legs and tail. The hooves were glued to the box using plasticine.
Step 4. Making a hedgehog. We make the hedgehog's face, eyes and nose. We stick the muzzle to the cone. Let's make needles from spruce branches. We glue them onto the pine cone using plasticine.
Step 5. Assembling the craft.
When the main details are ready, we begin to design the craft. We attach the fir branches to the box using plasticine. We're putting up a house. Spread the moss and sprinkle with larch leaves. We put the hedgehog. The craft is ready.
Vase
Wide possibilities open up when making vases from branches. One of the simplest options is shown in the photo. To make a vase for a flower bouquet, a glass jar with a capacity of 0.5 or 1 liter is used as a base, and for planting an indoor flower, any pot or metal jar is used.
The base is wrapped with a strip cut from burlap and impregnated with an adhesive composition. Branches are cut from the branches, and then they are cut into pieces of equal length. The rods are laid tightly on the surface of the burlap and glued. To strengthen the top, the branches are fastened with twine at the top and bottom. The coating is varnished.
A large flowerpot is made in the same way for installation in the garden. Any container of significant size is wrapped with branches. You can use old buckets, various boxes, pallets and barrels.
Another option - an openwork vase - is more complex. Vases or cups of the desired shape are used as the basis. The branches cover the surface of the base, intertwining each other to form a lattice structure. Glue is applied only to the junctions of the branches. The base is removed after the glue has hardened. For stability, the openwork structure is fixed on a weighted wooden base (for example, a cut tree).
The first version of the craft
This house was made by Iskander Khazipov (6 years old). Teacher - Khazipova Gulnaz Galimkhanovna, Kazan. (MADOU "Kindergarten No. 174 of a combined type" of the Moskovsky district of Kazan)
Pumpkin house: necessary materials
Pumpkin, zucchini, rowan berries, blueberries, various sparkles, pine cones, dry branches, a knife, cloves, kitchen accessories.
How to make a pumpkin house with your own hands with children
Step 1. Idea - we come up with what our pumpkin house will be like. Before making a pumpkin house, decide how many houses will be in the composition. If everything is clear with one house, then multi-level compositions require some adjustments.
Step 2. The pumpkin should be cleaned of seeds and pulp using a knife (this is done by an adult).
Step 3. Now use a marker to make marks on the pumpkin in the places where the doors and windows will be located. Mark the window with a felt-tip pen.
Step 4. After this, start cutting out the parts. Carved shutters and other decorative elements can be cut using curly kitchen attachments. It is not at all necessary to maintain neatness and clarity of lines (this will give the house a darker look). Attach the prepared parts to the pumpkin using small nails.
Step 5. It's time to work on the roof of the house. Cut half the zucchini and place it on top of the pumpkin and decorate with various glitter. We place red rowan berries on top of the pumpkin, and also put a cone (in the form of a pipe) on the roof.
Step 6. Design the composition. Place the pumpkin on zucchini cut into rings and decorate with pine cones and dried blueberries.
Clothes hanger
A homemade decoration for the hallway will cause more than one enthusiastic compliment, and you yourself will delight your eye every day with such an original element of your home interior.
Before you get started, don’t forget to prepare the following materials:
- thick branches with the same shoots;
- self-tapping screws;
- drill;
- saw;
- board for the base, previously prepared (can be opened with varnish).
Remember the following steps:
1. Prepare the hooks: cut the trunk of the twig into 2 parts, the length of which should be about 30-40 cm. Using a saw, form a part that looks like a hook. File the knot from the branch being processed, approximately 5-10 cm apart, and make a cut on half of the branch and the knot at the edge;
2. Attach the resulting hook structure with a self-tapping screw to the base of the hanger. If you are not going to use a hanger for heavy things, then instead of screws you can use special wood glue;
Paint the hook branches with paint or varnish.
The second option for making a pumpkin house
This pumpkin house was made for our competition by the family: Nabukhatny Lyubov, Nabukhatny Dmitry and their son Nabukhatny Igor (9 years old), Perm.
To make this pumpkin craft you will need:
Natural materials:
- pumpkin, - bark, - cones, - needles, leaves, grass, - acorn cap, - pebbles, - moss, - thin sticks.
Decorative material:
- wooden button, - lace, - key.
Super glue to hold all the parts together.
How to make a pumpkin house like this
Step 1. Making a house. After cutting out the bottom of the pumpkin, we cleaned out all the pulp from the inside. Windows and doors were cut out. The roof was made from thin pine bark, gluing the pieces on top of each other. It turned out very similar to a tiled roof. The door was a good piece of thick bark, the handle on the door was an acorn cap. Step 2. Decorating the house. To make the house cozy, you need to decorate it. Lace curtains were glued to the windows. The flower boxes were glued together from cardboard and decorated with pine cone scales. Summer is over, the flowers have faded. Therefore, the boxes now contain fallen leaves and pine needles. “Vine vines” stretch to the window on the second floor; we made them from green marsh grass. The carved bottom of the pumpkin served as decoration for the back wall of the house. With a button in the middle and rays, it reminded us of a mill. A key at the door and steps made of sticks completed this stage of the work. Step 3. Move into the house. The house was installed in a low box. A piece of moss became a clearing in front of the house. The rest of the surface was covered with small pebbles. At the end of the work, we dreamed for a long time about who could live in our house. Maybe a gnome, or a fairy with transparent wings, or a kind old sorceress. In the end, we decided that we ourselves were ready to live in a fairy-tale house. It's a pity that he is too small for our large family.
Do-it-yourself house - a mansion made from twigs
This little house was made by Vera Pavlova (6 years old). Teachers: Zueva Tatyana Vladimirovna, Karaguzheva Rufina Viktorovna (Perm region, Kungur MADOU “Kindergarten No. 6”)
This little house is made of twigs, built like a real log house. The branches are glued to each other.
The thatch on the roof is attached to cardboard.
The roof gable is covered with pieces of pine bark.
The fence is woven from thin willow branches.
The tower and fence posts are attached to a piece of plywood with glue.
A Christmas tree on plasticine is carefully placed in a moss clearing.
There is a Hedgehog sitting under the Christmas tree, playing hide and seek with the Bunny. This is such a friendly company.