Chair or armchair
If it is impossible or too difficult to uproot an old large stump from the site, you can cut a chair or even an armchair out of it. If there are several stumps nearby, you can make a recreation area in this place, using the trees as the basis for benches and a table. They can also be additionally decorated with branches and small driftwood.
Step-by-step instructions for making bonsai
Step 1. Find a small piece of driftwood that looks like an old tree. It should have a prominent thick trunk and crown branches on the sides. Do not pay attention to small branches; they can be cut off later.
Step 2. Clean it from dirt, wash and dry it. First, use pruning shears to cut off all the excess and form a crown, work carefully, you won’t be able to glue anything back.
You need to cut off excess branches from the driftwood
Practical advice. Washing driftwood is much easier and faster with an old toothbrush. Its fibers remove dirt from even the smallest holes and bends.
Step 3. Stir the alabaster. The quantity depends on the container in which you plan to fix the driftwood. Alabaster will hold it and imitate the earth.
The larger the snag, the larger and heavier the base should be to ensure the stability of the structure. In our case, approximately 0.7–0.9 liters of finished mass is sufficient.
Remember that alabaster hardens very quickly, first prepare a container for the composition, then you won’t have time to look for it.
The driftwood is fixed with alabaster
Step 4. Hold the driftwood upright with one hand and level the alabaster with the other. If dirty stains of the mass appear on the surface of the driftwood, they must be immediately and thoroughly removed with a slightly damp cloth. After drying, white alabaster is deeply absorbed into the wood, making it almost impossible to clean the surface.
Use a cloth to immediately remove spills and drops.
Wait a little until the solution begins to set; the driftwood should hold on its own. Leave the solution alone until it sets completely, this will take about 10-20 minutes.
Step 5. Prepare special artificial pine or spruce branches, they are then cut into small branches and inserted into the driftwood. To make holes you need to have an awl or a hand drill. The surface of the wood is impregnated with stain; it emphasizes the structure. Prepare small pebbles and a glue gun. It is better to use modern hot one, it is easy to work with, and the adhesion indicators are quite sufficient for our craft. To improve the designer look, a final varnish coating is applied. All these materials must be prepared in advance.
Step 6. Using a small brush, paint the alabaster with stain. The material absorbs a lot of water, you will need to cover one place at least three to four times.
Step 7. Saturate the driftwood with stain; here you need to be careful and achieve the most natural color of the wood. Don’t make it completely one tone, let there be areas with different shades.
Step 8. Using a small hand drill, carefully make holes in the driftwood, fill them with hot glue and immediately insert the pieces of artificial pine needles. Work carefully, do not leave thin strands of glue. They can be removed immediately or after the composition has hardened. The second option is preferable; the threads come off easily at the base and your hands don’t get burned.
Step 9. Gradually form the crown of the tree. Make every effort to make everything look organic.
Applying hot glue
Glue gun prices
Step 10. Cover the alabaster with moss and attach part of it to the driftwood. The fact is that in Japan such trees have been growing for many decades, and the trunk is always covered with living moss.
At this point, the production of the craft is completed, you can install it in the designated place and enjoy the results of your labors.
Artificial bonsai made from driftwood
Furniture
In addition to stationary objects, you can create furniture for your home and garden from stumps and snags. Chairs, tables and even beds and sofas made from peeled and varnished wood, the shape of which follows natural curves, will look very beautiful.
It is very easy to make a shelf for books, a coffee table or a small rack with your own hands, assembled from longitudinal cuts of a log and decorated with small driftwood and branches.
What to make from birch bark - ideas and photos of crafts
You can make amazing paintings from this material.
After you have removed a thin layer of birch bark from the bark, dry it, then you will need to cut these elements. You can lay templates on the bark, trace on them and cut out elements for flowers and leaves. Glue black paper onto cardboard or plywood. Start using glue to attach the leaves here.
Glue the flowers together from several petals in advance, attach them in the middle. Also glue a wooden stick here and wrap it with white electrical tape or paper. From these elements you will make stems. Glue the branches. Cut the birch bark into thin strips, twist them tightly in a spiral, you will get decorative elements that you will also attach to the picture. All that remains is to decorate it with a frame and can be placed in the most visible place.
If you don't know how to prepare bark for such work, then check this out. In the forest, you need to collect birch bark from the trunks of birches that have been in dead wood for a long time. Look at the following photo, which shows how to cut the bark into strips and roll it into a ball. This birch bark is suitable for weaving shoes, baskets, and belts.
You can also get birch bark from fallen large birch trees. In this case, panels and paintings are made from it. Then you need to take a strip at least 80 cm wide, see from which part of the tree you need to collect it.
Before you make a craft from birch bark, you need to prepare it. First, the collected bark is boiled, then you cool it, straighten it and try to divide it into thin plates. Then you need to place the materials collected in envelopes by color under the press. But already dry plates are placed here. Keep them in this form in a horizontal position so that they are straightened. And you can apply them. For example, to make such a wonderful piece of work.
To do this, take a prepared piece of bark. It's good if it's not very thin. But too thick won't work either. Then give the child some paint and let him start creating. You can first transfer the drawing here with a gel pen and start coloring. After which the picture is framed. For this purpose, wooden sticks are suitable, which are glued at the corners, and a rope is attached to the top.
You can also make wonderful flowers from birch bark. To do this, some petals are pre-colored. You can boil them in a solution of onion peels so that they acquire this reddish tint, then they are attached to wooden sticks, which will become stems.
They can be painted white or wrapped with such electrical tape, or glued strips of birch bark.
The following master class with step-by-step photos will help you understand what else can be made from bark. The step-by-step instructions are very accessible and understandable, so even beginners can master this craft.
- See also what you can create
Bar counter
The trunks of old trees can be dried, treated, coated with protective agents and several holes cut into them for bottles. Such crafts made from stumps will not only become an atmospheric decoration for the kitchen or dining room, but will also be a convenient stand for storing expensive alcoholic drinks.
How to make a lamp from tree bark with your own hands?
Surprisingly, it can be made from this natural material. You will get magical glowing mushrooms.
Here's what you'll need for this:
- cold porcelain;
- bark of tree;
- moss;
- LEDs;
- wire;
- wires;
- glue;
- drill;
- batteries;
- soldering iron;
- oil paints;
- modeling tools.
The prototype of this lamp turned out to be a forest picture where mushrooms grew on an old tree. The craftswoman tried to recreate it.
The lamp will turn out very similar to a natural fragment of wood. For this bark craft, you first need to decide what kind of mushrooms you want to recreate. The following picture will help you understand this.
But the craftswoman wanted to create toadstools. If you wish, you can make honey mushrooms.
First you will need to create the mushrooms themselves. You already know how to make cold porcelain. Now take a piece of this white mass and add a little burnt umber paint. Then you will need to mix it well.
Add a little less paint than necessary, as the shade will be stronger after the mushrooms dry.
Now take a piece of this mass, knead it with your hands, then use the tool to make a concave shape. In this case, it is a wooden egg wrapped in cellophane. It will help you create a hat of the desired shape.
Using a stack, make the inside of the cap even more concave, which is characteristic of these toadstools.
Now take another stack and begin to create a characteristic pattern for these mushrooms along the entire perimeter of the lower ring. If you do not have such a tool, then make these plates using manicure accessories or using a not very sharp knife.
It will turn out very realistic. After all, this mushroom is already almost similar to the real one. And if you tint it a little more with oil paint, you will get the desired effect. Take a lemon yellow color and use it to tint the middle part. Use natural umber to darken the edges and middle.
See how the newly created mushrooms for the lamp differ from those that already have a natural shade.
Make several of these mushrooms. To make the bark lamp next, start creating mushroom stems. They will be with a secret, because this is where the electronics are hidden.
First determine what kind of light you will have. The following table will help you figure this out.
Depending on this, you will install one lamp or another. Then see what size LEDs are best. Here it is 3 mm so that they fit under the mushroom cap. Larger LEDs are available. These elements specifically have legs of different lengths. This is done in order to understand where the cathode is and where the anode is. The short one is the cathode, and the longer one is the anode. The photograph clearly shows this.
There are a variety of switches, in this case it is a slide switch. The resistor helps reduce the current value. If this device is not present, the current strength will be too high. By calculation, you can find out that the resistor value here is 150 ohms. When buying it, you will know which one to buy. It is better to use thin acoustic cables with the following parameters: 2x0.25 mm2.
Now you can start making a bark lamp. Using wire cutters, remove the length of the LED knife, expose the wires, and heat up the soldering iron. Attach the resistor to the red contact and use a soldering iron to connect these places.
Now you need to solder the resulting products to the anode. Then all that remains is to insulate these wires using electrical tape. Now take the wire and use a thread to attach it to the wires.
After this, you can decorate the blanks with cold porcelain. After all, they will turn into mushroom stems to make such a ribbon. Lubricate the wire and thread with PVA glue, then screw a cold porcelain ribbon to this part.
Start rolling this part between the work surface and your palm. The mushroom stem should have a beautiful oval shape. Then connect it with a hot gun to the cap.
We need to hide this junction. To do this, you need to make a flattened piece from a rolled porcelain sausage, which you will cover with hot glue. Then go through the same jagged shape, do the same as you decorated the mushroom inside.
Check periodically to see if the mushrooms are glowing. If so, leave them for final drying, and then go over these blanks with the same paint as you did before.
Now you can move on to the final decoration. Here you will already make a lamp from the bark. Take 2 pieces of this natural material and glue them together with epoxy glue.
Using a drill or screwdriver, carefully drill a hole in this workpiece for each fungus. Now you need to insert each mushroom into its hole, and secure the structure on the back side using hot silicone from a heat gun.
Assemble the electronic components as in the photo, connect the switch and batteries here.
To then hang the composition, take a wire, bend the ends of it and screw this part to the bark from the back side. For this, also use a heat gun. So far the workpiece looks quite fragile. But very soon she will gain the necessary strength.
To do this, grind the boxes, just tear them, put them in a blender bowl and pour water into it. Let the moisture absorb well into the paper, squeeze out excess water. Then you will grind this mass using a blender. You can also do this with your hands. Then you will need to knead this substance to create a viscous material for modeling. Now coat the back of your workpiece with it, and glue the tape onto the wire.
Look how realistic these bark crafts turn out. Especially if you take them against the backdrop of nature.
If you live in a country house or visit there and you have trees, attach such lamps to them. In the dark they look very impressive.
You can make other crafts from bark. Birch bark has long been a sought-after material. After all, amazing things are created from birch bark.
- See also ideas
How to make a birch bark house with your own hands?
This is how it will turn out.
Take fresh birch bark, cut it into strips and remove the thin white bark.
Place it all in a saucepan, add water and bring to a boil. Then cover with a lid and turn off the heat. When the water has cooled a little, take each strip and roll a spiral from one edge and the other. Secure in this position with a clothespin and place back in the saucepan.
Then remove these blanks from the water, let them cool and dry. After this, you can remove the clothespins and begin to create a cube from these materials. Look, you need to slightly untwist the two blanks and lay them horizontally. This will be the floor and roof. Place the other two vertically. Due to their curls, these parts are held together.
Now take one blank for the roof, roll it out on one side first, and combine it with the curls of the house. Then decorate this blank in the same way on the other side.
Now you need to take the thread. You will thread this rope through the roof, secure it here with a stapler, and at the same time make the upper part of the house sharper, as required by the project.
Take acrylic or tempera paints and start painting the house. In this case, you can use the template. Cover the top of the roof with a birch bark ridge and secure it with clothespins so that the part dries in this position. This is the house made of bark.
Crafts from branches - material preparation
For creative activities to decorate the selected room (this could be, or even) you will need well-dried branches. They are easy to collect during forest walks, and also to pick up in a public garden or park. You can independently dry the branches that remain after performing sanitary pruning measures.
Before working, dry the material carefully for further use:
Inspected for cracks; Cleans from dust and dirt; Peeling areas on the bark are sanded.
To prevent the appearance of unwanted larvae in the house, it is necessary to carry out disinfection using a low concentration solution of potassium permanganate, known to many. Depending on the design, the branches can be painted in the desired tone, covered with stain or varnish.
Decoration of various items
Having brought home a bouquet, you can quickly make a creative vase using branches. To do this, take any suitable jar - tin, glass, and cut pieces of branches slightly longer than the height of the container.
They are placed close to each other in a vertical direction on the outer surface of the jar and secured by tying it with a beautiful braid or ribbon. You can plant twigs on glue. Flower pots are decorated in the same way.
To make this wonderful vase, in addition to the glass base, you will need: a glue gun, dry willow or birch sticks, and wire cutters.
- Harvested branches need to be cleared of bark. It is better to do this when the wood has not yet dried, so it will be much easier to remove the bark;
- Next, using wire cutters, cut the bare branches into small pieces. Their size should be calculated based on the height of your workpiece;
- After the material has dried, we glue each stick to the base so that we get a kind of lathing;
- It remains to give the glue time to dry for 10-15 minutes. Congratulations, the twig vase is ready!
Crafts made from branches will always find their worthy use in decorating the interior of a house or apartment. Their shape and size can be completely different, because different materials can be used to make them. Products made from bark, wood chips, driftwood, sawn logs or large branches, etc. will look good. It all depends on your imagination and personal preferences.
Branches installed inside a glass jar in a continuous layer along the entire side plane will look no less original. To prevent them from falling apart in a makeshift vase, the bouquet should be quite voluminous.
For the products described above, you will need fairly even trimmings from the lower ends of the branches. The upper thin stems will help create a delightful evening with the flickering of candles. To do this, simply place them in a glass container so that they rise above it, pour no more than half the volume with water and lower the floating candles.
Charming compositions from branches
To bring an unusual accent to a room, for example, a bedroom, trunks topped with a web of thin branches, placed at the head of the bed in a niche cut into one side of the coffee table top, will help. A tall floor vase containing dried cereals along with branches will look elegant in a dining area or office.
Bizarrely curved branched thin tree trunks are placed in a vase and decorated with decorative elements that match the color of the interior. These can be sparkling stars or snowflakes on the eve of the New Year, bright valentines on the eve of the corresponding Valentine's Day, or simply butterflies with fancy patterns on their wings, birds, flowers, fruits, leaves from any available material.
By attaching graceful branches to velvet fabric, the color harmonizes with the overall decor, and placing, after gluing onto cardboard, the resulting composition in a wooden frame, you can get an elegant interior decoration.
A beautiful branch can be complemented with golden bows, New Year's balls or forest cones. Such decoration will promote a good mood and evoke only positive emotions. In addition, New Year's decorations will create a festive atmosphere on the eve of the main winter celebration.
Branches in the interior: step-by-step master class
Tall trunks of shrubs (usually willow) will allow you to do this in an unusual way. For example, separate the sofa corner from the rest of the space in the living room. This partition is made very simply:
- To do this, take a wooden beam of the required length as a stand. You can use absolutely any type of wood.
- Two rows of non-through holes are drilled in the timber in a checkerboard pattern, in which prepared branches are fixed vertically to glue. Their length should be about a meter less than the height of the room. The step depends on how openwork the resulting screen should be.
- To make the product look stylish, it is varnished.
Current bedroom design ideas are limitless - birch trunks in the interior are proof of this
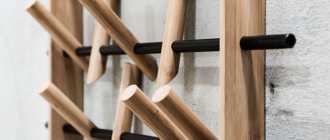
Trimmings of trunks with a diameter of 8-10 cm with strong branches extending upward from the side at an acute angle easily turn into dear hangers. They can be mounted on the wall in the hallway, creating a natural corner with a specific purpose. Among the designer finds you can find birch trunks that act as cornices and even posts near the bed for attaching a canopy.
The picture will be complemented by a coffee table, the base of which is a bundle of branches fastened vertically into a stable cylinder, and the tabletop is durable glass of a round or oval shape.
You can make an option with an unexpected effect by fastening the branches in the shape of a cube and laying it on the floor on the side edge. A plastic or glass square table top is placed on top.
Wall mirrors are often decorated with branches. They can be glued along the entire perimeter perpendicular to the frame or along it. There can be many options. Craftsmen easily make frames for photographs, children's drawings, and reproductions of favorite paintings from scraps of thin trunks.
A gracefully curved thick branch can become the basis of a table lamp. A branch with many branches, mounted on the wall near the mirror on the dressing table, will allow you to easily place all the jewelry.
This type of work requires gentle female hands and special attention.
Creative inspiration is the main incentive for a person who wants to create beautiful crafts from branches with their own hands.
.
In spacious hallways, one wall can be turned into a fairy-tale forest by installing trunks reaching to the ceiling behind a high plinth with LED lighting installed near the floor. This is one of the best ways to give your interior a picturesque look. Both thin and thick tree branches can be used as material.
Small items made from dried driftwood will look original. For variety, you can use tree bark and wood chips, later combining everything into a single composition.
We make decor from branches with our own hands
Crafts made from branches are always distinguished by their originality and unique design. With the help of these simple sticks and twigs you can create beautiful designer decor on absolutely any theme. , paintings, wreaths, flower pots, fancy animal figurines - this is just a small part of what can be created from this wonderful natural material.
- Making a wreath from branches is probably one of the simplest tasks that even a child can handle. Take thin rods of willow wood and weave them together into a tight ring, then carefully tie them with copper wire. As an additional decoration for the wreath, you can use tree leaves, flowers, and forest cones.
- You can revive an inconspicuous tree branch using ordinary snowflakes. Cut them out of paper, foil or colored felt and hang them on each branch. Such compositions will look great in the house against a wall with beautiful wallpaper.
- If you have any broken light bulbs, they can also be used as decoration. Use soft wire to make a special mount with which you can hang them on a branch so that the bulb base is at the top. Next, through a hole specially made in the base, the light bulb is half filled with water. All that remains is to give our miniature an elegant look. To do this, the branch can be decorated with decorative braid, ribbons and bows.
Despite the fact that the process of creating some crafts is quite long and labor-intensive, the result of the work done will be amazing.
Even the most ordinary painted twigs can be an excellent material for making fun crafts. For example, unique products made from star-shaped branches will look very beautiful and fun in interior design. You can make them with your own hands on a regular table.
- Preparation of material. For each craft we will need 5 sticks. These can be branches of any tree, the main thing is that they are even and of the same length. The material should be dried and varnished in advance, so your products will last longer. We also need thread, rope or thin ribbon. With their help we will tie the ends of our sticks.
- Making a star. Place the sticks on the table so that they form a closed pentagonal star shape. Tie each formed corner with thread or rope and decorate with satin ribbons. The resulting star can be hung on the Christmas tree or given to friends.
To create something unique for your interior, do not copy someone else’s ideas, but try to do everything yourself. Feel the mood of your home, think about what exactly is missing in it, what things and objects could highlight your own style. Write down everything that comes to your mind in a notebook - these thoughts may be useful to you when creating an interior design.
Pay attention to the little things. It is they, in creative union with non-standard design solutions, that create an unsurpassed atmosphere and place emphasis on a specific element of the interior.
An original floor lamp is a creative interior decoration
Crafts from branches are not only beautiful, but also profitable. The main advantage is that their production does not require any funds, because the material itself is literally lying under our feet. Moreover, all compositions can be created with your own hands, involving your children in this entertaining process.
Crafts made from branches can be sold easily and quickly, because this is a unique decor that is always in high demand. You can also earn extra money by teaching paid master classes on creating designer jewelry for beginners.
We really hope that this article was useful to you. Create, create, experiment and perhaps this interesting hobby will develop into your professional field of activity.
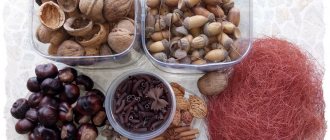
Coconut tree bark is a natural material. There is no artificial replacement for it, since it is simply not needed. Palm bark looks great and can be stored for a long time if it has been properly processed. You can buy palm bark at any florist shop. You can buy coconut palm bark inexpensively here...
What can be made from coconut tree bark:
- Crafts made from palm bark.
Any base (for example, a foam ring or a figurine, or a cone) can be covered with palm bark and you will get an original craft for your interior. - Palm bark paintings.
Stretch coconut tree bark onto a wooden or metal frame, secure it, and create your masterpieces! - Gift wrapping using palm bark.
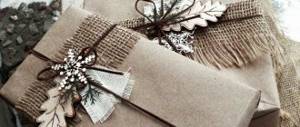
You can line the bottom of the package with bark or wrap the entire gift - whatever you like. Use a stapler and jute rope. - The basis for a photo shoot.
Just lay the bark on the table and take pictures. A very beautiful and contrasting background for photos of various objects, especially those made by yourself. - Palm bark topiary.
Wrap the foam ball in bark and secure it with a stapler. To secure the fastening, you can wrap the ball with jute rope. You can attach any decorative elements to the bark - flowers, berries, buttons, small cones and beads. Coffee topiaries on this basis look beautiful. The “hairy” part of the bark can also be used as an element of a decorative tree - you can glue it to a leg or decorate a pot with it. - Palm bark flower pots.
You just need to wrap the pot and secure the bark to it. Plants look very beautiful in such flowerpots. Both live and artificial. - Hanging planters made from palm bark.
You've probably seen hanging flowerpots made from palm bark in the store. But you can make them yourself. To do this, you will need a metal frame - a base for a flowerpot, wire and palm bark. Read more in our articles. - Artificial palm trees made from natural palm bark.
Palm bark is widely used in the production of artificial palm trees. At the same time, artificial plants look very natural. You can make a palm tree with your own hands, or you can buy a ready-made one in the Sosedka online store. - Coaster made from coconut palm bark.
You don't even have to do anything. Just a sheet of bark will serve as a stand for you. But if you want, you can cut a stand of a certain shape from the bark. - Palm bark rug.
Having cut strips of a certain size from the bark, you need to intertwine them together and fasten them together. Such rugs can be placed on the threshold of the house or on the floor in a summer gazebo.
These, of course, are not all the ways to use coconut palm bark. There are many more of them. If you have any ideas, write to us in the comments or send your work to the competition. Send us interesting master classes on making something from coconut palm bark for evaluation. We buy master classes and pay with money, not coupons or merchandise!
All photos from the article
Wood is an extremely useful material in construction and households, and today we will look at the use of not the most common wood raw materials, which are usually considered waste. Let's talk about the bark. We will tell you what you can make from tree bark at home, working with your own hands.
