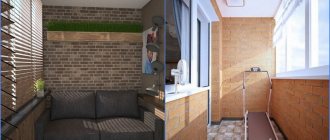
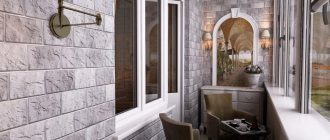
Hello! Today I’ll tell you how you can make an interior collage yourself using the POLYVOR service.
What are collages even for? By and large, this is just one of the ways to draw up an interior sketch, a certain plan according to which you need to act. Of course, you can paint your future interior with paints, you can make a 3D picture, but you must admit, not everyone has the talents and skills for this. And anyone can make a collage. And this must be done so as not to act spontaneously and not make impulsive purchases. Otherwise, people often just buy whatever they like, without thinking about how it will all fit together. A collage will help you avoid many mistakes. In the end, it is just interesting and exciting, if you are a creative person, then you will definitely like it.
A small digression... In general, it has long bothered me that in Russian interior design there is a bias towards 3D visualization, as if it were some kind of mandatory and integral part of the design project. And then the designers post 3D pictures and photographs of the completed interior from the same angles with a hint: look at how everything is the same, you won’t be able to tell the difference at all. People measure themselves by photorealism, not by design as such. All interior design is moving in some kind of wrong direction in our country, towards improving the photorealism of three-dimensional pictures, even in the economy segment. Whoever has cooler 3D makes cooler designs. This is nonsense.
3D is time (modeling, texturing, making edits, rendering...), and time is money. Making a collage is several times faster, which means it saves time and allows you to reduce the price for the client. That’s why I introduced ]Quick Design[/anchor], where I design the sketch only in the form of a collage. Indeed, often, when only cosmetic repairs are needed, without moving walls, this is more than enough to convey the idea to the customer.
Where to start making a collage?
The first step towards creating a quality collage is always to look for ideas and specific objects that inspire you. It is important to try at the very first stage to decide on the style of the room being developed: what colors will become leading, what style you will take as a basis, be it loft, retro or minimalism, and many other similar defining moments.
The work should begin with a sketch showing the location of interior details
At the second stage, the selection of images begins. You can either download them from the Internet or cut them from magazines. Every detail should be worked out: from the sofa or large table in the center of the room to the curtains and door handles.
We begin to select furniture and lamps
When all the pictures are prepared, start drawing up the overall picture. It will be better and more visual if you don’t just place objects on the background in a chaotic manner, but create a full-fledged layout of the room.
It is better to consider several options, moving furniture or changing shades of finishes
The last step to complete the collage is to add captions and notes. Indicate where you can find this or that item, the desired material, or even its approximate price. All this will help you quickly navigate the floor plan and eliminate any hiccups at the purchasing stage.
How to make an interior collage: 4 steps
Creating a collage is conventionally divided into the following stages:
Inspiration and ideas for creating a collage
- Of course, from magazines, if you plan to make a collage with your own hands (without programs)
- From nature. Take the concept and draw inspiration from nature! I spoke in more detail at the webinar, as well as in this article. It is important!
- From the InColourBalance website - beautiful pictures from nature will not only serve as inspiration, but will also help in choosing a color scheme.
Collecting material for collage
This stage closely borders on the previous one.
- Cut out or copy to your computer interior solutions and beautiful things that interest you. Organize into folders for convenience.
- Analysis of materials. Analyze what unites all the elements you like. Perhaps it will be a general style or color scheme - find something in common.
Combine interior elements into one composition.
You can do it:
- Manually (how to make a collage with your own hands is written below). White paper, glue, scissors. Arrange without gluing first!
- Using programs (review of programs below). For example, a simple program called Paint.Net, which is in many ways similar to Photoshop, but simpler and clearer, and you can download it for free.
Make explanatory notes.
They are needed so that you can then understand for which part of the wall/floor/ceiling this or that material was selected. You can make footnotes, and write the cost of the material and manufacturer on a separate sheet. Then the question is: “Ahh, where can I find this now? "will not disturb you
