Surely every home has an unnecessary thing that is a pity to throw away. Maybe it’s old or just doesn’t fit the interior of the room. To do this, there are many techniques that give life to old things. For example, using the decoupage technique you can decorate a cardboard shoe box.
This article will help you learn how to decorate a box in decoupage style.
Tools and materials: what is needed for the job?
In order to begin the process of decorating the selected product, you need to prepare all the materials and tools. This can be done in a specialized store or in regular offices.
To decorate cardboard boxes in decoupage style you need:
- box (it can be made of any material - cardboard, plastic, wood);
- acrylic paints (preferably light colors);
- glue (selected depending on the material of the box);
- napkins with drawings or printed pictures;
- varnish for fixing the finished product;
- brushes with good soft bristles;
- a bowl of water (preferably warm);
- scissors and sandpaper;
- additional decorations (rhinestones, beads, lace, etc.).
This is the basic set for work, supplemented depending on the complexity of the product design.
Sleeping area
People who have a cat as a pet know it when you buy a large sleeping house for it with a scratching post, with platforms at different levels; you arrange the space inside as comfortable and soft as possible, but the cat will still choose a flat cardboard box.
Related article: Design of Nyusha’s house and apartment: how does the singer live?
Many people begin to specifically accustom their pets to their new housing, but this should not be done. Why force a cat to live in warmth and comfort, if you can pleasantly furnish the same box.
You need to put a blanket inside the cardboard so that your pet can sleep softly and comfortably. Also, for your own aesthetic pleasure, you can paint the edges of the box as you wish. For example, sleeping cats, and then this place in the house will definitely become stronger, like a pet’s sleeping place.
Decor for decoupage boxes
Usually, original and unusual spice sets and sweet stands have a high price. But you can save money by decoupaging a shoe box with your own hands. You can choose any style, decoration and box size to suit your kitchen interior.
If you are decorating a box for a children's room, then you should choose the appropriate designs. It is better that the design is made in one stylistic direction.
LiveInternetLiveInternet
Quote from Marrietta
Read in full In your quotation book or community!
DIY tissue box.
Master class Well, you can make a very cute, and most importantly, necessary and useful box for napkins with your own hands. To create it you will need a cardboard shoe box and cardboard (you can use another box), as well as patterned paper, fabric with lace and glue. The work will take you very little time, the result will be very pleasing, the main thing is to guess correctly with the selection of fabric. I really like this option below, a great idea not only for yourself, but also for a gift. Are we watching a master class? After all, you probably have empty boxes? Please note: the window for napkins is covered with fabric with embroidery
Before you start watching the photo tutorial and getting inspired to create a tissue box, I want to make a small digression for everyone who loves to read and would like to read a book. I invite you to look at the author’s website of Sergei Ivlev. Here you can download or read directly on the website the author’s new book “Degradation. High Technologies”, which will be published in paper form by the end of this year. The book will tell you about the generation of the eighties, who grew up in the hungry nineties, about the difficult path in times of lies, corruption and betrayal, when not everyone is able to choose the right path of duty, honor and justice. A very interesting book, I recommend reading it)
In this master class we used a box like this, with a hinged lid. If you don’t have exactly this one, if the lid of your box is removable, then it’s okay, as I said above, you can use additional cardboard or another box, its bottom.
We disassemble the box and tear off its top. If you use another box, I think it’s clear from this photo what needs to be added from cardboard)
We wrap our box with fabric, you can use any cotton fabric
It is best to glue with PVA glue
Trim off excess fabric, leaving extra on the top and bottom sides of the box
Apply glue along the edges of the fabric
Bend and glue
Lubricate the bottom with glue and glue the fabric to it
Place a corner of the fabric in the corners of the bottom of the box
This is the neat corner you should get:
Now we take our second part of the box, cut out the window
Cut a slot in the window for napkins
Cover with cloth
We fix the fabric on the corners with clothespins, until the glue dries. We glue our lid with a window and put it under the press.
Now we will paste over the napkin window itself.
Glue the window with embroidery to the box
Now we cover the inside of the box with fabric or paper with a pattern.
That's all, thank you for your attention) Sincerely, Inspirational Marrietta
Tips for beginners in needlework
There are a number of tips that it is recommended to listen to when decoupaging boxes with napkins.
For children's rooms, it is recommended to use napkins of cute animals, beautiful flowers or favorite superheroes.
Men prefer designs with pictures of weapons or cars. You can make a beautiful box for a birthday gift.
To please your grandmother, you can make a box with images of family photos.
Drawings with fruit and vegetable still lifes, aromatic herbs, etc. are perfect for the kitchen. To store sewing accessories, use tin boxes with appropriate patterns (for example, fabrics, threads).
Regardless of the chosen design, a box made using decoupage technique will look original and stylish. It can become either a decoration for your home or a gift for loved ones.
Step-by-step instructions for product design
Decorating a decoupage box includes the following steps:
To begin with, the surface of the box is cleaned of various irregularities - sanded with sandpaper. Then a layer of acrylic paint is applied (choose the color to your taste, but it is better to choose light shades). The design is cut out from the napkin and the colored layer is separated.
There are two ways to apply a picture. The first is to soak a napkin in water, place it on the box and secure it on top with diluted glue. The second is to place a napkin on a dry surface and secure it with glue on top.
- Do-it-yourself orchid: master class on making and step-by-step description of creating an artificial flower (video + 105 photos)
Knitted jewelry - the best jewelry ideas and creating knitted jewelry for beginners (110 photos and videos)
Decoupage varnish: tips for choosing varnish, their main types and application options (100 photos)
After the glue has dried, colorless varnish is applied in several layers. If you want to add other decorative elements, you can look on the Internet for photos of decoupage boxes, where interesting ideas are presented.
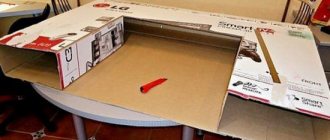
Transforming shoe boxes
Durable shoe boxes can easily be used in the home. After all, every home has many different little things and they all need to be neatly laid out somewhere. Boxes can help solve this problem. Some shoe boxes initially look attractive and you don't need to do anything to them. And if you want the boxes to match your interior, you will have to devote a small amount of time to them. There are many ways to decorate shoe boxes. Let's look at some of them so that you can get inspiration and, perhaps, some ideas of your own.
First method: Decorate the boxes with leftover wallpaper. If you have never covered a cardboard box with wallpaper, you need to be patient and try to do everything carefully. First measure and then cut the required strip of wallpaper. To do this, measure the width, length and height of the box. The length of a piece of wallpaper should be 2-3 centimeters greater than the length + four times the height of the box. And the width is 2-3 centimeters larger than the width + four heights of the box (this is in order to bend the wallpaper inside the box). Mark on the wallpaper where the cuts will need to be made. Try the pattern on the box. Fold the wallpaper inside the box correctly and now start gluing. You can use wallpaper glue, PVA glue, or hot glue (from a gun). It is worth saying that the thicker the wallpaper, the more difficult it will be to work with it. When you have sealed the outer and inner walls of the box, cut a piece of wallpaper to fit the perimeter of the bottom of the box and glue it. Decorate the lid with the same wallpaper or a matching one. The box is ready, use it!
Along with wallpaper, you can use other materials available in the house. And then you will get a beautiful combined box. At the same time - universal purpose!
Second method: Cover the box with self-adhesive film. Make a pattern as described above, measuring the height, length and width of the box. Cut it into three parts: one strip will be wider, and the other two will be narrow. This is because the film cannot be rolled up like wallpaper. In order for the film to lay well on the cardboard without wrinkles or unevenness, you need to carefully start gluing it inside, gradually moving around the box. You also need to separate the adhesive layer from the base gradually and carefully. If you do everything well, the box will become a quite worthy piece of furniture.
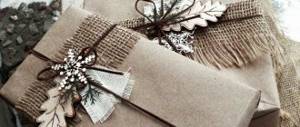
Third method: Wrap the shoe box in gift paper. The paper does not have to be glued to the box. You can use tape to secure the folds. When you work with gift paper, you will probably adapt and find several ways to neatly fold this material. It should turn out to be a pretty elegant box.
Fourth method: Covering the box with fabric. If you want your boxes to match the interior, decorate them with fabric left over from sewing curtains. You need to cut the required size of fabric and start gluing it to the box.
If you use a glue gun or special fabric glue, the box should turn out neat and elegant. Use attractive details to your liking to further decorate the box: braid, buttons, beads, crocheted flowers, and so on.
Fifth way to decorate shoe boxes: Pasting with colored paper. Maybe you like a certain color, then just take colored paper and cover several boxes with it. Silicate or PVA glue is suitable.
Sixth method: Decorate the box with a pattern or applique. If you plan to use shoe boxes for small items in the children's room, work with your child to glue pictures of his favorite cartoon characters or other characters onto the boxes. With such pictures, it will be easier for the child to remember which box contains pencils and which contains small toys.
Call your child and work together to decorate boxes for his room. You'll have a good time and the boxes will probably turn out great.
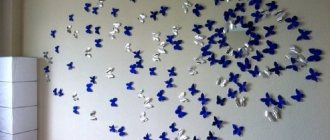
Seventh method: We paste over the boxes with clippings from magazines or newspapers: Perhaps it is better to take old magazines or newspapers that are still stored somewhere in your house and paste their pages over the shoe boxes. When the glue has dried well, apply several layers of acrylic varnish to the entire surface. It is necessary to let each layer dry! If such an idea seems too primitive to you, come up with something of your own, bold and unconventional. Let it be flowers or butterflies made of newsprint or something even more original.
Eighth way to decorate boxes: Favorite photos. As in the previous examples, you need to use a glue gun or other glue (PVA, for example). Glue the photo on the box in those places that seem most appropriate to you. Cover with acrylic varnish.
Ninth method: Decorating shoe boxes with several types of materials: Here you can give free rein to your creative inclinations. Try to use what you find at home. It’s just important not to overdo it and not spoil the box with excesses.
Tenth way to transform boxes: Make them even more convenient. Build partitions in a large shoe box, and cover the inside and outside of the box with the material you like best. This way, the little things you fill the box with will not get mixed up with each other.
If you have already decorated all the shoe boxes in the house, it's time to think about what you can use them for. You may find the ideas in this article useful.
© 2020, Home with a soul. All rights reserved.
Similar
Gift box: decoupage on wood
Wood is often used as a material for decoupage.
The best gift is one made by yourself. If you want to please your loved ones and give them an unusual gift, then decoupage a wooden wine box.
Such a gift is relevant for any holiday, and its design will not be difficult.
The technique for performing it is the same as described above, only with a few additions:
- a sanded wooden box should be treated with alcohol to degrease the surface;
- It is better to put sawdust and cut gift paper inside the box so that the bottle does not hit the walls.
Step-by-step tutorial for beginners on decoupage of a cardboard box
For the master class to be successful, you must first prepare the materials. You can decorate an ordinary box yourself at home as shown in the photo. For this you will need:
- Pre-printed drawings or napkins, photographs and other ornaments on paper;
- Water;
- Instant coffee (if you need to age our decor);
- PVA glue;
- Acrylic lacquer.
Detailed work progress for beginners in needlework
- To begin, sprinkle some sheets of paper with water and then gently spread instant coffee over them.
- After this, lay the sheets on the table and let them dry.
- After the sheets have dried, tear them into pieces, but they should not be very small.
- Cut out pre-printed figures (drawings).
- To decoupage a cardboard box, clean the surface of the box from excess elements.
- Glue the torn piece of paper to the surface of the box and coat the top with the prepared solution. Pay special attention to the edges.
- Glue the entire box like this, and glue the cut out figures on top.
- Let the box dry and then, if desired, you can coat it with acrylic varnish to add shine.
See the video for an example (they decorate a wooden box there, but the situation is the same with thick cardboard).