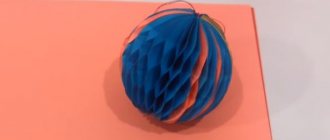
DIY cardboard garland
You will need:
- sparkles on the dress (sequins)
- cardboard
- stationery knife
- superglue or hot glue
- rope.
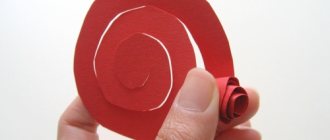
1. Draw straight letters, geometric shapes or patterns on cardboard and cut them out.
* To get a letter on cardboard, you can simply use a ruler and a pencil, or you can print the letter on paper, place the paper on the cardboard and use a utility knife to cut out the letter, tracing it along the outline.
2. Prepare sparkles (sequins) and start gluing them to the cardboard. You can use different types of sequins and it is not necessary that the sequins be on a thread.
3. When all the letters or shapes are ready, place them on a flat surface back to front and in reverse order and glue the thread to them.
DIY cardboard house with pipe and door
You will need:
- hot glue with a glue gun
- stationery knife
- scissors
- several cardboard boxes.
The large box will be the main part of the house, and the smaller boxes will be needed for small things like the pipe and window frames.
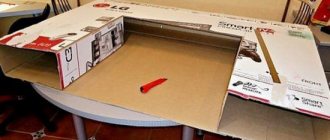
1. Cut off the pieces of the large box that form the lid - these will be used to create the roof.
2. Turn the box upside down. Cut out the door by making a large "L" shaped cut.
3. Cut out the squares for the windows using a utility knife.
4. Glue together 2 parts of the cut box lid. Repeat the same with the other two parts of the lid. You will get 2 halves from which you can make the roof of the house.
5. For windows, you can cut out 2 wide cardboard strips and glue them to the window. You can also cut several strips to create a window frame.
6. To glue the roof to the house, you must first connect the roof halves using small L-shaped cardboard pieces. Next, use the same parts to glue the roof to the house.
7. Now we make a small roof. You will need a sheet of cardboard of the appropriate size. Divide it in half (or just bend it) and glue it to the house in the same way as a large roof, i.e. L-shaped parts.
8. You can make a window in the door and, if desired, glue a cardboard window frame to it.
9. Optional:
If you want to make a pipe for a house, you will need a small box or 4 cardboard pieces of the same size, which you need to glue into a small box.
10. Mark on a small box the places that need to be cut so that the pipe will lie flat on the roof of the house. To make this easier, lean the box against the roof exactly on the side and draw lines with a pencil. Once you have glued the pipe to the roof, you can cover it with a cardboard lid and glue a cardboard toilet paper cylinder.
11. Optional:
you can add a handle to the door. Use any old handle and glue it to the door. You can also make a handle from cardboard.
DIY cardboard crafts: geometric lamp
You will need:
- thin cardboard
- scissors
- stationery knife
- PVA glue or hot glue
- ruler, compass and pencil (to draw a pentagon)
- LED light bulb (it is important that there is an LED light bulb so as not to burn the cardboard)
- lamp socket.
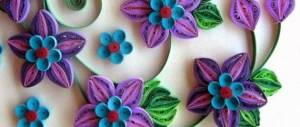
1. Start drawing pentagons (a figure with 5 identical sides) on cardboard. To start, you need 11 pieces, later about 10 more. In this example, the side size of each pentagon is 6 cm, but you can choose a different size, as long as all the figures are the same size.
How to draw a pentagon (video)
To draw an even pentagon, watch this video:
Once you have drawn and cut out the pentagon from your cardstock, use it as a template to trace and cut out the rest of the pentagons.
2. Inside each of the 11 pentagons, draw 5 smaller pentagons. In this example, the distance between them is approximately 6 mm.
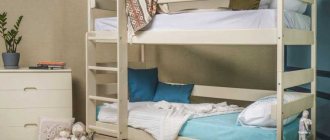
Cardboard cubes
Such cubes help a child learn to put together a picture from parts, a kind of puzzle, only for the little ones. In this case you will need:
- wooden cubes,
- a picture (which will be one cube wide and three cubes long) and glue.
- You need six pictures, each of which is cut into three parts.
- For example, here are pictures of six people (divided into head, body and legs).
The child can combine the cubes at his own discretion, creating new characters.
DIY cardboard wall decoration (diagram)
You will need:
- cardboard
- scissors
- glue
- pencil and ruler (to draw a few squares)
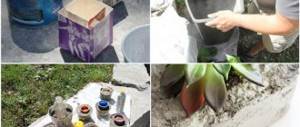
- acrylic paint or spray.
1. Cut cardboard (cardboard box) into several squares of different sizes.
2. Color all the squares. In this example, metallic color was used.
3. Prepare a large sheet of cardboard and paint it.
4. Start painting all the other squares and gluing them to the large sheet.
*Glue however you like.
5. You can stick the work to the wall using double-sided tape or simply place it on a shelf near the wall.
Useful and decorative crafts from cardboard: we make complex and beautiful things from simple things
Making cardboard toys of different sizes for your child is wonderful. But maybe it's time to move on to interior decoration? If anyone doesn’t know yet, cardboard boxes are used to make durable, beautiful furniture, shelves, picture frames, practical organizers and much more.
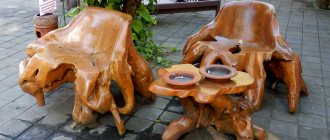
Cardboard furniture: home creativity
Cardboard furniture has proven to be highly practical, environmentally friendly, cheap and non-trivial. It will be especially interesting to assemble such items as a table, chair, armchair yourself. In the home “production” of furniture, you can use both cardboard tubes from rolls of various materials and corrugated cardboard.
Kitchen set? Easily! Layering of identical cardboard elements creates durable furniture
A small table can be decorated with putty, sanded and painted - no one will guess what such beauty is made of. Or you can leave the product in its original form and every time catch the surprised and admiring glances of guests
Cardboard tubes can be considered a treasure trove for creative home crafters. Both durable and interesting looking
Original shelf
Shelves of a non-standard type will also be able to find a worthy place in a house or apartment, be it a living room or a children's room. Corrugated cardboard is perfect for these purposes. The sheets of templates are glued together for strength, and then horizontal shelves are inserted into the slots.
Small compartments are convenient for storing small items
A standing shelf in the shape of an animal can live in a nursery and become a toy storage
Creative giraffe doesn't even need color
Cardboard lamp: soft light from a DIY lampshade
A lamp made of cardboard segments gives an amazing glow. Making the item is easy. If this is a lampshade consisting of template elements, then they are fastened to each other in a certain sequence. There is another option: cut out the necessary elements and glue them together layer by layer.
Lampshade made of segments
The shape of the lampshade is variable; it can be almost any geometric shape
Cardboard wall decor
Since we have chosen cardboard for various needs, why not decorate the walls with it? There are many ideas in this direction: cardboard frames, butterflies, pipe rings that create a composition on the wall.
It is not necessary to see the heads of killed animals on the wall; you can create a trophy with your own hands and without harming the animal world
The template needs to be enlarged and printed, or simply redraw the details manually
Corrugated cardboard opens up wide possibilities for creating simple abstract patterns
Cardboard organizer
Craftsmen also often began to use cardboard as the basis for convenient organizers. The material, to put it mildly, is inexpensive, durable and strong, retains its shape and is easy to decorate. To make a convenient organizer, they develop its design and determine storage locations specifically for the necessary things. Some people really need small compartments or want a convenient place for magazines.
Beautiful decor makes the product not only an attractive table decoration, but also a useful thing
A fun organizer for a child does not require any special decor.
Assembly is not that easy, although not complicated
Don’t rush to throw away the boxes, this is truly useful material!
DIY cardboard furniture: cloud-shaped shelf
You will need:
- several sheets of cardboard
- glue
- stationery knife
- pencil
- scissors.
After the text instructions, you can find video instructions for creating this shelf.
1. Take one sheet of cardboard and draw a cloud on it. It is better to draw so that one side of the cardboard sheet serves as the bottom of the cloud (see image).
2. Cut out your cloud with scissors.
3. Use the cardboard cloud to make several more of the same blanks - trace it on each sheet and cut it out.
* In this example, 23 sheets of cardboard were used - 3 sheets will follow the shape of the cloud and 20 will be “inside” the cardboard structure and they have a similar structure, but they can save cardboard (see video).
4. Cut the unused cardboard into small pieces that need to be glued between the cloud pieces
5. Start gluing carefully and one by one all the parts of the shelf, not forgetting to glue pieces of cardboard between the parts (see picture).
6. To hang a shelf, you first need to attach one hook and one nail (see video) and hang the shelf on them.
How to make a shelf out of cardboard (video)
Secrets of making educational toys from cardboard
Today I want to share with you some of the tricks of this, at first glance, simple task. At the very beginning, I used the materials that were at hand - cardboard from boxes as a base, tape or PVA glue - as a coating against moisture. But then, through trial and error, I came up with the materials and techniques that turned out to be the most convenient and practical. For those who, like me, want to do everything efficiently, beautifully and wear-resistant, my master class.
A short digression about the materials that we will need:
1. I buy cardboard at an art store. Typically, for the base of the “playing field” (jars of jam, like here, for example), the cardboard thickness is 1.5 mm. For small parts (like berries here) - 1 mm. If you are not confident in your abilities (or you do not need two huge sheets of thick cardboard), then you can take 1 mm cardboard for all the parts (it is, of course, a little less dense, but for such games it is quite enough). This cardboard is sold in a format of 70 cm * 100 cm (that is, almost Whatman paper). Therefore, if you are going to buy such cardboard, make sure you have transport, or take tailor’s scissors with you, or accept that you will have to carry a stiff piece of paper home
I wore Yes, it’s not very comfortable, but it’s quite possible
2. I use PVA glue. For working with paper, this is the most convenient option. It’s better, of course, to buy it at a hardware store (since the one sold in office supply departments is usually runny and warps the paper).
3. We will also need lamination film. You can buy a transparent film with an adhesive base, or hot-melt adhesive - it is glued with an iron (this is how our mothers pasted over the covers of our textbooks).
Well, we’ll figure out the rest of the materials as we go.
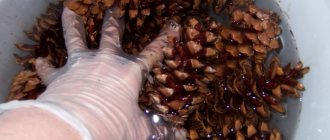
So, let's begin! First of all, we glue paper with a printed game onto our thick cardboard. I apply the glue with a construction brush, 5 cm wide - this allows me to do everything quickly, and speed plays an important role here. Apply glue to the desired area, carefully apply the sheet and immediately smooth it with a soft cloth (I use an old terry kitchen towel) so that there are no wrinkles left. After this, we let our beauty dry for about an hour. This is what we get after the first manipulations:
The second step is lamination. I laminate with hot melt film.
We cut our whatman paper into landscape-size sheets, cut the film into the same pieces, lay it with the matte side DOWN, straighten it, cover it with a regular sheet and go over it with an iron several times. Important: before laminating a future toy, try laminating some unnecessary piece to understand what temperature it is better to set on the iron. I laminate at medium power - then the film lays almost without wrinkles. If folds appear, then go over this place with an iron again (also through paper) and then they will almost completely come apart.
This is what we get - an almost mirror shine And, at the same time, protection from moisture and scratches. Put the iron and ironing board aside for a while and take up the scissors again.
First, we chop our sheet into small pieces, then cut it into shape. I don’t try to cut close to the outline - this has a bad effect on the strength and on the nerves of the cutter (we remember that our cardboard is very thick?). We give only a general form.
When everything is cut out, we return to the iron and go through the almost finished products again. This is necessary so that the film does not come off at the edges and grips even better.
So, the finish line! After everything is glued, laminated and cut out, all we have to do is assemble the toy. If you have a toy with clothespins, then take a glue gun and glue the clothespins.
If there is lacing, then we make holes with a hole punch (yes, it takes cardboard of this thickness) and select the lace.
If there is something with magnets, then we glue the magnets. This can be magnetic tape with an adhesive backing, or soft refrigerator magnets and double-sided tape.
Well, if this is a game with Velcro, then we will need Velcro with an adhesive backing.
You can, of course, get by with the usual ones, but in this case, you will need much more patience, effort and time, because this process looks like this:
In this case we use a glue gun. In order for the Velcro to adhere well to the base, we make notches in the places where they are attached and only then apply glue.
That's all - our toy is ready - time to give it to a happy baby and start developing while playing
Have fun and useful games!
And if, having familiarized yourself with the process, you realized that it is easier to buy such toys than to make them yourself, then you are welcome to come to my store
Come in! I will be very glad to see you