Many apartment and house owners prefer environmentally friendly finishing materials, among which paintable wallpaper deserves special attention. However, when faced with the purchase of such material, sometimes the question arises: is it possible not to paint wallpaper on the wall and ceiling, and advice from experts with photo examples will help you find the right solution.
What are the features of wallpaper for painting?
It is generally accepted that the most popular finishing coatings for walls are wallpaper, which is easy to care for and use, and their cost is affordable for everyone. Wallpaper, the color of which can be changed many times, is a real boon for those who like to change designs frequently.
If you are tired of one color, you can change it to a new one, which is quite simple and convenient. This way you can quickly update the room. Paintable wallpaper has an interesting pattern that looks very beautiful in the interior of the room. This material is mainly offered in white.
Variations of wallpaper for painting
Today, several types of wallpaper are offered, designed for further finishing. Each option is made of a different material and has its own texture:
- paper Can be two or three layers. The material is somewhat thicker than traditional wallpaper and is impregnated with a special agent that prevents the absorption of water and the spreading of the finish during operation. However, such wallpaper is characterized by a short service life, usually up to 4 years. The advantage of this type is its low price;
- glass wallpaper. They are distinguished by their high strength and are made from fiberglass, the threads of which are heated and intertwined. Such wallpaper is mainly characterized by the texture of a herringbone or cobweb. The material is durable and can last 10-15 years. Disadvantage – high price;
- non-woven. Basically, they are used when decorating apartments and houses, due to the optimal combination of price and quality. They are much more durable than paper ones, and are much cheaper than fiberglass-based wallpapers. However, it is worth considering that the top layer of this material is not strong enough and there are certain difficulties in working with this wallpaper;
- linkcrust. The main materials in production are fabric or paper, which are impregnated with components such as wax, linseed oil, and chalk. They are considered ideal for finishing with paint, but are not cheap.
https://youtu.be/paXtUlpWbRY
Is it necessary to paint wallpaper before painting?
This type of wallpaper will already look attractive after application. The room visually becomes more spacious than in reality and brighter. Therefore, a completely logical question arises: is it possible not to paint such material, but to leave it as is? It is impossible to get a definite answer to this question, which is due to a number of nuances.
If we consider glass wallpaper, they are initially quite durable, and coating with paint is not a necessary procedure. Other wallpaper options have a less practical outer layer that can wear out in a fairly short time.
If, for example, non-woven or paper-based wallpaper is not additionally protected with paint in the bedroom, then nothing bad will happen to it and it will last a long time. However, in a nursery their service life will be noticeably reduced. If this is a kitchen room or hallway, then you should not leave such wallpaper without a protective coating. Otherwise, they will quickly take on a sloppy appearance.
If after a certain time you decide to cover the wallpaper with paint, you need to take into account that over time they will become covered with dust, which will interfere with the normal application of the paint material.
In this case, the surface will need to be prepared in advance by removing dust and applying a primer.
Roller selection
Once you have decided on the coloring mixtures, you need to choose a roller suitable for the job. Its selection should be done not before buying paint, but after that. Otherwise, it may not fully match the properties of the paint, which can negatively affect the final result of the work.
It is worth noting that the correct choice of roller comes second after paint, since it determines how thinly and evenly the mixture will be distributed over the working surface.
A roller for painting any type of special wallpaper (especially for non-woven and glass wallpaper) must meet the following requirements:
- absorbs paint well;
- Wring it out well (after spinning, the coloring mixture should not flow down the roller);
- have a soft surface (old and hardened rollers with various solutions left on them are not suitable for these purposes, even if they were soaked for a long period of time before use).
In addition, the roller should have a “coat” of short pile made of faux fur.
It is best if the roller you use to paint non-woven wallpaper is new. Thus, the paint layer on the working surface will be uniform and thin, as required by existing painting technology.
The roller that is optimally suited for this type of work can be of the following types:
- roller nozzle with a length of up to 25 cm - allows for uniform application of the layer without creating visible transitions;
- a roller nozzle with a short length (no more than 10 cm) - allows you to effectively paint hard-to-reach places.
It's best if you have both options on hand.
Please note that if you prime the surface of the wallpaper before painting, then you need to buy one spare roller. The paint will adhere better to a primed base.
Related article: Warm flooring under laminate on a wooden floor with your own hands
Finishing technology
Having found out whether the wallpaper needs to be painted, you should understand the technology of the process itself. If you need to paint the walls and ceiling in a room, then paint the ceiling first, and then move on to the walls. Working with a roller at height requires some skill. If it is necessary to paint fiberglass wallpaper, then they are covered with a layer of primer in advance. Other types of this finish only need to dry completely for a few days.
A roller is used to paint the ceiling. There is no need to wet it too much. Otherwise, the coloring composition will flow down, staining not only the walls, but everything around. In places where a roller cannot be reached, you need to use a thin brush.
When diluting paint, you need to immediately prepare the required amount of liquid for the entire ceiling, since getting into the tone again will be quite problematic.
Features of painting with rollers
Paint rollers are used to apply varnish and paint to various surfaces. They can be used to level the coating, for example, to paint wallpaper on the walls or self-leveling floors. The main use of rollers is large, flat surfaces, such as ceilings, floors, walls, door leaves, etc. Rollers are not used for painting profiles, embossed and ribbed surfaces. With a roller you can apply any paint (enamel, water-based paint), varnish, adhesive compositions, as well as any liquid or liquefied compositions.
Types of rollers for painting.
The operating principle of the rollers is very simple. They first absorb the paint, and then the stored composition is applied to the surface. The application of the paint layer occurs due to the rotation of the working body. At the same time, it has a fairly wide working part, which allows you to apply a wide strip of paint at a time. When forming a layer of paint, the roller rolls over the surface, which ensures leveling and uniform distribution of paint.
The main parameters of rollers can be considered the volume of absorbed paint, the width of the stroke and the quality of the coating (layer thickness, uniformity of distribution over the area and evenness of the surface), as well as ease of use (weight, length and shape of the handle).
Painting in two colors
Many designers paint walls in different colors when decorating rooms. In this way, it is possible to perform a kind of zoning. Apartment owners themselves can use this technology, having decided in advance on the location and color of the coating. In this case, each subsequent section will be finished only after the previous one has dried. To create a clear separation of the two colors, you can use a wide spatula.
Today there are several ways to combine colors that allow you to:
- make gradient transitions;
- combine colors that are similar in shades;
- experiment with different palettes.
To hide transitions, there are special solutions, for example, moldings. These elements are made of polymers and are easily fixed to the wall and ceiling. Options for moldings made of wood or plaster are also possible, but they are preferable to use in rooms furnished with a large amount of wooden furniture.
Types of wallpaper paints
When purchasing wallpaper for painting, many believe that it doesn’t really matter what paint to cover it with. In fact, this opinion is wrong.
Based on the type of wallpaper, you need to select the appropriate paint, which can be of different types:
- water-dispersed. A distinctive feature of this coating is that it dries quickly after application, which allows repairs to be completed in the shortest possible time. The presence of such a layer on the wallpaper gives it water-repellent properties. To remove paint you will need a special composition. This paint is suitable for wallpaper based on paper and fiberglass;
- water-based. In some respects, it is similar to the previous version, but only before application: on wallpaper, the colorful material behaves completely differently. After the coating has dried, it can be removed from the surface with water without much difficulty. Therefore, it is preferable to use such paint in rooms with low humidity levels;
- latex. After the coating dries, an elastic layer is formed on the surface, which is able to withstand moisture and mechanical stress. This type of paint has a glossy appearance. The degree of gloss may vary, which determines the resistance of the wallpaper to moisture. Wallpaper protected with this coating can be washed. In addition, the paint is resistant to ultraviolet radiation, so it can be used to cover walls in sunny rooms. It can also be applied to non-woven wallpaper.
All these coatings contain water as a solvent. If the solvent is chemically active, it will penetrate the finishing material and destroy it.
To choose the desired paint color, you need to consider this point: not all ready-made compositions can satisfy customer requirements. In such situations, you can use special dyes, thanks to which you can obtain the desired shades. It is also worth understanding that depending on the lighting, the same color will look different.
How to “paint” the walls before hanging light wallpaper
It is planned to wallpaper the plasterboard. The seams between the sheets of drywall are sealed well, but they are white. The sheets of drywall themselves are gray. These seams between the sheets will be visible through light-colored wallpaper. What is the best way to “paint over” sheets of drywall to obtain white color? Are there inexpensive white paints for this that will stick wallpaper well?
Sergey. , Vetonit lr+, Shitrock, Rotband paste - after all, the wallpaper will have to be re-glued at some point! Don't save money.
But without additional putty, the wallpaper listed above will not stick? Or, on the contrary, will they be too good and cannot be removed from the drywall? The drywall is very smooth, the surface is excellent, I don’t understand why you should spread a layer of putty over it with a spatula. A roller can be used to apply a thin and even layer of white paint. How is this worse?
Sergey. , master master! drywall - who makes it? GKL, a priori, cannot be even, although it will go under wallpaper. I always put putty under the wallpaper, but use a covering primer if you find it, but it’s expensive!
Why is the word “painted over” in quotation marks? - Just take the paint and paint. The wallpaper goes well with the paint.
You can apply a thinner diluted putty with a roller.
Sergey. , as far as I know, if you putty and paint everything else, the difference in color will still be noticeable even if you prime it before painting. In my opinion, it is better to putty everything with the same solution and a thin layer.
strider1978 wrote: You can apply a thinner diluted putty with a roller.
Or a wide brush, but a wide spatula is faster.
why is the word “painted over” in quotation marks? - Just take the paint and paint. The wallpaper goes well with the paint.
Gray, Thank you! Can you recommend a type of paint? And what types of paint are undesirable here?
All the dirty plastering/putty work has been completed, everything has been primed, and there is no desire to add putty again. And there is no dust from the paint.
Related article: How to attach a mirror to a drywall wall
baikal, materials must be used for their intended purpose. Paint must be used for painting, and putty must be used for leveling. One layer of paint is ALWAYS enough for any wallpaper, even the thinnest and whitest. For special perfectionists, I especially advise you to paint it, maybe three or more times. This is better than putting putty, look at the next topic.
Paint type: moisture resistant. That's the minimum. Ideally, washable and super washable.
Almost any paint, with the possible exception of the cheapest ones, is stronger than general-purpose putties (there are very strong putties). Therefore, not the cheapest paint will solve your problems, unless, of course, you have adequately assessed the evenness of the walls.
Gray, I agree, but it’s not so easy to soak a regular ceiling one. It’s probably more important to let it polymerize properly, which takes 5-7 days.
Oleg V wrote: if, of course, you adequately assessed the evenness.
Oleg, this is already unnecessary.
Gray, I’m not imposing my opinion, but before painting the plasterboard needs to be puttied, otherwise the paint tone will not be uniform. Primer and a thin coat of finish or primer and several coats of paint. The girls putty in one room for me, not a drop of dirt and no stains. Before that, I did it myself in one room. The seams are putty, the rest is paint on a primer in three layers, before wallpapering it was not noticeable, but after gluing the stripes are noticeable if you look closely, of course. Maybe I did something wrong, I don’t know.
Expert advice
Before covering the wallpaper with colorful material, it is advisable to familiarize yourself with the recommendations of the masters:
- To prevent the paint from drying too quickly during application and to avoid the appearance of layering, it is necessary to increase the humidity level in the room by using a humidifier.
- If you plan to repeatedly repaint the wallpaper, it is better to choose a material of a higher price category.
- Gloss paint should not be used. Covering embossed walls with such a finish will not look very nice.
- Drafts must be eliminated during work.
- For your own safety, turn off the power supply and also use hand and face skin protection.
Wallpaper for further finishing is a practical option that will look harmonious in almost any interior. The tips and photo examples discussed above will help you understand whether it is possible not to paint wallpaper on the wall and ceiling. The final decision is up to you, but it is still better to listen to the recommendations of experts.
Related publications
- Read
How to putty walls with your own hands for wallpaper and painting
- Read
Wallpaper for the kitchen
- Read
Washable wallpaper for the kitchen
- Read
How to glue wallpaper correctly
- Read
How to hang wallpaper in crooked corners and adjust the pattern
- Read
Coloring Tips
There are rules that must be followed when painting wallpaper for painting. If the established technology is followed, the coloring result meets the owners’ expectations and is maintained until the next repair.
Tips for those who decide to paint the walls themselves:
- Paint should not be applied to wet wallpaper. Therefore, you need to wait until the newly pasted canvases are completely dry and only then start painting.
- Since the wallpaper is initially white, it can be painted any shade.
- When diluting paint, you must strictly follow the recommended proportions and remember the amount of pigment added. If this is not done, the next time you dilute it you will not be able to achieve the desired color, and the work will be ruined.
- To protect baseboards and ceilings from paint contamination, use masking tape.
- The canvas must be painted in one go, maintaining the same direction of movement of the roller and pressure force. Otherwise, spots and streaks will appear after the paint dries.
- You can avoid the appearance of streaks if you follow the following painting sequence: first, use a brush to go through the corners, areas near the baseboard and ceiling; then the paint is applied with a roller, moving without skipping from top to bottom.
- The next layer of paint is applied after the previous one has dried, usually two layers are sufficient.
- Wallpaper can be painted in several colors: a combination of different shades is used to give the interior an individual style. Different colors are combined on one wall or each wall is painted a different color. By skillfully using color combinations, you can hide the shortcomings of a room: for example, horizontal color stripes visually expand it, vertical stripes are used in rooms with low ceilings. A color accent on one wall is used to zone rooms in one-room apartments and studio apartments.
Read also: How to calculate the weight of a metal sheet
Wallpaper for coloring makes it possible to create a new unique interior, to embody the most daring design ideas with your own hands without significant expense and effort. If you don’t like the result, there is always the opportunity to repaint it and make it better than it was!
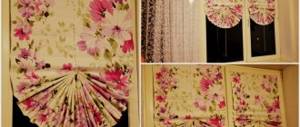
Some wallpaper requires additional painting after gluing to the wall. Such wallpapers very often help to find quite original and interesting color solutions for interior decoration.
It’s true that such products, together with the additional costs of the necessary paint and tools, including a roller for painting wallpaper, are a little more expensive. But if you have chosen this particular finishing option, then carefully read this article.
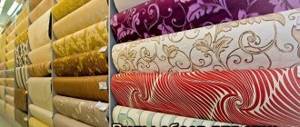
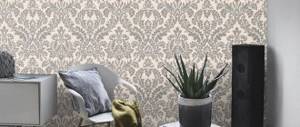
There are not many wallpapers that require additional painting yet:
1. Non-woven wallpaper, a fairly durable type of wallpaper made from non-woven material and having a foam vinyl coating on the front side.
2. Glass wallpaper, consisting of fiberglass, and usually having a texture, the patterns of which appear very impressively after painting.
Wallpaper for painting photo
Choosing a roller for painting.
In order to properly apply paint to the surface, you need a high-quality wallpaper roller. When making such a choice, you need to pay attention to the shaft itself. It is desirable that the roller be made of a homogeneous material. The length of the pile is almost always standard and ranges from 5-25 mm.
Next, let’s pay attention to how the holder is attached to the body of the wallpaper roller; it should be held tightly and comfortable for the hand. The roller should be easy to remove, but at the same time its rotation should be free. This should be maintained not only when the roller is new, but also during the painting process.
The design of the shaft can be different (disposable and collapsible, that is, with replaceable nozzles). Professionals choose a reusable wallpaper roller. If the tool is needed for a short period of time, it is better not to pay more and buy a disposable one.
Standards.
Regarding the standards by which types of rollers are distinguished:
– VP – foam roller, it is good to apply glue that dissolves in water. (We will use this option to paint our wallpaper). – VMP – purpose, painting floors. – VM – roller with a wool attachment, suitable for all types of surfaces. – VMU – corner roller, corners are painted from the inside.
Types of rollers.
They are: foam rubber, fur, polyacrylic, velor. On the website https://poremontu.ru you will learn more about each species separately.
To paint this kind of wallpaper, white or other neutral colors are often chosen. But in some cases, preference is given to canvases already painted at the factory, and then after painting such wallpaper you can get a more original, although not always expected, shade.
Tools for painting wallpaper.
To carry out the work you will need the following materials and tools:
– acrylic or water-based paint; – masking tape; – foam roller for painting wallpaper.
Wallpaper painting process.
The whole process is no different from any other painting process, that is, paint must be applied in an even layer to a dry and even wall using a roller.
Be sure to check that no bubbles appear on your wallpaper, and if you notice such places, you can remove the bubbles, carefully cut them, then smooth them and reapply a layer of paint.
Read also: What determines the melting point of metals
If repainting is required.
Before re-painting, it is necessary to clean the surface from unevenness and dirt, and also degrease it. Those places that have peeled off from the wall will need to be re-glued using PVA, and all discovered irregularities and cracks will need to be puttied.
And only after that a layer of paint is applied to the dry surface.
Tool: roller with fur coat; paint tray with squeezing mesh; brush - flute 50–80 mm; low-adhesive paper tape.
The choice of roller sometimes affects the quality of the paint more than the paint itself. For painting entire wallpaper, the best results are achieved when working with a long-nap roller. The long pile reaches the “bottom” of the relief pattern of the wallpaper, while the short pile paints only the “top” of the pattern. Foam rollers are not suitable for painting; they press air bubbles into the paint layer, which reduce the quality of painting. However, these rollers can remove paint from the “top” of the drawings. The velor coat takes little paint, and the roller itself does not fall to the “bottom” of the drawings; with this tool you can paint the top of the wallpaper relief.
To paint corners, narrow brushes - flute brushes or short (up to 50 mm) rollers are used.
Preparing for coloring. Cover and cover floors, window sills and radiators with old newspapers or plastic wrap. Apply paper tape to the baseboards (if you haven’t removed them) and the polystyrene foam cornice, wrap the heating pipes - we don’t need to paint the pipes yet. The paint does not bleed under the paper tape, and the tape itself is easily removed and leaves no marks. Remove the tape after the paint has thickened, but without waiting for it to dry completely.
For a good opaque paint, usually an expensive one, one coat of paint is enough; with cheaper paint, two coats are done. It doesn’t really matter whether the paint is imported or domestic, as long as it is real and not fake.
Wallpaper coloring. Follow the directions on the paint can. Each new layer of paint should be applied only after the previous layer has completely dried. During long breaks in work, the wall must be free of dust. If the manufacturer recommends thinning the paint to the desired thickness, usually adding 5-10% water, pour the paint into a bucket and add water. If you don’t need to dilute the paint, just mix it with a mixer or a wooden spatula. Strain the paint through a nylon stocking into a separate container. Close the lid tightly on unused paint in the can, turn the can upside down for a few seconds so that the paint inside the can plugs any holes, and store the can.
First, you need to use a flat brush or a special narrow roller to paint the upper and lower parts of the walls, along the ceiling and floor, and the corners of the walls in strips about 100 mm wide, so that the edge of the roller does not stain the corner or frieze. We paint not the entire perimeter of the wall, but in parts, in order to comply with the basic rule of a painter: the “wet edge rule.” When we apply paint, it begins to dry out; if we let it dry, then by applying new paint and partially covering the painted one, we get two layers of paint at the intersection. They are thicker than a single layer and the interlayering will stand out as a blur against the main background. If the painted edge of the first strip has not yet dried, but has already thickened, then by applying paint next to this edge and “going” onto it with a roller or brush, the tool “lifts” the old paint away from the paint surface. In order for the paint to lay down evenly, without spots of a more saturated color and not to “wind up” on the roller (brush), you need to apply a fresh strip of paint in time, mixing it with the old one - “along the wet edge”. Therefore, it is not advisable to paint stripes along the entire perimeter of the walls at once; you simply will not have time to “roll” the entire wall with a roller before the paint in the stripes begins to dry. It's best to touch up corners, outlets and switches - and other places where you can't roll a roller - as you move towards these areas. You need to paint one wall after another, if you work together, you can paint two walls at once, starting from the corner. You need to work without interruption until you have completely painted one wall. Then you can rest and paint the next one, again without interruptions.
Read also: What is a gear module?
Use a new roller or change the coat on the old one. Soak a new roller coat in warm soapy water, wring it out and rinse again with clean water - the goal is to remove loose lint. We take a roller and dip it in a trough (specially sold for working with a roller) with paint, do not completely dip it in the paint, but rather dip it. Usually the roller gets wet on one side, but there is no way to turn it with the other side - the wet edge becomes heavier. In order to wet the roller on all sides, roll it out over the mesh of the trough or over a clean sheet of linoleum, hardboard, etc. Just not on the wall! You may need to dip the roller in the paint again and roll it out again. You need to roll out until the coat of the roller is completely saturated with paint - the roller begins to “slurp”. As painting work progresses, this operation is repeated with each set of paint.
If you start painting a wall without ensuring that the roller is evenly filled with paint, you will end up with unpainted areas that will form stains after drying. Therefore, before each lifting of the roller onto the wall, it is imperative to ensure that it is evenly filled with paint. Experienced painters can do this automatically, but for now you need to practice. This technique is learned quickly.
Next, lift the paint onto the wall with a roller and roll it out evenly. Precisely evenly so that the paint layer is of the same thickness. The movements of the roller on the wall are reminiscent of drawing a huge letter W, stretched upward and narrowed at the sides. The last movement of the roller should be directed from the bottom up, this will not allow a thicker layer of paint to accumulate at the bottom of the wall. Without putting paint on the roller, turn it perpendicular to the layers of applied paint and shade them (Fig. 114). Having drawn one letter and shaded it, draw another under it, without lifting the roller and partially overlapping the painted one, do not forget about the “wet edge” rule. The paint is applied to the walls in vertical parallel stripes, from ceiling to floor, approximately 700 mm wide. The width of the strip can be narrower, the main thing is that the edge of the paint on the strip does not have time to dry, which the roller will “run over” when painting the next strip.
Rice. 114. Painting a wall with a roller
To prevent the paint from drying on the edges of the stripes, painters use a simple technique. Before starting work, water-soluble paints raise the air humidity in the room. To do this, half an hour before painting, a basin of hot water is brought into the room, the windows and doors are tightly closed, and the heating radiator is covered with a damp cloth. This increase in relative humidity allows walls to be painted in almost any order. The walls are painted without fear of the paint drying out prematurely and it lies on the base in an even layer. At the end of the work, the basin with water is taken out, and the doors and radiator are opened. The humidity in the room gradually decreases and the paint dries. However, it is important not to “overdo it” with increasing humidity; we must not forget that our wallpaper is pasted with water-soluble adhesives - it may fall off.
Having finished painting the wallpaper with the first layer, allow the paint to dry and, if necessary, paint it with a second layer using only vertical strokes, and then, after the second layer has completely dried, with a third layer using a velor roller, highlighting the design. The corners are painted with short rollers or, which is much more difficult, with flutes, without “sinking” the brush into the relief of the design. If a technology is used to remove paint from the top of a relief pattern, then the paint, without waiting for it to dry, is removed with a foam roller, frequently squeezing and washing the foam coat.
At the end of the work, the remaining paint is filtered through a nylon stocking. The roller, if it is still intended to be used with the same paint, does not need to be washed. It should be wrapped in a clean, damp rag and packed in two or three plastic bags. Washing the roller is a waste of paint; it should be washed only after completion of the work.
During subsequent repairs, you can paint the wallpaper as many times as the design allows. The last painting completely evens out the texture of the wallpaper.