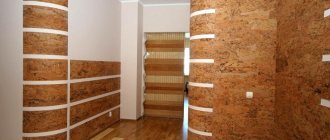
Usually, finishing the toilet is done at the end of the renovation of the entire apartment. With the right approach, you can create a design that will allow you to operate this sanitary facility without any problems and enjoy its unique appearance. Tile is the most common material for decorating a toilet, so in this article we will look at its use for this process and design options.
Material selection criteria
At the moment, the construction market is ready to offer a lot of different options for finishing walls and floors in the toilet. But the most justified and successful is still tile. In order to save time when purchasing and not make a mistake with your choice, you should study some of the nuances of this process before going to the store.
First of all, it is worth saying that purchasing this material for the toilet is justified, since it has many advantages:
- Environmentally friendly, which eliminates the release of substances harmful to human health and the environment.
- Resistant to various types of cleaning agents, which helps keep the toilet perfectly clean.
- A wide range, from which you can choose a design to suit any interior and the owner’s desires.
- Reasonable price.
But it is worth remembering the small shortcomings of the material. For example, if the tile is laid on an uneven surface, then due to uneven load it may break or crack.
Another unpleasant point is that the material itself is quite cold, so walking on it barefoot is not recommended. But this problem can be solved by installing a warm floor or laying a soft rug on top.
Before purchasing, first of all, the amount of material is calculated so as not to get into an unpleasant situation when there is not enough of it. Consumption depends not only on the size of the toilet room, but also on the installation option, of which there are quite a few. Among them we can distinguish such types as modular laying, herringbone, staggered, offset, classical and other methods.
Be sure to buy tiles with a reserve, since during cutting, transportation or installation, some units may be damaged, which will necessitate their replacement. The classic method of laying is economical; for it, only 10% more material is purchased from the main amount of tiles. For example, a diagonal layout will require a margin of 20%.
It is also important to pay attention to the appearance of the material. There should be no paint stains that do not match the design, chips, cracks, growths or deformations.
Important! It is best to immediately check the entire volume of material, so as not to later purchase additional elements due to defects.
What else can you decorate the toilet with?
Tile for the toilet room is not the only solution - besides it, there are also alternative options. Many, having become familiar with the difficulties of gluing tiles, are ready to abandon it in favor of some other material that is easier to install. To be fair, let’s look at them briefly:
- PVC panels are famous for their low cost, decent aesthetic level and quick installation, which you can easily do yourself.
- MDF panels are not an option for those who want to save money, but they are ideal for aesthetes who want to stand out and amaze others with a bathroom made in a natural wood style.
- Wallpaper is perhaps the cheapest option, but you can’t save money in this case, because you need moisture-resistant and durable. They are good for their variety of designs and ease of installation and dismantling.
Tile is considered the most practical and durable option for finishing a toilet, but other solutions are also possible, for example, wallpaper, MDF and PVC panels, and even decorative plaster.
True, all these ideas apply only to walls, but it’s difficult to come up with anything else for the floor, except ceramics. We should not forget that when finishing walls, it has many irreplaceable qualities - for example, maximum durability, reaching several decades, environmental friendliness and hygiene.
Variety of designs
Ceramic tiles are a material with which you can achieve a unique design in the toilet, not only in terms of color, but with the help of different textures, sizes, combinations of tiles and a variety of surfaces. This assortment allows you to choose a material that suits the style and can delight the owners throughout the entire period of use.
For example, a toilet with an arch, uneven walls or asymmetrical wall planes would be ideal for mosaic tiles. A small room requires finishing with light shades of material with a glossy surface. Those who carry out a modern or futuristic design can be encouraged to use dark, cold tones, but only if the toilet has sufficient space. In this case, it is important to choose the right lighting for the toilet.
Among all ceramic tiles, porcelain tiles can be distinguished separately. It is more durable and resistant to damage, so it is commonly used for flooring. But more and more often they are also used on walls. Larger sizes allow you to complete work faster. The design of the floor and half of the wall in one color looks especially relevant. The laying of porcelain stoneware material in the toilet, which imitates the surface of wood, is also original.
Textured material is new to the construction market and is often used to decorate an accent wall in a toilet or create an interesting design on the walls. Tiles with ornaments are also used.
Tiles with imitation brickwork look interesting not only for installation in the kitchen as an apron, but also in the toilet. In addition to the classic horizontal installation, vertical installation is often used. Laying tiles in neat diamond patterns on the floor complements the toilet area especially well.
Important! The material for the toilet floor should have a rough surface and not be slippery.
How to combine colors correctly?
At first glance, choosing the color of the tiles for the toilet is not at all difficult - just give preference to the shade you like, and that’s all. This is the wrong approach, since the repair will last for decades, and all this time it will remind the owner of his ridiculous haste. An ordinary bathroom can turn into a masterpiece if you choose the right finish for it. Most often it is made two-ton, and the right combination works wonders, allowing you to hide even the flaws of the builders.
Black and white
This combination of tiles in the toilet is called classic - it does not ripple and captivates with its simplicity. The proportion should be chosen based on the size of the room - black will visually reduce the area, so this option will not be suitable for very cramped rooms, but for very spacious ones it will be just right. The bottom is usually made black for psychological reliability of support, and the top, on the contrary, is lightened so that it gives a feeling of freedom. The finish can be mixed, but avoid excessive chaos, otherwise the walls will appear crooked.
Bright colors
Toilet tiles in flashy colors are much less common, but black and white are not a death sentence. Abandoning the black and white palette, preference is usually given to pastel shades, but expressive tones can also be used - however, only if there is a lot of white around. In this case, the bright tiles in the toilet play the role of an accent, just one of the details.
Choice of colors
As a rule, the toilet in most apartments occupies a very small area, which, of course, affects the choice of tile colors. The main task is to visually expand the space. Light shades help with this, but you don’t need to think that you can only create a “hospital” pure white bathroom. It's not like that at all. There are many options for decorating a toilet, including those with bright inclusions.
The floor looks great in blue or light blue. For those who are always in favor of daring decisions, we can advise decorating the floor in the toilet with red tiles, which will create the feeling of a low ceiling.
To visually expand the space, the short wall is made brighter than the rest. The same effect can be achieved if you decorate it with a wide strip of tiles in a contrasting shade. If the floor is covered with light tiles in combination with dark stripes, this is also an option for expanding the room.
For a small toilet, it is preferable to choose a beige or peach color. This color scheme goes perfectly with many shades, so it will be easy to choose a complete look. Pink, turquoise or light green also look good in the toilet.
For the most stylish design, the classic combination of black and white is often used. Laying in a checkerboard pattern or diagonally will give the interior a sophisticated elegance. For greater effect, a combination of matte and glossy tiles is used.
Tips for choosing tiles for a small toilet
In order to get high-quality decoration in a small toilet room, you need to stick to a single color scheme. This will help create a cohesive space. Large tiles without small patterns on the surface are ideal as a floor covering. Moreover, tiles in the same design are chosen for the floor and walls.
Advice! It is best to decorate a small toilet with large, plain tiles, but you can also use a large pattern.
Various drawings, relief and mosaics will help to divide the common space into zones. To increase the space, tiles with a slight relief can be used. It will also add unusualness and brightness.
To raise the ceiling, vertical installation is performed. It is best to place all decorative elements at eye level. To expand the space, preference is given to cold tones, which include blue, silver, bluish-gray or turquoise.
A stylish solution is to decorate the toilet with light tiles, but using dark grout. This is a modern option for brave individuals. If you don’t have much experience in installation, then you should invite a professional or opt for the simplest design option.
Laying that can visually change a room
Laying tiles in the toilet should be thought out even before they begin directly. There are little tricks with which you can achieve a complete transformation of space, and lack of thought, accordingly, can only aggravate everything. So what's the best thing to do?
- Toilet tiles are usually rectangular in shape and can be played with. Lay it straight, with strict lines, and the tile will “stretch” the side to which it touches with the narrow part. Diagonal finishing of the toilet can further enlarge the room.
Depending on how the slab was laid, you can visually expand the room, stretch one side or another, or raise the ceiling
- If the walls are made with numerous construction defects, have unevenness and other defects, you can try to correct the situation with the help of unevenly colored tiles in the toilet. To the observer, this pattern will appear to create a slight curvature effect.
- To prevent the ceiling from “pressing,” you can try to raise it a little using exclusively artistic methods. A good way is to use decorative elements at eye level, because the human mind perceives a room divided vertically as consisting of equal parts. Another method is to use narrow vertical dividing strips. Finally, vertical orientation of toilet tiles will lengthen the height.
You can raise the ceiling in the toilet using vertical strips or tiles with a vertical orientation
- There are even more ways to expand a narrow space. The first is to use a mosaic or simply the smallest possible tiles. Cool colors would also be an excellent solution. In addition, various narrow decorative decorations under the ceiling in bright colors will come in handy. An abundance of glossy surfaces will help expand the space.
Preparatory stage
In the toilet, as in any other room, careful preparation is required before finishing work. It's worth starting from the floor. Since there are risers in this room, you definitely need to think about waterproofing. Regarding the walls, I would like to say that all old paint and whitewash must be removed. To carry out this process you will need a small hatchet, water and a spatula. After removing the coating, you need to carefully remove dust and dirt and prime the surface.
To carry out further work you will need some tools. This is a container for mixing the mortar, a building level, a lath, a tape measure, a tile cutter, cords, a spatula, a drill with a mixer attachment, crosses for even laying of tiles, and a clean rag. This list is not exhaustive and can always be supplemented with something else or changed, it all depends on the scope of work and the desired result.
Features of repairs
Apartment renovation inevitably poses the task of changing common areas, such as the kitchen, bath, and toilet. It is especially important to keep these rooms clean and tidy, since, on the one hand, they do not have a specific owner, and on the other hand, these are the most visited rooms.
Nowadays, the toilet room is most often equipped with a toilet and sink, although there are houses in which the bathroom is combined. The toilet room also has a bath or shower. Let's consider the most common type of toilet in an apartment with a separate bathroom.
To renovate the toilet, you need to imagine what you want the room to look like in your apartment. As a rule, the toilet is the smallest room in the apartment, but with skillful design you can visually expand its area and raise the ceiling.
Repairs should begin with planning the work. First, you need to consider leveling the walls, then puttying and painting the ceiling, painting the walls, replacing rusty pipes with new ones, toilets and sinks, doors, installing lighting fixtures and shelves, and finally repairing the floor. The walls can be partially covered with waterproof wallpaper or tiles. Many housewives still prefer to cover their floors with tiles.
It must be said that modern designers have come up with an unusual toilet for small apartments. The sink sits directly on the cistern and the soapy water flows into the toilet. The faucet has a flexible hose shower that can turn a toilet into a bidet. By the way, if the toilet area is quite large, you should think about installing a bidet in it.
If there is a niche in the toilet, for example, with a heater, then below the heater you can place another cabinet for storing toilet paper and other necessary things. Another shelf can be placed above the toilet cistern, but the space there is still empty. For small toilets, we recommend bright lighting - it will visually increase the volume of the room.
Read more: Options for finishing the ceiling in the kitchen: 14 materials, more than 50 photos
If you are renovating a toilet in a small apartment, you should choose a finish in light colors: white, blue, silver, pink, beige. You may also need terracotta mirror tiles. It is better suited for large toilet rooms. If you are very attracted to the idea of using bright colors, it is better to take this into account when choosing plumbing fixtures - buy a bright toilet and sink.
If the toilet has a small area, as is usually the case in mass-built houses, you should not use large patterns when decorating the toilet room. If you still want wallpaper with a pattern, it is better that it be vertical, which will visually increase the height of the ceiling. If, on the contrary, the ceiling is too high compared to the width of the toilet, lay out the walls to the height of your height. For a narrow toilet, it is better to choose quadrangular materials and place them with the long side towards the narrowest wall.
Laying tiles on the floor
The beginning of renovation is always laying tiles on the floor. If the toilet has already been installed in advance, the tiles will have to be trimmed to smoothly go around it. In this case, we proceed according to the following algorithm:
- Mark the center of the floor and draw a line.
- We glue the whole tile, starting from the door to the parallel wall.
This will ensure an even distribution of the trimmed parts. ?Important! During work, be sure to use a building level to track the horizontalness of the resulting coating. - If the floor in the toilet has differences, then before laying the tiles, a concrete screed is made to level it.
- When laying, a gap of 2 mm is left between the tiles to ensure a neat design. You can regulate and maintain its uniformity using plastic crosses.
- After completely laying the tiles on the toilet floor, they should dry completely within 2 days. Then you can continue with the repairs.
Laying tiles on the walls
Parts are laid on the walls, starting from the door and from the side walls. The renovation begins with the installation of the first tile. Since the floor is already level, the tiles are placed on it and laid in the first row from the door. Be sure to check the top edge for horizontalness.
Laying the rows, we reach the ceiling slope on the door. At this stage, it is important to bring the seam of the tiles together with the side walls. You need to select the end of the tile on the wall, and attach the rail horizontally to the door so that it is the bottom of the element that will be installed above the door.
The end wall can be finished in the center, directing the tiles in different directions. But you can glue the tiles towards the riser, starting from an empty corner. Considering that the riser will be hidden in any case, the trim will not be visible. The result is a beautiful, neat design with less tile.
Important! After finishing, you need to wait a few days for it to dry completely.

