Any creative person always wants to decorate their home using available materials. If you love wood and simply adore creating beautiful interior items from it, then crafts from wood cuts will be an excellent solution to the problem.
With the help of such beautiful products, created with your own hands, you can perfectly decorate your home, create additional coziness and comfort.
At the same time, you need to remember that such a building element is environmentally friendly and safe, which is especially important for families with children.
What products can be made
Beautiful products can be created using not only saw cuts, but also knots that may remain after construction work. You can also use dried branches.
They can be easily decorated and created different products. Knots and irregularities add a distinct style, and the cut of the wood will add extra character.
Original country furniture
To decorate the interior of your dacha, you can use various interior items. Furniture made from natural materials is very popular today.
Cutting down a craft tree for a summer residence will be an excellent solution to such a problem. You can create a real masterpiece that can serve you for more than just one decade. You can create beautiful tables or stools.
In this case, it is better to use pine trees, as they are more durable and patterned. To create a beautiful object you will need to use all your imagination and talents.
We recommend reading:
Crafts from isolon - a manufacturing master class, nuances of working with the material and step-by-step instructions on how to make a craft (85 photos)
- Crafts from toothpicks - interesting ideas, manufacturing examples and the best crafts for children (120 photos)
Crafts made from jute - 95 photos, diagrams, patterns and beautiful design options for crafts
Examples
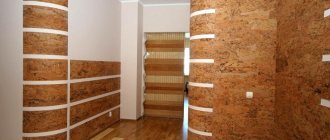
Sometimes it is difficult to find a suitable design idea using a specific material. After all, not everyone has such a rich imagination and fantasy. Therefore, below are several photo examples of how wood trim can look in different interiors and with different arrangements of this decor. At the same time, in some interiors only part of the wall is finished in this way, in others it is completely covered with wood, and sometimes the decoration is a hanging panel.
DIY crafts from saw cuts
Such works of art can delight everyone, the main thing is to follow some tips.
Wood is a fire hazardous material, so it is better to strengthen it after manufacturing using a special product.
To create the desired craft, use any available construction tools.
Recommendations for creating wooden crafts
If you want to decorate your interior, then you should listen to some recommendations, such as:
- When creating, you can use any tree species. Branches and twigs will do. They can be found both in the forest and in various parks.
- Next, the wood is thoroughly cleaned of various imperfections. A metal brush is used for this.
- Afterwards you will need to wash the product thoroughly and then dry it.
- When deciding what form the product will be, you need to take into account exactly how it will be used subsequently.
- Next, a recess is drilled.
- After completion of the work, it will be necessary to carry out finishing activities and cover the surface with a special varnish. This will not only improve the appearance, but also protect the surface from the effects of the external environment on it.
- Any product made from wooden saw cuts must be made taking into account these recommendations.
Wood flooring
Since wood is often used as a flooring material, log houses have also found their place here. The idea is quite interesting, the appearance of the final result will also not leave anyone indifferent.
It is important to note that the branches used to cover the floor are absolutely not suitable for log houses. Here the design will be carried out using larger wood elements.
Please note that the thickness of the cut for the flooring will play a significant role, because the constant load in terms of furniture and other factors must be calculated. One more thing - do not use soft wood, because it simply may not withstand constant load.
Article on the topic: Decorative street lamps: cozy lighting for the garden and cottage (35 photos)
`
The process of finishing the floor itself will be a little more complicated than, for example, walls. It is lined with ceramic tiles, and a special solution is used during installation. After the elements are installed, workers perform grinding so that in the end we can get a perfectly smooth and beautiful surface.
The final stage is treatment with varnish, which will prevent the floor from becoming dirty in the future.
Use in the garden
Wood is a durable and reliable material that is actively used in the modern construction process. It can be perfectly combined with various metals, plastics or glass inserts.
We recommend reading:
Foam crafts - how to make decorations and toys? Ideas and options for making crafts from foam plastic (110 photos)
Crafts from cereals - 75 photos of the most beautiful crafts from cereals for children and adults
Crafts from natural materials - a step-by-step master class on creating original crafts for children and adults (100 photos)
DIY crafts made from saw cuts can be supplemented with a wide variety of materials available to you. In the garden, with their help, you can create beautiful and original paths that have not only decorative, but also practical use.
Initially, wood is processed using special means necessary to prevent corrosion. Afterwards the products are stacked in the required sequence.
In this case, a sand base is installed to make the product more durable. Such paths will last a long time, while they have an attractive appearance.
Step-by-step master classes on making crafts
Beautiful natural crafts can be made from logs, solid wood, branches of any thickness. From properly processed wood cuts, you can make beautiful decor for the street or indoors, where each element will be unique. There are many simple master classes that even a child can handle. To make complex decor from cut wood elements you will need glue, a jigsaw, and additional materials for finishing and decoration.
Birds and animals
Crafts for the garden and home in the form of birds and animals are very easy to make, and they will look original. To make an owl with an owlet you will only need a few wooden rings of different diameters, a hacksaw and beads for the eyes. The saw cuts can be glued or nailed to each other. This decor is more likely to be outdoor, so the place where the birds will be fixed will be an ordinary log.
We take two saw cuts, with a diameter of 20 and 14 cm, and fix them to the base in a vertical position. We prepare 4 circles of smaller diameter for the eyes and nail them at the top of the larger circles. We saw 2 rings in half and made wings. It is better not to grind the surface of the circles for making a family of owls. With natural bark the craft looks original.
For miniature crafts, thin cuts of branches and logs are suitable. To make a pair of bunnies you will need 4 identical rings, 2 more identical, but slightly smaller, and a pair for each oblique cut for the ears and paws. Place a circle between two large elements and fix it - this will be the head. Add ears, paws and bunnies are ready.
Useful crafts for the kitchen
The key to individual style at home is kitchen utensils made of wood, made by yourself. In addition to the decorative purpose of decorating a table or tabletop, they can perform the direct functions of cutlery and serve as coasters for hot dishes.
To make a kitchen board you will need a wide cross section of wood. It just needs to be sanded and can be used for its intended purpose. In this case, it is not recommended to apply protective mixtures, varnish, or tint. A hot stand can be made in the same way.
Making a fruit and dessert plate will be a little more challenging. It is necessary to select a wide circle of wood, make a recess and sand all the rough edges well.
Read also What vitamins are in red cabbage
If you use coniferous wood to make coasters and plates, then when heated it will release essential oils that awaken the appetite and fill the room with a stunning aroma.
Bird feeders
The feeder made from prefabricated birch cuts turns out to be especially beautiful. You can also make a winter house for birds from soft tree stumps, large rectangular cuts and dense bark. The last option is the simplest and least labor-intensive. It is necessary to create all the constituent elements according to the diagram and connect them in a certain sequence and attach them to the base.
Branches of different heights and longitudinal sections will make a beautiful and durable autumn feeder. It is necessary to prepare the base and nail blanks of different sizes to it along the enclosing edge in a vertical position, simulating a fence. The roof can be made from round polished elements, birch bark, and pine branches.
Beautiful flowerpots made of thick sawn wood for flower beds
An excellent idea for making an original flower bed from sawn wood will help to successfully decorate the area, make it fabulous and interesting. This craft will look original anywhere in the garden or yard. A flower garden made of natural material does not require additional decor.
For the future container, it is necessary to choose a healthy part of the tree that is not subject to rotting, without signs of insect damage, otherwise the pests will ruin the flowerbed, and subsequently the plants. It is better not to use oak logs, since cutting a notch will be difficult at home.
Deciding on the size of the flowerpot is easy. It is necessary to step back 5 cm from the edge of the stump and draw an even line around the circumference. You can start making the recess. You can do this in several ways:
- Drill several holes in the middle of the stump and fill it with saltpeter. After a few weeks, a depression forms. Its size will be quite enough for planting flowers.
- Cut with a chainsaw. Make a cut along the perimeter of the circle. Loose pieces are removed using a chisel.
- Light a fire on the surface of the block and wait until the middle burns out. During operation, you must ensure that the fire is distributed evenly.
- Make several deep holes around the perimeter using a drill and knock out the core with a hoe or chisel.
Crafts for the New Year
New Year's toys made from small branches will become an original holiday decoration. The easiest way is to cut the blanks into rings without removing the bark, and decorate the sections with any colors. You can also apply beautiful patterns with a burning device.
If necessary, the shape of the cuts can be adjusted and adjusted to the desired silhouette. From several pieces you can make funny toys, snowmen, flowers, animals. Any Christmas tree decorations can be supplemented with decorative material and various stickers.
To make a Christmas tree from slices for the New Year, you will need to prepare a triangular shape. Now you need to glue wooden slats around the perimeter to fix the round elements and create an even contour. We lay out beautifully round pieces of different sizes, trying not to leave any voids. Fill the assembled tree with epoxy resin and leave to dry. After drying, separate the mold and retaining slats and polish.
Panels from saw cuts
An original wall decoration can be made from one specific type of wood or you can combine several at once. There are no specific strict frameworks that must be adhered to when creating panels. You can use any ideas in your composition, taking into account personal preferences.
It will not be possible to get a specific pattern on the wall from saw cuts, but you can give round elements a clear shape of a square, circle, or abstract figure. You need to start making crafts with a frame. It is better to use natural materials or their imitation. The saw cuts can simply be glued to the wall, if there are few of them and the weight is light, or they can be screwed with self-tapping screws to the frame bars or onto a special base.
After all the elements are laid out and fixed, the panel must be treated with drying oil and varnished. The gaps between the cuts are filled with a transparent gluing solution or painted over.
To hide the holes left after the screws, you need to drive wooden wedges into them. The remainder is cut flush and sanded. The resulting spot will resemble the location of a cut knot.
Making a clock
To make a natural and useful craft, you will need a minimum of materials. The clock mechanism itself, a neat cut of wood of any shape, a drill, a burning machine, paints and a brush. The work is as follows:
- Carefully process the cut using a grinding machine.
- We drill a hole in the center that is suitable in diameter for fastening the clock mechanism.
- We paint the cut with light paint, leaving one edge in its natural color.
- We burn or paste the numbers.
- Using a burner we make a random ornament.
- We install the clock mechanism.
Design of mirrors and photo frames
To create a frame with your own hands, you need to cut many small pieces of wood in advance. Place the mirror on the plywood and trace along the outline with a pencil. We increase the resulting circle by 9 cm and mark it with a line. We cut out the base with a jigsaw and sand the edges. On the reverse side of the circle we place a plywood strip for further fastening the mirror to the wall.
Read also Wood and gas stove
Now you can move on to decorating. We paint the marked part along the edge of the circle in a color suitable for the interior and glue the cuts. The frame will look more impressive if you combine elements of different sizes. When the composition dries, we smear the inner field with liquid nails and glue the mirror.
Design of paths in a summer cottage
A path made from saw cuts at the dacha will become a real design miracle. It looks beautiful and original, is durable and practical, despite the porosity of the natural material. With good protection and proper care it will last quite a long time.
Work on the manufacture of paths begins with the preparation of wood elements. It is better to give preference to hardwoods such as oak, beech, and ash. We saw the logs into pieces, 10-15 cm thick, of strictly the same thickness. Then we impregnate them with a protective composition. This can be copper sulfate, drying oil and other means.
Now let's move on to route markings. We drive in the pegs and stretch the rope between them. We dig a shallow trench and line it with film, pour a layer of crushed stone on top. We compact everything and level it. If desired, you can make borders from timber, sheet iron, or brick.
We fill the prepared trench with sand and fill it with water for better shrinkage. Wooden cuts are laid in any form. The main thing is that they are as close to each other as possible. The voids can be filled with sand or earth and planted with green grass.
We create pieces of furniture
Beautiful furniture for a country house or bathhouse can be made from longitudinal and transverse cuts of large and small sizes. The easiest way is to make a table from such material. First of all, you need to prepare a detailed drawing and select a suitable blank for the countertop. It’s easier to use a single piece, and then make furniture of a suitable shape from it.
We begin work by preparing the material - removing the bark, eliminating irregularities, cleaning the cut with a metal brush and a grinding machine. This stage directly affects the quality of the future product. Using furniture screws, we create a load-bearing part and fasten all components with glue. If there are pores or chips, they must be filled with epoxy resin and repaired. Then we install sides along the edges of the surface, fill it with resin and leave to dry. After a few days, we remove the excess parts and sand the surface of the table from the saw cut.
Original crafts from saw cuts for children
If you need to make something unusual for your child in kindergarten, then a beautiful vase made from saw cuts is a better choice.
For this you will need:
- A plastic pot to create the base.
- Various pieces of wood.
- The use of varnish, glue, scissors and dark paper is simply necessary.
The first step is to cut all the branches to a certain length. They should be exactly two centimeters higher than the existing container. The container is carefully coated with glue and wrapped in paper.
We recommend reading:
Wood crafts - the best craft options, instructions for beginners and ideas for making wooden crafts (85 photos)
- Fabric crafts - the best ideas and the most practical crafts and toys made from various types of fabrics
Sponge crafts: tips for choosing ideas and unusual ways to use sponges (75 photos and videos)
Next, the branches are attached to the paper. From below, all the sticks should be at the same level so that the product stands firmly on a flat surface.
You can decorate the product with various colors and additional accessories. Such crafts from branches cut down are suitable both for children in kindergarten and for your home.
Panel
A panel made from wood cuts is a kind of abstraction, made from blanks with different shades, sizes and textures. This is not just a decoration, it can be called a unique painting, a masterpiece with a clearly defined focus.
It is desirable that it be made from unrefined material, which is characterized by natural defects - the presence of knots and cracks. The product will be more expressive if the bark is left on it. This composition requires additional elements in the form of twigs, pieces of wood or stumps.
In this case, wood cuts for decoration are processed only on the side that will be attached to the base. You must immediately decide on the configuration of the painting and create a sketch. The boundaries of the substrate on which the dies are fixed can also serve as the contours of the future abstraction. The finished work is often framed, but this is only if it has regular, even shapes. Then the panel is attached to the wall. When choosing an option with edging, it should be made neutral.
Where to get ideas for crafts
Not everyone can immediately imagine what exactly they want to get in the end. Wooden saw cuts can often be found around your home or purchased at a hardware store.
They are quite inexpensive, so creating a practical and beautiful product from them is not difficult. However, finding an idea can be difficult.
You can use the Internet and find many photos of crafts made from saw cuts.
For every taste and color, everyone will be able to find exactly what interests them most.
Anyone can create the desired product, and there is no need to have certain knowledge and skills.
Even a beginner can cope with such a task in no time. The main thing is to believe in yourself and start bringing your ideas to life right now.
Anyone can make a beautiful craft from wooden saw cuts or branches, the main thing is to try. Moreover, the cost of such materials is affordable for every person.
Simple crafts
In order to make your first simple wood craft with your own hands, you first need to read the simple instructions on how to make it. To cut wood you need a tool. You can, of course, use a hand tool, but the cut will result in an uneven surface. It is better to use an electric tool: a jigsaw or a circular saw.
The cut pieces are processed with sandpaper to eliminate unevenness. You can immediately start making something from the prepared ingredients.
Small saws are primarily used to make stands. They can be glued together in groups. Such boards are used as stands for mugs, teapots and other hot objects.
A large number of sawn tree trunks can be used to decorate rooms and create interior items. For example, you can use the cut to make a base for a clock, candlesticks, decorate paintings, decorate walls, and make picture frames.
Cut tree sections can be used as blanks for further creativity. They are very successful in making a variety of toys and animal figurines (all kinds of foxes, ducks, bears, dogs, birds).
The scope for creativity is limitless. These products are best made with children. Making small items is also possible at home and in apartments. At the same time, the child will develop useful skills.
Photos of crafts from saw cuts
0

