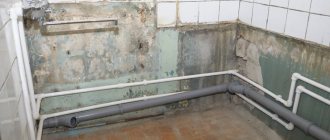
No matter how high-quality the kitchen facade is, sooner or later it loses its attractiveness. And in this situation, either complete replacement of damaged and worn elements, or do-it-yourself restoration of kitchen facades will help.
We will talk about the methods of such restoration in this article.
Elements of the facade during restoration
Restoring a wooden kitchen by professionals or with your own hands: pros and cons
Luxury kitchen furniture is made from solid wood and is quite expensive. In affordable kitchen sets, only the façade elements are usually made of natural wood. For the production of furniture, different types of wood are used: oak, maple, teak, walnut, beech. Proper care will significantly extend the life of this furniture set. And if small chips, cracks, abrasions and other damage appear, you can restore the kitchen made of wood.
In some cases, you can restore a kitchen set yourself, but it is still better to entrust luxury or antique furniture to professional craftsmen.
Advantages of a restoration workshop:
- High quality. You should not experiment with antique valuables. Haste, lack of experience and practice can only do harm. It is better to entrust the restoration of antique furniture to professionals. Only a skilled craftsman will be able to recreate the original forms and restore the coating of all items of the set.
- Saving time and effort . At first glance, it seems that restoring a wooden kitchen is an easy and quick procedure. Even a master will need several weeks to restore an antique sideboard. Now imagine how many evenings and weekends you will spend on this difficult task.
- Complex logistics. To remove furniture from the apartment, first each piece of furniture (cabinets, sideboard, table) must be disassembled. Then you need to think about the delivery method to the restoration workshop. Transporting furniture is always an additional expense.
If your house does not have a freight elevator, you will have to look for a team of loaders and pay for the services of a freight taxi. Or you can do it simpler - entrust the chores of delivering and transporting furniture to the workshop staff. As a rule, in reputable companies, all additional services are included in the price of the main service.
- Place . For any restoration work, you will need a spacious, isolated room, since in the process of restoring old furniture you will definitely encounter sanding dust and pungent odors from paints and varnishes.
It is better to carry out restoration work in a non-residential premises: a garage, utility room, on a glazed loggia or balcony.
If you live in a private house, then if the weather is favorable, you can do furniture restoration in the yard. In this case, you should pay attention to the recommendations for the use of paints and varnishes. For each type of coating, it is necessary to observe the optimal conditions described in the instructions, take into account the temperature and humidity of the air, and the reaction of the coating to direct sunlight.
Recommended articles on the topic:
- Furniture glue: its varieties and tips for choosing
- How to protect wood from negative influences
- Equipment for painting furniture: how to choose and not make a mistake
But if it is not possible to allocate a separate room for the restoration of a wooden kitchen, then restoration work can be carried out directly in the living room or kitchen. To avoid contamination of other interior elements with stains and dust, you need to carry out preliminary preparations - remove carpets and textiles from the room, remove curtains from windows, cover furniture that does not need repair with protective film, and cover the entire floor with protective material.
Replacement of the internal part of solid wood facades
You can update kitchen furniture in a classic style, the doors of which are made of solid wood or framed MDF, by replacing the internal part of the facade (panels). Following new trends in the style of premises, glass in any variations can be considered an ideal option for replacing the central part of the facade: stained glass, sandblasted patterns, glass with sprockets. Artificial rattan inserts are also always relevant.
If classic furniture has lost its aesthetics or you want to make it more modern, pay attention to the possibility of replacing the panels with more sophisticated options. This is especially true for upper cabinets with glass, which are so popular in new modern kitchens.
Time frame for restoring a wooden kitchen with your own hands
If you decide to start restoring old furniture at home, then you need to be patient. Restoring a wooden kitchen is a long process and can take several weeks. It is necessary to calculate the time not only for a large amount of painstaking work, but also for drying the paints and varnishes. To restore furniture you will have to use putty, primer, paint or varnish. Before proceeding to the next stage of work, you must make sure that the previous layer of coating has dried. Drying usually takes from several hours to one day.
If you have little free time or restoration needs to be carried out in a short time, then carefully plan all technological stages. Decorative elements, putty, paints and varnishes, polishing compounds, tools for work must be purchased in advance so as not to waste time later searching for the necessary goods.
When choosing paint and varnish compositions, pay attention to the drying time. It is better to give preference to quick-drying varnishes and water-based paints. Alkyd enamels will take longer to dry. Among quick-drying coatings, Danish oil is the leader; each layer dries within 30 minutes. It is widely used to protect wood from moisture. This coating does not require special preliminary preparation of the surface: primer, interlayer sanding.
Material on the topic: Restoration materials for wood: types and methods of application
Replacement of fittings during the restoration of facades
New mechanisms in the kitchen will make the furniture more convenient and modern. Smooth closing of the doors will extend the life of the frames, and silent mechanisms will allow the housewife to feel comfortable in the kitchen.
If it is necessary to replace fittings, the advantages of professional restoration become clear, because specialists will be able to assess the condition of the mechanisms, as well as repair or replace some parts. At the same time, you will not need to run around stores and construction markets in search of the necessary mechanisms, and you will not need to independently install complex modern products of functional fittings.
For example, hinges with closers have a deeper bowl for attaching to the facade, and not everyone can make a hole of the required size at home. New retractable systems require proper installation so that the fronts of the drawers do not rub against each other; installation must be precise down to the millimeter. Only master assemblers can install new functional fittings with high quality.
Materials and tools for restoring a wooden kitchen
To restore a wooden kitchen you will need:
- wooden blocks or boards (for replacing legs and panels);
- varnish;
- polishing compounds;
- dye;
- putty;
- self-tapping screws (screw elements for fastening parts);
- metal washers.
In any case, restoring a wooden kitchen will cost much less than purchasing new furniture.
To replace upholstery you need to buy:
- fabric (it can be drape, flock, matting, tapestry, artificial velvet, eco-leather);
- foam rubber, synthetic winterizer;
- universal glue.
For minor cosmetic repairs to furniture at home, you can use scrap materials.
If you have an allergic reaction to the strong odors of paints and varnishes, then it is better to choose a water-based varnish for coating. Finishing materials and tools for work are selected individually in each individual case.
In addition to all of the above, to restore a wooden kitchen you will need sheets of sandpaper of various grits, a spatula, brushes and rollers of different widths.
To manually polish a coffee table or stool with high quality, it will take more than one hour.
Craftsmen use an eccentric (orbital) sander to process wooden surfaces. In order to optimize and speed up the process of restoration work, it is recommended to purchase or rent a screwdriver, jigsaw, or hair dryer. It is more convenient to remove dust after sanding with a special construction vacuum cleaner.
Buying power tools is only beneficial if you regularly restore and renew old wooden furniture. If you do decide to purchase a set of power tools, it may come in handy for other repair work.
When only one piece of furniture needs to be updated, it is more advisable to borrow power tools from friends or rent them. The quality of the work done depends on the functionality of the tools. Facade elements processed at a professional level look much more beautiful and neat.
Material on the topic: Restoration of wooden furniture: necessary materials, special technologies and recommendations of specialists
Successive stages of wood kitchen restoration
- We dismantle furniture and remove fittings.
Before starting restoration work, it is better to disassemble the furniture into individual elements. This will make it easier to handle the most difficult to reach places. If you decide to renovate a wooden kitchen, you just need to remove the fittings and hanging doors and remove the drawers. The frame should be completely disassembled only when major restoration repairs are required. It is better to leave the glued elements assembled.
Before starting work, take a photograph of the piece of furniture and the attachment points of all its parts. Place the fasteners in small bags and label their purpose. This will make it easier for you to assemble the parts after restoration.
- We remove the old paintwork.
You can remove old paint or varnish from a wooden surface in one of three ways: using a hair dryer, sanding the wood with sandpaper, or using a special solvent-based remover. The choice of method depends on your preferences. In difficult cases, you can combine all the options - heat the coating layer with a hair dryer, scrape off the softened paint with a spatula, and then sand the surface with sandpaper.
Be careful when using a hair dryer to avoid burning the wood under the paintwork.
Do not forget about personal protective equipment - be sure to carry out all restoration work wearing gloves, safety glasses and a respirator. Washing can only be done in a well-ventilated area.
Let's take a closer look at how to properly remove old paintwork.
- We eliminate external damage.
Scratches, cracks and chips on furniture can be disguised using special products. It is better to fill up voluminous damage with a special wood putty, which should be applied in several layers. Small cracks and scratches can be filled with furniture wax.
To make working with wax easier, use a wax melter or a portable gas burner. If you don't have these tools, you can melt the wax on the stove or using a hair dryer. Small scratches are well masked by furniture touches. To ensure that the restored areas do not differ from the general background, carefully select the color. It should be close to the shade of the wood from which the furniture is made. The texture of wood can be recreated using a furniture marker.
- Getting ready for the final coating.
Before applying a new paint coating, the wooden surface must be carefully leveled and excess wax and putty must be removed. For this you will need fine-grained sandpaper marked P180–240.
After sanding, sanding dust remains on the wood, which can be removed with a damp soft cloth and then dry the surface well. Before applying some paints and varnishes, it must be primed (apply a layer of primer).
- Apply the finishing coat.
What the new look of your wooden kitchen will be depends on the chosen paint and varnish material. Water-based clear varnishes and wood oils preserve the natural texture and color of wood. Alkyd and polyurethane paints and varnishes give wood a yellow tint. You can imitate expensive species by tinting with a glazing composition: colored varnish, stain, oil, wax.
A kitchen made of wood, painted in a certain color, looks original. In specialized stores you will find colored paints and enamels for furniture, as well as white bases that can be tinted in any shade of your choice. Please note that many varnishes and stains raise the wood pile after applying the first layer, so sanding between layers is required.
Without a certain skill, it is difficult to avoid small smudges of paint and varnish. Apply the finishing coat first to the interior furniture elements, back and side walls. Always coat the front and countertops last.
- We install the fittings.
After restoring a wooden kitchen, you can install old fittings (drawer guides, latches, handles, hooks, hinges) or replace them with new ones. It all depends on the condition of the parts and your desire.
Material on the topic: Patination of furniture: varieties and techniques
How to restore a wooden kitchen facade: general rules
A kitchen made of natural wood looks luxurious, but requires compliance with certain operating conditions:
- You can remove dirt from solid wood kitchen units only with soft napkins slightly moistened with soapy water. Solvents and abrasive cleaning agents must not be used under any circumstances.
- The humidity in the room should not be higher than 70%.
- Minor damage and minor scratches should be repaired as soon as possible.
- To eliminate scratches and cracks on the facades of solid wood furniture, use melted wax. Chips can be smoothed out with wood putty and coated with furniture varnish.
If you decide to do a complete restoration of the kitchen facades made of natural wood, you will have to completely replace the varnish coating. Furniture restoration is carried out in the following sequence:
- Dismantle the facades, remove all fittings from them.
- Sand the surfaces thoroughly with fine-grit sandpaper. Before applying a new coat, completely remove the old varnish. This can be difficult if there are relief patterns or indentations on the surface.
- Remove varnish shavings and sawdust after sanding using a damp sponge or cloth. Dry the façade element thoroughly.
- Prime the dry surface, wait until the composition dries. Then apply a second coat of primer and dry again.
- It is better to apply the varnish with a brush or roller in several layers. Each subsequent layer of varnish should be thinner than the previous one. It usually takes at least a day to dry paints and varnishes. The room in which restoration is carried out must be well ventilated.
You can completely change the appearance of your kitchen set, making it more modern and stylish by painting it with enamel or furniture paint.
In what cases is facade restoration required?
Many housewives, after several years of decent use of kitchen furniture, dream of somehow updating their main “office”. But is it always worth changing the entire set or facades, or can you just add some polish to the outside?
If your kitchen with facades made of wood veneer or solid wood has already served for more than 10 years, but you cannot be called a fan of retro furniture and aged cabinets, then most likely you will want to update the set.
Restoring facades made of veneer or solid wood will help not only recreate the original beauty of the furniture, but also refresh the entire room. If you turn to professionals for help, and at the same time start renovating the room, then in just a couple of weeks you can get an almost new kitchen.
What you need to know about restoring straight facades during the restoration of a wooden kitchen
Let's look at the step-by-step restoration of straight facades. It is more convenient to work with surfaces located horizontally, so first remove all the facades from the furniture frame. To simplify the process of assembling furniture, do not forget to make a mark on the inside of each element indicating its location relative to the frame. Also remove all accessories (handles and hinges), put them in bags and label their purpose.
Wash and dry all removed facades thoroughly.
Any damage (chips, cracks, scratches) can be repaired using various restoration materials.
Restoration of solid wood kitchen facades involves covering them with self-adhesive film or paints and varnishes.
Varnishing is performed in the following sequence:
- First, fill the surface with cracks with a special putty for wood, and then sand it.
- Stains on the façade can be removed by sanding. Use coarse or medium grit sandpaper first and then fine grit sandpaper.
- Remove sanding dust with a damp cloth and dry the surface.
- Degrease the wood, apply a transparent primer or stain to it and dry thoroughly.
- Cover the facade with two or three layers of varnish, reducing the amount of tinting component with each layer. The last layer should be transparent.
- When the varnish has dried, install the fronts on the furniture frame and attach the fittings.
Restoring and painting the facade with bright paint can completely change the look of your wooden kitchen. Painting is carried out according to the following algorithm: degreasing – sanding – repeated degreasing – staining – painting. If desired, you can use a stencil to apply drawings to the surface of the façade elements.
Sometimes the wood on the facade swells. At the initial stage of restoration, it is necessary to perform jointing - leveling the wooden surface manually or on a machine. Sometimes cabinet doors become warped from excess moisture and do not close. You can carefully trim them, removing excess. If the wood has dried out and there is a gap between the doors, level the surface of each door, and then glue the trim or strip.
If a painted or enameled façade is being restored, the old coating layer must first be removed. This can be done using a solvent, a special remover, or mechanically (sandpaper).
Material on the topic: Decorative furniture fittings: what they include and how to choose them correctly
A simple way to restore furniture facades from MDF
Hello, dear readers and DIYers!
As you all know very well, almost all modern furniture is made from sheet composite materials.
Most often, the body of a cabinet or hanging cabinet is made of laminated chipboard, and the facades and countertops are made of MDF. MDF lends itself perfectly to milling and other types of processing. As a finishing coating for facades, either paint or PVC plastic film is used. Using film, you can create an imitation of the texture of wood, stone, etc. However, the use of such facades (covered with film) in very harsh kitchen conditions often leads to peeling and cracking of the coating. At the same time, the shape of the facades does not change.
In this article, the author of the YouTube channel “Vladimir Natynchik” will tell you how you can restore kitchen facades from MDF.
The proposed method is very simple, and almost anyone can handle it.
Materials. — Automotive putty — Acrylic enamel, varnish — Turpentine, acetone, or gasoline — Plastic film, masking tape — Sandpaper.
Tools used by the author. — Spray gun — Screwdriver, bits. Manufacturing process. So, Vladimir’s kitchen facades gradually fell into disrepair, and the PVC film began to peel off.
On upper cabinets it can be removed almost effortlessly. The MDF facades themselves were not damaged and did not swell.
First of all, the master unscrews the handle from the door of the lower tier.
Then he rips off the film. It can be removed just as easily as on the upper doors.
After unscrewing the screws that secure the furniture hinges, he removes the doors. The drawer fronts are also dismantled. It is very important to number them, put marks on the doors where each one stood. Otherwise, putting it back together will be another task. Even a simple change of drawers (identical at first glance) will, with a high degree of probability, lead to the fact that they will not close.
So, Vladimir removed all the facades and cleared them of film. Now you can go with them to the workshop.
If chips or dents are found on the surface of the MDF, they can be easily eliminated using automotive putty, which is what the author did. After the putty has dried, the surface is sanded with sandpaper.
After this, you can take the parts to a furniture factory to re-upholster them with PVC film. However, Vladimir decided to go a different route and simply paint them. This coating is much more durable than film coating.
Before painting, you need to protect the back side of the parts with plastic film and masking tape.
This composite material absorbs paint very well, so it is better to prime it first to avoid unnecessary paint consumption.
The author did not do this; he degreased all external surfaces using purified gasoline, and applied a layer of acrylic paint to the facades of the lower tier. He dyes them dark green and leaves them to dry. A pneumatic spray gun and an air compressor are used to apply paint.
Of course, not everyone has such a device, but you can purchase an electric version. You can also use spray paint in cans.
After the paint had dried, the author was pleased with the uniformity and quality of the resulting layer.
Acrylic varnish will be used as the finishing layer. The author rinsed the spray gun from paint residues and filled the container with varnish.
The varnish is applied in several passes to avoid drips.
And here is the finished result.
The glass with decorative frames also had to be removed on the upper facades. Vladimir paints them a brighter lime green. Moreover, as in the first case, the front surfaces are painted first, and then the ends of the products. After the paint has dried, a layer of acrylic varnish is also applied. That's it. Everything is ready. The author screwed the handles into place and installed the facades in their places. Now the kitchen looks like new! By the way, if you decide to paint facades, you can use another interesting drawing technique. To do this, you will need to prepare a project in vector format, for example, using the CorelDraw program. You can also download ready-made drawings on the Internet.
Then you will need to contact a company that specializes in plotter cutting. Typically this type of work is performed by advertising agencies. They will need to cut out your chosen design of the desired size on the self-adhesive film. By the way, with high-quality plotters the accuracy of the resulting pattern can reach 0.2 mm.
After cutting, you will be given a film with the thinnest slits. The film is removed from elements of the design that require painting. Then a transport film is glued on top (you also need to buy it from the same company), and the stencil is removed from the substrate. Having placed it over the desired part of the facade and carefully glued all the parts, the transport film is removed and a layer of paint of a different color can be applied. If the design will consist of several different colors, then you can protect individual segments with masking tape.
This technique is quite simple, but there should be no dust in the room where painting will be done.
And if anyone knows how to draw well, then acrylic paints and a brush will help you! It was my wife who painted the kitchen facades in Japanese style, depicting cherry blossoms on them.
Thank you Vladimir for the easy way to refresh your kitchen interior with your own hands!
Good mood, good luck, and interesting ideas to everyone!
The author's video can be found here.
Source
The nuances of restoring paneled facades during the restoration of a wooden kitchen
Paneled facades consist of a frame - a frame or groove and a panel (a convex middle part and lintels). All damage (small cracks, stains, chips) on them is eliminated in the same way as on straight facades, but some nuances should be taken into account.
If the humidity in the room is low, the panel may shrink in width. This leads to rupture of the varnish coating. Noticeable light veins appear between the panel and the trim. On dark-colored furniture, the tears become very noticeable. To restore the integrity of the surface, the wood must be painted or varnished. To restore the coating, it is better to use a thin brush.
Typically, drying out of the panel occurs in winter, when the kitchen air becomes very dry due to the heating being turned on. If the paneling is restored in the summer, then do not rush to restore the wooden kitchen. To create a comfortable indoor microclimate, buy an air humidifier.
But you shouldn’t get too carried away with humidifying the air. Excess moisture has a detrimental effect on furniture - the panel swells and can tear the binding. If this happens, don't despair. Remove the paneled façade from the frame, trim it, and clean or joint it.
If the panel is severely deformed, it can be replaced with another material: glass, bamboo, stained glass, rattan mesh. Each new element will make your kitchen unique and add an exotic touch to the interior.
Moldings, overlays and decoupage when restoring a wooden kitchen
Restoring a wooden kitchen is a creative process. Any of your imagination will make the furniture unique and original.
If you decide to decorate furniture items, then the wooden surfaces must be prepared for this - sanded, cleaned and degreased.
To create a pattern or ornament using the volumetric decoupage technique, you will need a stencil and material for forming a bas-relief. You can use wood putty. Using a stencil, apply the composition to the surface. After complete drying, sand the ornament with fine-grained sandpaper and cover with a layer of clear or colored varnish.
For decoupage, you can use napkins or special decoupage cards. Apply PVA glue to the paper material, and then apply the design to the wooden surface and smooth it thoroughly. After complete drying, apply four layers of matte or glossy varnish to the decorated surface.
Moldings are convex overhead parts for decoration. They are usually made of wood or plastic and attached to a previously prepared surface using glue or small nails without heads.
Restoration of a wooden kitchen table
There are many ways to restore a kitchen table - painting, decoupage, varnishing, finishing with ceramic tiles.
A countertop covered with ceramic tiles looks very beautiful and has many advantages:
- Does not deform from water and high humidity.
- Resistant to mechanical stress and difficult to damage.
- Easy to clean and remove dirt.
There is only one drawback to this coating - heavy ceramic tiles increase the weight of the table. But for stationary kitchen furniture this minus is not of great importance.
Ceramic tiles are laid on the countertop using regular tile adhesive. When restoring a wooden kitchen table, you should take into account some technological features:
- First make the covering edging. To do this, take metal corners and, using liquid nails, secure them along the entire perimeter of the tabletop, covering its end.
- Lay the tiles tightly, being careful not to leave large gaps. Since the glue dries very quickly, apply it to small areas of the countertop and attach one or two tiles at a time.
- Only after the glue has completely dried (at least 6 hours) can you start rubbing the seams and covering the tabletop with a protective layer of varnish.
If you are a creative person, you can decorate your kitchen table with original mosaics under tempered glass. Divide the tabletop into zones - screw several slats or corners onto its surface. Fill each compartment with decorative filler: small pebbles, shells, coins, beads, colored sand. When all areas are filled, cover the tabletop with tempered glass, which is secured with glue for strength.
Restoration of a burnt tabletop
Burnt countertops can also be restored to their original appearance. Restoration is performed in the following sequence:
- Using a hand router, carefully remove the area of damaged wood. Go deeper into the surface with ledges, grabbing some intact wood around the perimeter. The result should be a recess that looks like a miniature quarry.
- Clean the hole from wood dust and fill it with softened wood putty. Putty should be placed in the recess in small portions and each new addition should be compacted well.
- Cut off excess and protrusions with a sharp knife, carefully sand and polish the restored area.
- Paint the restored area in a color that does not differ from the shade of the entire surface.
Correcting problem areas
First, the surface must be wiped with a damp cloth. If there is a scratch, it can be removed using a wax pencil. This is done as follows. Melt it over the defect to fill the dent. Of course, you need to use a pencil in a shade that matches the color of the kitchen facade, although this depends on what the next steps will be. This means that if the surface is to be painted over, then the color of the wax does not matter. If the surface will be varnished or the restoration ends at the stage of eliminating a defect, then color matters.
The material will dry quickly, then you need to cut off the excess layer. After this, the area can be wiped with a damp cloth. If you need to achieve an attractive appearance after restoration, then you can use polish. By the way, it can be used about 4 times a year.
Now we will conduct a master class on how to perform the procedure with your own hands for each technology, the list of which was presented above.
Restoration of wooden kitchen chairs
Restoring kitchen chairs at home means updating their varnish and reupholstering the seat.
The technology for varnishing chair parts does not differ from the work with facade elements described above.
Let's take a closer look at how to replace the seat upholstery:
- Remove the seat and remove the old upholstery. While working, try not to damage the wooden base.
- Make a pattern from thick cardboard. To do this, place the plywood base of the seat on the cardboard and trace it with a pencil, taking into account allowances of at least 3 cm.
- Attach the pattern to the material and cut out a blank for the new seat from foam rubber or batting.
- Using the same pattern, cut out the fabric base of the new seat. Don't forget to leave 12cm of hem on each side. If there is an ornament on the fabric, maintain symmetry; the image should be strictly in the center of the fabric base.
- Glue the foam blank to the plywood base with superglue. Attach the fabric using a staple gun or a construction gun. First, a fabric blank is laid out on a flat surface, face down, and then plywood is applied to it. The side to which the foam was attached should be at the bottom.
- Stretch the fabric well around the entire perimeter or circumference of the chair and secure it with staples. There should be no large folds between them. If the old chair upholstery is not worn out and is thick enough, then you can stretch the new fabric directly over it.
Material on the topic: Decorative wood processing: processing secrets from professionals
How is the restoration of kitchen facades carried out in professional workshops?
To restore a kitchen, all you need to do is contact professionals by phone and order a consultant to come to your home. At the meeting, specialists will inspect the furniture and offer various options based on the main qualities of the furniture. There are many restoration options, and it all depends on what you want in the end: an updated old kitchen or a new style and color.
In the process of measuring and inspecting furniture, it often turns out that not only restoration of the facades is needed. Handles, guides, closers and other mechanisms require replacement. At the same time, the main incentive for owners is the desire to make their life more convenient: everyone today wants to replace old hinges, although they work, but without closers, with new ones with closers; retractable mechanisms in rickety drawers, which were subject to heavy loads during operation, also need to be completely replaced. Restoration company specialists, thanks to their experience and knowledge of the intricacies of furniture production, will be able to offer the best solutions for replacing failed parts.
As a rule, the restoration of kitchen facades is carried out in workshops, so they are removed and taken away. All other repairs are carried out at home. The process, depending on the complexity, lasts from one week to a month.
What else needs to be taken into account when restoring a wooden kitchen?
A kitchen made from natural solid wood is a classic that has not lost its practicality and attractiveness for many decades. Wood is valued for its unique properties: high strength, beauty and presentability, resistance to environmental influences, long service life, environmental safety.
To successfully restore a kitchen made of natural wood, you need to follow simple rules:
- If even small scratches or small cracks appear on the wood, immediately repair them using furniture wax. If this is not done, the damaged area will begin to dry out.
- The varnish coating is destroyed by mechanical stress. Fill the damaged area with a layer of clear varnish and leave until completely dry.
- Liquid putty for wood should be applied in thin layers using a spatula until the surface is completely level. Don't forget to clean and degrease the wood first. After complete drying, be sure to treat the restored area with sandpaper and cover it with paint and varnish material.
- If you don’t have special materials at hand, then you can use folk remedies to restore a wooden kitchen: walnuts, honey, potassium permanganate, colored pencils. To avoid worsening the damage, first test the effectiveness of the chosen method on a small, inconspicuous area.
To ensure that a wooden kitchen retains its functionality for a long time, follow the rules of caring for it:
- To wash and clean the kitchen from dirt, it is strictly prohibited to use abrasive materials and solvent-based products. When cleaning, use only soft cloths moistened with a mild soap solution.
- Control the microclimate of the kitchen area, do not allow intense steam formation and increase the humidity level above 70%. Moisture has a detrimental effect on kitchens made of natural wood.
- Do not place hot dishes on the surface of kitchen furniture.
- Regularly carry out minor restoration work aimed at eliminating scratches, small cracks, and chips. Repair fasteners in a timely manner. For protection, periodically coat wooden kitchen surfaces with mastic.
Why restore furniture when you can buy new?
From the point of view of rationality, furniture of medium and high quality should be updated, while products made from low-grade materials are better actually completely replaced with new ones.
Restoration, repair of facades, replacement of fittings are needed in the case when similar ready-made furniture will be many times more expensive than the costs that can be incurred when updating the set. If the frames are well preserved, but the exterior of the furniture needs to be refreshed, and worn out or outdated mechanisms require replacement, restoration will be the best solution.
Kitchen furniture occupies a special category among restorers, because according to the price criterion it differs from other cabinet products. The total cost of manufacturing frames, facades, costs of functional fittings - all this requires significant expenses from the family budget. A new kitchen can be achieved by updating the old one, especially if it is made of solid wood. Restoring the facades in this case can completely change the appearance of the kitchen. Coating with enamel in almost any color, new tinting, varnishing the facades, replacing handles - the kitchen can be completely transformed, and the family budget will not incur significant costs.