What is compost
Compost is an organic fertilizer that is obtained through the decomposition of animal and plant waste under the influence of various microorganisms, fungi and insects. Composting requires air because the process is aerobic. Therefore, raw materials are stored in a compost bin located above ground level, although it is often called a “pit” in the old fashioned way. Since there is not enough air in the soil, the residue will simply rot, but will not turn into fertilizer.
Properly prepared compost is almost no different from humus Source vasha-teplitsa.ru
For enhanced vital activity of microorganisms and accelerated composting, the following components are necessary:
- carbon (dry leaves, hay, straw, onion and nut peels - in a word, “brown” waste) - its participation in the process occurs with the release of heat;
- nitrogen (fresh weeds, tops, rotten fruits and vegetables - “green” raw materials) is necessary in nitrogen metabolism;
- oxygen - without it, carbon will not be able to oxidize and the decomposition process will stop;
- water - with high humidity, but without compromising aerobic conditions, the necessary environment for the life of bacteria and microorganisms is created, which speeds up the processing of raw materials into fertilizer.
The rate of maturation of the contents depends on the percentage of these substances in the compost pit.
Preparations for compost pit
To stimulate and activate the work of biological organisms, the following drugs based on pathogenic microflora can be used:
- In this case, “Compost Boost” will be effective.
- "Biocompostin" or "EcoCompost".
- The drug "Baikal EM" is based on natural microorganisms.
- The “Doctor Robik” product converts the base into humus, fights larvae and insects, and prevents the presence of an unpleasant odor.
- Natural bioactivator "Green-Master", as well as preparations "Green Universal", "One Season Compost".
Note! Each specific drug must be used according to the manufacturer’s instructions; the final result can be achieved after 3-4 months of using special stimulants.
How long will it take for the fertilizer to be ready?
Before you properly make a compost pit at your dacha and what to add, you need to know what processes occur during the preparation of the substrate. For good aeration and humidity level, the mass must be stirred and shoveled from time to time.
Regular mixing of components in the compost pit Source svoyabesedka.ru
With a sufficient amount of air and water, the temperature of the mass is first 50-70 degrees (at this time the components are intensively processed, helminth eggs and pathogenic microflora are neutralized), then 40-45 (the compost is maturing). The process of obtaining good organic fertilizer takes 2 years, but using forced aeration or modern compost accelerators, it is obtained in 1 season.
During the processing and maturation of the substrate, the level of mineral fertilizers in it increases in a form accessible to cultivated plants:
- potassium;
- phosphorus;
- nitrogen;
- magnesium;
- boron;
- zinc and others.
The mixture becomes homogeneous, free-flowing, pleasant to the touch, similar to humus.
Compost care
It is important to ensure optimal moisture content of the composted mass. The average is 45-70%. Warmth is required, since compost ripens at a temperature of at least 28 degrees.
Dry material practically does not decompose. If the humidity is excessive for a long time, the components become compacted, their interaction is disrupted, which also negatively affects the rate of their decomposition.
In dry weather, compost heaps are watered twice a week. During the rainy season, if there is excess moisture, it is recommended to shovel them regularly. This operation additionally ensures the supply of oxygen. Avoid excessive heating of the layers, since at 60 degrees the death of microorganisms begins.
Methods for making compost at home
Methods for accelerating compost maturation
In order to intensify the maturation of compost, various methods are practiced:
- Use biodestructors in accordance with the instructions. Organic fertilizers such as Unikal-S, Baikal-Em, and Siyanie are popular.
- An infusion is prepared from chicken manure, crushed green grass and water in a volume ratio of 2:5:20. Leave for 4-5 days and pour into the compost heap.
- You can make a yeast catalyst. Pour 1 liter of warm water into a jar, in which 200 g of sugar is dissolved and stir dry yeast - 1 tbsp. spoon. After signs of fermentation appear, pour the solution into a hole made in the center of the compost heap.
- Three matchboxes of urea and 2 tbsp are dissolved in a bucket of water. l. superphosphate. The solution is evenly poured over the material laid for composting, and the layers are carefully shoveled.
Well-rotted compost acquires a loose, uniform structure of a dark shade, indicating high fertility. Approximately 15 kg per square meter is applied both for autumn and spring digging. Also used as a mulching material.
Author of the article: Borisenko Ivan Nikolaevich
Tags: vegetable garden
- Related Posts
- Do-it-yourself lawn at the dacha: planting, care, fertilizing, watering, choosing seeds
- A fountain made of stones in the garden: how to make it yourself (photo)
- Do-it-yourself birdhouse, from which you can make a cozy house for birds
« Previous entry
What can you use for compost?
To get high-quality fertilizer, you should know what can be put in the compost pit.
What can and cannot be used to fill a hole Source stroyboks.ru
Many wastes are suitable for preparing the substrate, for example:
- manure, bird droppings, spoiled feed;
- shavings, wood chips, sawdust, pine needles, dry leaves;
- weeds, shoots, small fruits, tops, corn cobs, lawn clippings, corn and sunflower stalks, algae;
- peat;
- vegetable food waste (vegetable and fruit peels, seed husks, nut shells, cores, coffee cake, fish scales and entrails, eggshells).
The optimal ratio of green (nitrogen) and brown (carbon) raw materials is considered to be 1 to 25-30. For example, in fallen leaves it is 1 to 50, and in fresh grass – 1 to 15. If these components are taken in equal proportions, the composition will be almost ideal.
The construction of a compost pit at the dacha allows you to avoid purchasing expensive manure and humus, since the resulting soil is used in the same way as other organic fertilizers - for digging, in holes and planting holes, as mulch.
Adding humus to the greenhouse Source sveklon.ru
What can you put in a compost bin?
Gardeners can throw any organic elements into the compost pit, for example:
- Straw.
- Fresh grass.
- Branches.
- Weeds.
- Onion peel.
- Egg shells.
- Food leftovers.
To make the fertilizer more saturated, you can mix the compost with peat, manure, and droppings.
Prohibited ingredients for compost heap
It is not recommended to add the following components to the compost heap:
- Plastic.
- Polyethylene.
- Construction debris.
- Human waste.
- Cardboard.
- Printing products.
- Loach, wheatgrass, sow thistle.
Let's celebrate! Sawdust must be used quite carefully, because they decompose poorly and take nitrogen from the fertilizer. You should not use human feces or waste products of four-legged pets for future compost.
Standards and requirements for a compost pit
The compost bin must be located at a distance of at least:
- 8 m from sources of drinking water;
- 7 m from the cellar;
- 2 m from the neighbor's fence;
- 5-6 m from the drainage area of a bathhouse or shower;
- 7-8 m from the house and summer kitchen.
This applies to both your own plot and neighboring plots. It follows that a compost pit is a structure that should be placed closer to the fence or toilet.
Before making a compost bin, you should also take into account fire safety standards, according to which there must be free passage around it (at least 1 m wide). Usually they choose a place hidden from view, where almost nothing grows.
In addition, the compost pit can be located in the shade or partial shade, on a slight slope or hill. The main thing is that it should not be in a low place, since when the temperature drops, the processes occurring inside may stop.
A place for a compost bin, hidden from view Source seloveselo.ru
Besides:
- It is better that the bottom of the compost pit is earthen; in the case of a ready-made container with a perforated bottom, it is advisable to raise it 10 cm above the ground level so that excess water can drain freely and the mass does not rot;
- for the same purpose, the bottom should not be lined with solid material;
- Film or roofing felt can sometimes be covered on top to increase the temperature and prevent the top layer from drying out;
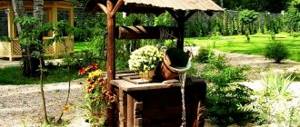
- It is not permissible to plant plants in the compost pit; for decorative purposes, you can install a removable container with flowers;
- if the compost pit is constructed in the ground, then it should be buried no more than 0.5 m and the contents should be mixed more often for aeration;
- the dimensions of the compost pit can be different - depending on the amount of raw materials and the need for organic fertilizer, for example, 1 x 2 m or 0.8 x 1 m, and the height - convenient for shoveling, usually 1-1.2 m;
- the order of laying the components does not matter - the main thing is that the ratio of nitrogen and carbon is maintained, as described above;
- To avoid smell and flies, you should try to sprinkle food scraps with green mass or peat.
The waste is lightly sprinkled with soil Source pics.botanichka.ru
See also: They specialize in house and landscape work, design and construction of MAF
If the structure is planned without a bottom, then the turf is first removed, and the surface is dug up, leveled, compacted, and the removed turf is laid with the roots facing up. If the weeds have not yet become seeded and are not very tall, then it is permissible to place the box directly on the grass with the condition of immediately laying it at a height of 20-30 cm so that the plants do not break through to the light.
What can a box be made from?
To briefly answer the question, what is a compost pit? It is essentially a box with a lid, but without a bottom. It can be made from many materials:
- boards;
- pallets;
- slate;
- bricks;
- concrete;
- metal;
- metal mesh with fine mesh;
- polymer plastic.
There is even experience in creating compost in thick garbage bags.
Ready-made plastic containers
Before making a compost pit at your dacha, it makes sense to take a closer look at ready-made polymer containers. Similar garden products at affordable prices are presented in a wide range and various sizes.
Ready-made composter in the garden Source www.fermeru.pro
Their advantages are as follows:
- compactness;
- aesthetics;
- the presence of a lid and a side door for removing finished humus;
- aeration system.
Containers are offered disassembled with assembly instructions.
Wooden box
In this case, you can use boards or slats. This should not be waste material, since the construction is not built for one year and the appearance will depend on what kind of wood is used. Before properly making a compost pit, boards or slats should be treated with an antiseptic composition against rotting or painted on all sides.
The wooden structure must be:
- strong;
- roomy;
- with a collapsible front wall, the removal of which did not reduce the rigidity of the box.
The manufacturing process consists of several stages:
- First, the turf is removed and the fertile soil is removed;
- then in the corners, to a depth of 40 cm, bars are dug into which boards or slats will be attached;
- wooden planks are mounted on self-tapping screws, leaving gaps of 3-5 cm;
- The lower 1/3 of the front wall is made removable to make it convenient to select ready-made humus.
The bottom boards can be easily removed and ready-made humus can be selected Source www.polhill.co.uk
If a metal mesh is nailed at a height of 1/3 from the ground parallel to the base area, the rotted product will invariably fall down, being saturated with oxygen, which will lead to better structure finished mass. The process is similar to the settling and removal of ash from a stove after burning wood.
Video description
Another way to build a compost pit from pallets is presented in the video:
Concrete compost pit
Before making a compost pit from concrete mortar, you should think carefully because:
- monolithic walls will not allow air to pass through and rotting of the mass is possible;
- construction of formwork and mortar reinforcement will be required;
- you will have to order delivery of concrete or mix it on site;
- It will take a lot of time, effort and money.
Another thing is a ready-made concrete ring for a compost pit. It just needs to be placed on the ground and covered with a lid. The only inconvenience is that it is difficult to mix the components in it, so it is better to use 2 rings so that you can transfer the mass from one to another.
Installation of a concrete ring for a compost pit Source media.makler.md
Brick compost pit
If there is an old or unnecessary brick that has nowhere to be used, then it can be used to build a compost pit. It is placed on a sand bed using cement mortar. The front wall is made with pieces of metal profile and removable boards and is provided with a lid. Laying is carried out with or without holes for air access. In any case, the bottom and top rows must be continuous.
A similar front wall solution is suitable for most compost pit options Source pbs.twimg.com
Other materials for compost pit
A compost pit is a universal solution, for which you can use any material, you just need to apply a little imagination.
Brick compost pit
To make a compost pit using red, white or fireclay bricks, you need to choose a structure with 3 walls; it is advisable to make small gaps between the bricks to ensure air flow.
If you lay brick without using cement, the structure can then be easily moved around the site if necessary.
Note! In such designs, it is recommended to provide an additional compartment used for throwing and turning compost. Make a comfortable lid with handles from any existing material.
Compost pit made of concrete rings
By creating an improvised well on the surface of the soil, you can easily put grass, table waste, dry leaves, etc. inside. You will get high-quality fertilizer without extra costs.
If desired, the rings can be buried in the soil or not; the cover is made of wood or film material.
Let's celebrate! The only disadvantage of this design is the labor-intensive process of removing compost, due to the fact that there is no possibility of making a removable front panel. But it is worth noting the high strength, reliability and durability of the structure.
Compost in an iron barrel
To save money, many gardeners use old metal containers to create compost. To do this you will need:
- In the prepared structure for the pit, cut out both bottoms and place them on prepared, leveled soil.
- Treat the container with dark (black) paint to attract direct UV rays and maintain optimal “ripening” conditions.
- In order to pour the finished fertilizer in the future, you will need to lift the barrel with a crowbar.
Compost pit made from car tires
You can also use old vehicle tires to form a compost pit:
- Remove the side part of the tread using a jigsaw, so that you get a small well of rubber elements.
- 4-5 tires will be enough to form a spacious and comfortable cylinder.
- To ensure unhindered air circulation inside the structure, plastic tubes can be placed on the side walls.
Compost pit using Finnish technology
If you don’t have the time or opportunity to make a mold yourself, you can buy it in online stores, trading farming and gardening companies - a composter using Finnish technology.
The design is a unique device based on the principle of a dry closet. It includes 2 compartments with a capacity of 80 liters.
When the container is completely loaded, the compartment opens and is replaced with a new one.
Made from slate and metal profiles
The stages of work are as follows:
- First, you should dig a 40 cm deep trench around the perimeter of the future structure.
- Then install 2 pieces in each corner. metal profile in the form of a channel and fasten them in pairs so that with the open part they are directed in the right directions.
- After this, insert the material vertically (it is better to use flat slate).
- Fill the trench and compact the soil.
The front wall of the compost pit does not need to be deepened so that it can be removed freely. Since the edges of the metal profile are sharp, protection must be provided. These could be pieces of a disused watering hose cut lengthwise.
Principles of constructing a compost pit
To form in the future high-quality and rich compost of the required consistency and properties, the following features must be met:
- It is necessary to maintain a high temperature; for this, it is better to choose a useful pit volume of about 1 m3.
- In order for the internal layers of humus to be constantly blown by air currents, it is necessary to leave gaps in the side sections of the pit.
- The products should not be overdried; this requires constructing a roof or part of a folding section in the pit.
- To make it convenient to later pour the finished product for laying on the beds, the front wall must be made retractable and removable.
Video description
For a compost pit made of wave slate, you will need a frame made of boards. If the height of the box is less than a meter, then the material can be buried only to the length of a shovel. This can be clearly seen in the video:
Mesh at the service of compost
The mesh simply needs to be secured to buried pipes or bars and covered with permeable material or a lid. This is a very simple, cheap and quick option.
Metal mesh is an economical material, but the waste will be accessible to rodents.
Video description
A very interesting solution for a compost pit-bed made of metal mesh and spunbond is presented in the video:
From a fine-mesh mesh you can make a rotating structure on supports in the form of a horizontal cylinder with wooden sides.
This design of the compost pit allows you to mix the contents without much effort Source info.zhratsushi.ru
How to make a compost pit with your own hands?
To independently carry out such a design on the site, you can use any available materials, for example, slate, corrugated sheets, iron or plastic barrels and much more. More permanent buildings are considered to be those based on the use of brick and concrete.
Compost pit in the ground
The work algorithm is as follows:
- After choosing the right location for the pit, you need to decide on the dimensions, for example, the area of the pit can be 1.5-2 meters.
- Remove the top layer of soil with a shovel, approximately 0.5-0.7 meters deep.
- Place a small sand cushion at the bottom of the hole to prevent water from penetrating the compost.
- After this, slate walls with supports can be installed around the perimeter of the pit.
- Lay layers of compost material, sprinkling them with peat, soil and watering them with water. To do this, use fresh mowing, sawdust, manure, weeds, dry leaves and branches, and food waste.
Important! To speed up the process of compost processing and obtain the finished result, all components of the compost can be finely chopped with a shovel.
The finished result will be suitable for use after 2 summer seasons.
Concreted compost pit
This type of compost pit design is considered the most preferable and has many advantages:
- Thanks to the thick walls, the pit will maintain the desired temperature inside the mixture for a long time.
- Durability and reliability of the compost pit.
- No exposure to adverse environmental factors.
Important! It is recommended to make a permanent compost pit made of concrete into 2-3 compartments.
To complete this design you need:
- In the place selected for compost, dig a hole of at least 1.5 x 3.5 with a depth of 70-100 cm.
- Make formwork from timber and boards, leveling 15-20 cm from the edge of the pit. It should be 40-50 cm above ground level.
- Make reinforcement from metal mesh inside the formwork, fill it with crushed stone and fill the formwork with concrete.
- The concrete formwork in the pit will completely set after 1.5-2 weeks, after which the boards can be removed.
- Place compost material inside the pit and place a roof made of wooden panels on top.
It is worth considering: that in a concrete pit the decomposition process will occur quite slowly, so you can use special chemistry to speed up this process.
Slate compost pit
The pit, made of roofing material, is durable. To implement this idea, building material of any shape and length is suitable.
The compost pit can be made simply (sheets are buried in the ground around the perimeter) or thoroughly (slate is attached to a laid frame of beams).
It all depends on the need to construct a temporary or capital form. It is also worth understanding that wood is not a durable material, and from time to time it will need to be tediously treated with antiseptics or replaced.
The lid of the compost pit can be made of wooden panels or covering material.
Compost pit made of boards
If a temporary solution for a compost bin is needed, a plank structure can be used. This pit can be disposed of at any time or moved if there are any landscape changes. In this case, it is recommended to use the largest box size - 1.5-1 meter.
Step-by-step manufacturing instructions include the following steps:
- In the place that was allocated for the pit, mark the perimeter.
- Remove the top layer of soil up to 10 cm deep with a shovel.
- Install and drive metal pipes at the corners of the pit, insert timber into them and secure everything with concrete mortar.
- The timber and boards for the pit must first be treated with a protective solution, which prevents the appearance of rot and destruction of the frame.
- To improve air exchange inside the structure, boards and beams do not need to be laid tightly together; the recommended gap can be 3-5 cm.
- In order for air to flow from below to the raw materials without obstructions, you can leave a space of up to 30-50 cm from the lid. This will be a good solution for placing the material in a hole and collecting the finished compost.
- For greater convenience, you can build a lid for the pit with a handle and hinges.
Compost pit made of corrugated sheets
To make a pit using corrugated sheets, it is recommended to choose sheets with a special coating that has anti-corrosion properties.
The work plan includes the following actions:
- At the site that was selected for manufacturing, build a metal base.
- For the selected size, choose the length of the sheets; it is better to make a hole with 2-3 compartments.
- Make a standard frame for the pit, with a profile on the outside secured with self-tapping screws.
- After this, attach each sheet along the perimeter of the pit to the base. But it’s worth knowing that the sheets get very hot on a hot day.
Metal mesh compost bin
Having a little extra, for example, metal or galvanized chain-link, you can build an effective pit shape. A small cylindrical container is made from the mesh, which will be well and efficiently ventilated; the substrate for fertilizer will be ready for use quite quickly.
For such a pit, you need to perform the following steps:
- Calculate the required mesh size based on the dimensions of the compost pit, adding 20 cm for the mesh overlap.
- According to the dimensions of the mesh, obtain a piece of burlap or simple film.
- Insert the selected protective material into the thickness of the mesh.
- Secure wooden beams around the perimeter of the pit for greater stability; be sure to bury them 50-70 cm into the ground.
Note! Instead of standard materials, you can use a large trash bag. The advantage of this design is that it is easy to assemble or dismantle and move to any convenient place.
How to disguise compost
The appearance of a compost pit is usually not attractive. The problem is especially acute for small areas that are visible from all sides. But, if this place is disguised, then it will fit perfectly into the overall landscape of the garden or vegetable garden.
For this use:
- A narrow hedge. This method is especially good if there is a similar fence around the perimeter of the entire site.
- Artificial screen. Depending on the style of landscape design, you can choose a product, for example, in Chinese or Japanese traditions.
- A bamboo fence will be appropriate in many directions, for example, in minimalism or Asian styles. Far Eastern bamboo is planted in the central zone. Climbing plants climb well up its trunks.
- Wicker fabric made from willow branches. It can also be artificial.
- Trellis with climbing plants.
All elements are placed at some distance from the compost itself to ensure easy access to it.
Beans climbing up a mesh trellis will soon completely hide the compost bins Source pics.botanichka.ru
If a finished plastic product is used, then there is no special need for its decoration.
Popular brands and models of containers
The two models L&T Globe and Bulbeo gained the most popularity.
L&T Globe
The first development from a Finnish manufacturer is suitable for those who live on the site year-round, since this composter can also be used in winter (down to -10 degrees). If the temperature drops below, the process stops and resumes when warmer. Besides:
- working volume is 310 l;
- made of durable polyethylene;
- thermal insulation made of foamed polyethylene 15 cm thick;
- height 73 cm;
- spherical shape with globe relief;
- deep dark green color.
This stylish product does not need to be refined. It consists of 3 parts:
- removable small lid with adjustable ventilation shutter (winter/summer);
- removable housing, which provides access from all sides;
- an expansion ring that allows you to increase the volume by 160 liters;
- bottoms with holes for ventilation at the top and for drainage at the bottom.
The Finnish composter does not need additional decoration Source insales.ru
There are no small and heavy parts in the Glob design. In a composter, the contents are completely isolated. The product is very ergonomic and aesthetically pleasing. At a high rate of compost maturation, productivity is comparable to a 700-900 liter compost pit.
Bulbeo
Bulbeo - a development from a Spanish manufacturer, is available in 2 variations of 700 and 900 liters. When disassembled, the modular design made of environmentally friendly durable polyethylene is easy to transport and takes up little space during storage.
This seasonal composter has:
- wide hatch for loading components;
- convenient doors on 5-6 sides for removing the substrate;
- bud shape, color – calm green;
- the case has holes for ventilation;
- assembly is carried out without the use of tools.
Dimensions:
- width – 1.22 m;
- height – 0.85 m;
- weight – 19 kg.
Rounded walls contribute to better heat transfer and, accordingly, faster preparation of compost.
Approaches to the container are made from all sides Source static-eu.insales.ru
Briefly about the main thing
Good fertilizer can be obtained from various organic wastes by building a compost bin. If you fill it correctly, moisten it and mix it, it will ripen in one season.
Compost pits or boxes can be made from almost any material. The main thing is that one of the walls must be completely removable or have doors at the bottom for access to the finished substrate. It is also necessary to provide holes for ventilation, a lid and protection from rodents.
Ratings 0