DIY paper Christmas decorations: ball for the Christmas tree
The most popular Christmas decorations are, of course, balls. They can be made in a bunch of different ways, but I suggest the simplest ones that a child can handle. Naturally, after adults teach him.
This figure is called a charcoal.
To make it you will need:
- Colored paper (4 A4 sheets per 1 ball)
- Glue
- Scissors
- Pencil
- Any cylindrical glass
Assembly:
1. Take a glass (or mug), place it upside down on colored paper and trace it with a pencil to make an even circle.
For one ball you need to draw and cut out 27 to 32 circles.
You can take paper in different colors and combine it as you like.
2. Now you need to give the circles a three-dimensional shape. This is done in several stages.
First, bend the circle in half.
Then cut in half again. Press the folds well.
The result is a “piece of pizza”, which we mentally divide into three parts and wrap in a rectangle. First we bend the larger side.
Then a smaller one.
With these simple steps you need to fold all the cut circles.
This preliminary preparation allows me to distract the children and attend to urgent matters for about 20-30 minutes.
3. After the preparatory stage, assembly begins. We unfold one of the circles and see that it has now become “ribbed”.
4. Apply glue to the second edge on the left and the second edge on the right on the lower half of the circle.
It is better to use PVA glue in a tube with a spout for more precise application.
5. Connect and press the halves so that they stick together. We do this with all the circles.
6. Next, take one of the halves and apply glue to the first, middle and penultimate folds.
And glue the next half to it. We coat and glue all the halves in the same way.
As a result, you will end up with this rather weighty thing that needs to be weighed down with a book or something else heavy and left for 15 minutes for the glue to dry.
7. After the glue hardens, the halves can be unfolded like a fan. The last step remains: grease the upper side part with glue and glue the thread. We also lubricate one of the sides of the future ball with glue.
And, opening the ball, glue it to the other side.
Let the glue dry and you're done!
Balloons
The most common and versatile DIY toys for the New Year are Christmas tree balls. You can make it from any thick paper: colored cardboard, colorful postcards or old magazine covers. Plain colored balls will give a uniform style to the room, while multi-colored ones will give an atmosphere of fun and fairy-tale magic.
So, before you start making New Year's paper toys, you need to prepare the following:
- thick paper with a pattern;
- scissors;
- PVA glue;
- a compass or any object that, when outlined, can be used to reproduce a circle (jars, lids, glasses, etc.).
How to do:
- Draw 21 identical circles on paper and cut them out with scissors.
Prepare the mugs as follows:
- bend the circle in half twice (this is necessary to determine the center);
- straighten the circle and bend one side so that the edge of the circle is exactly in the center;
- bend two more sides of the circle to form a triangle with equal sides;
- cut out the resulting triangle, which will act as a pattern for the remaining parts;
- Place the triangle on the remaining circles, trace with a pencil and bend the edges outward along the lines.
- Glue 10 circles together on both sides so that you get a strip: 5 circles on top, and 5 on the bottom. The strip must be glued into a ring. This will be the base for the ball.
- Divide the remaining 10 parts into 5 pieces and glue them into a circle. The result was two “lids”.
- Glue the upper and lower “lid” to the base in sequence.
- The loop by which the ball is suspended can be made from a thread threaded through the top of the toy with a needle, or from a beautiful ribbon. The ribbon loop is secured with a knot and threaded through the top of the ball “cap” before gluing it to the base. The knot remains inside the toy, and the loop remains outside.
An original do-it-yourself paper toy for the new coming year is ready!
Paper ball - master class for kindergarten
If the previous method is more suitable for entertaining one child, then this one can be done together with a whole group of children. Making the ball is very simple and will not cause any difficulties in explaining.
Only all the elements will need to be prepared in advance, because... you need a needle and children can’t handle it.
So, we will need:
- Thick colored cardboard A4 format
- 2 beads
- Needle and thread
- Scissors
Assembly:
1. We cut the cardboard along the short side of the sheet into strips 1.5-2 cm wide. We do not need perfectly even lines and strict adherence to the width, so it is not even necessary to use a ruler.
In total you need to cut 8 strips.
2. We put the strips in a stack and, having made a hole in the middle, thread a thick thread with an attached bead. We take the length of the thread to be 15-20 centimeters.
3. Next, turn the stack over and insert the thread into a hole made 0.5-1 cm from the edge of the strips.
4. We pull the ends of the strips together and make the same hole and pull the thread from the inside of the opposite end of the stack.
5. Stretch and measure the length of the thread so that we get a circle, then thread the second bead into the thread and tie a knot on top, fixing the shape of the circle.
6. The ball is ready, all that remains is to “fluff” the stripes.
Christmas tree toy in the form of a three-dimensional ball - a simple assembly diagram
Well, another simple but beautiful version of a paper ball.
Assembly:
1. And again, using a glass, pencil and scissors, we make circles from colored paper. This time you will need 8 of them. Available in different colors.
2. On each circle we make a cut to the middle.
3. Apply glue to the places where the cut was made and roll one side into a tube first.
And then another. It turns out to be such an interesting figure.
4. Glue all the circles together in the same way.
5. Then we take a thick thread threaded through a needle, pierce the top of the cone and thread it onto the thread.
We do the same with all our blanks.
It is important to ensure that the figures are strung on the same side: either the front or the back.
6. And now all that remains is to tie and tighten the opposite ends of the thread.
And the workpiece will turn into a beautiful three-dimensional ball.
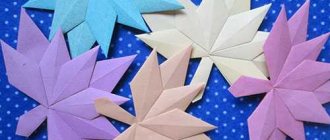
Volumetric snowflake
Another indispensable attribute of the New Year is snowflakes. They can be the simplest, cut out of a sheet of paper in a random design, or they can be voluminous using the origami technique. We suggest making the latest version of the New Year's snowflake with your own hands.
WATCH: Paper boats: step-by-step master classes
To do this, you need to cut out six squares of the same size, fold each of them diagonally, and then in half. Parallel cuts are made along the fold. The square unfolds, the inner tabs are wrapped and fastened together.
The outer petals are connected to the same petals of the remaining squares. You can attach them using either glue or a regular stapler.
Such a voluminous snowflake can be sprinkled with sparkles, sequins and decorated like the Christmas tree itself, a wall, or assembled as a whole garland.
The simplest Christmas tree toy for children 4-5 years old
If your child has not yet mastered assembling a three-dimensional ball, then you can simplify the work even further and make just a round Christmas tree toy.
All you need is colored paper, scissors, a stapler and a ribbon for hanging.
Assembly:
1. From colored A4 paper, cut 12 strips about 1.5-2 cm wide.
2. Then we leave the first strip unchanged, shorten the second by 1.5 cm, the third by 3 cm, the fourth by 4.5 cm and so on.
3. And we collect them into one bundle, aligned along the bottom edge. Along the same bottom edge we fasten the strips with a stapler.
4. Consistently twist the ribbons into rings, again aligning them along the bottom edge. As a result, it turns out that each subsequent ring is larger than the previous one.
5. When all the rings are rolled, we fasten them with a stapler at the base.
Instead of a stapler, you can use glue, but then each strip will need to be coated separately.
6. Done, all that remains is to tie the ribbon and hang the toy on the Christmas tree.
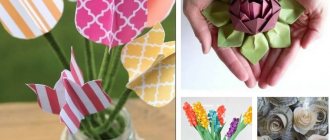
Volumetric paper flower
You will need: colored paper, scissors, ruler, pencil, cardboard, glue, decorative elements, pebbles, beads, sparkles, rhinestones, braid...
Master Class
- Cut 14 2.5cm squares from paper.
- Cut out 14 more squares of paper, the sides of which are 3 cm.
- Fold the opposite sides of the squares, fix the contact point with glue.
- Cut out a circle from cardboard.
- Mark the center of the circle with a pencil.
- Glue the larger tubes in a circle.
- Glue smaller blanks on top in a circle.
- Decorate to your taste by decorating the flower with rhinestones, braid, sparkles...
The volumetric paper flower is ready!
DIY paper lantern
But I’m sure you all made this toy yourself in childhood. There is nothing simpler than this.
Assembly:
1. Take a sheet of A4 colored paper, fold it and cut it in half. For those who understand, the result will be A5 format. We will continue to work with him.
Fold the sheet in half along the long side.
2. On the folded side, make cuts at a distance of 1.5-2 cm from each other. The cuts should not reach the opposite edge by about 2 cm.
3. Open the sheet and glue the opposite sides together, rolling the sheet into a tube.
4. Done, all that remains is to glue another strip of paper on top, with which the lantern will be hung on the Christmas tree.
Paper cone
You will need: paper or cardboard, scissors, pencil, ruler, glue or needles, a foam ball or a ball of crumpled paper, decorative elements, braid, glitter...
Master Class
- Cut strips 2.5 cm wide from paper or cardboard.
- Cut the strips crosswise into squares.
- Fold the strips to form an arrow.
- Take a foam ball or make one out of paper.
- Glue the blanks to the ball. Carry out the work from the bottom row, gradually moving up, applying layers of blanks.
- Decorate the pine cone to your taste.
The paper cone is ready!