History of Christmas tree decorations
New Year's decorations are an integral attribute of the holiday. They have come a long way of development, which has an interesting history. Residents of European countries were the first to decorate their homes on the eve of the New Year. Then branches of coniferous trees and fruits were used. People tried not to advertise their actions, since the tradition was not encouraged by the authorities. The Catholic Church considered it a pagan heritage.
The classic rules for decorating the main Christmas beauty have not changed over time. Only Christmas tree decorations have a huge difference. Previously, each element of edible decor was symbolic and carried a certain deep meaning, mainly with religious overtones. Sweet waffles were reminiscent of the unleavened bread used for communion, and apples were associated with the forbidden fruit.
From the middle of the 18th century, New Year's honey gingerbreads were replaced by Christmas tree decorations, vaguely reminiscent of modern ones. Most families made them with their own hands from eggshells, pine cones, paper, and various sparkles. Craftsmen began to create figurines of angels and fairy-tale characters from coinage and brass.
The first Christmas tree balls appeared in 1848 in Thuringia, the city of Lausch. These were heavy glass items. The weight was given by a lead coating used on the inside to create shine. Multi-colored jewelry was very expensive; ordinary people could not afford them.
Almost 20 years later, in 1867, the technology for creating balls changed. This was due to the opening of a gas plant. From the glass mass, brought to a high temperature, neat thin-walled products were obtained. The plastic material made it possible to make toys of various shapes. Mirror shine was achieved by adding silver nitrate.
Until the beginning of the twentieth century, Lausch was the only exporter of Christmas tree decorations. Then the technology was adopted by other countries, including Christian ones. After the events of 1917, the celebration of the pagan event stopped for the Soviet people, and the production of jewelry stopped. Only in 1935, newspaper headlines were full of calls to decorate the Christmas tree only for children, and in 1937, the New Year's beauty even decorated the columned hall of the House of the Unions.
In accordance with the events of history, the semantic load and appearance of the toys changed. In the 70s, Christmas tree decorations lost their individuality. Production was put on stream. The same type of multi-colored balls and figurines filled the counters. In the 21st century, handmade toys came into fashion.
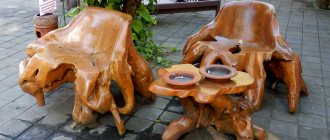
Pine cones - original and beautiful decorations on the Christmas tree
Fir cones can be considered the second unofficial symbol of the New Year. The accessible natural material exudes a pleasant aroma; even the smallest needlewomen can work with it easily and safely. The material can be used as the main element when creating a Christmas tree decoration, and as an addition to an entire New Year's composition. The pine cones make funny animal figures, flowers, houses, and baskets. You can simply attach secondary materials to crafts.
Master class - angels made from pine cones
For this craft you will need beautiful even cones, ribbon, pieces of felt and wooden and plastic balls. To prevent the natural base from losing its shape due to temperature changes, the pine cone can be lowered for a few seconds into a container with wood glue. After drying, it will not lose its shape and will always remain closed. The following master class will help you create simple angel figures:
- Draw a face on the ball with a felt-tip pen - this will be the head;
- We attach the head of the figurine to the prepared cone with PVA glue;
- The hairstyle can be drawn or created from tow, artificial wool, fabric, dry grass and other materials;
- We glue or press down the hair with a cap from the top of the acorn;
- We tie the ribbon in a bow and attach it to the back. For better fixation, you can use a felt belt;
- Hands can be made of thick fabric or wire.
Paper angel for Christmas tree
You will need: colored paper, a simple pencil, scissors, glue, a compass or a round object, a satin ribbon for hanging, glue.
Master Class
- Draw a circle and cut it out.
- Step back from the center of the circle a little down and a little to the left, then draw a small circle.
- Label the segments as shown in the image.
- Cut the template along the marked sections.
- Form a cylinder and secure with glue.
- Shape the wings, then glue them on.
- Glue the satin ribbon pendant.
The paper angel is ready! I recommend watching the video master class!
Simple paper ANGELS | New Year's DECOR
Salt dough toys
The ingredients for the base are flour, salt and water. Christmas tree decorations from natural ingredients are very easy to make and can be stored for a long time. You can create figures using cookie cutters or simply cut them out according to the sketch with a knife. A beautiful relief pattern is obtained by imprinting various leaves, twigs, and coins. Paints, beads, rhinestones, and powders are suitable for decorating original hanging toys.
You can color crafts in several ways - after drying and when making the base. In the first case, coloring will be done using gouache, acrylic, and oil paints, and in the second, you will need to add food coloring at the dough kneading stage.
After complete drying, New Year's crafts are decorated with any elements (ribbons, buttons, beads, rhinestones). If you make holes in the center of the toys, you can create a bright, original garland.
In order to hang a New Year's toy made from salt dough on the Christmas tree, you need to pierce a hole for the thread in its upper part. It is easier to do this while the product is not frozen.
DIY New Year's toys made from pine cones
Cones are a fairly common natural material used in making crafts. You can make a variety of New Year's toys and decorations with your own hands from pine cones, and at the same time, do without material costs. Let's look at our photos, where a small forest is formed from cones. It is very easy to turn a cone into a Christmas tree by turning it over and painting it with green or white paint. You can also make miniature decorations and sprinkle them with glitter. To make cute animals, you will need fur, from which you can easily sew a ball-head and tail, and then attach it to the pine cone using a heat gun.
To make New Year's toys from pine cones with your own hands, you just need to decorate this natural material. To do this you will need large multi-colored beads and a heat gun. Glue a bead to the tip of each “blade” of the cone, cover the entire craft with transparent varnish and sprinkle lightly with glitter (you can use artificial snow).
Cardboard gift boxes
Creating boxes for gift wrapping is especially important on the eve of the New Year holidays. Hand-made products from simple materials will add a mysterious anticipation to the surprise. To make elegant and functional boxes of any design and size, you will need a minimum of materials: cardboard, knitting needles, glue, scissors, decorative elements.
Before starting work, you need to prepare special templates for cutting out blanks. The packaging box can have any shape, method of attaching the lid and gluing, folding the sides. The diagram can be enlarged to any size. To attach parts of a box made of thick cardboard, it is better to use PVA glue or double-sided tape.
With New Year's gift boxes, after fulfilling their main function, you can decorate the symbol of the holiday. Cardboard products are made in the shape of snowflakes, Christmas trees, and candy boxes. Download the template from the Internet and adjust the dimensions on paper. Then we transfer it to the base and cut along the dotted line. We bend the places intended for this, coat it with glue and assemble the box. For decoration, you can use any decorative material.
DIY Christmas tree decorations “Birdhouses” from scrap materials
Create an idea for birds from scrap materials and turn it into fairy-tale houses. Birds live in the forest where Christmas trees grow and where the New Year comes to our house.
Master class on creating a New Year's toy:
1. For the craft you will need a drawing (pattern) of a house.
2. We cut out the pattern without allowances, because cardboard is a hard material. But if you took paper, then allowances would be needed for gluing.
3. Place the cut out template on thick cardboard, trace it with a pencil and cut it out with a stationery knife using a ruler.
4. All that remains is to cut a hole for the bird. To do this, put a cork on the circle and carefully use a knife to make cuts in the circle and squeeze out the cut out circle.
5. You will get this project for a cardboard house. Make cuts where the corners and roof are bent so that the fold is even.
6. Bend the cut cardboard and secure all parts with paper tape.
7. Using polymer glue, glue the twine loop. Apply glue to the roof slopes and glue the twine in oval circles.
8. Spread glue on all the walls of the house and cover all the walls with twine all around. Let the glue dry and then cut out the hole with scissors. Glue a piece of twine around the hole.
9. Separate the scales from the cone and stick them on the roof. Start gluing the flakes from the lower eaves to the ridge, this is how the roofs of real residential buildings are made.
10. Using white acrylic paint, apply “snow” to the roof.
11. DIY Christmas tree decorations, surrounded by a white coating, look more fabulous. Apply a little white paint to the walls of the house.
12. For decoration, stick an artificial green sprig near the hole, as well as red and white berries.
13. DIY Christmas tree toy “Birdhouses” from scrap materials is ready. Make 2-3 of these houses and the tree will immediately come to life.
Ball of acorns
The New Year holidays are the perfect time for creative evening activities. Many professional craftswomen and simply lovers of exclusive New Year's toys prefer to work with natural materials. Ordinary acorns will make original and simple Christmas tree decorations. They can be assembled into a hanging arrangement by simply painting the caps golden, or you can make a beautiful mixed garland with the addition of small cones.
Whole acorn caps will be useful for creating an interesting New Year's ball in a fashionable eco-style. This craft mentally transports you to the very thicket of the winter forest and makes you believe in a real miracle. The basis of the toy will be a foam blank. You can buy such an element at any handicraft store.
We paint the prepared kernel brown and glue the caps with tails to the ball. It is necessary to fill the space as tightly as possible. The place of one sunken element will be taken by a wire hook. You can decorate the toy using silicate glue and sparkles, beautiful beads inside the hats, and ribbons.
Textile toys
New Year's textile toys will not only decorate the Christmas tree in country style, but will also fill the interior with warmth and a festive mood. Thematic crafts can be grouped into compositions or individual exclusive items can be created. Any fabric is suitable for creating textile masterpieces, but materials that retain the shape of the toy (felt, fleece) are more preferable. You can also use acrylic or cotton yarn. To create such products you will need minimal knitting skill. If you don’t have such talent at all, you can make beautiful dense frames of any shape from threads.
From yarn
These Christmas tree decorations look truly homemade. They can be made flat or voluminous. Flat products based on a ring look beautiful. The cut edge of a plastic cup and any thick yarn will do for this. If desired, you can place any New Year's picture in the center. If you have experience with crocheting, you don't have to use the warp. To keep the item in shape, you just need to starch it.
You can make Christmas trees out of flat yarn. First we knit several green squares of different sizes. We bend one of the corners of each part halfway and secure it with a button. You get beautiful triangles. Then we fasten all the products in the form of a Christmas tree and sew on a brown knitted or textile leg.
It is easier to knit voluminous balls on five knitting needles, using a sock pattern. Balloons in vintage style with jacquard patterns look very creative. You can also create an exclusive toy from threads using a crochet hook using the technique of alternating the number of loops. The filler can be cotton wool, padding polyester, or any fabric.
From felt
Flexible, plastic material can serve as the basis for any craft, including Christmas tree decorations. The colorful felt is soft and pleasant to the touch. Products made from it do not have a statute of limitations. They will always remain bright, unique and fashionable. You can create a real highlight, a symbol of the New Year, without having sewing skills or experience working with patterns.
The simplest Christmas tree decorations are flat. These are ordinary carved figures, decorated on one or both sides. Using a marker, transfer the template onto felt and cut it out. You can make a beautiful Christmas tree, the face of any animal, for example, a pig. The reverse side is reinforced with cardboard for strength.
If you need a voluminous Christmas tree toy, then two blanks are cut out at once according to the template. Then the pieces of the whole are decorated and connected with threads. Several of the following stitches are used:
- "Based". The simplest stitch. There are gaps between stitches. It is used to connect small parts along the cut;
- “Back the needle.” The stitches are smooth and beautiful;
- "Assembly". Used when connecting voluminous, openwork toys. It is performed using the “forward needle” technique, but with strong thread tension;
- "Over the edge." Securely secures the cut line and prevents individual hairs from coming out. Stitches at the same distance at an angle;
- "Looped". Practical invisible loops run along the edge of the cut.
Snowman made from socks
Handmade decorative toys are always original. Like nothing else, they are suitable for gifts because they are made with soul. A simple, unpretentious option is a snowman made from socks. To make this craft you will need one knitted cotton sock, several buttons, pins, and 1 kg of rice.
The sock must be cut into two parts at the heel. The top half will serve as the base of the craft, the bottom will be used for decoration. Turn the workpiece inside out and tie one end tightly with thread. We hide the knot and return the sock to the front side. We fill the toy with rice until it takes the desired shape, but retains its plasticity. We form the correct body and tie the top edge. The snowman's head should be highlighted with thread.
Now all that remains is to decorate and dress up the kilogram blank. The face can be drawn with a felt-tip pen or embroidered with beads. A piece of colored fabric in the form of a scarf will disguise the threads on the neck. The remaining part of the sock will be the cap. We decorate the body with colored buttons.
Snowflake and stars made of threads
Stylish Christmas snowflakes and stars will be made from yarn and glue. It will take no more than half an hour to create such Christmas tree decorations. To create Christmas tree decorations with sharp corners, you will need a special machine or an improvised frame made of carnations.
Draw a star or snowflake on the board. Then we apply cling film so that the toy does not stick, and drive nails in the corners of the figure. The next step is to separate some of the threads from the ball and coat them with glue. Without waiting for the material to harden, you need to quickly wrap it around the frame. In some places you should make knots so that the toy does not delaminate after drying. The central pattern of a snowflake or star can be made in any way. After 12 hours, the craft will completely harden and there will be no trace of glue left.
Thread balls
From ordinary woolen threads you can create round mesh toys for the New Year tree. To work you will need small balloons, threads and PVA glue. Inflate a balloon of a suitable size and tie its tail with the end of the thread. Starting from the same edge, wrap the shape tightly and in any order. The threads of yarn should not be close to each other.
Then we lower the workpiece into a bowl with a mixture of water and glue and turn it until all the textile elements are well saturated. It will take at least 24 hours to dry. A day later, we pierce the balloon and remove it through the slot. Ready-made thread balls can be decorated with sequins, beads, and bows.
Decorating a ball using the kinusaiga technique
The artistic genre of creating paintings and other products arose in Japan due to austerity. The main task of Kinusaiga was to recycle old kimonos. Modern needlewomen use this decoration technique to create designer New Year's decorations.
To decorate a ball using the kinusaiga technique, you will need a round foam blank, similar scraps of different colors, decorative braid and beads for decoration. First of all, we mark the base into four slices. Then we make shallow cuts in the dotted areas. The edges of the flaps will be placed in these grooves.
The prepared fabric rectangles must be placed evenly on the slices and their edges hidden in the grooves. You can push the material with any flat object. After all sectors have been decorated, you can proceed to decoration. We hide the seams under tape or braid, wrapping the material diagonally around the ball. We form a loop from the remnants of the cord.
Button toys
Original decorations made from buttons will complement the New Year's theme. You can make a craft of absolutely any shape, but it’s better to start with a simple Christmas tree. To work you will need multi-colored buttons of any size and a sheet of cardboard. You can attach the elements using a glue gun or sewing pins.
We roll the paper into a cone and secure the edges of the workpiece with tape. We make the bottom smooth and stable. Now we randomly distribute the buttons over the surface of the future Christmas tree, starting with the largest. We place small buttons in the remaining spaces. We decorate the craft with beads and bows. A New Year's toy can be placed in the hall or children's room.
Christmas tree toy “Snowman”
DIY New Year's toys are created from scrap materials that can be found in every home. The time required to make these cute guys is minimal, and the joy cannot be described in words.
You need to take:
- foam balls (different sizes) - 2 pcs.;
- black beads - 3 pcs.;
- plastic bottle cap - 1 pc.;
- sheet of paper (white) - 1 pc.;
- red felt-tip pen;
- black gouache;
- ribbon (narrow) - 10 cm;
- glue gun
Let's start making:
- Using a glue gun, glue two foam balls together. This will be the head and body of the snowman.
- We glue a cap on the head - a hat.
- We attach the beads to the body with a pistol, like buttons. We draw eyes and mouth with gouache.
Photo: youtube.com/Crafts Homemade products
- Cut out a small square from paper, twist it and shape it into a cone. We paint over it with a felt-tip pen to make it look like a nose. We attach it to the snowman's head.
- We glue the tape around the neck - this is a scarf. Glue the fishing line to the craft and hang it on the tree.
Photo: youtube.com/Crafts Homemade products
Using light bulbs to decorate a Christmas tree
There are many benefits to creating original toys from scrap materials such as burnt out light bulbs. This is a significant saving on traditional decorations, an opportunity to create an original design for the New Year's beauty. You can simply paint a light bulb any color or create interesting shaped toys for the Christmas tree.
Snowman made of light bulbs
The basis of the snowman will be a simple light bulb. It must be painted white before use. It is better to use a piece of sponge or foam rubber to avoid leaving streaks and uneven strokes. To make the coating more dense, the paint must be reapplied. We make a hat from a piece of knitted fabric. For decoration, you can use a pompom or just a bright ribbon.
The eyes and nose can be cut out from cardboard in matching colors or any suitable material can be used. We decorate the body with buttons or any other decor. Hands can be made from yarn, cotton coils, and twigs. Any of the elements must be attached with a glue gun. To turn a snowman into a Christmas tree toy, you will need to make a thread attachment. You need to thread a beautiful cord through the bead and secure it in the middle of the cap.
Snow globe toy
A traditional European Christmas gift can be made with your own hands. A snow globe assembled piece by piece from scrap materials will give joy and faith in miracles to adults and children. The basis of the toy can be any jar with a tightly screwed lid. For the filler you will need plain water and a few drops of glycerin.
Before starting work, you should come up with a composition. These can be single toys from kinders, items made of fabric, plastic and other small items. We glue the parts using waterproof glue to the inside of the lid and fill it with a mixture of water and glycerin. Then add glitter and screw the lid on tightly. The more antifreeze, the slower the imaginary snow will sink to the bottom of the jar. The final touch is to treat the joint with glue.
Metal products placed in liquid run the risk of rusting. Therefore, before use, they should be treated with colorless varnish.
Decoupage on light bulbs
Glass Christmas tree decorations have always been considered especially beautiful and individual. You can hardly find them on the shelves of modern stores. Such products gradually replaced more practical and similar plastic analogues. Fortunately, such toys can be made independently from available materials. An old glass light bulb is perfect for this purpose.
To decorate using the decoupage technique, you will need a special napkin with a picture, a photograph on a thin sheet, strips of music, scraps of newspaper or other paper elements. First, the light bulb must be wiped with alcohol and painted in any color you like. After the workpiece has completely dried, cut out the designs from the napkin and glue them to the light bulb. The edges should be straightened well and pressed down with a dry towel. You can add shine and protect the coating from external factors using a thin layer of colorless varnish.
You can decorate a nondescript metal base with paint, foil, and beautiful ribbons. We fix the rope by which the toy will be suspended in the upper part of the light bulb, simply wrapping it around the base several times.
We draw faces and put hats on lamps
The best idea on how to decorate an unattractive lamp base is to hide it under the hat of the chosen character. To create simple and original figures you will need multi-colored paints, some fabric and decor in the form of beads, seed beads, and ribbons.
It is better to draw the background with a piece of foam rubber, using careful movements so as not to disturb the brightness of the color and not leave streaks. For clear lines of the face, thin brushes are suitable. You can also complement the image of the hero with elements made of clay or artificial wool. It could be Santa Claus's mustache, the bangs of a shy lady, etc. The hat can be made from absolutely any material. It is better to pre-starch thin fabrics or make a cardboard frame for them.
DIY Christmas tree decorations from scrap materials
From all sorts of odds and ends and scrap materials you can create wonderful toys that will delight you on holidays and on weekdays. Such creations are especially valuable if you make them with children.
Christmas tree decoration made of pine cones
What the New Year's tree lacks is pine cones. Perhaps this is the most environmentally friendly material for a toy. Yes, and you can find it in most parks or nearby forest belts. All you have to do is decorate the cones a little, make a beautiful ribbon pendant, and the original toy is ready!
Required:
- cones;
- foil;
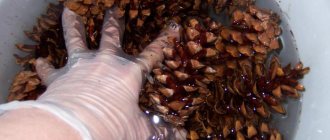
- latex gloves;
- spray paint;
- hot glue;
- glitter;
- Polish for hair;
- decorative decorations.
Stages of work:
1. If necessary, clean the cones from dirt and dry them. Spread foil on the work surface. We put on gloves and thoroughly paint the pine cones using a can of paint. Let it dry completely.
2. Cut a ribbon 24 cm long. Fold it into a loop and attach the pine cones to the base with hot glue. We wait until everything dries and decorate with bows, beads, and other decorative elements at your request.
3. All that remains is to generously spray the cone with varnish and sprinkle with glitter of a suitable color. We remove the excess simply by shaking the cone. You can also just use glitter hairspray. And the beautiful decorations for the New Year tree are ready. By the way, no worse than store-bought ones.
You don’t have to use only blue colors for your work; you can use absolutely any colors you want.
Cones decorated with ordinary beads also look no less interesting. We make a pendant from a beautiful cord, and attach multi-colored beads to the cone itself using hot glue:
And how cute the owls or baby gnomes will look. To do this you will need small pieces of felt or decorative cardboard:
Christmas tree decorations made from plastic bottles
Such cute toys are considered the easiest to make, but they open up the flight of your imagination. There are so many ideas you can implement!
Bells on the Christmas tree will be a great decoration
Here are some cool bells you can make from baby yogurt
It's very easy to make snowflakes, you need to take bottles of the same size, cut off the bottom, decorate them with paints in the form of winter decor and attach a ribbon, that's all.
DIY Christmas balls - creative and very original!
Christmas tree decoration made from light bulbs
And you can create such beauty from light bulbs! Both the snowmen and penguins turn out incredibly beautiful!
Citrus decorations
New Year's crafts made from oranges and tangerines will create a real holiday mood in your home. Citrus fruits are easy to find at any time of the year and are a pleasure to work with. They make magical decorations that fill the house with amazing New Year's aromas. You can add a little orange color by making one of the following crafts for your Christmas tree:
- Fragrant balls. Poke holes in the peel of a fresh orange with a skewer and place sprigs of cloves there. The holes can be chaotic or create complex patterns. Such a creative ball will look great on a Christmas tree, front door, or on a kitchen cabinet;
- Orange garlands. You need to thread a metal wire through the fruit and twist its ends in the shape of a snail. We tie a beautiful ribbon to one end and hang it on the tree. You can leave them natural or cut out spiral stripes or any patterns;
- Peel pendants. Products cut out using a cookie cutter can be used as a Christmas tree decoration, decor for gift wrapping;
- Golden wreath. The main detail is orange slices. You can simply attach them to a wire or pre-lay them with spruce branches.
Gingerbread and cookie decorations
Edible decorations began to appear on Christmas trees less and less often. But some modern design styles still accept this way of decorating a holiday. You can revive a wonderful tradition by hanging delicious Christmas trees and snowflakes made from cookies on your Christmas tree.
On New Year and Christmas, gingerbread and crumbly cookies are usually prepared. The recipe is very simple; you just need to have special shapes. You also need to remember about the need for a hole in the top of the toy.
There are a huge number of design options for edible flour decorations. The constant rule is the presence of multi-colored glaze. You can hang cookies on the Christmas tree as individual toys or create garlands from them.
Christmas tree ball made of paper
You will need a base - a foam or wooden ball. They can be bought in specialized stores, or, if desired, can be ordered online.
Instructions:
- Cut the corrugated paper into narrow strips. Dimensions: width approximately 1-1.5, length 3-4 centimeters.
- Twist the strips into a rosette.
- You need to make a lot of roses so that there is enough to cover the entire workpiece.
- Carefully glue to the ball.
- Decorate with beads and sparkles.
- Glue a ribbon so that the toy can be hung on the Christmas tree.
It turns out to be a very elegant ball.
Paper toys
DIY Christmas tree decorations are valued much more than conveyor belt plastic balls. The very process of making them gives a lot of positive emotions and increases the anticipation of the holiday. The most affordable and simple material for New Year's toys is paper. You can create a real masterpiece from the most inconspicuous, at first glance, piece. The work does not require special skill. All you need is imagination, patience and a few available tools.
Master class “paper cones”
Any New Year tree must have pine cones. Paper crafts of this shape will be very useful. There are several ways to make a toy yourself. To do this, you must strictly follow the recommendations of the following master classes:
- Spiral cone without base. To work, you will need several multi-colored sheets of cardboard and a detailed gear diagram (can be printed from the needlework website). We cut out the parts from cardboard. You should get 16 elements with teeth and a circle. Glue the ends to the round base, combining colors. Putting the craft together. Each element must fit into the grooves of the previous one.
- Cone based on triangular scales. You can use a foam or paper form as a frame. Glue a circle to the top. While the workpiece is drying, we begin making the scales. We will make them using modular origami technique. Cut out squares of colored paper - 2 cm, bend two ends to the middle. Now we attach all the elements in a circle in a checkerboard pattern to the round top.
- Cone based on round scales. To keep the toy in shape, you will need an egg-shaped frame. Its design will be similar in type to the previous version, only we will use circles rather than triangles. Cut out 150 round elements. The ideal option is to make them with a hole punch of a suitable diameter. We paste over the form in a checkerboard pattern.
Felted wool toys
Felting wool is a simple and fun activity. Volumetric figures are light and soft. For this you will need pieces of padding polyester and a skein of wool yarn. It is better for beginning needlewomen to give preference to simple forms of New Year's toys.
We cut out the blanks in 2 copies (hearts, circles). The elements should have a diameter twice the size of the desired toy. Using a needle, assemble the outline along the outer edge (basting type), leaving the thread free, without knots. We fill the resulting bag with padding polyester, tighten it and tie it. Parts of a different shape can simply be sewn together.
Now the workpiece needs to be covered with wool. We pull out the strands and wrap them around the base in different directions. They must be fixed with a felting needle to prevent bald spots from forming. The simplest thing remains. We place future toys in a nylon stocking and put them in the washing machine on a standard washing cycle. After drying, we get neat lumps. You can decorate with beads, braid, bows and other cute little things.