DIY apartment interior decorations are gaining more and more popularity. They use materials that craftswomen previously did not pay attention to at all, and did not even consider as a basis for crafts.
One of the best finds for needlewomen was coffee beans. Coffee-based crafts will give your apartment an original look and fill the house with a pleasant, invigorating smell.
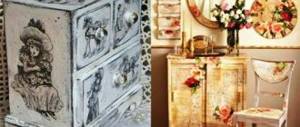
Such accessories will fit perfectly into an interior made in eco-style or using ethnic motifs.
At the same time, crafts made from coffee beans will be an excellent addition to the kitchen or dining room, further emphasizing the purpose of these rooms - cooking and eating.
Coffee beans, both unroasted and of varying degrees of roasting, are available for sale in any supermarket. Their cost is low, which means that creating a masterpiece from this material will not hurt your wallet.
By the way, if when working with a craft there is a need to use different colors of coffee, then it is better to roast the beans yourself, achieving the desired color.
A huge number of photos of crafts made from coffee beans are freely available. Experienced needlewomen share ideas for original crafts. We'll tell you how to make a craft from coffee beans below.
Coffee scented candle
The candle is made by gluing coffee beans to the side of the finished candle. You can heat it up and gently press the grains into the heated candle material, then you won’t need glue.
After complete cooling, you can further decorate the candle. It all depends on your imagination - wrapping with twine, a thin strip of burlap or lace will do.
Some grains can be painted in a contrasting color, for example, light beige or gold.
We recommend reading:
Crafts made from epoxy resin - stylish, original and beautiful products and decorations made from epoxy (110 photos)
Crafts from seeds: step-by-step instructions and tips for choosing the most beautiful ideas for crafts
Crafts from airy plasticine - ideas for creating beautiful crafts, the main steps and a description of how to make a craft correctly (100 photos)
There is a simpler, but no less sophisticated option. For it you will need a round vase, on the bottom of which you need to pour coffee beans in a thick layer.
Then simply press a short candle into the grains so that almost all of it is hidden under the grains. This is a wonderful and unusual find for a romantic evening.
Crafts made from burlap and coffee beans
Burlap is an excellent companion material for coffee. It can additionally decorate the finished product, and is often the basis on which the grains are attached. For example, when making a painting or a watch.
Coffee bean painting
Materials:
- sheet of hard cardboard;
- a piece of burlap slightly larger than cardboard;
- coffee beans;
- glue;
- pencil;
- clear varnish;
- frame.
Stages of work:
- Pull the burlap tightly onto the cardboard and secure it with glue on the back side.
- Apply the design chosen in advance.
- Glue coffee beans along the outline of the design.
- Cover the drawing with varnish.
- Add decor as desired. It could be wood, lace, twine, cinnamon sticks, vanilla, star anise.
- Insert into frame.
Coffee painting
From coffee beans you can create real works of art with your own hands, for example, various paintings.
We will need:
- thick cardboard;
- glue gun;
- a piece of linen fabric;
- glue stick.
Description of work
- The production of any painting should begin with preparing the base. To do this, cut out a square from cardboard, the size of the future painting;
- Let's prepare the fabric. Its edges should protrude about two centimeters beyond the edges of the cardboard base;
- Next, you need to cover one side of the cardboard with glue, securing the fabric and folding the edges, glue them to the back side;
- Now let's start forming a pattern from grains;
- As soon as the base has dried, you need to sketch the image on the fabric with a simple pencil.
A coffee cup and saucer will look very harmonious, but don’t get too hung up on it – the theme can be varied.
- After drawing a sketch of the design, we proceed to pasting it with aromatic material. We start with the outline and move in the direction of gradual filling towards the middle. Coffee must be placed with the convex side facing the fabric;
- The final stage of making our masterpiece is creating a frame. To do this, we make a base around the perimeter from grains (glue them on), which will give a finished look to the product.
Return to content
Burlap plant pots
A very simple and at the same time elegant solution for the interior will be a flower pot made from burlap. To do this, the burlap must be decorated in advance along the edge with lace. Place a square piece of burlap under a regular plastic pot.
Coat the edge of the pot with glue. Next, wrap the pot with burlap. You can press it tightly by gathering the frill around the edges, or you can give the burlap the appearance of a stuffed bag.
Use twine or ribbon to secure the burlap in several layers. Next, glue the coffee beans around the perimeter of the flowerpot.
Such a pot can also be made using twine. Then the degreased surface of the pots is treated with glue and tightly wrapped layer by layer with twine.
The ends of the twine should be carefully hidden under the winding, having previously been glued thickly. Then decorate as you wish, and you should remember that you can glue coffee beans and other parts only after waiting until the glue under the twine has dried completely.
A coffee tree
You will need:
- round base;
- decorative pot;
- gypsum;
- Styrofoam;
- twig;
- glue.
Description of work
- First you need to form a crown. For this we will use a plastic children's ball;
- so that the main color of the ball is not visible, it needs to be painted with brown paint, it is better to use a spray;
- leave the ball to dry for a day after painting;
- We will make a hole in the ball where the barrel is inserted.
Next, we will deal with gluing the grains. It is better to use a glue gun for this phase of work, which sets instantly and makes it easier to apply glue with it.
- We start gluing each coffee grain from the top of our crown;
- The flat side of the grains is the most convenient for gluing. The initial layer will not completely hide the base of the crown. This is caused by a small seal;
- The ideal crown will be obtained by gluing the second layer onto the ball. Although this will increase the consumption of grains, it will significantly improve the appearance of the finished product.
There is a little trick that allows us to get a fluffier crown of our tree. This result is obtained by a grain glued with an edge.
Allow the glue to dry completely, and at this time we will begin to work with the barrel:
- for the trunk, you can take any strong and rigid material, for example, a hard roll, which must be wrapped with straw or twine for decoration;
- Alternatively, you can use a slightly curved, fairly thick branch. Only it should initially be rubbed with sandpaper to make it smooth, and then painted. Color should not disturb natural combinations;
- secure the barrel by inserting it into the ball until it stops;
- Glue a few coffee beans around for rigidity;
- Now you need to secure the resulting tree in the pot by wrapping the base with wire and inserting it into the pot. And the free space needs to be filled with foam;
- Dilute gypsum in water and pour into a pot;
- wait for the structure to dry;
- Try to hide the plaster with decorative elements sprinkled on top.
The tree is ready and waiting for the hand-made decor to become an interior decoration.
Return to content
Topiary
Crafts made from twine and coffee beans are very popular because they allow you to play with the shape of the product.
So, if you use wire to fasten parts, then wrapping it with twine, you can achieve the effect of structural integrity. For example, this technique is used in creating topiaries.
Topiaries are crafts in the form of a tree. Their other name is “tree of luck.” Therefore, homemade topiaries have become very popular as cute and easy-on-the-wallet gifts.
Such a sign of attention will bring good luck to the house and will fit perfectly into almost any interior of the living room or dining room.
We present to your attention a master class on crafts made from coffee beans in the form of topiary.
Materials:
- newspaper and plastic ball or foam for the base of the crown;
- brown paint (gouache);
- coffee beans;
- Super glue;
- mug, pot;
- thick wire;
- plaster or alabaster;
- brush, scissors.
Manufacturing stages:
- Cover the balloon with scraps of newspaper. Let dry.
- Paint with gouache. Dry.
- Coat the wire with glue and wrap the twine tightly.
- Carefully glue the coffee beans with the convex part down using superglue. Leave some space for the wire.
- Insert a wire wrapped with twine into the ball.
- Pour gypsum into a cup or pot and insert a structure made of crown and wire into it. Make sure that the trunk is kept level - you can put a support.
- Place coffee beans in two layers in a pot.
- Treat the edges of the pot with glue and decorate it with ribbon or twine, you can use small parts, beads, include cinnamon, star anise in the composition, you can use chestnut and small cones to create the crown and “ground” in the pot.
In general, if you decide to use coffee beans for crafts, you can create a masterpiece that will decorate any interior and delight the eye with its originality. And such a craft will bring a lot of pleasure to the creator.
Cup and saucer decorated with coffee
We offer another master class on crafts made from coffee beans. It will require a tea pair - a cup and saucer, glue, jute twine, coffee beans.
Apply glue to the cup and cover it with twine. Do the same with the saucer. Glue the cup to the saucer at an angle. Arrange the coffee beans as if they were pouring out of a cup into a saucer, and glue them.
- Choosing a brick of your life
- DIY shoes for life
DIY is a place for DIYers.
You can complement the decor with coffee beans on the cup or along the edges of the saucer. To make an original souvenir fill your kitchen with a stronger aroma, add elements of dried citruses and cinnamon.
If you glue the cup not directly to the saucer, but to the wire frame at a small height, raising it above the saucer, you can make a coffee “waterfall.” To do this, cover the wire frame with coffee beans and coat them with varnish. You will be left with the feeling that the cup is hanging in the air and coffee is pouring out of it.
These are just some examples of how you can use coffee beans to create original items for your home. Take a look at the photo and come up with your own ideas for coffee creativity.
Photos of crafts made from coffee beans
1+