Choice of linoleum
The wooden base transmits sound, moisture and cold very well, so when choosing linoleum you should choose a coating with good protective properties.
Despite all the advantages of natural material, it is not recommended to use it in this case. It is better to choose a synthetic one, which has low thermal conductivity and is not susceptible to rotting due to fairly high humidity.
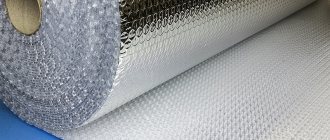
Particularly good in this regard are types of PVC linoleum on a foamed or multi-layer heat and sound insulating base.
Alkyd linoleum also has good insulating characteristics, but it is quite brittle. Since the wooden base has a large number of seams, even after preparatory work, this type of linoleum is still not worth choosing.
Otherwise, there is a high probability of creases, cracks or even tears in the fabric. For the same reason, you should not purchase products with a thickness of less than 3 mm.
Floor condition assessment
Before laying linoleum, it is necessary to assess the condition of the wooden floor and the need for preparatory work.
Walk energetically around the room, or better yet, jump.
If the floor does not wobble underfoot and does not make any sounds, then such a floor will be the easiest to work with, even if it does not have a perfectly flat surface.
Inspect the surface: the color of the boards should be natural. Try to pierce areas with discoloration with a screwdriver or an awl - healthy wood, regardless of age, will be strong enough.
The good condition of the floor and a normal level of humidity is indicated by the absence of fungus or mold on the boards and rust on the heads of the nails.
Another problem with wood flooring is wood-boring insects. Their presence is indicated by eaten grooves on the surface and inside the boards. Rotten boards must be replaced, otherwise the rot will spread to other wooden elements.
If there are traces of the presence of insect pests, then treatment with bioprotective preparations is mandatory.
It is advisable to lift one or two boards and assess the condition of their undersides and the joists on which they are laid. Tap them with a hammer - a distinct wooden sound should be heard, and a dull sound indicates the presence of pockets of rot.
Particular attention should be paid to load-bearing joists if the floor creaks or sag: most likely, they cannot withstand the load and you will have to place bricks or bars under them, and additional boards are nailed to the joists.
The squeaking noise can also be caused by friction between the floorboards. To solve this problem, it is recommended to pour talc or graphite powder into the cracks between them.
In addition, it is necessary to evaluate the evenness and horizontality of the surface. Performing all these actions is the key to long service life and good appearance of the coating.
Tools and additional materials
Before starting work, prepare everything you need:
- Sharp knife;
- A spatula with teeth (wooden or metal);
- Long ruler or staff (2-3 m);
- Glue or double-sided tape depending on the mounting method;
- Roller;
- Nails;
- Cold welding for linoleum, if joints of the panels are expected.
For preparatory work the following will be useful:
- Planer or sanding machine for leveling the surface;
- Plywood, bars (joists) and nails/screws to create the most horizontal and even surface;
- Glue, putty.
Preparation of the base surface
It is necessary to remove paint from the old plank floor and deepen the nail heads.
If the floor is strong enough and does not have any distortions in height, but the surface itself is uneven, then you can use a plane or sanding machine to level it.
Scraping can also be done manually using a hand scraper or a piece of glass, but this method will be very labor-intensive and ineffective.
The gaps between the boards must be filled. In the same way, it is worth treating the places where the nails are buried.
If the surface is not treated, then the unevenness of the wooden flooring will appear on the linoleum.
If the floor has significant unevenness or differences in height, then sanding the surface alone will not do.
How and with what to level a wooden floor under linoleum? Methods of preparation
In this case, several options are possible:
- Leveling the floor with a self-leveling mixture.
Although the floor will be almost perfectly level, this is not the best option for wooden surfaces. But if you decide to use it, then you should select a mixture specifically designed for plank floors.
- Leveling the surface using sheet material.
Under linoleum on a wooden floor, you can use hardboard, plywood, fiberboard or furniture panels. If you only need to get rid of unevenness, then the sheets are fixed with parquet glue or a mixture of PVA and gypsum, and then additionally nailed to the floor with nails or a construction stapler.
To create a horizontal line, you will have to lay the sheets on logs made of bars or plywood strips fixed to the floor with glue.
After laying the sheets using any of these methods, the seams must be puttied. Finally, the surface must be oiled.
Additional thermal and waterproofing is usually not required, since the base of correctly selected linoleum itself performs these functions.
Before laying linoleum, the floor must be thoroughly cleaned of debris, vacuumed, washed and dried.
Read on to find out more!
How to lay laminate flooring yourself
Floor plinth is a detail on which the perception of the interior depends
Self-leveling floors: types, advantages, disadvantages
Efficient heating with underfloor heating
Water heated floor: calculation
Wooden floor on joists
- 2.58
Rating: 2.6 out of 5 Votes: 187
- 7
Reply
4 years ago
Karina Golub
4 years ago
Quote
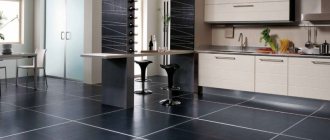
It is not at all surprising that linoleum has gained popularity among the population. The material is durable, practical, well suited for use in private homes. I think it is most suitable for the kitchen.
Artem
4 years ago
Quote
You can also add that if you buy linoleum in winter and it was stored in a subzero room, then lay it immediately in the apartment and let it rest for 2-3 days at room temperature so that it acquires its elasticity; under no circumstances should you unwind it immediately , may crack.
Juliana
4 years ago
Quote
The instructions, of course, are simple and quite understandable, but... only, to be honest, I think that instead of laying linoleum on a wooden floor, it is better to restore the wooden floor. It will be much cheaper and more aesthetically pleasing.
Alina
4 years ago
Quote
My husband does all the home renovations himself, but has not installed parquet. I really wanted natural wood on the floor and I was able to persuade him. It took a little more fiddling, but everything turned out perfect. Never be afraid to try using tips from articles.
Vladimir
4 years ago
Quote
I completely agree with Karina. I chose linoleum myself because of its cheapness and practicality. I laid it down, trimmed it with a knife, screwed the baseboard and everything was ready. So the whole house was covered with linoleum. That's how enterprising he is.
Catherine
4 years ago
Quote
We laid linoleum in my grandmother's kitchen directly on the wooden floors. It was terrible. Then everything was removed. The floor was leveled with thick plywood. The linoleum was laid again. Beauty. Everything is smooth. And not just one bump.
Preparation of linoleum
When purchasing linoleum, you should add 5-15 cm along the length and width of the room. If it has a repeating pattern, then you need to take one more row on each side. Thermal shrinkage allowance should also be taken into account. For PVC it is 2%.
Do not bend linoleum during transportation, as creases will form. Having brought it home, you need to spread it in the room, leveling it from the center to the walls, and leave it for a couple of days to adapt. If there are waves, they must be pressed down with a weight.
And if significant fractures or bends are detected, it is better to replace the roll. The room temperature should not be lower than 16°C, and the humidity should not be 40...60%.
It is better to place single-color or marble canvases in the direction of daylight, which makes the seams less noticeable. The joints of linoleum of any color should be placed in the middle of the board.
After leveling, the canvas is cut, leaving a space of 5..30 mm to the walls, which will be covered with skirting boards. To cut holes for pipes or protrusions for other elements, these places are first marked with a pencil or gel pen, and then carefully cut out by making small cuts.
Laying linoleum
Before laying linoleum on a wooden floor, you need to prepare the surface for laying, prepare the linoleum itself, and therefore lay and secure it.
Preparing the wooden surface
The technology for laying linoleum on a wooden floor depends on the thickness and type of material, the condition of the floor and the size of the linoleum. Thick insulated linoleum is suitable for laying on old floorboards without prior preparation. You just need to replace damaged, cracked or rotten boards and remove the baseboards.
To lay linoleum with a thickness of 3-5 mm, repair the boards, remove the plinth and cover the floor surface with plywood or chipboard (chipboard). Allowable gaps between sheets are 1 mm. After laying the plywood or chipboard, fill the gaps. To do this, mix the shavings and dust obtained when cutting sheets with PVA glue and fill the cracks with this composition. The complete drying time for the putty is two days. After drying, sand the seams with sandpaper.
To lay thin linoleum, repair the floor and cover it with plywood or chipboard, fill the seams and sand the surface. The purpose of this operation is to smooth out the base. During processing, check the base with a two-meter long building level. Height differences of more than 5 mm per two meters are unacceptable. Use a sander to smooth out any protruding areas.
Preparation of linoleum
Having prepared the base, bring the linoleum into the room where the renovation is being carried out and leave it for 3-4 days. This is necessary so that linoleum is laid on a wooden floor without cracking the coating. After that, start marking. If the size of the linoleum allows you to lay it in one piece, you will not have to weld the individual parts together.
Spread the linoleum around the room, avoiding any free areas. This will help you see where and how much the covering needs to be trimmed. It is advisable to start adjusting the linoleum from any of the far corners of the room. Trimming is done with a stationery or sharp shoe knife.
Properly fitted linoleum fits neatly into place. If it fits the wall, apply new markings and adjust it. A gap of 0.5-1 cm is allowed between the wall and the linoleum, which will subsequently be closed with a fillet or plinth. A larger gap will make it more difficult to secure the linoleum.
Use caution when pruning. Carelessness can result in damage to the linoleum or personal injury.
Trim the linoleum around the perimeter of the room, avoiding the appearance of gaps larger than 1 cm. If decorative fillets of small width are used, reduce the gap tolerance to 1-3 mm. This is not difficult if you do the work carefully and without haste.
When using linoleum, the size of which is smaller than the room, you will need to join the edges of the sheets. If you have a welding gun for linoleum, the distance between the sheets should be 2±1 mm. If there is no gun, adjusting the edge is not acceptable. Lay the sheets so that the edges are completely in contact, then adjust to the size of the room.