Some historical facts
The history of collage goes back several centuries, but at the beginning of the 20th century this technique reached a new level. The idea of creating such images has become a distinctive trend in modern art. The term comes from the French coller, which means “gluing”. Avant-garde works were created using this technique.
A new round in the history of the development of collage technology has spread thanks to two famous artists. In 1910-1912 Pablo Picasso and Georges Braque realized the idea of this composition. Later this method became widespread and gained incredible popularity.
Basic materials and tools
The set of materials will depend on the main idea and manufacturing method. At minimal cost you can get by with the most affordable components. But if you manage to select unusual bright materials, the collage will turn out to be very original. The main materials can be:
- colored paper or foil;
- canvas;
- paints (oil, acrylic, watercolor, tempera);
- colorful bright fabric;
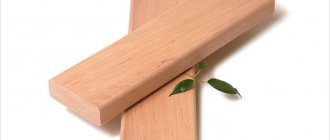
- wood;
- transparencies;
- cardboard;
- plastic or plastic;
- wood varnish.
In addition to materials, you will need tools for work: scissors, a stationery knife with replaceable blades, glue, rags.
This is just an approximate list of possible collage materials. The dimensions of the future work of art, as well as the placement, shape and set of components are limited only by the author’s imagination.
To feel like a truly creative avant-garde artist, you can give free rein to your own imagination and try to realize something non-trivial. You can use any little things for decoration: buttons, buttons, coins, beads, seed beads, etc.
Original ideas
It’s impossible to list all the ideas, but here are a few options:
- Stretched ropes with photographs attached with clothespins or hooks look unusual. The clothespins themselves are colored and you can glue small decorative elements onto them. You can also choose the thickness and color of the cord or rope. Photos from a holiday at sea or the summer season will look especially relevant. You can create a nautical theme by hanging starfish and anchors from strings, and placing a clear jar of sand on the shelf next to it.
- The composition of hanging frames looks stylish and at the same time homey. You can combine round and square frames, choose different sizes, hang them on beautiful ribbons at different levels, and tie bows. The downside is the need to drive a lot of nails into the wall. This idea is suitable for a family collage.
More original ideas can be seen in the video.
To make a collage from photographs, it is not necessary to follow clear instructions and stick to the theme. This is the whole point - to show your imagination and do everything to your taste.
Process of creation
Creating such objects of art is not at all difficult. You need to turn on your imagination, give free rein to your dreams and imagination, and acquire the necessary materials. Then you can safely begin to implement your plans.
Work on the composition can be divided into three stages:
- First of all, you need to decide on the topic. This could be a love story, travel, places that have yet to be visited, wedding, family and friend photos.
- Selection of materials. First of all, you need to look among the old things. Perhaps among them there is something that can be used for creativity. If not, you will have to purchase the missing materials.
- Manufacturing plan and detailed design. This is the most interesting part of the job. It is important to consider that the finished “picture” must be harmoniously combined with other interior elements.
Preparing the base
There are an incredible number of ideas for posting photos. If the wall is a flat, monochromatic background, you can do without any base. But if you still decide to place images on any substrate, you can consider several options:
- The simplest solution is considered to be a regular sheet of paper. You can give it any color you want, apply inscriptions and patterns, and then post a photo. Creating a collage of photographs on whatman paper with your own hands is quite simple. In addition, this will require a minimum set of materials.
- Styrofoam is another simple but convenient idea. Photos can be attached using the buttons. Over time they can be updated.
- Tree. This can be either a treated surface or a cut of the barrel coated with varnish. Wood will perfectly enrich any interior.
- Canvas or fabric. In appearance, this background is a bit like paper, but the fabric base is more durable.
- A piece of linoleum or laminate. Perhaps after the repair there was an unused piece of such coating. It is also great as an alternative background for images.
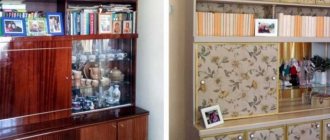
- If you place images directly on the wall, you can use frames. Each picture will be neatly framed. This stylish design will wonderfully decorate any interior. Another great idea for decorating your room with your own hands is a collage of photo frames on the wall.
To correctly and accurately determine the size of the required covering, you must first place photographs on the floor. All details must be positioned as planned on the collage. When the optimal placement of the elements has been determined, you can begin cutting out the shape of the base.
Types of decorative frames for photos on the wall
A photo frame, or as it is also called a “passepartout,” is not as simple an object as it might seem at first glance. It largely determines how the photograph will be perceived and looked in the interior. Picture frames differ in shape, size, material and style. We'll look at these main differences below.
White photo frames of classic shapes
According to the shape and size of the frames
Modern manufacturers of decorative accessories offer photo frames of various shapes at affordable prices: rectangular, square, round and oval, which can be considered classic, as well as polygonal and stylized to resemble various shapes (heart, house or cloud). The classic form of photo frames is still very popular. However, interior designers recommend making compositions from frames of various shapes or using multi-frames to create original collages.
Frame sizes are dictated by the most popular photo formats. Rectangular frames are available in sizes ranging from 9×13 to 50×60 cm. The most common photo sizes are: 10×15, 15×20 and 20×30 cm. To decorate walls, photographs of A and B formats are used, corresponding to generally accepted paper standards.
Classic rectangular photo frame of standard size
Polygonal Photo Frame for Wall
Photo frame "book"
By material and style
Photo frames can be placed in any interior, since a variety of materials are used for their production: wood, plastic, metal, glass, plaster, cardboard or fabric. Natural wood is used to create frames in a classic style (strict straight, smooth or even carved). Frames made of glass, plastic or metal will look harmonious in interiors in the style of Art Nouveau, high-tech, minimalism, pop art, etc. Since there are no strict rules for frames, anyone can make them with their own hands from a variety of materials, according to their own taste and imagination.
Wooden photo frame
Tabletop glass photo frame
Metal frame for several photos
Tips and tricks
Often the main problem is a lack of ideas. Sometimes it’s difficult to just squeeze something new out of yourself. It helps a lot to get acquainted with the implementation of other people’s creative ideas. By looking through other people's works, you can take existing ideas as a basis, bring in something of your own and find a unique, stylish design solution.
If it is difficult to imagine how a particular combination of photographs will look on the wall, it is better to use special computer programs. They will help you choose the most suitable background, optimal location and select additional elements. And most importantly, this method allows you to see firsthand how appropriate the chosen method of placing images is.
The approximate flow of working with the program is as follows:
- download a program (for example, Photo Collage) and install it on your computer;
- click “create a new project”;
- choose a template and type of collage;
- upload selected photos to the program;
- beautifully arranged and edited;
- save.
One of the simplest ways to make a photo collage on your wall with your own hands is to print an image created in a special program, combining many small photos, and attach it in the chosen place.
Scene selection
In addition to traditional family photos, you can come up with a lot of great photo collage ideas. The main thing is that the finished work of art brings positive emotions, awakens the best memories and inspires.
Design Rules
In addition to selecting the plot, determining the composition and other details, there are several important points. To flawlessly implement a collage idea, you need to listen to the opinions of interior designers. There are several important steps.
Wall selection
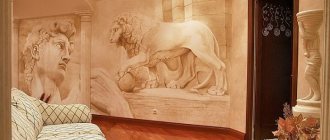
To achieve maximum impact, you need to carefully choose your wall. The ideal option is an absolutely free and monochromatic surface, on which there are no sconces, paintings or posters. In addition, it is best to place the collage on the far wall so that you can appreciate the composition from some distance.
Design experts do not recommend placing collages on the stairs or in the hallway. In such rooms it will not be possible to achieve the desired effect. It will only give the impression that there are photographs, but not a single structured composition.
It is advisable that there is no large furniture near the wall: a double bed, a wide table, etc. Since it will interfere with free passage, and viewers will not have the opportunity to clearly see the subjects of the photographs. Above the beds, it is best to place neutral images rather than family photos.
What does Feng Shui recommend?
According to Feng Shui, an advantageous place for family photos is the wall in front of the sofa or a shelf with sufficient lighting.
More: Original interior design with stumps and logs
A corridor or hallway is not a place to hang photo frames, just as you should not choose a bedroom. Photos of a couple in love are allowed in the bedroom.
How to activate zones:
- In the southern part and southeast of the house there is a zone responsible for wealth and fame. Photos of people who have achieved success and recognition are posted here.
- In the western part there is a creative and children's area. Here it is worth hanging positive children's photographs and pictures depicting fairies and elves.
- Single people who dream of a life partner should hang pictures of happy lovers.
- Frames with photographs of mountains are hung in the office. The family photo is placed on the right side of the table.
- You cannot place photographs next to a stopped clock, otherwise it will affect the energy of the hero of the photo.