DIY table lamps are the simplest lighting devices. They are compact in size and light weight, so they can be installed not only on a desktop, but also on a small coffee table or bedside table in the bedroom. Despite the fact that table-type lamps do not play a big role in the interior design of the room, they still give the room a more comfortable and cozy homely atmosphere with their decorativeness and functionality.
Such lighting equipment can easily be made independently at home from a wide variety of available materials and old unnecessary items. For example, many people don’t even realize that there are craftsmen who make unique designer floor lamps, chandeliers, table lamps, and other decorative lighting devices from the following items:
- ordinary glass wine bottles;
- glass, metal cans;
- flower pots;
- tin cans for beer, cola, and other soft drinks;
- plastic disposable tableware;
- nylon threads and wire;
- thick paper or cardboard;
- other, at first glance, unnecessary things.
Table lamp made of bars
Handmade has always been in great demand among lovers of the finest. And today it is extremely popular, which means that any product made with your own hands will find a worthy place in the interior design of an apartment or your own home. For example, such an item could be a designer lighting fixture made of wooden beams.
Required materials and tools:
- screwdriver;
- hacksaw;
- drill;
- gilded paint in a can;
- wing bolt and nut;
- long wooden block - 1 pc., short - 2 pcs.;
- electrical kit: socket, plug, cable and light bulb.
Bottle table lamp
This option for designing a light source is very common, since making a table lamp from a bottle is much easier than it seems at first glance.
The bottle can act as an excellent base for a table lamp or as a stand-alone lighting fixture without the addition of a lampshade. This is especially true if you have a bottle or jar of an original shape or color in stock.
A DIY bottle lamp can have 2 light connection options:
- external - the cord and light bulb socket are attached to the outside of the bottle;
- internal - the cord is threaded through the bottle.
In the second option of creating a table lamp from a bottle, you must first make a hole in the bottom so that the bottle does not burst. To do this, you need to bury it in a bucket of sand with the neck down, leaving about 5 cm above the sand. You need to pour a small puddle of water at the bottom. Using a diamond drill, you need to drill a hole in the center of the bottle, holding the drill strictly vertically. A similar hole needs to be made in the bottle cap. Now you can design a table lamp for your desk, bedside table or window sill.
Manufacturing instructions
- Initially, you need to make three pieces of timber of any length, but the main condition: one bar must be longer than the other two, and the latter must have the same length.
- Holes are drilled at the ends of two short bars at the same distance from the edge. Similar holes need to be made in the long bar: one in the center for the bolt, the second in the upper part for the electrical cable. The distance from the edge of the first hole depends on the expected angle of the lamp.
- After preparing the hole for the bolted connection, short bars parallel to each other need to be pressed against a long bar, the resulting structure is connected with a bolt and a wing nut.
- Now you need to thread the electrical cable through the top hole in the long bar and secure the socket. A plug is connected to the second end of the cable to connect the lamp to the mains voltage.
- The original table lamp is ready for use.
If desired, you can pre-tint the cartridge and cable with spray paint, let them dry thoroughly, and only then install them in their place. This will give the product a more attractive appearance.
DIY table lamp shade
If there is an old table lamp lying somewhere in the household that no one needs, it can be given a second life. To do this, you just need to make an unusual designer lampshade with your own hands, which does not present any difficulties or material costs.
Using a homemade lampshade for a lamp, you can achieve the most optimal illumination for the room or work area, for example:
- the lighting source will provide soft diffused light through thick fabric - this is an excellent option for the bedroom; the lamp can be used as a night light;
- If the lampshade is made from threads, then such a lighting device is suitable for illuminating a work surface.
Required materials and tools:
- old lamp with lampshade;
- dense soft fabric, such as satin or chintz;
- matte paint (color selected to match the interior design of the room);
- glue gun;
- cardboard stencil of a circle (D=100 mm).
The power of fantasy
If you want to make a truly original lamp base, take a look around! It could be an abandoned camera tripod, a teapot, or your son’s old plastic superheroes - that is, absolutely anything that comes to your mind!
Photos: homesthetics.net, homedit.com, crafthubs.com, slimnewedit.com, themerrythought.com, thegreenhead.com
Add to favorites15
- Tags
- lamp
- with your own hands
- DIY
lamp, do it yourself, DIY
Manufacturing instructions
- Initially, you need to cut fabric strips 10 cm wide, cut them into equal squares (approximately 200 such pieces are needed).
- Circles are cut out from prepared fabric squares using a stencil.
- The old lampshade needs to be painted to match the color scheme of the room's interior. The lamp will look more original if the paint is applied in uneven strokes, that is, to give the surface relief.
- While the paint is drying, you can start making parts for the lampshade from prepared fabric circles. Each resulting element should look like a badminton shuttlecock or a folded paper bag for sunflower seeds. To give the blanks a similar shape, the center of the circle is coated with glue, then the sides of the circle are compressed in the center.
- After the painted lampshade has completely dried, you can begin decorating it with fabric blanks. The parts are smeared with glue and pressed against the surface of the lampshade.
If desired, the edges of the fabric flounces can be lightly sprayed with gold or silver paint from a spray can. This will further embellish the finished product.
Important! Depending on the intensity of light flux required from the lamp, the decorative elements are glued either tightly enough to each other, or more loosely.
Homemade thread light
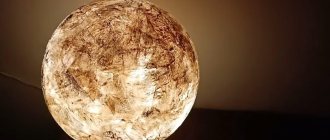
To create an original table lamp or floor lamp, you can use ordinary thick threads.
Required materials and tools:
- children's balloon;
- an old lighting fixture without a lampshade;
- thick cotton threads (the color is selected to match the interior of the room in which the decorative light is planned to be used);
- PVA glue and an unnecessary container for it (you can take a plastic disposable plate, cut a container from a plastic bottle, etc.).
Paper lamp: how to make it yourself?
From such a simple material as paper, anyone can make incredibly beautiful and modern lamps with their own hands. In the photo below we have presented several unusual options for homemade lamps made from paper. Enjoy watching!
Be sure to see: 10 best ideas that you can do for your home yourself
Chinese lanterns: DIY paper lamp
Thanks to such a simple and at the same time interesting decorative item as Chinese lanterns, you can add a little brightness, vibrant colors and a sense of celebration to the interior.
Materials you will need for this:
- Colored or white paper;
- A socket that you can remove from an old lamp or buy;
- LED light bulb (note that you should not use a heated light bulb, because we make the lamp from paper);
- Pencil and ruler;
- Stationery knife;
- Thread;
- Awl.
Making a lamp with your own hands (step by step with photos)
First, you need to draw lines on the back of the paper that will create the relief of the lamp. Below is a drawing according to which it is proposed to make markings.
We fold the paper along the marked lines to form a kind of accordion. At this stage, it is important not to rush and do everything carefully so that the lamp comes out smooth and beautiful.
Next, connect the light bulb to the socket. We make a small hole with an awl at the bottom and thread a thread through it.
Now we create a lampshade for a lamp from paper around the socket. At the junction, the sheet can be glued with ordinary PVA glue or joined in any other way. Please note that without gluing the edges, you will have an easier time changing the bulb in this light fixture.
Our Chinese lanterns are ready! In the photo below you see what happened in the end.
For more ideas on how to make a table lamp or pendant lamp out of paper, check out our article DIY Lamp Ideas from Pinterest.
Manufacturing instructions
- Inflate the balloon and tie the hole tightly to prevent air from escaping.
- Pour a large amount of glue into the prepared container.
- You can use a whole thread, gradually unwinding it from a spool, or cut it into separate pieces in advance. The goal is to tightly wrap the threads around the entire surface of the ball (you must leave a small space at the bottom so that you can then remove the deflated ball).
- Before wrapping the frame with threads, they must be thoroughly soaked in glue. Each subsequent turn should fit tightly to the previous one. You can completely cover the ball with threads or leave equal gaps after several turns (the intensity of the light flux will depend on this). To make such a lampshade more durable, it is recommended to coat the threads already placed on the ball frame with glue again.
- The product must be allowed to dry completely (this may take up to 10 hours).
- After the glue has completely dried, the ball can be deflated and removed from the resulting structure.
- The exclusive lampshade is ready, it can be placed on the lamp.
If desired, a hand-made table lamp can be additionally decorated with other decorative components, for example, braid, beads, homemade paper butterflies, etc.
How to make a lampshade for a lamp with your own hands from threads
This lamp will become a creative and unique decoration of your interior. It will easily fit into both the kitchen and the bedroom and living room.
So, what you will need: a balloon (you need to take into account the size and shape of the inflated balloon, because the shape of the lampshade will depend on this), thick cotton threads (preferably twine), PVA glue about 250 g, a hanging cord that will hold the lampshade, an energy-saving lamp, scissors, a needle, any cream, a brush, a cotton pad, and a cotton swab.
Step 1. Inflate the balloon to the desired size and tie it securely.
Step 2. Using a cotton pad, lubricate the ball with any cream to make it easier for the threads to detach from the base later.
Step 3. Thread the needle and pierce the glue bottle all the way through. Wind the threads around the ball as you see fit, but do not pull them too tightly.
Step 4. When all the threads are wound, apply a little glue to those places where there is not enough of it. Now the lampshade is almost ready and should be put away to dry overnight.
Step 5. In the morning, take a dried lampshade and start pressing the ball with a cotton swab to help it separate from the threads. Carefully and most importantly slowly deflate the balloon, because by doing it quickly, you risk creating a dent in the lampshade with your own hands.
Step 5. Mark the future hole and make 4 cuts in all directions so that the light bulb and socket can fit into the lampshade.
Finally, you need to insert the socket with the light bulb, and carefully attach the lamp holder between the threads. The lampshade is completely ready, now all that remains is to hang it in the room you have chosen and enjoy the results of your creativity.
Table lamp made of pebbles and wood
Natural materials, for example, pebbles, pieces of wood, are ideal for making a decorative lamp.
Required materials and tools:
- 5 pieces of wood (knots, fragments of driftwood, etc.);
- three round or oval stones (marble, sea pebbles, etc.);
- reed branch;
- electrical cable with socket;
- pin for table lamps (D=10 mm);
- 2 nuts (D=10 mm);
- metal knife;
- electric drill;
- set of drills for wood, concrete.
Manufacturing instructions
- Preparation of consumables. It must be thoroughly washed and dried.
- Next, the most massive, stable piece is selected from the wood materials, which will be used as a stand for a table lamp. A hole is made in it with a drill for a pin, which is first trimmed to the required parameters with a metal knife. The height of the stud should be approximately 5 cm higher than the level of stones and wooden blanks stacked on top of each other.
- The pin is inserted into a hole made in a wooden base.
- Using different drills, holes are made in each prepared stone and wooden piece to match the diameter of the stud. All made parts are threaded onto a pin already fixed at the base.
- At the very end, a reed branch is put on the hairpin (it will cover the thread).
- Next, a socket is attached to the end of the pin (while the electrical wire remains outside), the light bulb is screwed in, and a decorated lampshade is installed.
For your information! To secure the cable along the base of the lighting fixture, you can attach a small spring or a piece of thin wire.
This DIY design invention is perfect for a rustic, ethnic style; the most optimal installation option is a country house.
In addition to the options described above for manufacturing exclusive lighting fixtures, there are many more. From scrap materials you can make lighting devices from LED strips and other lighting devices for any room, for any interior, at home.
DIY table lamps: components of the product and its varieties
The main condition when choosing the type of lamp is to decide on the tasks that it will perform, and based on this, start working. If the main purpose of a table lamp is lighting, you should carefully consider the shape of the lampshade and the design of the leg. If the main function is illumination, then it is worth choosing a simpler form, and for a night light you can use the most basic option. If you look at the lamp, the following details generally stand out:
Any table lamp has a cord, a switch, a shade, a column and a lamp
- Column. The main element that ensures the stability of the lamp on the table.
- Light diffuser. The most visible detail can be a lampshade or a lampshade. It is the lampshade you made yourself that allows you to harmoniously fit the device into the surrounding interior.
- Cord. Serves to connect the lamp to power; there must be a plug at the end of the cord. If you make a device using a battery or batteries, this element can be neglected.
- On/off button. Allows you to regulate the operation of the device without disconnecting the cord directly from the network.
- Light source. This refers to a light bulb that provides illumination. It is selected based on the type of lampshade, the required lighting and the purpose of the lamp.
- Mounting the lampshade. Promotes reliable positioning of the light diffuser.
Before starting work, you need to decide on the type of lamp
The most popular types of table lamp designs
Based on their purpose and design, there are various options for table lamps. The table rack lamp is considered the most popular because it illuminates a large space on the surface of a work or dressing table and at the same time can easily be moved to the right place depending on needs.
Another advantage is that such lamps are easy to decorate, and the technical side of the issue is quite simple. Before you make a table lamp yourself, you should take into account that such a product cannot be adjusted in height, but by adding a thyristor power regulator to the device, you will be able to change the light intensity. And also the light falling evenly on the table surface reduces eye strain and prevents rapid fatigue. There are other types of table lamps (the photo is proof of this) that you can make yourself.
A lamp with a lampshade is quite simple to make, so it is suitable for beginners.
On a hinge. Such lamps are more suitable for people with an analytical mind than for creative individuals who like to decorate. Before you make a table lamp on a flexible bracket with your own hands at home, it is worth considering that making such a design is not so easy, and the price of the finished product will most likely be higher than the cost of the purchased option. The main difficulty in creating this model, as opposed to a rack lamp, is that more effort will be required to ensure electrical safety. One of the advantages is the ability to adjust the angle of inclination of the incident light rays.
Console lamps. They are heavy due to the fact that it requires the development of a heavy base that firmly holds the device on the surface. These lamps, like rack lamps, are not adjustable in height or angle, but they provide good light.
The easiest and safest lamp to use is a flexible LED tube, which will serve as an excellent night light in the room. It is important that you do not need an outlet to connect the product, because the lamp can be powered by several button batteries with a voltage of 3 W. To make it you will need an LED, a transparent tube and a fluorescent liquid.
It is more difficult to make a lamp on a flexible bracket, and you will also have to spend money on materials
How to make a lamp with your own hands: the technical side of the issue
If we talk about the internal filling of the lamp, then everything is extremely simple, because the device consists of a power plug, a cord, a switch and a light bulb socket. Those who are no strangers to technical issues can supplement their homemade device with a voltage regulator. Whatever chuck is chosen, it is mounted on a thread or steel plate.
Helpful advice! The best option for self-production is considered to be a chandelier socket with screw-on threaded flanges, because between them it is easy to clamp a steel faceplate, which serves as a fastener for the lampshade frame, or a clamp for mounting on a hinge.
For homemade lamps, it is better to use sockets with threaded flanges
The main requirement for devices is electrical safety, since if you make a table lamp with your own hands incorrectly, you can not only cause a short circuit, but also damage the wiring. To prevent this from happening, experts recommend first choosing the right cord, which should be round and double insulated.
The places where the cable passes must be protected with dense dielectrics. To prevent damage to the integrity of the cable, before inserting it into the channel, it is tied with a small knot and pulled through the hole of the dielectric fixing washer. Only after all these points have been completed can you begin decorating and exterior finishing.
Electrical safety is the most important thing when making a homemade lamp
The method of pulling the cable for the lamp on a hinge should also be clarified. So, if the bracket link is solid, the cord is passed at the top, left or center and securely fastened to the movable knee. If the hinge is a pipe, then it is better to pass the cable inside, but you need to add additional centimeters to the required length of the cord, which will be enough to bend/unbend the lamp.
Special attention should be paid to the place where the cable from the bracket passes to the illuminator: you need to leave 8-10 cm of additional length, because the design of the lamp provides for significant changes in the position of the lampshade, which must be taken into account when selecting a suitable power cord. It is worth considering in advance the method of attaching the hinged lamp. Most often, a screw clamp or clamp is used for this. Craftsmen recommend using a carpenter's clamp for this purpose, which, unlike a metalwork clamp, has a softer coating.
