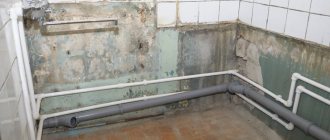
Installing a bathtub can often be a lengthy and labor-intensive process. After installation of the product is completed, a joint is usually formed between the bathtub and the tiles. We'll look at the best way to close this unsightly gap below. Such a seam looks very untidy and can completely negate the carefully thought-out design of the room. In addition, good sealing in areas where moisture can penetrate is very important in the bathroom. Failure to comply with this rule can cause mold and even destruction of wall and floor coverings.
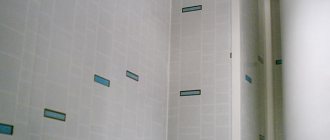
Making an unattractive joint at the border with cladding
Many owners are interested in the question of how and with what to seal the gap between the bathtub and the wall in order to improve the overall aesthetics of the bathroom and the practicality of the further use of the room. To do this, you need to take into account some nuances.
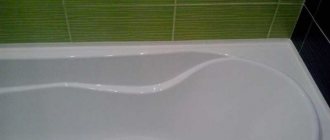
After installing the bathtub, there is often a gap between the wall and the side
First decide on the width of the clearance. You need to pay attention to the temperature of the room, the shape and material of the bathtub, as well as the finish of the wall surface. Previously, only a cement-sand mixture was used to create such a joint, but progress and technology are constantly developing. Today there are several options for solving this problem. Your choice is determined only by the distance from the wall to the side of the bathroom and personal preferences.
Types of sealing
Currently, there are a large number of methods for sealing joints, most of which are suitable for use in this case. Among them are:
- Sealing the joint using sealant.
- Using grout for tile joints.
- Polyurethane foam.
- Self-adhesive waterproof border.
- Plastic corner to cover the joint.
- Ceramic border.
At their core, all these methods can be combined into two categories: the use of various sealing solutions and the use of additional materials to eliminate particularly wide gaps between the bathtub and the wall. However, both of these methods can be combined to decorate the bathtub with your own hands.
Let's look at how to seal seams using each of these methods.
Small gap
If the gap does not exceed ten millimeters, it would be advisable to seal the seam between the bathtub and the wall using sanitary silicone, polyurethane foam, plastic corner or grout.
Silicone
The optimal solution to the problem of how to seal the joint between the bathtub and the wall is plumbing sealant. This polymer material is intended to create a waterproofing layer. Once applied and dried, this substance forms a dense, elastic coating similar to a rubber surface.
The advantage of such a seal will be a reliable, non-toxic and durable layer of sealant that can withstand significant temperatures and ultraviolet radiation.
Plumbing silicone has sufficient adhesion, so it will easily adhere even to the glossy coating of tiles and bathtub enamel. Remember that an acid-based substance will cause corrosion on metal products.
Silicone sealant will do an excellent job of sealing the lumen
Polyurethane foam
To seal the gap between the wall and the bathtub, it would be a good idea to use waterproof construction foam. The polyurethane included in its composition helps the substance harden when exposed to air. When applied, the material fills all irregularities, therefore it contributes to good sound insulation and prevents heat loss. The low cost of polyurethane foam and high adhesive properties will be another advantage of its use.
Polyurethane foam will help with waterproofing the bathtub
However, a gap sealed in this way will not be completely sealed due to the porous structure of the substance. In addition, such a surface will require additional decor, as it looks extremely unattractive.
Grout and plastic corner
Both of these materials are not independent waterproof coatings. However, when, after applying silicone or polyurethane foam, the question arises of how to close the gap between the bathtub and the wall, the use of these products will be the optimal solution. As a rule, they are needed only for decoration after applying a layer of unsightly sealants. It should be remembered that the width of the corner does not exceed fifteen millimeters, so it is not practical to decorate gaps of more than one centimeter with it.
On top of the sealant or polyurethane foam, you can apply grout to match the color of the tiles in the room
Sealing seams with plastic corner
Using a plastic corner to seal joints is a relatively cheap method, which at the same time allows you to ensure an aesthetic appearance of the resulting seam between different surfaces.
The plastic border is attached to the surface of the bathtub and PVC panels (tiles) on the wall using silicone-based glue. Before gluing it, you need to clean the installation site from dust and dirt, and also wipe the seams and joints dry. Use masking tape to prevent glue from getting onto the tiles or bathtub surface. You should be extremely careful when determining the required length of the corner when cutting it.
The final stage of work is the installation of PVC ends at the junctions of the bathtub and the wall. As in the previous case, the use of a plastic border can be successfully combined with the use of polyurethane foam or sealant.
If the hole is large, then you will need to use a wide angle. By the way, this feature can be turned into an advantage and used as a shelf.
Medium-sized slots up to 30 millimeters
Sealing the seams between a bathtub and a medium-sized wall is usually done using a special baseboard, tiled frieze or border tape. It is worth noting that these materials are not independent sealants, so for high-quality insulation you should take care of additional purchase of silicone or foam.
Decorative tape
Bathroom sealant tape –
This is a strip made of polyethylene.
Its width will allow you to mask gaps of medium width, which are found in most cases. This material is cheap and very easy to use. High hydrophobic properties and presentable appearance allow it to be used as an independent coating, and not just as decoration. Many of these products have an antifungal additive, which will prevent the appearance of mold at the joint.
Border tape can be used as skylight decoration
Perhaps the main disadvantage of this material will be its fragility. The joint between the bathtub and the tiles designed in this way will last very little, a maximum of two years. However, subject to careful use, its service life is extended to five years.
Polymer plinth
Another solution to the problem of how to seal the joint between the wall and the bathroom is to purchase a plastic baseboard. This product has a decorative surface and is very often used only for decoration. It is better not to purchase models that have self-adhesive tape designed to secure the element. This adhesive part is not waterproof.
Plastic skirting boards will help hide gaps up to three centimeters
Transparent adhesive for polymers will help securely fix the plinth, and you can additionally seal the product using silicone.
The best alternative to such a plinth would be a ceramic frieze. Installation using tile mortar guarantees excellent tightness and durability of the coating. In addition, a border purchased together with wall tiles will become an unusual addition to the interior design.
Large gaps
The question of how to seal a seam larger than three centimeters is usually not very relevant. However, there are situations when the dimensions of the bathtub are smaller than the size of the walls, for example, by 7–8 cm. In this case, to seal the cracks on the sides of the tank, you will need basic construction skills. Such a joint can only be formed using cement mortar. This method has long been known as the most reliable and durable. In addition, the cost of this work is quite low. However, you should know that the appearance of the concrete coating itself is not very aesthetically pleasing and will also turn yellow over time. Also, a cement surface contributes to the appearance of dust and can become a source of allergic diseases. To avoid negative consequences, the rough coating should be painted over with enamel or acrylic paint or covered with decor. For this, plastic panels, tiles and other waterproof finishing materials are usually used.
Sealing seams with cement will require additional decoration
Surface preparation
Before proceeding directly to filling the gap with one material or another, you must first prepare the surface. To do this, sand it thoroughly with sandpaper and degrease it with a solvent. A clean and free of grease film coating is ready for further installation.
It is important to consider that for reliable sealing, the material must extend onto the plane of the wall and bathtub by at least five millimeters. This will help to better secure the element and increase its water-repellent properties.
Installation recommendations
The key to a positive result of any event is proper preparation and installation. Each material has its own characteristics and nuances. In order to properly design the gap between the bathtub and the wall, you should inquire about the intricacies of the installation work of each of the above products and substances.
Ceramic frieze will be an excellent alternative to plastic products
The main materials for ensuring sealing are polyurethane foam, sanitary silicone and cement mortar. However, a seam designed in this way will not look very attractive. To improve the aesthetic qualities of such a joint, you should purchase an additional decorative and protective coating based on the width of the gap.
Carrying out work with sealant
In order to make a seam using silicone, you do not need to have any special knowledge or skills. This material is carefully applied to the area with the gap. The sealant reacts with warm air and hardens. You should know that increasing the room temperature promotes rapid hardening of the material.
Before filling the gap with sealant, it is better to cover the adjacent surfaces with masking tape.
Approximately 15 minutes after applying silicone to the surface, carefully level the resulting layer and remove excess with a knife. To make the job easier, cover the wall and side of the bathroom with masking tape in advance so as not to stain the surface.
It is important to remember that before eliminating the gap between the wall and the acrylic bathtub, the product must be filled with warm water, and only then begin to apply silicone. It is advisable to carry out such work in the evening so that the sealant dries by morning.
The approximate curing time for plumbing silicone is from five to six hours, depending on the composition of the material and the air temperature. However, you should know that experts recommend using the bathroom after such work no earlier than one day later.
Features of applying polyurethane foam
Polyurethane foam is good for its ease of use and quick hardening. It perfectly fills microcracks and uneven surfaces during application. To avoid foam getting on the coating, protect its surface with masking tape, and after complete drying, cut off all excess with a knife.
In some cases, layer-by-layer application of foam may be appropriate. This method will help reduce the porous structure of the material, which will slightly increase its waterproof properties.
Sealants
69 votes
+
Vote for!
—
Vote against!
Renovating a bathroom and installing a new bathtub is always a pleasant event, but it is not always possible to install it so that a gap does not form between the bathtub and the wall. It is obtained due to the loose connection of the tank to the finishing materials. Most often, the dimensions of the bathtub and the niche for its installation do not match. Sometimes its configuration does not coincide with the room, and the angle of the wall in the bathroom does not always form 90°. But even when everything matches perfectly, it is not possible to achieve complete tightness of the joint with the help of proper installation, especially when facing with decorative tiles. How to close the gap between the bathtub and the wall – we’ll look at it in the article.
Table of contents:
- Why do you need to close the gap between the wall and the bathroom?
- Choosing a material to eliminate the gap between the bathtub and the wall
- Basic ways to seal a gap near a wall
- Properties of silicone sealant
- What is important to know when sealing a gap between a bathroom wall
Why do you need to close the gap between the wall and the bathroom?
At any junction of surfaces in a bathroom, bathtub or swimming pool, it is important to ensure increased tightness so that water does not enter through the gaps. This results:
- to high air humidity;
- chronic dampness in the room;
- breeding mold, fungi and pathological microflora.
As you know, all this is harmful for:
- frail and elderly people;
- children;
- allergy sufferers;
- citizens sensitive to pathogenic environments.
With excess humidity, building materials and surface finishing become wet and lose their excellent consumer properties. Damp tiles become porous, expanded and more brittle, wood swells and deforms, and cracks form in some other materials. Water is known for its ability to penetrate into the smallest crack, but from there it is poorly removed by natural evaporation. This leads to rotting and destruction of not only any viscous medium, but also fairly strong solid building materials.
If mold has grown under the bathtub, where water flows through the gap, it will most likely gradually invade other spaces. For example, the seams between the tiles or the corners near the bathtub will turn black, and dark spots will appear near the ceiling, and then it will be most difficult to deal with it. If a bathtub is installed after laying tiles on the walls of the bathroom, then a large gap usually forms between the bathtub and the wall, into which water flows during bathing. This defect will have to be eliminated somehow - by sealing the gap between the bathroom and the video wall.
Choosing a material to eliminate the gap between the bathtub and the wall
There are several options for how to remove gaps between the bathtub and the wall, and this depends not only on the width of the gap, but also on the overall finish. There are also secondary factors, such as:
- capacity configuration,
- availability of ventilation,
- temperature changes,
- general design.
If the dimensions of the bathtub approximately coincide with the niche where it should be installed, then experts recommend:
- lay out the floors under the bathroom,
- install the tank,
- lay tiles or other cladding so that the tiles rest on the bathtub,
- additionally treat the joint with a special tiled plinth,
- Be sure to seal large gaps between the bathtub and the wall with any kind of border.
Also, the material from which the product is made is also taken into account. For example, an acrylic bathtub should not be treated with rough building materials, but even a small gap near the wall will still have to be foamed or filled with silicone. But this is not enough to eliminate the installation defect, since it will deform and sag under the pressure of the acrylic tank. Over time, the tightness of the silicone seal may become compromised. Special sealants are not always advisable. And the bathtub needs to be additionally attached to the wall so that it does not stand on only legs or pipes for drainage.
It is important to mount the container securely using regular hooks or anchors. It is enough to screw them in the corners and in the center of the long side of the container for hygiene procedures:
- baths,
- home mini-pool,
- shower tray.
And although all these containers require different sealing methods, the gap at the wall will have to be eliminated in any case. This is done in different ways, for example, with a special soft tape or a hard border.
Basic ways to seal a gap near a wall
You can seal a deep gap or a small gap between the bathtub and the wall in different ways, using decorative materials, regular grout or sealant. It is important that the filler underneath does not fall out into the gap when performing work. There are certain difficulties in how to seal the gap between the bathtub and the wall with a large hole. The choice of sealing method depends solely on:
- dimensions of the wall clearance,
- bath stability,
- decorative properties of the finishing and the material laid in the seam.
1. You can use a regular plastic profile (corner), which can easily cover a small gap or unevenness in the tiles at the junction of the bathtub. It can be fixed with any construction adhesive or mounting silicone. And the joint at the corner and the ends of the plastic profile must be cut correctly, accurately measuring according to the dimensions of the container. It is important to cut the angle at 45° and sand the edges so that the joint is accurate. Next, silicone is applied along the edge of the bathtub, which should flow deep into the cracks and harden a little, and only after this the seam can be closed with a corner. Remove excess silicone by lightly pressing the plastic profile. What comes out when pressed is unnecessary; it must be carefully cut off with a knife after hardening or the liquid silicone sealant can be wiped off with a damp rag.
Attention: Whatever solution, glue, foam or sealant you use when sealing the gap between the bathtub and the wall, try to lay out a little less of them than necessary, otherwise the seal will turn out sloppy. It is better to remove all traces of application before drying, so as not to spoil the surface of the wall and bathtub with remnants of the adhesive base!
Advice: Experts recommend sealing an acrylic bathtub only when it is filled to the top. It is better to keep the entire volume of water in the container until the silicone dries completely, that is, 12-15 hours.
2. Another way to seal is to use a decorative tiled corner or border of small width. In the old fashioned way, they also used narrow strips of ordinary tiles, laid at an angle of 45° relative to the bathtub. But this method is not acceptable if there is a large gap, or the gap had to be sealed with a glazing bead so that the cement mortar does not fall out of the bathtub.
3. Of the modern methods, the simplest method of sealing the gap is self-adhesive curb tape for the bathroom and a specialized plastic baseboard. It can also be mounted directly on silicone, however, if there is a large gap, this method is also unacceptable. Installation of the corner involves a reliable fastening, which requires thorough cleaning and degreasing of both surfaces.
4. Self-adhesive in the form of border tape - we seal large gaps between the bathtub and the wall correctly. It is sold in any construction supermarket in the form of a roll. However, it must be properly glued to both surfaces so that the seam is smooth and neat. Experts recommend gluing the roll tape from the corner, first only on one side of the junction of the wall and the bathtub. The layer, which must reliably adhere to smooth surfaces, has a protective film, which is carefully removed 15-25 cm at a time immediately before gluing it dry.
Attention: It is important that the container and wall finishing materials are completely dry, otherwise the gluing will have to be repeated, and the roll will already be damaged!
5. A fair question - how to cover the gaps between the bathtub and the wall if they are too wide, or when there are gaps that diverge at an angle and have deviations from a right angle at the corner of the bathroom where the tank is installed? The methods listed above do not work here. In some cases, special carpentry skills are required to fill the gap with a piece of wood with a protective impregnation against moisture and mold. The seam on top has to be concreted, and only then a decorative border - plastic or tiled - must be laid. A kind of wooden formwork along the edges of the wide gap holds the concrete solution.
Tip: You can use the tips listed or come up with your own method, based on the finishing materials and design of the bathroom. However, not all materials are suitable for these purposes. For example, a strip of mirror laid on a joint at an angle will look original and practical, but over time moisture destroys the amalgam layer on the back of the glass, resulting in unsightly stains. Whatever you use to decorate the seam, remember practicality and tightness.
Properties of silicone sealant
Modern methods of sealing and sealing joints in rooms with high humidity usually involve the use of silicone sealants. This is a synthetic transparent polymer that resembles liquid rubber or a dense gel. It is used for various purposes and in interaction with other building materials. It contains various additives that affect its properties:
- density,
- moisture resistance,
- adhesion.
Filling the seam or gap between the bathtub and the tile with a moisture-resistant polymer is the most common method for small gaps or uneven tile laying. An unsuccessfully processed gap can always be additionally decorated with a plastic profile or even a foam border for painting, but before it hardens.
There are sealants:
- multicomponent,
- single-component.
Based on the chemical composition, commercially available silicone sealants are divided into:
- acidic;
- neutral.
They differ in the method and time of hardening, since this depends on a chemical reaction or under the influence of an open environment. They react differently to temperature changes, exposure to ultraviolet radiation and humidity. This is why it is important to read the instructions when purchasing silicone caulk. Before using it, it is important to clearly understand:
- method of applying it,
- hardening time,
- interaction with decorative and finishing materials.
Attention: Acid sealant is not suitable for metal surfaces, as it oxidizes stainless steel or aluminum profiles, which leads to corrosion! Experts recommend using only silicone with a neutral reaction.
Otherwise, the sealant has no “cons”; it is reliable and easy to use. It dries completely after 5-12 hours, but it is better to swim in the bath no earlier than 24 hours after treatment.
However, not everyone knows how to achieve a smooth and aesthetically pleasing surface when applied.
Tip: Apply silicone sealant a little at a time, evenly, carefully trimming the top layer on the seam between the bathtub and the wall with a spatula. To avoid staining the joining surfaces, use masking tape. Remove excess silicone immediately with a spatula; if it hardens, use a sharp knife. Any leaks of excess sealant should not be left until hardened and then cut off; clean them 10-20 minutes after completing the work and treat the adjacent surfaces to remove all traces of application.
What is important to know when sealing a gap between a bathroom wall
1. It is necessary to thoroughly clean all treated surfaces from abrasive particles, construction debris, mold, rust, and calcium deposits from prolonged use of water.
2. It is important to degrease the wall and bathtub before application and dry it after cleaning. It is also recommended to use white spirit, ethyl alcohol or another volatile solvent to treat surfaces.
3. The chemical components used in sealing may be harmful to health, so be sure to use a household respirator. Upon completion of work, be sure to ventilate the room, do not use the bathtub for at least a day, and before taking a shower or bath, be sure to rinse the container thoroughly with a stream from a flexible shower.
4. Any material used to seal the joint, including caulk and cement mortar, should not drip or fall into the gap in large quantities. The optimal penetration of the composition beyond the edge of the bath is no more than 1 cm.
5. Make sure that there are no gaps when applying the solution or silicone, otherwise the seal of the seam will be compromised.
6. All tools for applying cement mortar or sealant should be on hand so that you do not have to look for or buy them while the mixture hardens into snowdrifts.
7. Polyurethane foam can also be used as the main material for sealing the gap between the wall and the water tank. Remember that when it hardens, it expands and bursts adjacent surfaces, and its excess does not look aesthetically pleasing. All excess must be carefully cut off and the seam covered with a decorative border. Clean the places where it extends beyond the seam onto the bathroom with a rag soaked in a vinegar solution.
8. Border tape for a bathtub is an excellent option, but it is short-lived, so you should count on 1.5-2 years of its use. In addition, it contains a fungicide that prevents the growth of mold. It can be recommended for use on top of polyurethane foam to close its porous structure.
Attention: When applying decorative finishing materials to the seam, you can also use not only cement mortar and silicone, but also any construction adhesive, liquid nails, etc. However, the tightness of the sealing of the gap itself must be impeccable!
Tip: If there are problems with mold in the bathroom, before sealing the seam, be sure to thoroughly clean all surfaces and treat them with a special fungicide solution that prevents its development. Only after this can all work on sealing the seam begin. Do not think that mold itself will “disappear” somewhere after removing the cause of excess dampness - it is very tenacious and harmful to health!