Many of us are quite cramped in our living conditions. I want to place so much furniture, but there is so little space. This is especially true for our kitchens or balconies. I have long dreamed of making myself a mobile workplace in the kitchen.
A kind of transformable table that could be mounted on the wall, folded and unfolded as needed, and that would take up minimal space when folded. Unfortunately, in our city I was unable to find a place where I could buy a folding table, so I had to make it myself.
Stage 1: Materials
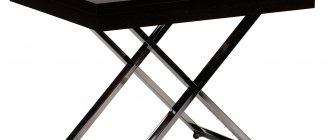
- A pair of mechanisms for a folding table. In the store, such a mechanism was called a folding bracket. I took the size 300x200mm.
- Plywood 19 mm thick. Piece size 110x55cm. You can replace it with chipboard or MDF and take the size at your discretion.
- 200ml varnish or paint + brush
- Self-tapping screws
- Wall fasteners (dowels + screws)
- Screwdriver (for assembly)
- Hammer drill (for wall mounting)
Apply two coats of varnish to the countertop at 6-hour intervals. You can avoid this operation if you use laminated chipboard or MDF as a tabletop, but then you will have to apply an edge.
Materials
The most popular materials for making countertops are:
- Chipboard, MDF or plywood;
- tree;
- glass.
Each of them is endowed with certain features.
Plywood, chipboard or MDF
It is a commonly used material that is easy to work with. Using a jigsaw, you can cut out any shape and size of the tabletop, and the edges can be treated with special adhesive tape. Among these three materials, preference should be given to plywood; it is desirable that it be moisture-resistant and laminated.
Wood
Stylish, strong and durable material. However, when choosing it, you need to be prepared for difficulties during installation, which will require special equipment. The naturalness of the material, environmental friendliness and difficulties in working with it make the design expensive.
Glass
Lightweight, modern material, which is made from special thick glass. The table also turns out to be expensive, because the tabletop will have to be ordered, because... at home, without special tools, it will not be possible to cut and make holes in it.
Stage 2: Screw on the folding mechanism
Place the folding brackets at a distance of about 6-7cm from the edge so that the mechanism is accessible to the hands and at the same time visually hidden.
In order to ensure the perpendicularity of the bracket and the table, we attach the entire structure to the wall.
Mark the holes for fastening to the tabletop.
Stages of work
DIY folding table. Step by step guide.
- Draw a table top on a board, sheet of plywood or chipboard. Be sure to use a compass and ruler. They are easy to make with your own hands. Otherwise, it is impossible to securely attach the hinges, and the design will look sloppy.
- Cut out the lid to the required size. You will need one more rectangular piece. The length is equal to the base of the lid, the width is 9-11 cm. Do not press the saw too hard - you can deform the material.
- Cut out a support from the same sheet. It consists of two parts. The first is a rectangle, 2-3 cm long less than the width of the table top and 18-22 cm wide. The second is exactly the same rectangle, sawn diagonally. You only need one of the resulting triangles.
- Finish all edges with a fine file, sandpaper or sandpaper to prevent splinters later. This refers to the natural wood surface of the lid. Then completely cover the future countertop with anti-fungal agent. Additionally, so that the structure fits perfectly into the interior of the balcony, it can be painted in the desired color, or varnished for beauty.
- Attach the edges of the tabletop to the first rectangle. Book type loops are ideal. For a large tabletop, the hinges that attach the window vents to the frame are suitable. Choose the same option for a tabletop made of natural wood.
- Assemble the support by placing the triangle in the middle and slightly below the top edge (2-3 mm) of the rectangle. This will prevent premature wear of wooden parts due to constant friction. Similarly, secure on one side with two loops. The structure should fold freely. A very large table top will require not just one support in the middle, but two supports (one on each edge) to make the structure sufficiently stable.
- Draw a line marking the height at which you want to hang the folding table, and use self-tapping screws to securely attach the support to the wall. Its upper edge coincides with the line. To ensure the horizontal is perfect, use a level. As a last resort, you can make a plumb line with your own hands and measure the angles.
- Attach the tabletop to the end of the support with self-tapping screws.
- Fix the structure when unfolded.
- Choose matching chairs or stools. The ideal option is folding structures. To make them take up less space, attach small hooks to the wall next to the table and hang them there.
Related article: How to make a beautiful and durable metal bench
Video gallery
Photo gallery
Step 3: Preparing the Holes
Drill pilot holes in the plywood. To prevent through drilling, place a piece of plywood (as shown in the picture) and make sure that the drill does not penetrate the front surface of the countertop. When drilling, the chuck will rest against this piece and protect you from drilling too deep.
We place the washers over the resulting holes. The washers were included with the folding mechanism.
Secure the brackets using self-tapping screws.
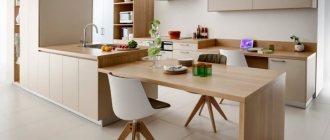
How to make and where to use a folding table?
To create this piece of furniture you will need a tabletop, fasteners, hinges and support. The latter is used as a wall or window sill. The folding table will fit perfectly into the interior of the kitchen or balcony.
In the kitchen
If the kitchen is small in size, a folding table, which can be of various sizes, would be an excellent option.
When disassembled, this design can easily accommodate a large company. Important! When choosing the size of a folding table, you need to take into account the number of people who will be seated at it.
It can be round, oval, rectangular and square in shape. The material you can choose from is chipboard, MDF, wood or glass. For work you will need: a support, a tabletop, a base bar for attaching the table and support, hinges and wall fasteners.
The process for creating a table is as follows:
- Cut the tabletop to the required size and shape.
Advice! It is better to mount it on a wall near a windowsill or other place.
- Connect the tabletop to the support strips using hinges.
- Attach the metal corners to the support.
- Attach the structure to it using self-tapping screws.
On the balcony
Folding furniture is a very convenient and functional piece of furniture, especially if you need to save space.
To create a table on the balcony you will need a sheet of chipboard, hinges, screws, sandpaper, varnish and a metal corner. Manufacturing process:
- Prepare a drawing and calculate the dimensions of the table.
- Cut out the tabletop, sand it with sandpaper and paint it with varnish.
- Attach a support to it.
- Attach metal corners to the place where the table will be installed.
- Connect the tabletop and corners using hinges.
For a balcony, such a table is an ideal option, because they are small in area and there is not always enough space to implement design ideas.
Step 4: Choosing a Height for a Wall Desk
Choosing the right height for your desk is an important part. A few centimeters of error can lead to great discomfort for you. For my wall-mounted table, the height of 70 cm from the floor turned out to be convenient when sitting on a stool in the kitchen.
Mark the height on the left and right using masking tape (paper) or draw a line with a pencil.
Use some objects to position the folding table at the desired height.
Choosing a balcony table: what to look for
Material
The choice of a table, like any other piece of furniture, primarily depends on the microclimatic conditions of the room. If the balcony is glazed and insulated, then you can install a table on it from absolutely any materials, focusing on the quality of construction and appearance. If we are talking about landscaping an open loggia or balcony, then you should give preference to the most durable and wear-resistant products.
It is believed that materials such as plastic and metal behave best in outdoor conditions; accordingly, the balcony table should be made from them. Of course, these materials are good because they are practically not afraid of moisture, and this significantly increases their service life. However, one should not exclude the possibility of decorating the balcony with furniture made from lighter materials. If the interior of the room gravitates, for example, to tables made of wood, rattan or bamboo, please note that serious manufacturers always treat products with moisture-resistant and antifungal mixtures, which significantly increases their wear resistance.
Folding table and chair for the balcony
Glass table hanging for the balcony
Plastic table with chairs on the balcony
Design
The balcony area, as a rule, is not spacious, so standard tables are unlikely to add convenience to this room. But a small table on the balcony can give your family unforgettable moments of relaxation in the fresh air. Which table should you prefer? First of all, this piece of furniture should fit compactly into the room, without taking up extra centimeters. If the balcony is too narrow and long, then it is more rational to install a corner rectangular table on it, which will not take up too much space, and at the same time visually make the room more proportional. For glazed balconies this can be a window sill table.
Related article: Width of a balcony in a panel house
Window sill-table on the balcony photo
Convenient and compact table for the balcony with your own hands photo
If the balcony has a normal width, it is quite possible to install a small table of a standard design on it. For example, round tables on one leg or light structures with rectangular tabletops look very beautiful on open or closed loggias.
Furniture for the balcony - round table and chairs
Balcony table models
Balcony round table
Often, owners of small balconies refuse to improve them, believing that the furniture will create a feeling of clutter. This is true, but only if the size of the table does not correspond to the size of the balcony. Now in the assortment of many furniture manufacturers you can find incredibly compact and comfortable folding tables that are perfect even for miniature balconies. Sometimes the design of such tables is very different from standard products. For example, a folding table for a balcony can be made in the form of a high stool, which when folded takes up virtually no space.
Cute folding table for the balcony
Blue folding table for balcony
Wooden balcony table photo
In addition, there is another interesting and convenient option for a balcony table, which, in fact, is a hanging tabletop. Hanging tables for balconies are most often attached to the railings, but there are also models whose fasteners allow them to be mounted to a wall or window sill. The main advantage of tables of this design is their mobility and compactness. Such a table can be removed or moved to another place at any time.
Folding glass table for the balcony
Folding table for balcony photo
If the space on your balcony does not allow you to place even such a miniature product, please note that hanging tables can be folding. If you are not currently using the table, you can lower it down and it will practically merge with the wall, taking up 2-3 cm at most.
DIY folding table for the balcony
Hanging balcony table photo
Hanging balcony table photo
Design
The choice of table design depends entirely on the interior of your balcony. Metal products with carved legs or elegant wicker rattan furniture look great on open terraces. For closed balconies, you can choose a table that matches the decoration or other pieces of furniture, thanks to which the design style will acquire integrity and harmony.
Wooden table with carved legs for the balcony
Ergonomic mini table hanging for balconies
Design of a folding table for a balcony
Stage 5: Attach the folding table to the wall
Mark the position of the holes on the wall.
Remove the table and drill holes. You may need a hammer drill.
Insert the dowels into the drilled holes.
Stage 6: Leveling the table
If you doubt that you have fixed the table to the wall strictly horizontally, then it would be a good idea to check it using a building level. This will help clear your doubts or indicate that adjustments are needed.
Interesting design solutions
A table with canopies is perfect for open balconies. This structure is attached to the balcony parapet using two metal profiles. The tabletop constructed in this way looks very stylish and folds up in a couple of moments.
It is clear that small tables are not very versatile. If you particularly wish, you can install a small wardrobe with a folding section on the balcony. This will create a very comfortable workplace.
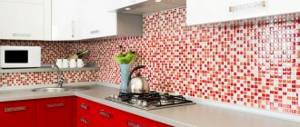
Decor plays an important role in design. The most commonly used option is tinting or varnishing the table. Ceramic mosaic will look interesting.
Related article: Is it possible to glaze a balcony without permission?
Stage 7: Checking the folding mechanism
After installing the table, you need to check how well its folding mechanism works.
If the brackets are not installed parallel or at the same level, this will lead to friction between the bracket and the surface of the tabletop or will not allow the table to be folded at all. This can be avoided if everything is done well at the second stage.
Stage 8: The folding table is ready
This is how the table turned out!
Tip : Keep minimal items on your desk so you can stack it as often as possible. Good luck!