Preparing the shells
- If there are no shellfish remains in the shells, they are not very dirty - just rinse them with plain water.
- If the shells have mollusc remains, boil them for 5 minutes, then remove the remains using tweezers. If this is not done, then over time the craft will have an unpleasant odor.
- If they need to be bleached and disinfected, prepare a solution (water + chlorine-containing agent - for example, bleach in a 1:1 ratio). Leave the shells for 30 minutes, scrub gently with a brush if necessary, then rinse thoroughly with water.
- If there are sharp edges, sand the shells with sandpaper.
- To make the shells shine, cover them with clear manicure polish.
How to make a hole in a shell?
- You will need a drill with a drill or a screwdriver with a very small diameter of 1-2 mm. Place the shell on the board, stick a piece of tape to the shell so that it does not break, then drill in the right place on the shell directly along the tape.
- For another method, take a nail and a hammer. Cover the shell with tape to prevent it from splitting, then hit the nail several times with a hammer.
- This method will take approximately 10 minutes to make one hole. Take a thick needle or awl and, using the principle of a drill, make a hole with rotational movements.
Shell frame
In this master class you can decorate – photo frames, picture frames, decorate mirrors and watches.
You will need: shells of the desired sizes - small, medium, large, glue gun, tape, newspaper, optional decorative elements - beads, stars...
Master Class
- Cover the picture or mirror with newspaper and secure with tape. If you have a regular frame, you don't have to do this.
- Distribute according to shell size
- Glue shells of the same size.
- Glue the remaining shells, adhering to the same style, in a chaotic order or overlapping in a checkerboard pattern.
- Fill in the gaps with small shells.
- Glue beads and starfish as decoration.
- Remove the tape and newspaper.
The shell frame is ready! I recommend viewing a photo gallery of ideas for decorating frames with shells!
I recommend watching the video master class!
DIY: Seashell Photo Frame
Heart made of shells
You will need: shells of the desired size, cardboard, scissors, glue gun, a simple pencil, an awl or hole punch, twine or rope, sesal, burlap, optional decorative elements - beads, beads, starfish...
Master Class
- Draw a heart on the cardboard.
- Cut it out.
- Make 2 holes for hanging using a hole punch or awl.
- Glue sesal to the front of the heart.
- Cut out a burlap heart 1 cm larger than the cardboard one.
- Stick it on the other side.
- Insert the rope into the holes.
- Tie double knots on the wrong side of the heart.
- Cover the side of the heart on which the sesal is located with shells.
- Glue a starfish in the center.
- Cover the contours of the heart with twine.
The shell heart is ready! I recommend watching the video master class!
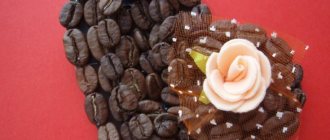
master class: valentine - shell panel
Crafts made from stones for children
The process of making such crafts requires a creative approach and the ability to take an unconventional look at ordinary objects. Each image is dictated by the shape of the stone - its contours, size, as well as what other stones are available.
All that remains for the creator after he imagines the future image is to bring it into reality with the help of bright colors.
City of stones
Children will really love a mosaic made of colored pebbles on a plaster or clay base. It is very interesting to post it, and the result will be bright and elegant.
Mosaic made of pebbles on a gypsum basis
Rounded and elongated flat stones become owls if the little creator so desires.
Owls made of stones
You can make an “autumn tree” applique from painted small pebbles
Autumn tree made of stones
Perhaps the most popular master class made from stones is flowers. The shape of the pebbles is very convenient for making petals, and a round pebble will make an excellent centerpiece.
Flowers made of stones
Stones can be used to make incredibly adorable round chickens. We place them in a cozy nest made of straw or thread.
Chicks from stones in the nest
Stones of different shapes are turned into houses for fairy-tale characters.
Houses made of stones
You can make a small magical town out of pebble houses.
Houses
Playing with such a stone house is a real pleasure.
House-stone
And flat oval stones - into a fairy-tale bus or car.
Typewriter
And here is an example of how you can make a real highway out of stones with a road, cars, road signs and a gas station.
Road
Seashell painting
You will need: shells of the desired size, glue gun, canvas, a simple pencil, a drawing template printed on paper, tape, decorative elements as desired - beads, seed beads...
Master Class
- Secure the drawing template to the canvas with tape.
- Transfer the drawing to the canvas, tracing the template with a simple pencil.
- Glue the shells strictly along the contour of the picture.
- Glue the shells tightly to each other, filling the entire pattern.
- Try to ensure that there are no gaps between the shells; if there are any, fill them with beads or seed beads.
The shell painting is ready! You can make any picture in the same way. If you want to fill the entire canvas with shells, for example, to make a landscape, select a template, transfer it to the canvas, paint the shells, place them on the canvas. When you see the whole picture, only then start gluing the shells. I recommend viewing a photo gallery of ideas for creating pictures from shells!
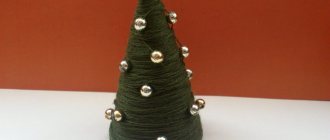
You can make a very beautiful topiary from shells, and see how in this video!
Making TOPIARY from shells with your own hands / master class
Craft ideas
Making crafts from shells with your own hands is not difficult. Before starting work, you need to prepare all the materials: glue, wire, beads, plasticine, paints with brushes, etc.
Three-dimensional figures and applications are distinguished. The techniques for creating them vary.
Shell frames
Ordinary photo frames will look more unusual if you decorate them.
For this you will need:
- Seashells of different sizes and types.
- Newspaper.
- Glue Moment or glue gun.
- Beads, starfish (artificial), stones and sparkles, optional.
The working surface is covered with newspaper. Arrange the shells in the desired order, building an approximate picture. A few ideas:
- Arrange the shells according to their size from largest to smallest.
- Group shells by type.
- Place small shells on top of large ones.
- Group by color.
- Turn flat shells inside out.
You don't have to use all the space. You can make small groups of shells. Fill unused space with additional decorative elements or leave it empty.
Using glue, secure the parts in the chosen position and let dry.
There is another way to design a frame:
- Large flat shells are glued to the frame, maintaining a distance between them.
- Fill the entire space with the remaining shells and pieces of coral.
The methods are distinguished by their simplicity and speed of execution. The first option will require more time, as well as a vision of the composition, but the second method is not inferior to the first in terms of the beauty of the result.
Heart made of shells
A heart made of shells can be made in the form of a panel or a plaster figurine.
To make a plaster figure, you need to cut out a heart from cardboard. Plaster of Paris is applied to it in layers. A hole is made in one place on each layer, then left to dry.
Shells, buttons, pieces of broken dishes, beads and other decorative elements are lightly pressed into the last layer.
A ring is threaded into the resulting hole and a ribbon is attached to it.
To create a panel you will need:
- Cardboard.
- Shells, stars and small stones.
- Leg-split.
- Cezal.
- Sackcloth.
- Glue gun.
- Scissors.
- Awl.
- Pencil.
- Beads and beads.
How to do:
- Cut out a heart from cardboard, having previously outlined the boundaries.
- Use an awl to make one or two holes.
- Cut out a heart from burlap, 1 centimeter larger than the first one.
- Glue sesal onto the cardboard, then attach burlap on the back side.
- Pull the twine through the holes and tie a strong knot.
- Glue the flat shells onto the sesal, then all the other elements.
- It is recommended to place the starfish in the center.
- Place and secure twine along the edge.
It is not recommended to arrange sinks by grouping them by size, color or other characteristics. It is better to price a composition based on personal feelings and preferences.
Thus, there are two completely different methods of creating a heart from shells, which is placed on the wall.
Seashell painting
Paintings can be created with a minimum amount of materials, but modular panels will require not only materials, but also the ability to draw.
To make a picture you need:
- Draw or print a picture on paper, fix it on the canvas and transfer the contours.
- Use a glue gun to secure the shells, placing them tightly together and strictly following the contours.
- Fill in the gaps with beads.
For the panel you need to have:
- Eggs.
- Sheets of plywood 15x15.
- Sand.
- Glue gun or Moment glue.
- Varnish.
- Seashells.
Manufacturing instructions:
- Cover the plywood with adhesive.
- Sprinkle sand, press with a heavy object, and let the glue dry for several hours.
- After the sand has dried, coat the surface with varnish.
- Glue the corners with crushed eggshells and apply another layer of varnish.
- Arrange and glue shells, stars, beads and other details.
- Connect three plywood sheets with wire.
The varnish creates a natural shine, so it can be used in any crafts.
You can add any objects related to the sea, beach and relaxation to the picture, so the work will store only the best memories of happy moments.
Making candlesticks from shells
There are several types of shell candle holders.
Interesting options:
- Place wax in the shells. Place in a frying pan and turn on the stove over low heat. Wait until the paraffin melts, insert the wicks and remove the shells with tongs. You can put several small shells in the wax.
- Use empty snail shells instead of shells. Do not apply sudden heat, as this may cause cracks.
- Create a rosette around the candle. To do this, single-leaf shells are glued to the lid layer by layer, starting from the outer layer. Each new row is placed on top of the previous one. The edges, if desired, are treated with glitter. A wax candle is placed in the center.
- A candle is placed in the middle on the lid or wooden stand. Shells are attached to the edges in two layers, placing them on top of each other.
- Place a candle in a round vase and fill the remaining space in the vase with shells.
It is recommended to paint the shells in advance and fix the paint with varnish and cover the edges with glitter or glue a bead matching the color into each one.
Marine-themed candlesticks create a romantic atmosphere, as well as comfort and peace in the home.
DIY flowers made from shells
Flowers are distinguished by their volume, which depends on the angle at which the shell is glued and the number of layers.
Flowers are attached to a panel, lid or large shell.
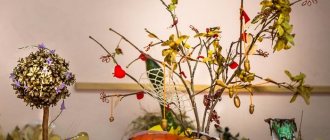
Algorithm of actions for creating an orchid:
- Select three shells of varying sizes and connect them with glue.
- Cover the surface with varnish.
- Glue a bead to the center.
- Attach velvet paper to the cardboard.
- Weave short stems and leaves from wire and beads.
- Secure the buds and flowers.
To make a voluminous flower:
- Glue 3 shells in a semicircle onto a surface covered with velvet paper.
- Glue 2 shells perpendicularly.
- Complete the semicircle of the first row with shells, gluing them right side to the paper.
- Attach 1 shell to the top of one of the petals.
- Add petals to the center.
- To prevent the petals from falling, cotton swabs are placed between them, which are removed after drying.
- Flowers are connected with wire and artificial leaves are attached.
Curls are often made from wire to decorate the work. Beads and beads are attached to the paper after all the colors are completed.
There are several options for creating both flat and volumetric flowers. The simplest methods are presented above.
Ship made of shells
You will need: 2 rapan shells of different sizes, a small stone, large round shells, small spiral-shaped shells, a glue gun, toothpicks, wooden skewers, varnish, thick cotton thread.
Master Class
- Apply glue to the stone and glue a larger rapana shell. The shell should not wobble, it should be firmly attached to the stone.
- Glue a wooden skewer inside a smaller rapana shell. This will be the bow of the ship.
- Glue the skewer with the nose onto the base of the sailboat.
- Glue 3 wooden skewers perpendicular to the base of the ship.
- Trim the first and third skewers so that they are just below the middle skewer.
- Glue large shells as sails on the front side of the mast, and on the back side glue toothpicks that will serve as yards. There should be 3 shells on each mast.
- Make ropes from cotton thread in this way: tie the thread to the back of the ship, then pull it along the top of the masts all the way to the bow, then stretch the thread from bottom to top, winding it onto the yards on each mast, and if the thread slips in some places, fix it with glue.
- Glue spiral shells to the tops of the masts.
- Cover the craft with varnish.
The shell ship is ready! I recommend viewing a photo gallery of ideas for creating a boat from shells!
You can make letters and numbers from shells for a special event, and see how in this video!
Shell letter | Interior decoration | DIY Seashell Letter Room Decoration
We make rugs and coasters
Smooth sea wave pebbles also make an excellent base for a cookware rack or rugs. Here you will need a lot of small pebbles without sharp corners, a plastic or metal surface (an old tray, plywood, etc.) and a glue gun.
Instructions on how to make a stone craft in the form of a flat rug look like this:
- Find a base that is the right size and shape.
- Lay out the stones in a single sheet or in an unusual pattern.
- Glue each element.
- Fill the voids with small pebbles.
- Place satin ribbon around the edges.
Even the most boring and inconspicuous cobblestone can be turned into an elegant piece of furniture in a couple of minutes, and if you take the selection of suitable pebbles seriously, you will get the ideal composition for your home or garden.
Let the above ideas be the first step towards creating interesting, unusual and practical things from seemingly unsuitable material for creativity.
Shell frog
You will need: shells 5, 3 and 1 cm long, 2 pieces each, 4 shells 2 cm long, glue gun, 2 black beads for the eyes.
Master Class
- Glue together 5 cm of shells, leaving the wide part slightly open as a frog.
- Glue 2 shells of 3 cm each as a body.
- Glue the frog's body and mouth together.
- Glue 2 cm shells in place of the paws.
- Glue a bead onto the smallest shells.
- Glue the smallest shells as eyes.
The shell frog is ready! Check out the photo gallery of ideas for creating green beauties from shells!
I recommend watching the video master class!
Crafts from shells. Little frog.
Application of sea stones
Crafts made from sea stones are distinguished by their originality, since such stones can have an unusual shape. While on the seashore, you need to look for decorative stones thrown up by the surf. Particularly valued are flat stones with a hole, oddly shaped pebbles, stones with inclusions and various imprints on the surface, and interesting colors. At the same time, you should pay attention to the shells.
Sea stones make beautiful jewelry - beads, bracelets, pendants. The flat, smooth shape allows you to apply any design. A common option is a souvenir with a magnet. A design is applied to the stone, and one or 2 magnets are glued to the back side. This craft can be mounted on the refrigerator.
The simplest craft, which at the same time reminds of an unforgettable vacation at sea, is a glass container filled with sea pebbles of different colors. The composition of shells and stones is particularly attractive . In a transparent container, it will imitate the seabed, especially if there are “algae” made of plastic or synthetic threads.
Shell earrings
You will need: 2 identical shells, 2 faux pearl beads, earrings, rings, glue gun, awl, pencil.
Master Class
- Mark with a pencil the location for the hole in the shells on the inside.
- Make a hole by carefully turning the awl.
- Turn the awl into the same hole, only from the other side.
- Glue the bead in the center of the shell.
- Secure the shells using earrings and a ring.
The shell earrings are ready! I recommend watching the video master class!
Unusual DIY earrings made from shells.
You can make a huge number of crafts from shells, look through the photo gallery and gain creative inspiration!
Crafts made from sea shells are perfect as an original gift. Bring more shells from the sea, use your imagination and delight your loved ones with exquisite handmade crafts.
Send your photos
Do you also make beautiful crafts?
Send photos of your work. We will publish the best photos and send you a certificate of participation in the competition. See also:
Applications from leaves. Crafts made from natural materials. Autumn
Photos of your crafts made from natural materials on the theme “Autumn” will be published here. Oh different...
Crafts from chestnuts and acorns
Autumn time is generous with gifts. An ordinary family walk in a park or forest can end with a collection of beautiful…
Outdoor candlesticks
DIY street candlesticks from jars Another master class by Ekaterina Nesmirnaya for our competition...
Vegetable craft “Garden Bunny”
The last master class of our competition “Crafts from natural materials”, sent by Svetlana Pankrats...
Elements of the play park layout: tree, bench
In kindergartens, they often make play models of buildings, playgrounds, and different areas for children. Such games...
New snow figures of Izhevsk kindergarten No. 267
Dear readers, you, of course, remember photographs of snow figures made by the hands of kindergarten teachers...
Crafts from cones, leaves, seeds, straws
Photos of children's crafts made from pine cones, autumn leaves, seeds, nuts, branches, straws are published here...
Buildings made of snow MBDOU No. 267 (continued...)
New photographs of snow sculptures, as well as slides and sports facilities made of snow, were sent to us by Ol...
"Smeshariki" - crafts for the garden
Another work for the “Second Life of Things” competition. Author of the work: Gasnikova Ekaterina Andreevna, 13 years old...
New snow buildings for kindergarten
Snow buildings in kindergarten And again snow sculptures of teachers of kindergarten No. 267 in Izhe...
Craft “Forest Master” – Leshy
Evgenia Ivanovna Srednyakova from the city of Kirishi, Leningrad Region, sent a craft “...
Crafts from vegetables and fruits
Crafts from vegetables and fruits On this page all photographs of children's crafts from vegetables, fruits, berries...
Tags: Garden crafts
Discussion: there is 1 comment
- Albina Nikolaevna:
September 19, 2020 at 12:12In this category today I would like to highlight Galina Chirkova’s work “Turtle on a Waterfall.” The competition requirement for creating a composition from natural material was met. Thank you and good luck in the competition.
Answer