A bathroom in the attic is not a rare occurrence both in private houses, the owners of which decided to make maximum use of the top floor, and in city apartments, where attic floors are found mainly in the old building. In this case, a full-fledged bathroom with a toilet or shower can occupy a small space next to the bedroom, or the entire attic. Due to the peculiarities of the floor with a sloping ceiling, the design and layout of the bathroom are somewhat different from its usual counterparts.
Features of arranging a bathroom in the attic floor
As for the interior of a bathroom in the attic, many designers take on this task with enthusiasm. The sloping ceiling is the architectural dominant of the room, and with the right skill it can be played out so that this room becomes the highlight of the entire apartment, bright, beautiful and comfortable. However, both this moment and the very location of the attic on the top floor under the roof itself require a carefully thought-out layout, decoration and preparation of space for the future bathroom.
The main issues that you should pay attention to when arranging a bathroom in the attic:
- sewerage and water supply (experts recommend placing a bathtub and shower above the kitchen or bathroom located on the floor below, then there will be no problems);
- windows (windows in a sloping wall or ceiling are not only a source of light, but also an important design element, because not everyone can boast that they wash while looking at the sun or stars);
- finishing (can be any, the main thing is treatment against mold, moisture, fungus, allowing air to pass through);
- furniture and plumbing (for small rooms they usually choose compact plumbing fixtures, bidets and toilets with installation, sinks with cabinets, glass shelves and transparent shower walls).
Design features
When planning to create a bathroom in the attic, questions arise about the renovation concept, selection of plumbing fixtures and interior styling. The space under the attic roof is characterized by uneven walls and a sloping roof in some places, which can also be used functionally when placing bathroom interior items.
General recommendations:
- It is easier to install a water supply and sewer system above the kitchen.
- Make reliable thermal and waterproofing. Due to high humidity, use moisture-resistant panels and ceramics as finishing.
- It is advisable to design a window on a sloping wall with drainage, or hang a mirror there.
- The corner under the sloping ceiling should be used rationally, for example, to place a toilet, cabinet or bathtub.
Practical tips for locating a bathroom in the attic
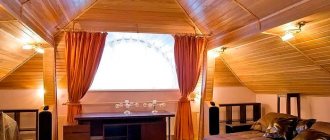
Since the attic is located under the roof itself, care must be taken not only about good moisture insulation and forced ventilation of the room, but also about the heating system. Even if there is central heating in the domestic climate, electric or water heated towel rails and a floor heating system will not interfere. To finish the walls and floors in the bathroom, you can use any moisture-resistant and breathable materials: lining treated with special compounds, plaster, paint, ceramic tiles, wood, mosaic, drywall. The ceiling can be painted, covered with wood, plastered, or left with “living” brick and wooden beams, as in the photo, treated with waterproof compounds.
If the window is located on a sloping ceiling, it must be equipped with a drain to prevent condensation from accumulating. In the case where there are no windows on the walls and ceiling of the attic, you can turn a dormer hatch on the roof into a window or imitate a window using a mirror with a decorative frame.
If we are talking about a bathroom in a private house, it is worth insulating the attic with basalt sheets, and not with polyurethane foam, since it does not conduct moisture well. Furniture and plumbing fixtures are selected based on the size and style of the room; the requirements for them are the same as in a regular bathroom.
Selection and arrangement of furniture and plumbing in the attic bathroom
An ideal option if the attic area allows you to place all the necessary bathroom furnishings, including:
- shower or shower cabin;
- free-standing bath;
- toilet and bidet;
- sink with cabinet and mirror;
- a cabinet for washing supplies, towels and other necessary things;
- shelves for hygiene products;
- washing machine and dryer.
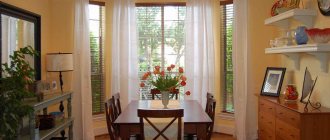
When the attic or the area allocated for the bathroom is slightly larger than the average bathroom, you have to look for compromise solutions. For example, you can limit yourself to a bathroom with a shower head or just a cubicle, choose a wall-hung toilet and bidet with an installation system, and abandon bulky furniture, as in the example in the photo below.
Features of the room and layout of the bathroom in the attic
As a rule, the main difficulty in furnishing and arranging a bathroom is not the small area, but the wall adjacent to the sloping ceiling (attic wall). In order to be able to place something near it without any problems, the height of the wall must be at least 90 centimeters, and the angle between this wall and the sloping ceiling must be at least 45°. In this case, a bathtub will sit next to the wall (the average height of standard models from the floor is 60 centimeters). In this case, the distance from the floor to the ceiling near the outer edge of the bath should be at least 180-190 centimeters, so as not to hit your head after water procedures.
Near the attic wall you can install a bathtub along or facing the wall. The rest of the furniture and plumbing fixtures are placed opposite or around the perimeter of the attic. A cabinet with a washing machine and dryer will also fit here. With the height of the attic wall being 110 centimeters, you can place a bidet and toilet right next to it; the bathtub and shower stall will be located opposite. If the length of the external wall allows, a corner Jacuzzi bathtub will fit here.
The shower stall is also mounted close to the sloping ceiling and attic wall, but the angle of inclination must be large. However, in any case, the cabin walls will have to be made to order or adjusted on site to the size and bevel angle, as in the photo.
The bathtub can stand in the center, becoming the dominant feature of the room, but it is more convenient to place the shower in the corner; by the way, you can save on finishing. In general, the layout should be as comfortable as possible so that owners do not slip on wet tiles and do not hit all sorts of corners and protrusions. For a tiny bathroom, it is preferable to have built-in and compact plumbing fixtures, a corner bathtub, a sink with a cabinet for storing accessories, corner and wall shelves, minimal but beautiful accent decor that sets the mood.
How to choose and install a roof window?
You may be surprised, but a dormer window is the best gift for the whole family. With the appearance of a window, the attic is transformed, light fills the room, and harmony settles in the rooms. Once you install even the simplest model, an additional floor under the roof becomes your favorite place in the house. And even in a crisis, you shouldn’t skimp on the comfort of your loved ones. After all, installing roof windows, like building your own home, is your contribution to the future.
But how to choose and install a roof window? What pitfalls are fraught with its installation in the roof? About this in the article.
If the roof window is installed correctly, the roof will remain a solid monolithic structure, the heat level in the attic will remain at the same level as before, but there will be much more sunlight.
The choice of window size should not depend on the rafter pitch
To simplify the installation of a roof window as much as possible, craftsmen often advise choosing windows whose size corresponds to the width between the roof rafters. This is due to their desire to make their work easier or ignorance of simple methods for adjusting rafters.
As a rule, the step between the rafters is no more than one meter - most often 60 cm. If you select a dormer window according to the rules so that there is a distance of 2-3 cm from each side of the window to the rafters, then the maximum window size is 55x98 cm. But this The window is only suitable for the bathroom. Yes, installation in this case will be as simple as possible, but there will not be enough light, and the interior will look inharmonious.
Therefore, it is good if you planned the installation of roof windows in advance and chose the optimal rafter pitch taking this into account. To install roof windows of the most popular size, it is enough to provide a distance between the rafters of about 85 cm. For most cases, this is possible.
The most popular window sizes:
- 55×78
- 66×118
- 78×98
- 78×118
- 78×140
- 78×160
- 94×140
- 114×118
- 114×140
But, if you came to your senses later and thought that a dark attic instead of a bright, cozy attic is not what you need, don’t be upset; The distance between the rafters is not that important when choosing a roof window.
Feel free to choose the size that will be good in your interior and will provide enough light.
With modern technologies, the integration of roof windows into the finished roof will be easy and painless. To do this, you need to perform a simple adjustment of the rafters to the required width.
Depending on the situation, the master provides either additional mounting rails or a vertical auxiliary beam. In the first and second cases, reliable fastening of the window frame is ensured. Only your master will have to work a little more.
As a rule, recommendations for adjusting rafters can be found on the website of the manufacturer of your roof windows.
The most common methods of “adjusting” rafters:
| The distance between the rafters is 5-9 cm less than necessary. | The distance between the rafters exceeds the required by 10 cm or more. |
| The distance between the rafters is 5-9 cm more than necessary. | The distance between the rafters is 10 cm or more less than required. |
“Effect of loopholes” and “sunny floors”
“The effect of loopholes” and “sunny floors” are the two most common mistakes when choosing roof windows and where to install them.
The “loopholes effect” occurs when, due to the small pitch of the rafters (60 cm), a person chooses the smallest windows for his attic. Whereas they are recommended mainly for the bathroom or pantry. The “loopholes effect” should be avoided, because small windows in the attic will not provide the amount of light for which everything was intended.
"Effect of loopholes"
Vertical windows in the gables of the building also “steal” light from your attic. By installing small windows in this part of the house, a person gets the following result: the areas near the windows are well lit, but in the center of the attic and under the ceiling there is still darkness. Light flows only in the lower part of the room - this is how “sunny floors” arise. But why do you need them?
Solar floors
Engineering solutions from VELUX will help you easily and efficiently install windows in the roof of the size that will transform your attic.
How to install a roof window?
How do you install roof windows into the roof? In three stages. First, the window itself is installed, consisting of a frame and a double-glazed window, then external frames are attached to the roof side; and the installation is completed by installing the slopes from the inside.
Between these parts, in a strictly defined order, special materials are laid that are necessary to completely seal the joints between the window and the roof. The service life and reliability of your window depend on the quality of these materials.
Professionals call this entire structure a roofing pie: immediately under the roofing there is a waterproofing layer, then insulation and vapor barrier. The roof window elements must be securely connected to each of these layers. It’s good when the manufacturer you prefer offers ready-made installation solutions.
For example, the VELUX company offers ready-made flashings for installation in different types of roofing materials: profiled and flat. Profiled roofing includes, for example, metal tiles or corrugated sheets, and flat roofing includes soft tiles and seams. By choosing a specially designed flashing that is suitable for both the type of roofing and the model of the roof window, you will achieve reliable waterproofing. Not a single drop of water will penetrate through such a frame.
Waterproofing
A kit for hydro- and thermal insulation will also help to correctly integrate roof windows into the roof structure. Purchasing a kit from a manufacturer will help you avoid mistakes when installing windows, because its elements were developed by experienced engineers.
The kit includes a thermal insulation contour made of foamed polyethylene on a steel frame frame, and a waterproofing apron. The thermal insulation circuit can be made of different materials, but it is better to give preference to one that is durable and not afraid of moisture. For example, foamed polyethylene. Today only VELUX makes thermal insulation circuits from it.
Such a contour will eliminate “cold bridges” along the perimeter of the window frame (installation seam).
A waterproofing apron tailored exactly to the size of the window will help connect the frame elements with the under-roof waterproofing. A drainage gutter installed above the window will drain condensation to the side.
It is also recommended to install a vapor barrier apron for proper vapor barrier of slopes. It is made to fit the size of the window and will help to achieve a complete sealed connection between the apron and the main vapor barrier layer.
Window installation: at the bottom - a waterproofing apron, at the top - a drainage gutter
You should not perceive branded kits and materials for installing a roof window as additional costs; in fact, this is your guarantee of quality. The manufacturer has thought out everything to the smallest detail: what, how and with what should it be connected? Small elements fit tightly together. The reliability of fastening has been tested experimentally.
VELUX is one of these demanding manufacturers regarding the quality of their products. In the fight for quality, the company has developed “Snow+” protection specifically for Russia. This is a set of additional seals. They are attached between the sash and the frame frame and seal the stationary part of the window. Additional seals are also installed under the side pads on the rotating frame. Such details help to retain heat in the room, reduce overall energy costs when heating the house and reliably protect against moisture penetration into the room, even during the period of snow melting and temperature drops through zero.
Choose safety
It's raining in February, the next day it's frosty, and icy conditions form on all the roads. Strong gusts of wind in the off-season. Large hail - in summer! These are the weather realities in our country. And how will skylights cope with all this?
To be confident in your choice, pay attention to reliability indicators. For example, windows with lightweight single-layer glass are not suitable for a residential attic.
The outer glass must be tempered to protect against falling branches, hail, and withstand snow loads.
It is also important that the glass unit meets safety requirements. In case the glass does break, it is advisable that the fragments are held together with a special film; this will protect your furniture, and, more importantly, your children from injury.
All these requirements are fully met by the triplex glass unit in new generation windows from one of the leading manufacturers.
Light in your window
In addition to reliability and safety, when choosing a roof window, it is important to pay attention to the glazing area. After all, light is the most important thing for which we buy an attic window!
The amount of light that each window provides directly depends on the size of the window and the area of glazing. Recently, a new generation of VELUX windows appeared on the market, with 10% more glass area. As a result, with the same dimensions, the window lets in much more light!
This technical innovation also qualitatively improved the design, due to a more elegant frame. Now roof windows have a stylish, modern appearance.
Selecting the opening method
Another subtlety that I would like to mention is the choice of handle. The handle is important for ease of opening. It can be located at the top or bottom. The choice of the first or second option is determined by the height of the walls. If the walls are high (the distance from the floor to the bottom edge of the window is from 130 to 160 cm), then it is better to choose a model with a handle at the bottom so that you can easily reach it.
Handle at bottom
If the attic has low walls, then choose windows with a handle at the top. It allows you to easily open the window, even if there is furniture underneath it. And children will not be able to reach it.
Handle at the top
Often the cost of the product becomes the decisive parameter when choosing. And here the main thing in the pursuit of discounts is not to lose the quality and reliability of the design. After all, a roof window, like building a house, is something that is done once and for all.
To be sure of the quality of the window for your attic, pay attention to special window models that are developed and tested by the world's leading manufacturer specifically for the climatic conditions of Russia. Still, not a single young company can compete with a manufacturer that has been developing roof windows for more than 70 years. We're talking about VELUX now.
Choice of style, colors and decor
The choice of style, and accordingly, color and decorative design of a bathroom in the attic depends only on the preferences of its owners. Today, eclecticism is the trend, so mixing different styles is not forbidden, the main thing is to do it wisely and tastefully. Let's look at the most popular and beautiful interior solutions for the bathroom under the roof itself.
Scandinavian style bathroom
Light wood flooring, lining or wall panels painted white and similar colors, light minimalist furniture (white cabinets, bedside tables, shelves made of chrome or natural wood), white compact sanitary ware - this is a Scandinavian bath. Plants in pots and cute accessories like black and white photos on the walls, scented candles in unusual candlesticks, laconic lamps in metal or mesh lampshades would be appropriate here.
Bathroom in Provence or shabby chic style
A beautiful bathtub on curved lion claws, brass and copper taps, retro-style plumbing, lace curtains by the window and near the shower will become the basis of the atmosphere of Provence dear to the girls’ hearts. The color of the walls is bleached, as if faded, mint, lavender; on the floor there are ceramic tiles imitating stone or wood; the lamps are wrought-iron chandeliers, painted white with the same shades. In the dry area, you can use floral wallpaper, as decoration - towels with lace trim, mats on the floor, white jugs and vases or pots with spray roses, geraniums, and lavender.
Modern attic bathroom in a neoclassical style
This style is characterized by light but noble colors. White moldings, ceiling, baseboards, floor will emphasize the blue, gray, cream color of the walls. Modern plumbing - with a touch of luxury in the form of gilded metal taps, shower head; On furniture with bent legs and smooth shapes, vintage handles with inserts made of cracked enamel or shiny stones look good. On the floor you can lay a fluffy white leather carpet made of artificial material that is resistant to dampness and washing. Beautiful elegant sconces, a mirror in a gilded or snow-white frame, and a ceiling-mounted chandelier of a similar shape will create an atmosphere of elegant luxury.
Country or rustic style
This style should be preferred if we are talking about an attic in a private log house. The walls are treated with waterproof impregnations and varnishes; the interior is dominated by wooden furniture and high-quality, classically shaped plumbing fixtures. You can decorate the room with flowers in large tubs or painted pots, and lay colorful rugs on the floor, as in the photo below.
Bathroom in the attic
Dear customers! We accept orders remotely (by phone and mail) and deliver them!Home → Roof windows → Velux → Velux kits → Bathroom in the attic
Metal tiles Soft roofing Ondulin Drainage systems Siding Facade panels Roof ventilation Dormer windows Attic stairs Where to buy
Velux roof windows - price listDownload in PDF
Solution for a bathroom in the attic
The main feature of bathroom windows is the moisture resistance of all components and accessories. A comfortable climate at any time of the year and the absence of drafts are also important.
A moisture-resistant GGU window made of white polyurethane, equipped with blinds that protect from prying eyes, and an external awning that protects from heat, is offered by the Euromet company for the bathroom. The set of 6 elements also includes an installation package (flashing, slopes, hydro- and thermal insulation), which ensures reliable installation, protection from drafts and an aesthetic finish.
Option "Optimum"
This practical, manually operated, moisture-resistant window is easy to maintain and reliable in operation. Blinds allow you to regulate natural light, cover the window from prying eyes and serve as its decoration.
| Moisture-resistant window (GGU) | 14 400 | 14 400 | 16 000 | 17 400 | 20 300 | 20 800 | 21 100 | 22 200 |
| Mounting package (EDW/EDS, BDX) | 6 200 | 6 200 | 6 600 | 7 000 | 7 700 | 7 800 | 7 900 | 8 200 |
| Slopes (LSC) | 6 400 | 6 200 | 6 500 | 6 700 | 7 000 | 7 000 | 7 000 | 7 200 |
| Marquisette (MHL) | 2 100 | 2 300 | 2 300 | 2 300 | 2 300 | 2 700 | 3 000 | 3 000 |
| Blinds (PAL) | 4 600 | 3 800 | 4 100 | 4 500 | 5 900 | 6 000 | 6 100 | 6 500 |
| Full price | 33 700 | 32 900 | 35 500 | 37 900 | 43 200 | 44 300 | 45 100 | 47 100 |
Option "Innovation"
The io-homecontrol remote control for GGU Integra® windows eliminates the need to stand up if you are lying in the bathtub, and to reach up if the window is located high enough. Blinds and awnings are also equipped with a remote opening system.
If you set up the automatic ventilation function, your participation in creating a comfortable climate in the bathroom will be limited to pressing a couple of buttons.
| Window size | 66 x 118 F06 | 78 x 98 M04 | 78 x 118 M06 | 78 x 140 M08 | 78 x 160 M10 | 94 x 140 P08 | 114 x 118 S06 | 114 x 140 S08 |
| Kit elements | ||||||||
| “Smart” moisture-resistant window (GGU Integra) | 36 500 | 36 500 | 38 100 | 39 500 | 42 400 | 42 900 | 43 200 | 44 300 |
| Mounting package (EDW/EDS, BDX) | 6 200 | 6 200 | 6 600 | 7 000 | 7 700 | 7 800 | 7 900 | 8 200 |
| Slopes (LSC) | 6 400 | 6 200 | 6 500 | 6 700 | 7 000 | 7 000 | 7 000 | 7 200 |
| Marquisette (MML) | 12 800 | 12 800 | 13 200 | 13 500 | 13 900 | 13 900 | 14 000 | 14 300 |
| Motorized blinds (PML) | 10 800 | 10 800 | 11 100 | 11 500 | 12 100 | 12 200 | 12 300 | 12 700 |
| Full price | 72 700 | 72 500 | 75 500 | 78 200 | 83 100 | 83 800 | 84 400 | 86 700 |
The tables indicate prices for roof windows installed in roofs covered with profiled material. For flat roofing, prices are 1000 rubles lower.
- Living room in the attic
- Bedroom in the attic
- Bathroom in the attic
- Rooms with overhead light
Home → Roof windows → Velux → Velux kits → Bathroom in the attic