The Mystery of Floating Ceilings
The new finishing technology is called floating because of its appearance. The illusion is created that the structure is not in contact with the walls, as if suspended in space.
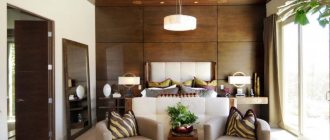
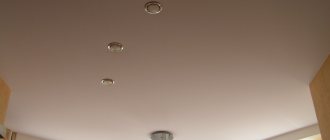
The highlight of the soaring effect is well-organized lighting with secret lighting around the perimeter of the vault.
The bright luminous flux of the LED strip mounted between the tension plane and the walls or tier (for a multi-level structure) does not allow you to concentrate your gaze there, so it seems as if the ceiling is flying.
The floating ceiling effect became available thanks to the appearance of translucent stretch fabrics, behind which the builders successfully hid the lighting.
Scattered light rays breaking through translucent materials served as a cutting barrier, allowing one to see only the composition that was intended. For example, a skylight with cherry blossoms and clouds, a traveler's map, a porthole, etc.
Manufacturers of tension systems met the designers halfway and developed a special profile with ready-made grooves for LEDs, which made it possible to use matte and satin films when arranging floating ceilings, in addition to translucent canvases. Glossy textures should be used carefully so as not to create glare that irritates the eyes.
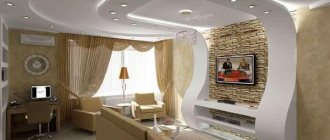
The new technology is not limited to installing LEDs only around the perimeter. It is possible to create dividing light strips along the canvas and illuminate individual ceiling fragments or figures, which visually makes them float in space and opens up enormous possibilities for the designer's imagination, as evidenced by photos of soaring ceilings for the hall.
Types of ceiling: what can it be and where will it look good?
But before you order such a product, you need to think about its design.
- It can be a simple ceiling with one sheet - in this case, an LED strip is attached along its perimeter and creates a feeling of floating of the entire structure.
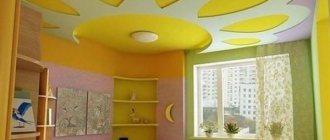
- A real “wow effect” can be achieved if you make the ceiling multi-level - in this case, several levels can soar, while the second level can be of a complex curvilinear shape.
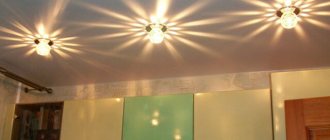
Another original solution is a “starry sky” ceiling with additional LED lighting, or you can apply any design to the canvas (for example, a real sky with clouds). The main advantage of floating ceilings is their eye-catching appearance. The design seems weightless and allows you to implement unusual design projects.
Do you need floating coatings?
Floating structures:
- Fabulously attractive. However, their advantage over suspended ceilings tied to walls is mostly purely aesthetic. Therefore, each owner decides for himself whether to invest more money in beauty.
- They illusorily expand the space. The absence of corners visually raises the ceiling, making the vault light and, one might say, frivolous. Sometimes it seems that the fabric will hang a little and fly away with the wind, leaving behind the endless sky. However, this effect is only possible with a properly designed and installed system.
Do not forget that the floating effect is achieved thanks to lighting, therefore it appears only in the dark, and during the day these will be ordinary tension structures.
To expand, reduce or adjust the room, alternative techniques will be needed.
Selecting a profile for floating suspended ceilings
Several specialized types of frames have been developed for both single-level and multi-level structures. However, you can also use ordinary ceiling moldings for installation. All such profiles are made of aluminum with a harpoon fastening system.
Special baguettes
The profile for floating suspended ceilings is available in several variations:
- with light-diffusing insert;
- a step hiding the diode strip;
- a place for lighting, which is hidden behind the stretch fabric.
Each one is better suited for different situations. Let's tell you more about the most popular options.
Wall molding KP 2301 - the LED strip is inserted after installation of the canvas, and then covered with a translucent plug. The profile height is 45 mm; the ceiling will drop by this distance. To create curved structures, the baguette is sawed every 5-10 mm and bent.
The insert transmits about 90% of radiation and does not distort color. The light flux is directed downwards, making it brighter and clearer than with other profiles. If necessary, the tape is easy to replace; to access it, just remove the plug. When the lights are turned off, the ceiling looks almost like a normal one; the light-diffusing insert performs a camouflage function and hides the LEDs.
Profile KP 2429 - resembles a curved hook in cross-section. The upper part is attached to the wall, and the canvas is mounted in the lower part. A special niche is provided for the diodes; the tape does not need to be covered with a light-diffusing plug, which greatly simplifies installation. An aesthetic appearance is achieved thanks to a hidden harpoon system. The height is the same as the first one - 45 mm, also suitable for curved structures. But unlike the previous option, the lighting is directed towards the wall, so the lighting intensity is less.
Similar models also include the PC 6 baguette and floating profile . The latter is equipped with special mortgages for perfect joining of elements without differences or steps.
Baguette KP 4003 - unlike the previous ones, it is used for translucent canvases. First, the LED strip is inserted into the gap, and then the film is mounted. The light is soft, diffused and directed towards the wall. To replace the diodes you will have to remove the entire panel, which makes the closed arrangement inconvenient.
Ceiling profile
It is more convenient to install a floating ceiling with special baguettes, but they are not necessary. You can take a regular ceiling profile that is attached to the floor slab. But the installation will be more complicated.
First, mark the position of the future structure. Metal corners are attached to the ceiling through dowels, and a wooden beam is screwed to them. The bottom edge should be positioned strictly horizontally; it is convenient to use a laser level to check. A space of several centimeters is left between the wood and the walls.
Then the ceiling profile for suspended ceilings is attached. It is screwed to the beam from below, from the outer edge (closer to the wall). This way, after installation is complete, the beams will be hidden.
An LED strip is glued to the back of the baguette. Connect the power supply. Then the fabric is stretched.
Cost of floating structures
The costs of arranging a simple suspended ceiling are calculated simply: the cost of tension fabrics + the cost of a load-bearing profile laid along the perimeter of the walls + the cost of arranging additional corners (if there are more than 4 of them in the design) + the cost of lamps + installation work.
When calculating the costs of installing floating systems, to the costs of installing ordinary tension structures, you need to add the cost of an LED strip of the required footage, equal to the perimeter of the walls and power supplies (transformers) for protection against overloads and power surges at the rate of 1 device per 10 m of strip. It is necessary to take into account that:
- multi-color (RGB) tapes are more expensive than white ones;
- When choosing strips with color LEDs, you will additionally need a remote control for adjusting the brightness of the light output and color.
Each owner can calculate the cost of a new super-fashionable ceiling and decide on a budget in advance.
Floating ceiling with lighting: features
You should install the power supply exactly within the range of the remote control, if there is one, of course. There is no need to glue the diode strip itself; it can simply be inserted into a special groove. And the ends of the wires near the tape and the power supply need to be cleaned and connected in the usual way. Don't forget, of course, to wrap a layer of electrical tape on top.
The brightness of the tape itself will depend on the number of diodes per meter. For example, at a voltage of 12 W, their number ranges from 12 to 30, and if the power supply is 24 W, then there can be up to 240 diodes, and they will be located in 2 rows. On average, 30 pieces per meter will be sufficient.
And after the tape, but at the same angle, you attach a translucent insert with a special translucidal layer. The fact is that this material has almost complete light-penetrating ability, but like frosted glass, it scatters the rays. As a result, you get soft light and even illumination without any harsh shadows.
Types of floating structures, advantages and disadvantages
Depending on the complexity of the device, floating coatings are:
- Single-level systems. You can install profiles for such elementary suspended ceilings yourself if you purchase a ready-made baguette with LED strip. It is only important to take accurate measurements.
- Multi-level planes with many curved figures. Installation of such structures requires experience or the involvement of specialists. For the second and subsequent stages, designers use ready-made panels from various light-transmitting materials, securing them into profiles hidden under the tension fabric. Due to this, the tiers create the appearance of being suspended in the air. The same mirage is given by the lighting on the first level, thanks to which the entire composition makes an indelible impression.
Stretch ceilings using floating technology differ in the material of the canvas, among which the most popular is vinyl film, wrapped around the edges with a special tape (harpoon), which ensures ease of fastening. Industrial floating profiles for suspended ceilings are mainly designed for such a connection.
Advantages of illuminated stretch ceilings:
- Clean and quick installation in 1 day (it will take about 4 days to create such a plasterboard structure, which is necessary for puttying, priming, painting, and drying the box).
- A variety of textures and colors of stretch fabrics: white, red, gray, blue, yellow and even black shades.
- The possibility of photo printing - this makes it possible to choose an image of any type and make the ceiling unique.
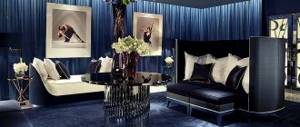
- The transition of lighting from the ceiling to the wall and even to the floor, which makes the interior of the room extravagant. This transition is not suitable for all style trends. It is chosen for modern interiors (high-tech, avant-garde, minimalism, art nouveau, etc.).
The disadvantages of floating ceilings include:
- higher cost compared to standard tension structures;
- slight reduction in the base overlap.
Design of floating ceilings: 6 stages in installation
Installation of floating ceilings is carried out in stages. An example can be given by considering the six main stages. Depending on the design, there may be more.
Ceiling installation steps:
- The first is preparing the surface of the rough ceiling (putty, primer, laying communications);
- The second is taking measurements and creating a drawing of the future structure;
- The third is the fastening of profiles for suspended ceilings, as well as suspended structures of all levels;
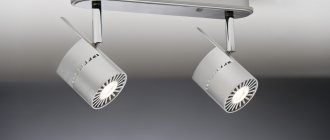
- Fourth – installation of lighting;
- Fifth - installation of the canvas with marking of fastening points for the next level;
- Sixth - bringing the lamps out, attaching the plugs, installing the hanging elements.
As you can see, the line of work is quite logical and technologically not particularly complicated.
Do-it-yourself installation of a floating ceiling
The high cost of floating coatings, according to consumer reviews, is due only to the popularity of the trend, although the work of installing them is no more difficult than installing a polymer film; it consists of the following stages:
- Draw a floor plan and a detailed sketch of the future ceiling, not forgetting to mark the location of electrical wiring and communications.
- They clean the ceiling slab from defects, putty, level it and remove or move the furniture.
- They make ceiling markings, for which they transfer all the lines and figures from the sketch, and using a laser level, mark the attachment points of the floating profile along the perimeter of the walls so that the distance between the lowest point of the ceiling and the future suspended ceiling is at least 5–6 cm.
- Install the profile starting from the corners and joining it only in straight sections to avoid damage to the baguette and subsequent tearing of the canvas.
- A separate wire is provided for the lighting so that it turns on regardless of the central lighting.
- An LED strip is glued to the profile, transformers and possibly amplifiers are screwed to the base ceiling, they are checked again with the sketch and the functionality of the lighting system is checked.
- Having successfully completed the installation of the lighting, which is the main difference between the installation of floating ceilings, they warm up the room with a heat gun and hang the film on the clamps in the corners in a diagonal direction.
- They begin to work with the corners: remove the clamp, heat the film until elastic, tuck it into the baguette with a special spatula for suspended ceilings and snap it into place.
- After working out the corners, proceed as if hanging curtains: secure the film with several locks in the center of the wall, then in the middle of each segment, etc., alternating working walls.
- Install a translucent plug to mask the profile and diffuse the light flux.
There is nothing difficult about installing a floating ceiling. Detailed installation instructions are included in each tension fabric package.
The main thing is to ensure that distortions, wrinkles and folds are not created. If they appear, then eliminate them in time by warming up the problem area and smoothing it out with your hand.
You must have minimal skills in working with films. But it is better to hire craftsmen. Sometimes the services of specialists are cheaper than correcting mistakes.
Description of technology
Floating ceilings are the latest technology in the design field. At its core, this is a tension structure with ceiling lighting, which creates the effect of floating. However, unlike other types, there is no need to install additional suspended structures. Because for the installation of floating ceilings, special profiles are used, which not only serve as fasteners, but also contain space for LED lighting.
The light rays are directed towards the wall, due to this a feeling of volume is created. The installation process is not very difficult, as it might seem at first, let's look at it in detail.
Installation principles
The very first installation step is to select the type of canvas and backlight color. There are no restrictions regarding the shape of the ceiling; the materials used allow you to create everything to your liking. In terms of color, there is also freedom of choice; in addition to standard colors, it is possible to design a suspended suspended ceiling with illuminated photo printing or a pattern.
There are many varieties of such paintings; paintings of the daytime or starry sky are especially popular. Then you need to choose a backlight that matches the base, although you can create a specific contrast. Having selected all components, you can proceed directly to the installation, which consists of the following steps.
Installation steps:
- Schematic drawing of the ceiling shape;
- Accurate measurement of hangers, perimeter corners and other parts. What should be taken into account here is that the canvas itself must be placed 12-16 centimeters below the base;
- Installation of profiles on walls;
- Installation of wiring for main lighting and adjustment devices;
- Installation of plasterboard boxes in places previously marked for this purpose;
- Fastening the canvas;
- A small hole is cut in the canvas for the main lighting. A special ring is installed there, the wiring connected to the lighting device is brought out into it;
- The overlap joints of plasterboard materials should not be visible; to do this, you need to carefully putty these places.
The installation process of floating ceilings differs from standard suspended ceilings; this is also due to the design features; we will consider them in more detail.
Design Features
Among the main features, we can highlight the locking system of profiles, because it differs significantly from the usual technology. This system involves fixing LED lighting to create a space between the canvas and the wall, which ensures a floating effect. The structure consists of:
- Aluminum profile;
- Stretch ceiling fabrics;
- Harpoon;
- LED strip;
- Light-diffusing insert.
The profile is installed either around the perimeter of the room or on the sides of the ceiling structure itself. The canvas is tucked tightly, and its edges are fixed with a clamp (harpoon). The LEDs are placed directly in the profile, between the mounting strips, and a diffuser insert is installed on top. It is used to soften the light, since the diodes themselves produce light that is quite harsh and unpleasant to the eye.
An important design detail is the backlight control device. The most common and simple option is a device that turns the backlight on and off; this can be done using a remote control. However, there are more complex devices, the functionality of which also includes adjusting the brightness, turning the light of the strips on and off, and changing color combinations. There are also devices with which you can turn on/off the light using a timer.
We talked about the basic installation principles and design features of all floating ceilings, now we will look at all their varieties separately.
Backlight color change
How do you change the color of floating structures? Elementary. Using the LED control panel you can:
- reduce the intensity of the ceiling glow to a minimum, using floating technology in the form of a children's night light or creating a romantic atmosphere in the living room or bedroom (such photos can be found in magazines and the Internet);
- increase the radiation intensity and obtain diffused light in the room;
- choose any shade of lighting: white, light green, blue, orange, red spectrum, cream, yellow, etc.;
- turn on flashing mode or color rainbow.
In addition to its aesthetic function, changing colors can affect mood. With white lighting around the perimeter, the mood will be business, work, everyday. Yellow light pouring on the walls will add warmth and comfort. Red will excite you, and green will create a feeling of mystery.
Although floating ceilings create a stunning effect, there is nothing special about their design. This applies even to highly complex multi-level tension systems. But it is worth noting that the work of professionals will not cost much more than self-installation, but the result will delight not only you, but also your guests.
Soaring stretch ceilings in the interior
Thanks to modern technology, there are more and more design options that combine practicality and aesthetics. Floating stretch ceilings are a striking example of a new generation of finishing with functional and original lighting.