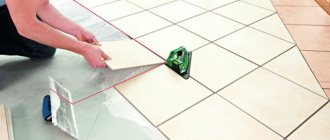
Marking paths and platforms
Marking of surfaces to be covered with paving stones is carried out taking into account the following factors:
- location;
- slope away from buildings;
- load on the surface (pedestrians, vehicles);
- configuration (conditions for safe passage of vehicles).
The areas are marked out with your own hands using a 10-meter long construction tape, wooden pegs and twine.
The paths are paved with a slope of 3% in the direction opposite to the existing buildings, in order to divert storm and melt water from them.
Foundation diagram for paving slabs
If passenger vehicles are planned to move along the paths, then the thickness of the paving slabs used must be at least 6 cm. When arranging the passage of vehicles, the width of the paths must provide the opportunity for a pedestrian and a car to pass each other safely. The radius of curvature of uneven sections of driveways should allow the vehicle to turn, and the dimensions of the site or parking lot to turn around.
Marking the area for paving slabs
Cladding is an element of improvement of an existing site. Therefore, special accuracy is not required when marking paving slabs, and the entire alignment comes down to building one or two lines on the ground where the installation of curb stones is required.
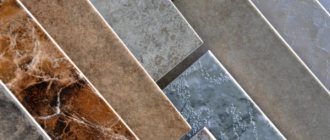
You don't need expensive tools to lay tiles
It is better to start laying from an existing building (for example, if there is a path between two objects), or along it - parallel to the facade line.
If the situation allows, the width of the coating should be “adjusted” to the whole number of tiles. This layout looks better and you will have to cut less tiles.
To do this, first estimate the width of the paving slabs by eye and mark them with pegs. We measure and divide the resulting value by the size of one tile. The resulting value is rounded to a whole number.
For example: the measured value is 264 cm, the width of the tile is 19.5 cm. Divide - 264 cm : 19.5 cm and we get 13.53. That is, for a given width, 13 or 14 whole tiles can be laid. We choose what is preferable in our case to expand (if possible) or slightly reduce the width of the area, and count down.
Let's say the situation allows you to lay 14 tiles, then 14x19.5 = 273 cm. This will be the width of the cladding. We set aside 273 cm and mark it with a peg.
We indicate the direction of laying with the next peg, driving it in so that the cord stretched between it and the first peg is perpendicular to the line connecting the first pegs. And if the site is adjacent to the building, then it is parallel to its facade (see Fig. 1).
Site marking
As for the height of the cladding, it usually corresponds to the entrance openings of buildings adjacent to the site and (or) porches. It is extremely rare that the height can be tied to any special mark (benchmark) depending on the features of the building.
I recommend: Studio apartment renovation: features, photos, design
The direction of the slope of the site for the drainage of rain and melt water is determined by the general slope of the relief.
Removing the top layer of soil
From the surfaces planned for laying tiles, remove the top layer of soil 25-30 cm thick, this is approximately one bayonet of a shovel. If the areas are large, this operation is carried out using a bulldozer. The new foundation is then leveled and leveled by hand. If the soil is sandy or sandy loam, then it needs to be compacted.
Compaction is carried out using a tamper made by hand from a piece of log 1 meter long with a transverse handle-crossbar nailed to the end. Better compaction is performed by a movable vibrating plate with an electric drive, the use of which, in addition, will save effort and time.
Then, on the compacted base, it is necessary to lay geotextiles in one layer with an overlap on the roadsides in order to isolate the soil from the crushed stone preparation being developed and to prevent future subsidence of the paving slabs.
The type of geotextile used in this technology does not matter.
Crushed stone cushion and installation of curbs
On a compacted base covered with geotextile, crushed stone of a fraction of 20-40 mm is poured and leveled, taking into account the planned slope, in a layer of 12-15 cm. Along the perimeter of the sites and along the paths, the crushed stone is slightly raked and road stones are installed along a stretched control cord with a recess into the crushed stone with a gap of 5 -10 mm. To form ovals, do-it-yourself borders are cut lengthwise into 4 pieces using a grinder with a dry cutter, and smooth joints are laid out from the quarters.
Layout of the base for paving slabs
The top mark of the curb should not be more than 5 cm higher than the curb. After the installation of the curbs is completed, the joints between them are filled with cement-sand mortar and rubbed down. A day later, a rake is used to finish leveling the crushed stone bed, indicating the slope and taking into account the selected transverse profile of the path (flat or convex), and then compacting it with a mobile vibrating plate with an electric drive.
After compaction, sand is poured over the crushed stone, distributed over the surface in a layer 3-5 cm thick, and compaction of the base with a vibrating plate is repeated, filling the voids in the crushed stone with sand.
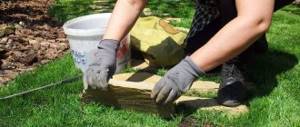
Installation of curbs
The boundaries of tiling are determined by existing buildings, and where they are absent - by curbs. We also use borders to frame flower beds, lawns, engineering structures such as hatches, etc. located on the site.
As a rule, installing curbs and laying paving slabs with your own hands is carried out in parallel. That is, we install two or three meters of curb stones, then we fill this gap with tiles, put up curbs again, etc.
Borders also frame various flower beds and lawns on the site.
In relation to the slopes of the site, the lines of curbs can be located either horizontally or following the general slope of the site.
I recommend: How to make paths in your dacha with your own hands
Marking and installation is carried out as follows:
- At the starting point of the curb line, we drive a peg and mark on it the height of the top edge of the curb. The height depends on the level of existing structures, as well as the chosen option for laying paving slabs relative to the ground level of the site (see Fig. 2). To accurately determine elevations, we use a hydraulic level or level.
- We measure 6-8 meters in the direction of the laying line and drive in the second peg. We measure the distance from the ground surface to the mark on the first peg, at the same distance from the ground we make a mark on the second peg. Using these marks, we stretch a cord between the pegs, which will give us the position of the upper edge of the entire row of curb stones.
- The installation is based on either a directly compacted soil base or a drainage layer. Their surface is far from ideal and therefore we install curbs for paving slabs not directly on the ground, but on a leveling bed. We build it 3-5 cm thick from sand, a mixture of sand and cement, cement mortar or concrete with fine aggregate.
- We install curb stones on the bed, ensuring that the top edge matches the cord. If necessary, we press it down with a rubber hammer or add bed material, increasing its thickness. The inner edge of the curb should almost touch the marking cord along its entire length.
Important
! When installing curb stones, do not allow them to fall over, checking the verticality of the side edge with a bubble level.
Even the most unusual tiling can be done by a beginner
Installation of a sand cushion for laying paving slabs
A layer of sand 4-5 cm thick is poured on top of the second layer of geotextile, leveled and compacted. Geotextiles will prevent sand from falling into the lower layer of crushed stone and thereby causing subsidence of the paving stones. Paving slabs begin to be laid on this sand preparation.
The cushion under the paving slabs is laid in three layers
However, there is a technology that differs little in cost from a sand preparation device, but guarantees a higher paving result in terms of strength and durability. On the second layer of geotextile you need to put a thoroughly mixed dry mixture of sand and cement in a ratio of 7:1 in a layer of 4-5 cm and level it.
Cement in this proportion will slightly increase the cost of laying tiles, but, gradually absorbing moisture due to its hygroscopicity, it will make the cushion monolithic. The procedure for preparing such a dry mixture is incomparable in terms of labor intensity with preparing concrete with your own hands, on which paving slabs are also laid, but it gives a result close to it.
Choosing a base: what can be laid on and methods of installation
When all the nuances have been clarified, you should move on to the question of the base on which the paving slabs will be laid.
There are several ways to lay paving slabs:
- To the prance . This method is used in cases where the path or sidewalk has a significant slope. Pros: an important property is the prawn, which is a dry mixture of sand and cement that can set when exposed to moisture and reliably adhere to the tiles. As a result, the paving slabs cannot slide towards the slope.
- Disadvantages: The prawn cannot be stored for a long time with wet sand. Moisture in the cement begins the setting process.
- Pros: replaces crushed stone bedding; High-quality concrete mixture is made from the screenings.
- Pros: ease of work on laying paving slabs using sand.
- Pros: high degree of coating strength; designed for places with intense loads.
- Pros: a minimum layer of solution of just a few centimeters is required.
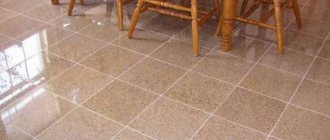
Laying paving slabs requires strict compliance with all construction regulations.
If paving technology is violated, the coating quickly collapses. The most common method of laying paving slabs is laying on a sand base. This way you can lay almost any type of tile, including sand-polymer tiles. Firstly, this method is quite simple, and secondly, it is not labor-intensive. Choosing this method is relevant if you:
- We are not sure that the design of the garden area will remain unchanged for a long time.
- You don’t want to go through the longer and more thorough work involved in laying a multi-layer base.
The video explains the benefits of laying paving slabs on sand:
Laying paving stones
After installing the sand cushion, they begin laying the paving stones. Paving slabs are laid in the “toward” direction with a gap between the products of 2-3 mm. A trowel and a rubber mallet are used to lay the paving stones and adjust them in place. Trimming tiles is also done with your own hands using a grinder with a dry cutting disc, which allows you not only to cut concrete, but also to undermine it with its side surface.
Scheme for laying paving stones
When laying paving slabs, every linear meter of masonry is checked for compliance with the slope and cross-sectional profile of the coating. The correct convexity of the track profile can be formed by periodically applying a self-made plywood template to the coating.
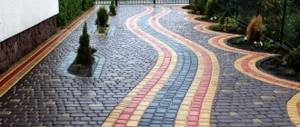
Paving slabs in the decor of a country house courtyard
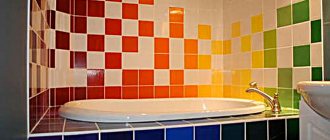
There are several ways to lay tiles. For beginners, it is better to work according to a simplified scheme, when two colors alternate in a certain order. Those more advanced in construction can try to create real masterpieces by laying out intricate patterns from tiles. You can pave the yard or garden alleys with a regular rectangular material. Despite the simplicity of form, laying paving slabs can be successful in color combinations. It’s easy to create an interesting composition using multi-colored elements. For more original compositions, it is better to choose tiles in a figured design.
Christmas tree
This is one of the most affordable ways to artistically lay tiles with your own hands. The pattern is obtained by paving the elements at a selected angle. The latter can be equal to 45o or 90o. Variants of the Christmas tree also include wicker. In this case, the tiles are alternated in longitudinal and transverse laying.
Herringbone paving slabs
Chaotic variant
A random mixture of tiles will also look very good in garden design. Creating a chaotic pattern is also easy. It is enough to purchase consumables in a variety of shapes and colors, and simply lay out the available elements in random order. The result is usually very impressive.
Chaotic way of laying
Chess method
Checkerboard tiling is a yard decor option that even a child can create with their own hands. It is simple, but quite effective. To work, you can take both square and rectangular tiles, only in the latter case, to create cells, the elements will need to be laid in pairs.
Laying tiles in a checkerboard pattern
Snail
The circular laying pattern is the pinnacle of construction and paving skills. In this way you can beautifully decorate a relaxation corner in the garden or an area in front of the house. Creative individuals manage to achieve amazing results when creating circular patterns. Paving slabs laid by a specialist will look great both from a normal angle and from a height.
Circular laying of paving slabs
Combination with lawn
When paving courtyard areas, especially those intended for recreation, it is worth combining areas for laying paving slabs with green lawns. This technique will help add aesthetics to the territory and not upset the fragile balance between civilization and nature.
Combination of paving slabs and lawn
Arrangement of seams of paving slabs
Having laid the tiles, they begin to process the joints of the paving stones with each other and with the curbs. To do this, using sifted sand, prepare a dry cement-sand mixture with your own hands in a 1:1 ratio, which is poured one bucket at a time onto the floor tiles and swept with a hard broom towards the slope, filling the joints and seams of the coating.
When the entire surface has been treated, the paving stones are lightly watered with water from a garden watering can, just to wet the seams and allow the dry mixture to shrink into them.
A day later, the procedure of filling the seams with a dry solution followed by wetting is repeated. When repeating the filling procedure, the mixture should not be placed in the joints flush with the surface of the paths; the seams should be clearly marked on the surface of the coating. 5-7 days after the joints are laid, the paving surface is washed with water from a hose using a stiff brush to remove traces of cement mortar.
You can hammer the masonry into the sand using a regular hammer.
DIY methods for laying paving slabs: step-by-step instructions
Option 1: sand-based
A sand mixture is poured into the recess of the pit. The layer height is about ten centimeters. It is better to use coarse river sand. The mound should be leveled with a rake and thoroughly watered with water from a hose using spray nozzles. For every square meter you need to pour at least ten liters of water. After watering, the entire area should be compacted again using an electric or manual compactor.
You can make a rammer yourself from a sheet of iron or plywood, a pipe and two handles
Important! Curbs on the site are installed and fixed with cement mortar one day before paving.
Laying begins from the edge of the site. You should move forward along the already laid tiles. It is better to do this on your knees, otherwise you risk accidentally moving an already installed element with your foot. Between the paving fragments you need to leave a gap of about three millimeters.
If during the process unevenness of the base is revealed, sand is added
Advice! If it is necessary to insert cut fragments of tiles, this is done after the main paving.
When the site is ready, fine sand is poured on top. You need to take a long-handled brush or broom and spread the mixture so that it fills the joints between the tiles. The excess is swept away. After only a day, the path is suitable for use.
Photo gallery of laying paving slabs on a sand bed:
We outline the boundaries of the future path
Removing the top layer of turf
Leveling the site as much as possible
We stretch the rope between two pegs (pins) to mark the boundaries of the path
Add a layer of sand and level it with a shovel
Using a level, we achieve the most level surface possible.
To shrink the sand layer, water it from above from a watering can. Make sure that holes are not formed in the resulting base due to too large portions of water
If the future path is large, the formation of traces from forced walking is inevitable.
They can be eliminated by adding fresh sand and leveling with a spatula.
We lay geotextile fabric on the base
Pour a new layer of sand on top and level it
We begin laying paving slabs, constantly monitoring the plane of the base with a level
Using a rubber hammer, we knock out individual tiles, lightly “embedding” them in the sandy base
We also do the same with the side surfaces so that the tiles fit as closely as possible to each other.
If the base is not level, add the required amount of sand
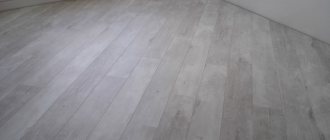
This is what a laid path looks like
Trim off excess geotextile
Fill the side grooves with sand
Carefully pour sand into the tile joints and level them
We pass the surface with a broom so that all the sand goes into the joints between the tiles.
We water the finished path with a watering can. The finished result
Option 2: laying on crushed stone
As a base, fine crushed stone with a fraction of no more than two centimeters is poured into the pit (the ideal option is 5-10 millimeters). The backfill layer is two-thirds of the height of the pit. The crushed stone is compacted. A mound of dry mixture of sand and cement is placed on top to a third of the height of the pit. If the crushed stone is large, you can lay a geofabric before filling the second layer. It will not allow sand to spill through the stones.
The tiles must be laid out in the same way as in the first option, with the difference that the surface must be leveled with a rubber mallet
Advice! Before cutting the tiles to fill the edges, you need to lay them down on the paving and mark the edges of the cut.
The gaps between the tiles are filled with a sand-cement mixture. The entire site is watered with water from a hose with a sprayer. In order not to spoil the appearance of the site, you must first sweep away the remaining cement mixture and only then fill it with water.
Option 3: concrete base
For laying paving slabs in a dacha, in most cases a sand or crushed stone base is sufficient. The only exceptions are situations when the area or path is intended for driving or parking a car.
In this case, the prepared pit is first filled with a cushion of crushed stone. After compaction, the formwork is secured. If the site is very large, you need to leave thermal gaps of half a centimeter every three meters. If necessary, reinforcing mesh is laid. Next the concrete is poured.
It is important to maintain the slope for subsequent drainage of rain and melt water
Curbs are placed around the formwork. The tiles are laid on the screed. The gaps between the elements are filled with elastic grout.