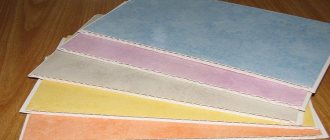
What could a bathroom border look like and how to install it?
After the installation of a bathtub, shower tray, sink or washbasin has occurred, there will be a gap between the side of the appliance and the wall. Sometimes it is only a couple of millimeters, but water still gets there, flows along the surface of the wall onto the floor and, if the degree of sealing is insufficient, it can “please” the neighbors who live below with a dark spot on the surface of the ceiling. Even if you live on the ground floor or in a privatized house, dampness under the bathroom will not bring anything great - fungus and mold, a musty aroma. That’s why they are trying to close these gaps. There are countless and different bathroom curbs that cover this gap. They are placed not only on bathtubs, but also on trays in the shower or near sinks. They simply select a different profile and its dimensions. But the installation principles remain the same.
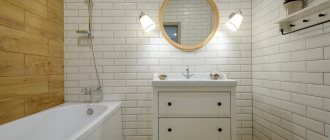
Well-designed gap between the bathtub and the wall
Characteristics
When renovating a bathroom, it is very important to take care of every little detail so that the interior is not only beautiful, but also highly functional. Thus, experienced specialists strongly recommend closing the gap that forms between the side of the bathtub and the wall to which it adjoins
After all, after taking a shower, droplets of water condense on the surface of the tile, which gradually falls down the wall into a gap over the side of the bathroom onto the floor. This provokes rot, fungus and mold, which negatively affects the bowl and shortens its service life. Also, this phenomenon is a direct threat to the health of family members. Installing a plinth on the side of the bowl will help prevent this from happening. This is easy to do with the help of a special border, which helps seal the gap between the wall and the side of the bowl.
Clearance between the wall surface and the bathroom and choice of border
If the bathtub was installed after wall finishing, a gap inevitably remains between its side and the wall. Large or not very large - depends on how ideal the surfaces of the walls are and whether the bathtub itself is level. In any case, it is better to seal this gap. Firstly, there will be no dampness under the bathtub, secondly, the appearance is better.
To select a border for a bathroom, you need to proceed from the width of the gap. Depending on the distance to the wall, the installation order changes:
- If the distance between the bathtub and the wall is up to 3 cm, you can immediately install a side. Only its bottom shelf should be wide - it should be 3 times wider than the slot. And one more thing - in such a case, only hard corners - ceramic or plastic - are suitable. It is better to glue the border tape with a small gap of a couple of millimeters or seal it in advance with a cement-sand mixture.
- If the distance from the side to the bathtub is more than 3 cm, it needs to be sealed first. There are three options: Fix the formwork from below, pour it using concrete, after drying (at least three to four days) you can continue work.
- Seal the gap with 2 layers of green plasterboard. A frame is assembled, which is fixed to the wall surface with dowels, and to the bathtub - with foam for installation work or liquid nails. If the shelf is large, install vertical supports. In general, they assemble a real frame. You can install a corner or tile on the fixed gypsum board if the gap is too high and the width of the corner is not enough to close it.
- Make a side from the same tiles as the walls. The option is familiar from previous years, but at the moment it is no longer popular.
Assemble a frame from a metal profile and cover it with green plasterboard. You can connect it with a frame for a screen under a bathtub
Having formed the technology for sealing the gap, you can select a border for the bathroom. It's not as easy as it may seem - there are many different options, so you can get lost.
Ceramic border
More recently, ceramic tiles have been an important finishing material for plumbing fixtures. And if there was a gap between the wall and the bathtub, you had to figure out how to make a border in the bathtub from tiles.
It was quite difficult and diligent work: I had to cut small squares from the tiles, which were then used to form the slope from the wall to the bathtub. If the work was done conscientiously, the effect was absolutely decent. Now there is no such need.
In many construction stores, when you buy tiles for a toilet, they can immediately recommend favorable ceramic borders. But often they still have to be purchased separately. When choosing such a frame, you need to work hard so that the border matches the color of the tile itself.
In exceptional cases, you should choose a white border, then merging with the plumbing fixtures, it will not stand out from the uniform design.
In fact, all ceramic products are considered quite strong and hard. And therefore, of all the options that have been considered, ceramic borders will especially last a long time; they are virtually not subject to deformation and can be used without replacement for many years.
We invite you to familiarize yourself with How to install a PVC corner on a bathtub photo instructions
But you need to remember about the disadvantages of this option: it has poor resistance to mechanical damage, i.e. with a strong blow, such an object may prick.
In most cases, this kind of trouble occurs when installing ceramics, and already installed borders add to their own hardness the mechanical strength of the wall and bathtub and are virtually invulnerable.
Working with ceramic components requires specific skills, and therefore the best option is to entrust this process to specialists. If, for example, you personally agreed to take on this task, then it will be useful for you to read how to make a border in the bathroom from ceramic profiles (or baseboards).
Ceramic border for waterproofing
A ceramic border for a bathroom is considered the most beautiful type of design and is durable, although its installation requires much more time. Previously, to decorate the joint and seal it, it was necessary to cut borders from the remaining tiles, but today this is no longer necessary, since the production of ceramic corners has been established at an industrial level.
Such a corner between the bathtub and the wall is sold today in almost every building materials store. The product has a wide range of colors and design variations, which allows you to choose a model for almost every interior style. The material is highly durable and durable, although its installation process is a little more complicated than previous ones.
Important! Before choosing corners for bathroom tiles, you need to remember that this method of sealing the joint is not able to withstand bending stress and deformation, since it is laid on tile adhesive. It is better not to use this option for acrylic or steel bathtubs, but only for cast iron ones
- Before starting work, purchase the required number of curb modules with corner joints;
- clean and dry the joint;
- then seal the gap using polyurethane foam or silicone, depending on the thickness;
Color options for ceramic borders
For your information. At this stage, you need to decide how to glue the corner in the bathroom. If you have an acrylic bathtub, then it is prone to expansion when heated, which means it is better to use a sealant for the corner, which will provide elasticity when dried. If the bathtub is cast iron, then this material practically does not expand and in order to securely fix the bathtub corner, you can use ordinary tile adhesive.
- mix the tile adhesive and apply it to the joint using a spatula, then tightly lay the curb modules, saving space for grouting;
- After installing the border on the bathtub is completed, you need to wait a day until the tile adhesive has completely dried and then apply moisture-resistant grout for the joints.
Having studied the information presented above, you already know how to glue a corner to a plastic or ceramic bathtub yourself, which will allow you to significantly save money on repairs. And to consolidate the material, we suggest watching a video clip that will answer many questions.
Types of curbs for the bathroom and their installation
All bath corners can be divided into two large categories, each of which has several subtypes:
- polymer and polyvinyl chloride: plastic (PVC) curbs for bathtubs;
- plastic corners;
- self-adhesive tape;
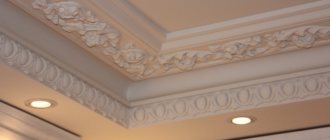
- foam or polyurethane (ceiling) borders.
Several profiles of plastic curbs for the bathroom
Products from the first group are more affordable in price and are easier to install. Ceramic, marble or granite borders are much more expensive and difficult to install, but they also look much more colorful. True, the design of the bathroom should also be appropriate.
These can be ceramic or marble
Installation of plastic borders and corners
If we talk about plastic borders for the bathroom, they are usually placed under the tiles and on the tiles (or any other wall cladding). The border on the bathroom floor tiles is installed during the wall finishing process - its upper edge is placed under the tiles. This option is wonderful, but it is impossible to move/replace the bathroom without destroying the lining.
Plastic border for bathroom under tiles
The type of second borders is installed after finishing work is completed. In this option, the bathtub is simply placed against the wall surface, and the existing gap is covered with one of the plastic or polymer corners.
Plastic borders placed on tiles are available in various profiles, with various shelf sizes. The sides of these products themselves are elastic and they fit well to the wall surface and the plumbing fixture. The traditional facing corner made of plastic is more rigid. You can install it tightly only on a smooth wall - not on tiles and, especially, not on structured tiles. For these cases, there is a PVC bathtub plinth with rubber sides. The rubber edges of this border fit well even in the seams between the tiles and in the relief. Where the fit is not tight enough, glue or sealant “works”.
What adhesive sealant to use
In many cases, bathroom curbs are installed with silicone-based sealant. However, problems then appear: after a certain period of time, the seam becomes dark and mold develops. Everything has to be removed, disinfected, degreased and put back in place. The gap between the normal state and the occurrence of mold is different for everyone - from a year to a couple of months. It depends on the operating intensity, but more on the availability of sufficient ventilation in the bathroom. If the ventilation system is poor, it may bloom after a couple of months.
Certain types of aquarium sealants
A solution has been found. And not even one:
- You can use sealant for aquariums. It does not bloom in any way (perhaps it contains antibacterial elements). Like traditional plumbing sealant, aquarium sealant is white and transmits light. Only the packaging in most cases is small and the cost is higher. However, it's worth it.
- Moisture resistant glue. Any, but not bad and good. If you need an example, Moment Crystal. Budget, good. But one thing: you need to use it specifically according to the instructions. Then it lasts a long time, and fungi and mold do not grow on it.
- A good (read expensive, branded) sealant based on MS polymers. It is actually hydrophobic and continues to repel water even after years, whereas traditional acrylic begins to leak after only 4-6 months. Among MS polymer sealants, there are compositions with antibacterial elements that prevent the development of mold and fungi. After drying, they remain flexible, so they can withstand small movements of cast iron or metal baths without problems.
How to glue it so it doesn't fall off
Many people have already used a bathroom border more than once, but every time problems arise - after a while, a corner or baseboard falls off the wall surface. This happens because while using the bathtub or shower stall, they move at least a little bit. You step into the container, it moves a little, you come out - again the smallest, but the movement, leaning on the edge of the bath - it moves again. And so every time. Naturally, if you fasten the curb to the bathtub tightly, someday it will fall off. There is a large range of motion for acrylic bathtubs and shower trays, and a smaller range for steel and cast iron ones. Based on this, the baseboard falls off faster on acrylic containers, while on others it lasts longer.
One of the convenient ways is to ensure reliable fastening to the wall surface.
To avoid this problem, glue the PVC border for the bathtub or shower tray only to the surface of the wall. This is especially true for acrylic containers. With this installation method, the adhesive layer on top prevents water from leaking into the gap between the bathtub and the wall. The part from the bottom of the corner is pressed tightly against the side (during installation you need to press it firmly), excluding water from entering from the side. In such a case, all movements are easily compensated by the elasticity of the material and the plinth is held on the wall surface.
This border will work perfectly with an acrylic bathtub - there is no need to glue it at the bottom
If you are not satisfied with this option, look for a sealant that remains impenetrable after drying (in particular, these are the same sealants based on MS polymers). It is suitable for cast iron and steel bathtubs; the bathtub border will hold up. For acrylics, this is unfortunately not an option - the movements are excessively large.
Why does the baseboard stink?
There is another bad thing that often arises after the installation of a PVC border for a bathroom - a foul smell from under the plastic. It is impossible to make the connection 100% impenetrable, although microscopic cracks remain. Water seeps into them and stays there. After some period of time, the water rots and begins to emit that same aroma. This happens due to the accepted installation technology for bathtub sides - it is advised to first fill the gap between the bathtub and the wall with sealant, and then install the baseboard. The idea is clear - so that water that gets under the baseboard does not leak under the bathroom. This is what happens - the water remains in the remaining gap, where it “smells”.
How to install a quality bathroom border
To avoid such a nuisance, it is better to place the bathroom border directly on the wall, without filling the gap with anything in advance. Yes, with such an installation a couple of drops of water can penetrate under the bathtub. But such an amount will not cause any damage; with sufficient ventilation, the moisture will dry out after a while.
Sequence of installation of plastic bath corners
Despite all the differences in the installation options for different types of profiles, there is a specific sequence of actions that is performed and leads to a positive result. In general, you need to act like this:
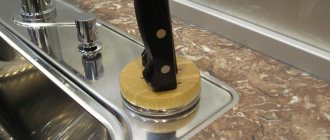
- If there is an outdated baseboard or border, remove it. Remains of sealant or glue are removed from the walls and sides. To do this, in most cases, a knife is used, or a wallpaper knife.
Remove outdated baseboards and glue residues
- Mold is often found under the side, it is removed with a cloth soaked in any detergent, then everything is coated with antibacterial impregnation. There are quite a lot of them at points of sale, choose the one that best meets your requirements. Follow the rules - observe the exposure time, number of layers, etc.
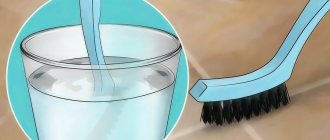
- After the antibacterial impregnation has dried, the wall and side must be degreased. To do this, take a rag soaked in solvent or alcohol and wipe everything thoroughly. We wait until everything dries. The process can be made faster with a hairdryer; there is no need to wipe.
- The selected border is tried on and cut to size. At the junction of two sections, standard corners are used (if any) or the corners are cut at an angle of 45°. Plastic can be cut with scissors for working with metal or cut with a hacksaw on which a blade with a very small tooth is attached (special for plastic, but also suitable for metal). In any case, the region is not exemplary. It is brought to a perfect match with a file or sandpaper with different grain sizes attached to a block (when cutting off pieces, leave a couple of millimeters for adjustment). When the result of joining the two pieces suits you, let's move on to the next point.
- Further actions depend on the type of curb selected. They may be present on a self-adhesive base. Then you need to remove the protective tape, put the bathtub curb in place and press it well. If it is just a PVC baseboard, glue-sealant is applied to the wall and/or shelves of the baseboard in advance, after which it is installed and pressed well.
- The sealant that protrudes from under the baseboard is immediately wiped off with a soft cloth. Do this without delay - if it hardens it will be difficult to clean off.
Degreasing is one of the stages
Wipe off residue with a soft cloth
That's all. The curb for the bathroom has been installed. Now you need to wait for some time until the composition hardens and sets. The exact period depends on the type of adhesive/sealant used and can take from a couple of hours to several days.
Using this method, self-adhesive (border) tape is also installed for finishing work at the junction of the bathroom and the wall. This is a budget-friendly and quick way to seal a small gap. Such a lining may last only a little less than a plastic one, but there is less fuss with it, although all the preparation steps remain in force.
Bonding Bathroom Curb Tape
There is one point that must not be forgotten if you are installing a border on an acrylic bathtub. Before gluing, the bathtub is filled more than half with water and left in this form until the sealant polymerizes.
Methods for gluing a border with adhesive tape and a flexible (rubber) edge
It just seems that installing a strip of plastic with an adhesive layer is simple. Absolutely not: you need to immediately install it in place, since moving the baseboard is impossible. Peeling it off when trying is also not the best solution - some of the glue remains on the tiles and the side of the bathtub/shower tray. In general, you need to practice without removing the protective tape first.
Even if you managed to put the border in place right away, not everything is so rosy with skirting boards of this type. The thing is that the tape on which they are attached is quite thick and even the edges pressed tightly to the surface of the wall and sides do not fit so tightly. It is quite possible to leak in certain places, especially at the seams.
How to perfectly install a skirting board with a flexible edge
If you really like this type of baseboard for your bathroom, you can glue it with an adhesive mixture/sealant. To do this, peel off the adhesive tape, apply adhesive to the inside, place it in place, and press it well. The layer of glue comes out thin, the baseboard is pressed tightly, and leaks are practically eliminated.
And one more thing - so that the border does not come off, there is no need to apply glue to the side that is fixed to the bathtub (described above).
Varieties
Modern borders are produced in several design variations, they can have all sorts of colors and are made from different raw materials. According to the method of design, products are divided into:
- internal - designed for installation at joints before performing facing work (the curb is installed first, and only after that the tiles are laid);
- external – designed for installation at joints on top of wall cladding.
We suggest you familiarize yourself with the Indesit machine, which does not squeeze well.
Also, the sides differ in the installation method. There are flexible self-adhesive and non-self-adhesive solutions. The inside of the former is treated with a specialized glue, protected from drying out by a thin shell. After removing the film, the border must be immediately attached to the tile. Non-self-adhesive corners are mounted using silicone compounds or acrylic sealants.
Skirting boards are classified depending on the raw materials from which they are made. Let's talk about each variety in more detail.
Plastic
A border made of PVC has many advantages. It has optimal elasticity and many color options. Plastic resists moisture well and does not deform due to temperature changes. Due to the variety of colors, you can choose a corner for almost any type of wall cladding. Another advantage of a plastic corner is its budget cost.
PVC products are made as self-adhesive finishing fillets designed for installation over tiles, or as internal solutions installed under the finishing at the initial stage of cladding. The disadvantages of plastic solutions include fragility.
Ceramic
It is not difficult to choose a beautiful and high-quality fillet for your bathroom - these products are sold in various sizes and color variations. Other advantages of ceramic corners include:
- water resistance achieved due to a special glazed layer that repels liquid;
- high strength indicators - ceramic products are able to withstand some mechanical loads (light impacts, abrasion), while maintaining external flawlessness;
- durability - due to the resistance of such borders to the microclimate in the bathroom and various mechanical influences, they can last at least 20 years;
- resistance to chemically aggressive detergents;
- excellent decorative qualities.
Despite their significant advantages, not everyone prefers ceramic fillets. There are a number of arguments for this. Ceramic corners are expensive, especially when compared with budget PVC analogues. Products from European brands are the most expensive.
The ceramic plinth is laid using tile adhesive. To fix it evenly and accurately, experience and extreme patience will be required. Not everyone is able to cope with the task of sealing joints with a ceramic corner.
Rubber
Rubber corners are highly flexible, making them recommended for use in areas with frequent bends. The material is highly resistant to temperature changes, which is why it does not deform when exposed to hot and cold water. Rubber products are inexpensive, but at the same time fully cope with the tasks assigned to them.
Such borders also have some disadvantages. Judging by the reviews, they quickly lose their appearance when washed with chemically aggressive compounds. Their appearance often suffers when cleaning with powdery substances containing abrasive particles.
Metal
Metal products have numerous advantages. They are durable, reliable, look stylish and expensive. Such corners are made of stainless metals; they are often coated with special compounds that protect the product from corrosion.
Metal fillets are more expensive than popular plastic or silicone skirting boards, but with proper care they will last several times longer. The disadvantages of borders include the difficulty of choosing the optimal solution for the interior of the room and the design of plumbing equipment. In order not to make a mistake, it is recommended to think through the details of the bathroom design in advance and provide for the presence of various metal parts, interior items or decor.
Border tape
Polymer materials are used to produce self-adhesive curb tape. Such products have different widths, so you can choose the optimal solution for yourself. Border tape is inexpensive. It is easy to install - even a beginner can cope with the task of sealing joints.
The disadvantage of this product is its fragility due to the loss of aesthetic qualities and loss of sealing during operation. Customers complain that they have to re-tape every 2 years. If you use abrasive, alkaline or acidic compounds to maintain cleanliness, you will have to reseal the joints even more often.
Silicone
The physical properties of silicone skirting boards are similar to those of rubber products. They have increased elasticity, due to which such borders are used for sealing joints in places with maximum bends. Silicone corners are inexpensive and look presentable, but they require careful care. They cannot be cleaned with products containing abrasives, alkaline or acidic compounds. Otherwise, they will quickly lose their aesthetics.
Acrylic
Acrylic corners are recommended for acrylic hot tubs. Such skirting boards are in great demand, despite their higher price compared to their silicone and plastic counterparts. Advantages of acrylic corners:
- various design variations - products are produced in a wide color palette, thanks to which you can easily choose a solution for any bathroom design, regardless of the overall color in which the room is decorated;
- strength – acrylic can withstand severe mechanical loads;
- durability;
- resistance to chemically aggressive detergents.
The most popular borders are products from. This brand produces solid corners suitable for edging all types of bathtubs.
The disadvantages of acrylic corners include their weak elasticity, which is why they are not recommended for use for edging plumbing fixtures with complex geometric shapes. Otherwise, the product will easily burst if subjected to excessive bending.
Artificial stone borders are produced by using acrylic resins, various minerals and pigment compounds that impart color to the finished product. Such corners are hygienic - due to the absence of micropores, they do not absorb moisture and perfectly resist the growth of fungus and harmful microorganisms leading to the formation of mold. In addition, they are distinguished by their versatility - fillets can be used both to seal joints and to hide the seams between the floor and wall cladding in the bathroom.
Skirting made of artificial stone looks aesthetically pleasing and expensive. It is able to withstand severe mechanical stress and sudden temperature changes. These types of borders are absolutely safe for health - they do not emit harmful substances when heated.
If installed correctly, stone products can last for decades. At the same time, the corners will not fade or lose their original color even with intensive use and daily washing. The disadvantages of the products include their absolute inelasticity, high cost and complex installation.
Technology for installing a ceramic border for a bathroom
Ceramic borders consist of straight, corner and end components. The number of straight components is calculated based on the dimensions of the bathtub/shower tray, corners and ends; in a typical placement, two are required for a bathroom; for a shower tray, there can be one corner. Take the number of straight components with a smaller margin - for trimming.
It is best to inspect all parts before laying. If there is a need (they do not fit together accurately, there are differences in thickness, etc.), the reverse side can be slightly worked on with a file. It is better not to use an angle grinder - there is an excessively high chance of causing more harm than correcting it.
Mounting options
The installation option for a ceramic border depends on the wall cladding and the size of the gap. If it is tile, you can use moisture-resistant adhesive. If the tile is embossed or the wall is simply plastered, installation on the adhesive mixture will not provide the required level of tightness. In such a case, install a ceramic border for the bathroom using specialized tile adhesive for rooms where there is moisture. It is sold in bags in dry form, before consuming a certain amount of it is mixed with water until homogeneous.
The colors can be different, but very often they use white - to match the color of the bath
Sequence of actions
The general process consists of the following steps:
A ceramic baseboard for a bathroom can be like this
The installation process of a ceramic bath corner is not much different from laying tiles. The actions are the same. You need to level the parts in two planes - so that both the edges and the surface go smoothly and without differences.
Technology for installing skirting boards at the junction of tiles and bathtubs
Let's take a closer look at the options for laying skirting boards for tiles in a bathroom made of plastic and ceramics.
Installing a PVC border on tiles with your own hands
Installing a plastic border is quite simple, using the instructions:
- Wipe the edges of the tiles and edges adjacent to the joints with a dry cloth.
- Seal the gap with sealant and wait until it dries completely.
- Cut the plastic profile into pieces equal to the lengths of the sides of the bathtub. Cut their edges at an angle of 45°.
- To protect against contamination with glue, apply masking tape at a distance of 2 mm from the intended installation location of the corner, as well as on the corner itself.
- Glue the corner between the bathtub and the tiles. Why apply it to the corner and press with force. At this time, bend the top side of the curb outward and apply sealant under it using a special gun. Level the layer of sealant with a spatula. Do the same with the bottom edge of the corner.
Applying sealant under plastic baseboards
The border gluing stage requires the participation of a partner. Since alone it is not possible to press the corner to the surface with equal quality and force and at the same time fill the space under it with sealant.
Installation of a ceramic plinth at the junction with a bathtub under tiles
Installing a ceramic border is a little more complicated. The process technology is as follows:
- Remove dirt and grease, wipe dry the surface around the perimeter of the bathroom and along the wall.
- Carefully seal the gap between the wall and the bathtub with sealant using a special gun. Level the layer of sealant with a spatula or fingers soaked in water.
When applying sealant with your fingers, you can use tape to level it
- Dilute the tile adhesive in water to the required thick consistency.
- Cut the edges of the ceramic skirting boards at 45° using a diamond grinder disc or pliers, breaking off a piece along a pre-drawn line.
Ceramic border is usually sold together with corner elements
- Smooth the cut edges with a polishing stone.
- Apply glue to the underside of the border with a spatula. Glue the ceramic bathroom corner under the tile, pressing it firmly against the curb.
For better adhesion of the glue to the surfaces, it is recommended to fill the installed borders with water the next day after it has dried.
When choosing plastic or ceramic options for corners, it is necessary to take into account that for the first option, experts guarantee preservation of tightness for a period of no more than a year with the need for subsequent replacement, while ceramics, if handled with care, will last for decades without deterioration in performance properties.
Types of baseboards for the bathroom and their installation
If when tiling residential premises there are no questions with the choice of skirting boards (they are chosen for the ceiling or floor), then when decorating a bathtub everything is different. This is a room with high humidity and special hygiene requirements. Also, in many cases, the plumbing unit is tiled, which makes it particularly difficult to select and install the frame around the bathtub.
You will learn from this publication which skirting board to choose for this room, and how to install it correctly and reliably.
Why do you need a bathroom surround?
A plumbing unit is a place for hygienic procedures, and thanks to this it must be as safe as possible for human health. If water gets into the gap between the bathtub and the wall, mold and mildew may occur. Due to this, there is a need to install a protective rail.
The edging will add a finished look to the bathtub in terms of aesthetics.
Types of frames for the bathing tank
Until recently, in order to veil the joint that appeared after the bathtub was installed, tiles cut into thin strips were used. New technologies make it possible to do this better and faster.
Ceramic frieze
In a tiled room, a ceramic border would be appropriate. A skirting board of this type between the bathtub and the wall will hide all joints, protecting them from water penetration. The material tolerates temperature changes well, does not change its color, and has a different pattern.
Practical and beautiful ceramic baseboard for the bathroom, photo
Note: ceramics can be damaged by a powerful blow; if treated with care, it will last for a long time.
Plastic baguette
When decorating a toilet, you can also use a bathroom plinth made of plastic. It is budget-friendly, lightweight, and has a soft rubber band around the edges, which helps improve adhesion to the wall surface and sides of the tank. Very often, plastic skirting boards are used for two-piece bathrooms. First of all, a mounting strip is fixed to the wall surface, and a decorative part is placed on top of it.
The plastic border is equipped with corners and plugs
Advice: when choosing a plinth for a plastic bathtub, give preference to colored products. The white PVC border may turn yellow after a certain time.
Ribbon edging
If you want to make it easier to install the frame on the bathing tank, choose L (a roll of thin self-adhesive plastic tape). Before gluing the product, it is necessary to thoroughly level and dry the surface on which it will be mounted.
Self-adhesive bathroom skirting board can be of different colors
Important: if you do not properly prepare the surface for pasting the strip plinth for the bathroom, then water can get there and the border will come off.
These are the main types of tank framing. Slats made of wood and MDF are not suitable for these purposes because they do not resist moisture well.
What types of bath skirting boards are there?
The types of moldings that can be found in finishing materials stores today can be divided into three types:
- Plastic, one- and two-piece.
- Plastic flexible, tape.
Plastic skirting boards
There are a lot of varieties of one-piece plastic bath skirting boards, and the photo below shows the most popular of them. This model is very easy to install, using liquid nails or silicone glue. , like floor and ceiling moldings, or special fittings are used. Plastic will last quite a long time, but it cannot be cleaned with abrasive agents, in addition, the material does not tolerate exposure to aggressive chemicals.
One-piece skirting board for acrylic or metal bathtub
The next bath skirting board, plastic, is installed simultaneously with the wall tiles. One edge of this molding rests on the side, and the other goes under the tile, embedded in the tile adhesive. A bathtub plinth on tiles is usually used in cases where the dimensions of the bathtub are large relative to the room, and the wall covering cannot be placed down the wall.
Installing plastic molding with one edge under the tile
Next is a two-piece bathtub plinth. In essence, it is the same as plastic molding for countertops: first, a mounting rail is installed, onto which the outer part is then attached. This baguette has the same disadvantages as described above for one-piece profiles.
Two-piece plinth
Tape skirting boards for bathtubs are sold in the form of self-adhesive tape, hence the name of the material. This molding is best used as a temporary way to seal the seams between the bathtub and the wall. Self-adhesive bath skirting board is a rather capricious material. The apparent simplicity of installation actually turns into serious preliminary cleaning of surfaces. Without appropriate preparation of the working area, the tape will periodically peel off during operation.
Strip plinth
Description and installation of ceramic molding
Ceramic skirting boards will cost more than any plastic ones, but the expense will be completely justified. Ceramics will last much longer and will not change color over time or exposure to chemicals. In addition, the surface of these moldings is more difficult to scratch.
The color palette of ceramic baguettes is quite small; in fact, the photo below shows almost all the colors that you can find in stores. The joining of moldings in the corners is carried out by trimming, as for floor or ceiling baguettes, or corner elements are used, as in the photo.
Ceramic baseboard for bath. Photo of several elements in different colors
Before laying the ceramic baseboard on the bathtub, all gaps must be carefully sealed. If the cracks are larger than 0.5 cm, then we first foam them, having previously protected the adjacent surfaces with masking tape. After the foam has dried, carefully trim off the excess material with a knife. For gaps up to 0.5 cm, this step can be skipped.
In the following video you can see how to glue the baseboard to the bathtub:
Further. If the masking tape on the walls remains intact, then we leave it as is, and if it is damaged, then we remove it and stick on a fresh piece. Now we take a silicone-based sealant and coat the entire seam. Immediately remove the excess with a special plastic spatula. We wait for the glue to dry completely.
How to install ceramic moldings: pre-treat the seam with silicone or acrylic sealant
Now the actual installation of the baseboard between the bathroom and the wall. It is better not to use silicone-based adhesives here, as they can turn black during use. Liquid Nails glue, marked MB50 or MB70, works well. It is applied to the entire back surface of the molding, then it is pressed and held for several seconds.
Then you can begin installing the following elements around the bathtub. Finally, we close the side sections of the plinths with special end caps, as in the photo. We coat the seams with acrylic-based sealant. Installation of skirting boards is completed.
When cutting ceramic moldings, it is better to use a grinder with a solid diamond blade. This is the only way to ensure an even cut on the ceramic, and the glaze will remain intact. But using a fragmented disk can lead to chipping of the edges and damage to the glaze.
Installation of end caps
Installation of tile framing
Although a bathroom skirting board is a common product, taking into account the specific use of the toilet, when installing it you must adhere to a number of rules. Actually, then the product will ideally fit into the room interior. and will serve for a very long time.
How to stick a baseboard on a bathroom? First of all, you need to take measurements and make markings on the surface of the walls along which the border will be laid. Next, using angle grinders, the ceramic slats are cut into appropriate sizes.
Tip: when cutting, use specialized diamond wheels with a very small coating, which will not spoil the glaze and edges of the slats.
The joint between the bathtub and the wall is cleaned and dried
Ceramic slats can be installed with tile adhesive and sealant. It is applied along the perimeter of the joint, and then the lath is placed, lightly clamping it.
Installation of ceramic borders
Finally, the top and top edges of the baseboard are sealed and finished with a paste to fill the joints between the tiles.
Note: to coat the bathroom frame with sealant, it is better to choose a specialized waterproof compound.
Laying a ceramic baseboard on a bathroom - the last stage
Installation of ceramic edging
Although a bath skirting board is a simple product, taking into account the specific use of a bathroom, a number of rules should be followed when installing it. Only then will the product organically fit into the interior of the room. and will last as long as possible.
How to glue a skirting board to a bathtub? First you need to take measurements and make markings on the walls along which the border will be laid. Next, using a grinder, the ceramic planks are cut into the required sizes.
Tip: when cutting, use special finely coated diamond discs that will not spoil the glaze and edges of the plank.
The joint between the bathtub and the wall is cleaned and dried
Ceramic planks can be mounted with tile adhesive and sealant. It is applied around the perimeter of the joint, and then the strip is applied, lightly pressing it.
Installation of ceramic borders
Finally, the lower and upper edges of the baseboard are sealed using tile grout.
Note: to seal the bathroom edging, it is better to choose a special moisture-resistant compound.
Laying ceramic skirting boards on the bathtub - the final stage
Installation of PVC border
Plastic edging can be divided into:
- bathroom plinth on tiles - placed after tiling, on top of it;
- under the tile – installed in front of the tile, provides better insulation from moisture. But if the curb needs to be replaced, the covering will need to be dismantled.
Installation of bathroom skirting boards under and on top of tiles
You can install the border around the bathing tank yourself. The video will show you how to install the product:
Skirting boards are a must-have element for a bathroom. Having made your choice on a certain product, do not forget that it must perform the main functions: protect the walls from moisture penetration, the appearance of fungus, hide very small disadvantages of repairs, and give the interior a finished look.
A corner made of plastic in the bathroom: 6 positive parameters
Plastic corners are designed to hide the gap between the bathtub and the tiles. Between the bathtub and the wall, it is necessary to seal the space, no matter how small it may be. Even if the seam is only a couple of millimeters wide, then water will flow through it behind the plumbing equipment, and due to the lack of ventilation, fungus and mold will begin to form. To install this seam, you can use different methods, but the most popular is considered to be a plastic border for the bathroom. It is placed on top of the seam, due to which the sealing occurs.
Pros and cons of a bathroom border
Before installing a plinth, you need to look at its advantages and disadvantages in order to make the right decision and give preference to it specifically.
The corner made of plastic should be constantly cleaned using household chemicals.
- Ideal price. This product is one of the inexpensive ones and makes it possible to quite efficiently close the gap between the bathtub and the wall.
- It is not difficult to stick the curb on the bathroom so that water does not flow in; you only need a couple of movements and construction material with a tool.
- The corner, made of plastic, is resistant to environments with high moisture, as well as strong temperature changes.
- The plastic is flexible and soft in structure, which is why the sides can be attached even to uneven surfaces.
- The plastic border is not afraid of the influence of chemicals used in the care of bathrooms and tiles.
- Plastic corners on tiles do not require special care. Cleaning them is a real pleasure, as it is very easy to wipe them with a specialized cloth.
Plastic corners placed around the bathroom have their own disadvantages, but they are not very significant.
Despite the fact that the material is resistant to moisture, it can become a source of problems such as fungus and mold.
To eliminate this problem, it is worth wiping the surface of the corner dry every day after using the bathtub.
Installation - step by step instructions
How to glue a ceramic baseboard in a bathroom?
If you want to do it yourself, then in addition to ceramic finishing you will need some tools and materials, namely:
- Putty knife.
- Liquid Nails.
- Glue (on which the tiles will be attached).
- Building level.
- A block with sandpaper.
- Caulk gun.
- Pliers.
To calculate the required number of skirting boards and elements for installing a border, you will need:
- Measure the working area on three sides.
- Divide the result by the length of the curb.
- Then we round the result up and add 2-3 skirting boards.
Installation of skirting boards
You can install ceramic borders on or under tiles, but the first option is considered easier.
For this:
- Clean the working surface of the bathtub and walls from construction dirt and dust.
- Now degrease everything with a standard detergent and wipe it down.
- Fill the gap with liquid nails.
- Treat the surface using tile adhesive.
- Fix the curbs at the corner, and before that install the corner element that was included in the kit.
- Don't forget to use a building level for control.
- When installing, press the borders firmly against the tiles and maintain this pressure until the adhesive sets.
- Remove any remaining glue.
- After drying, treat the seams with grout to increase the life of the ceramic border.
Important! When the glue has dried, pour cold water over the borders and only then can you grout them. Ideally, this should be done on the second day after installation. For long-term use of the baseboard, periodically renew the grout.
Types of plastic borders for the bathroom
In what form can you choose tiled corners for a shower or bathtub? There are quite different variations of these products in the assortment, and the most popular are those that do not require adjustment and have a self-adhesive surface.
The plastic border for the bathroom differs in shape, color and size
The characteristic of such models is that:
- No need to buy additional glue;
- It will not require too much effort for installation;
- If it is necessary to remove the baseboard, this can be done with one jerk, without using a tool.
Installation of a corner in a bathroom can also be done using a more modern and modified model. In appearance, it does not stand out from the usual corner, and it is similar flexible, although rubber.
Thanks to the rubberized edges, the sealing of the seam becomes very high quality, and no additional use of putty is required, which will reduce the cost of finishing work.
The dimensions of the decorative corner are generally standard. It is 250 cm long. For finishing work on the side of the bathtub, one product is not enough and at least 2 are required so that the cracks are sealed as tightly as possible on each of the three sides of the bathtub adjacent to the room walls. Plastic can be very easily cut into the necessary parts, for example, to make an inner corner, and to do this you will need a sharp stationery knife. The width of the corner made of plastic varies from 25-50 mm. Which option to choose depends solely on your own desires.
How to choose a corner
When choosing a corner to close the gap between the bathtub and the tiles, you must consider:
- type of sealing element;
- device manufacturing material.
We invite you to familiarize yourself with Small bathtubs and compact sizes
The main types of corners designed to eliminate gaps in the bathroom are:
- soft corners, which are made in the form of a tape;
- rigid corners made from various types of materials.
The advantages of soft tapes are:
- ease of installation, since in most cases the tape is supplemented with a self-adhesive base;
- low cost;
- ease of care. There is no need to purchase specialized products to clean the tape;
- diversity. Ribbons are available in different colors, sizes and shapes.
Self-adhesive bath tapes
Manufacturers produce two types of tapes:
- corner tape, which is intended to eliminate gaps no larger than 3 mm - 5 mm;
- curly tape to eliminate large gaps.
Differences between types of self-adhesive tapes
A significant drawback is the short service life, since over time and when exposed to moisture, the adhesive base loses its qualities.
Rigid corner corners are different:
- variety. For the manufacture of sealing elements, various materials are used, varying in quality and cost. In addition, corners are available in different shapes, colors and sizes;
- durability;
- minimal care.
Bath border
To reduce the complexity of installing a rigid corner, you can use special fittings made in the form of corners, plugs and other additional elements.
Additional items for easier installation
plastic. The plastic corner is characterized by minimal cost, a variety of shapes and colors, maximum level of tightness, and resistance to temperature changes. To clean the corner, it is not recommended to use products that contain abrasive substances, as this will negatively affect the surface of the sealing element;
Assortment of plastic corners
ceramics. The ceramic corner is highly durable and resistant to various phenomena (temperature changes, mechanical stress, and so on). Unlike plastic corners, ceramics can be cleaned using any chemical composition and this will not affect the quality of the glossy surface;
Ceramic Bathtub Sealing Corner
Ceramic corners are not recommended for installation on acrylic bathtubs, since it is impossible to achieve maximum contact between the surfaces and, as a result, complete tightness.
- acrylic (a type of plastic). The acrylic corner has an aesthetic appearance, unlike other types of plastic, a variety of models, but at the same time a higher cost. However, the difficulty of cleaning acrylic elements significantly reduces the possibility of their use. It is recommended to install acrylic corners on bathtubs made of the same material. In this situation, there is no need to purchase additional surface cleaning products;
- natural and artificial stone (marble, granite, etc.). Stone corners are distinguished by their presentable appearance, maximum stability and durability, as well as their large size and high cost.
Marble bath corners
Which corner is better to choose? It all depends on the user’s priority and the size of the budget, as well as the decoration of the bathroom, since the best corner is a corner that is completely compatible with the design of the room.
How to install a baseboard on a bathroom to prevent water from flowing in
Professionals in finishing work think that it is much better to install a plastic corner on the tile itself.
This will make it easier and suitable even for beginners.
You can install the baseboard on the bathroom using liquid-based nails
- Before starting work, you will need to clean the surface of the tile and dry it. The same is done with the edge of the bathtub, where the plastic profile will adjoin.
- If a corner has already been installed before, then you need to not only remove it, but also clean the surfaces of the bathtub with tiles from glue residues.
- The gap between the bathtub and the wall must be filled with plumbing sealant. The use of foam for installation is allowed.
- To avoid staining the edge of the tub, painter's tape must be applied before the sealant is applied.
- Next comes the cutting of the corner into the necessary parts.
- You need to apply glue to the product from the inside, and apply not only the main part, but also the edges. Likewise, a better fit is ensured.
- To install the plinth, you need to lean it against the desired location and press it firmly. This will increase the adhesion of the material and bathtub coating to the tiles.
- After the glue has completely dried, the joints are treated with a specialized transparent sealant.
Due to the fact that the PVC corner was produced for decorative purposes, in other words, to neatly mask the gap between the bathtub and the wall, it does not lie tightly on the surface, which means that additional plumbing sealant will be required.
It is best to choose silicone putties; they are more moisture-resistant and translucent.
The service life of the product is not very long. It will last much less than a ceramic product, and replacement will be required every 1.5-2 years.
Problem resolution options
Experts know many ways to deal with this problem if water is leaking. Before choosing how to eliminate leaks between the bathtub and the wall, it is worth familiarizing yourself with all the methods in detail.
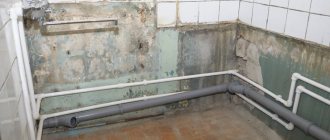
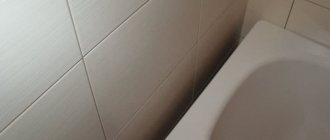
Gap between bathtub and wall
Usually one of the following methods is used:
- seal the gap with mortar;
- foam the joint with polyurethane foam;
- filling the gap with silicone sealant;
- curb tape is installed.
A plinth made of ceramic or plastic is installed along the edges of the bathtub and between the wall. According to Soviet standards, a bathroom was included in the design of a house or apartment based on the standard dimensions of the bathtub itself. If the size of Soviet baths is 170 cm, then a typical bathroom was also 171 - 172 cm wide.
Currently, the approach to the design and construction of apartment buildings has changed. The dimensions of the bathroom spaces have also changed. In addition, the range of bathtub models has expanded significantly, which differ from the standard ones in both configuration and size. Naturally, when purchasing a non-standard bathtub, a gap appears between the bathtub and the wall.
Small cracks and methods for sealing them will be discussed below, but what should you do if there is a gap of 4 cm or more? In this case, you cannot do without installing a protective screen. Underneath it is necessary to install a frame made of wooden blocks, boards or a metal profile. This design is sheathed to choose from:
- waterproof GVL;
- plywood;
- fiberboard sheets.
Alternatively, you can glue ceramic tiles on top of this base (use “liquid nails”). Fill the gaps between the tiles with a special grout, and fill the junction with the bathtub with a waterproof sealant. For small gaps between the wall and the bathtub, there are other ways to eliminate leaks.
We place a plastic bathroom corner on the tile
There is a type of installation of a plastic skirting board in a bathroom under the tiles. But only a master finisher can handle such work. The essence of the cladding is that the installation of the corner is carried out at the same moment when the tiles are laid.
In such a case, the plastic corner is fastened firmly and tile adhesive is used for installation.
You should select a corner made of plastic based on the style in which the room with a bathroom is made
Installing a corner under the tile is a very reliable method, but it has a very big disadvantage. It lies in the fact that replacing the corner will only be carried out simultaneously with the deformation of the bottom row of tiles, which is not only very time-consuming and difficult, but also expensive.
As we said before, a corner made of plastic is not reliable in terms of service life. Masters believe that ideal replacement should be carried out once a year. In reality, the product lasts a couple of years, and sometimes up to 5-6, but over time, it will begin to turn yellow.
To ensure that the installation of a plastic profile on a bathtub is actually good, you need to look at a number of tips:
- If a corner made of plastic, made of metal and covered with plastic is used, then it must be very smooth, just like the surface that is being processed. Otherwise, the final result will be far from the most effective.
- Calculation of the dimensions of any element when installing a plinth should be as accurate as possible, up to 1 mm.
- Work begins with the internal corners, and only then additional details are placed. To be more precise, it is best to cut the parts first and measure them without applying glue. In another case, you can get not only your hands dirty, but also the surface of the bathroom, but removing the sealant from it will not be easy.
- There is no need to select a corner made of plastic to match the color of the walls. It is quite possible to choose a favorable white option. It is considered traditional and is perfect for any designer’s decision.