A modern kitchen has a dozen mandatory attributes. The premises are not complete without additional lighting, hoods and baseboards for countertops. Exceptions are made only in rare cases, due to antique style or the lack of a suitable baseboard option. Protective strips are sold separately, but sometimes included with the countertop. In the second case, the buyer is deprived of the opportunity to make the optimal decision. At the same time, the size of the products, the material and the complexity of manufacturing affect the large price gap. Decorative options often turn out to be inconvenient, but modifications with cavities and prefabricated models have the best characteristics. The first ones help in organizing space, the others are easy to install, as they consist of a bottom strip and a decorative plug. The decorating function comes in second place, right after the protective one.
Functionality
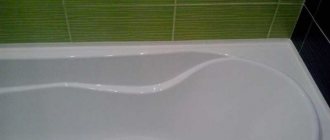
The junction of the kitchen work area and the wall is usually hidden with slats, and this place is not the most convenient for installation. There are practical and aesthetic reasons for using skirting boards for countertops. Grease, water, debris and food fragments will certainly fall into the gap and, over time, greatly spoil hygiene and create a mess behind the bedside tables. Now furniture baseboards are used in almost all kitchens, and the problem has been partially solved. In addition, the planks help hide wall defects and visually round out unevenness. The protection also benefits the countertop materials. For example, wood will last longer due to additional insulation and sealing and will not swell from water. Joint skirting provides additional options for cable routing. Thin, attractive borders become the final element in the arrangement of the room and design.
Shape and size
Popular shape options:
- rounded frieze;
- triangular border;
- figured relief;
- flat strip;
- rectangular plank.
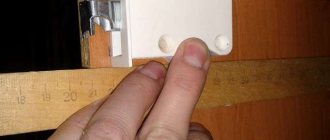
The shape of the product for the kitchen countertop is selected depending on the size and characteristics of the gap between it and the apron; otherwise, they are guided by personal preferences. A variety of designs is typical for plastic and wooden planks. You can first inspect the skirting boards in the interior, and after that you can make a decision about the purchase. In the case of other elements this would be difficult. As for sizes, more than half of the models on the market have standard parameters. Often you have to make a special order. The usual height is in the range of 1-2 cm, but standard models also come in higher heights - 10 cm. Sometimes there are reasons to install larger options, depending on the characteristics of the hob. The standard length of skirting boards is within 3-4 m. The strips are easily cut.
Types of tabletop fastening
The installation methods for plastic and aluminum structures are practically no different. However, there are differences in the shape of the product that must be taken into account during installation. Here are some examples:
- The lath completely covers the outer part of the material. With this form, installation of the baseboard on the countertops is ensured by silicone inserts. In their design, they resemble similar floor products made from PVC. Plastic products have this shape.
- The edge is located on the mounting part, and the outer component serves only as decoration. This type of plinth for kitchen countertops is used in the production of only aluminum products.
- The third type has a mounting rail that does not fit well to the tabletop, and the installation of the baseboards on the tabletop is done from the top. Only aluminum structures have such characteristics. Please note that the plugs and corners for such skirting boards are also made of aluminum.
Related article: How to sew a comfortable beanbag chair with your own hands
Material - advantages and disadvantages
Skirting boards are made from:
- Polyvinyl chloride (PVC);
- Aluminum;
- Silicone;
- Acrylic;
- Natural stone;
- Natural wood.
The choice of material is not very variable, because the place of use is subject to significant loads: moisture constantly accumulates there, and near the oven and stove the temperature remains high. Plastic and metal, as the most versatile materials, provide protection from external influences. Moreover, when choosing between the first and second, you can sacrifice appearance and get more reliability, that is, choose metal, or make a more “aesthetic” decision at the expense of some functionality. Natural and acrylic stone are, in a sense, rough materials. They are not suitable for fine work, are less versatile and are expensive. In return, the stone has good external characteristics. Wood is a classic that should only be used if the performance characteristics of the furniture will not be affected. Silicone is added to models made from other materials and is rarely used separately.
PVC
PVC skirting boards are highly elastic: the products tightly cover gaps with thoughtful curved shapes and pronounced irregularities. Polyvinyl chloride is resistant to moisture, corrosion, and rotting. Skirting boards made of plastic more easily take the desired shape during production, so there are practically no options on sale without cable channels. The assets of PVC planks include a variety of textures and colors, while there are also products with imitation metal, wood and stone. To all these advantages is added an affordable price: beautiful and high-quality skirting boards are available in all price categories. Installation of plastic slats will not cause any difficulties even for the average person. At the same time, PVC skirting boards have 3 fundamental disadvantages. The most unpleasant is discoloration as a result of exposure to cleaning products. PVC is not very durable and, in addition, does not tolerate extreme temperatures well.
Aluminum
Aluminum products are noted for their heat resistance, functionality, increased decorativeness, ease of care and convenience. They have high strength and resistance to deformation. In addition to the main advantages, purchasing metal skirting boards has several alternative options. Purchase either the molding alone or a modification with colored tape. The finishing coating can be replaced at any time. The surface itself can be simple, polished and embossed, which adds options for different interiors. Even if the baseboard is not included with the set, it will still look organic. You just need to choose a similar color scheme. Aluminum skirting boards have a minimum of “weak points”. These include high cost. In addition, the plank material is more suitable for sturdy countertops.
Aluminum products sometimes darken!
Silicone
The solid version is rarely used. Silicone in baseboards usually acts as a sealant. Silicone edging is present in wood, metal and plastic products. Manufacturers place it either along the edges or inside, next to the groove for the wires. Silicone adheres tightly to the coating and protects the joints from water and foreign objects. At the same time, solid silicone skirting boards are also made from the sanitary version. The special material is endowed with improved qualities in terms of resistance to moisture and mold growth. It has increased adhesion to commonly used materials: wood, tiles, glass, concrete. At the same time, regular and modified silicone does not combine well with granite and other types of stone. The performance of the silicone layer in the baseboard is sometimes let down. Small seams will generally look unsightly.
Acrylic
Skirting boards made from this material will prove useful in areas where dirt accumulates and pests gather. Acrylic prevents unpleasant contamination and prevents the spread of microorganisms, since it has no pores. Acrylic stone was invented a long time ago - 50 years ago, and its relatively low prevalence is explained by the popularity of other raw materials. The material is obtained by processing acrylic resins, mixing them with mineral fillers and pigment inclusions. The main component is usually polymethyl methacrylate. The quality of acrylic directly depends on the concentration of this component, the higher the better. The acrylic stone coating is easy to clean with one movement of the hand, which is why skirting boards made from it are widely used in restaurant kitchens, as well as in medical institutions. Disadvantages include a modest choice of shape and high cost, which increases in direct connection with increasing concentrations of polymethyl methacrylate.
A natural stone
The most expensive of the popular options. Stone baseboards for table tops are small furniture friezes. The key advantages of natural stone are felt already upon contact with this material - it is durable and able to withstand mechanical loads of various types: impacts, exposure to sharp objects, pressure. This is associated with its durability, which is also expressed in maintaining its appearance. Stone planks retain their color and texture for a long time, and are not afraid of moisture, chemical agents and ultraviolet radiation. Stone skirting boards are made in the form of a flat panel, and despite their attractive design qualities, the frieze cannot hide some joints. The wall must be as flat as possible, and this is the main limitation. Channels for wires are rarely made in stone baseboards due to the technological complexity of the process.
Natural wood
Wood lacks most of the benefits of metal and PVC. At the same time, the products last more than 10 years if treated with compounds against fungus, mold, insects, aggressive chemicals, ultraviolet radiation, and moisture. At the same time, fire protection will not hurt. The external characteristics of wooden products are worth spending time searching for a well-processed option or carrying out independent manipulations. Aesthetic qualities are ideal for an expensive interior. Wood has become widespread due to its environmental friendliness and thermal conductivity, and these are two more arguments for purchasing wooden plinths. The variety of textures, in turn, helps designers realize new ideas. In contrast to all this is the cost and the total number of shortcomings. Wood rots, swells from water, and loses its integrity at the ends.
Types of wood used:
- oak;
- beech;
- ash;
- pine.
Classification of skirting boards
Often, the kitchen set already includes a baseboard that matches the color scheme of the furniture. But if the set is made to order, then manufacturers offer customers several types of skirting boards to choose from. But such products do not always fit the main furniture or meet the customer’s requirements. In such cases, it is necessary to purchase the strips separately. Before purchasing, it is advisable to familiarize yourself with all types of skirting boards, because they are classified by shape, material of manufacture and design.
There are different types of skirting boards
By shape
There are many different forms in which such products are produced. The most popular of them include:
- triangular skirting boards;
- sketches;
- with rounded sides;
- flat or straight;
- square.
The shape and size of the skirting boards can also be different
It is necessary to choose the shape of the molding taking into account the gap between the edge of the table top and the wall. You should also choose a product taking into account the design idea.
By design features
Based on their design features, kitchen skirting boards are classified into cast and universal. Cast moldings have a rigid and more massive design. Such products are attached directly to the seal, since they are not equipped with a silicone profile. Cast skirting boards have a presentable appearance, but due to their increased rigidity they do not last very long.
Mounting methods
There are 2 options, using glue or self-tapping screws, but recently there are more self-adhesive models of skirting boards that are installed faster. As for glue, it is better to choose liquid nails. The adhesive is applied to the plank, then carefully placed on the joint and held until the glue has completely hardened. After this, they are treated with sealant and a plug is mounted on top. Installation on fasteners such as self-tapping screws takes longer. You will need to mark and drill holes. The process is no different from the glue method in terms of calculating the length of the fragments and the number of connecting and corner elements. Self-adhesive skirting boards can be installed on any type of joint, regardless of shape. The planks are installed directly from the roll, and sometimes additional fastening elements are used. The choice of materials is small.
Options using adhesive surfaces are more difficult to dismantle, although installation takes less time.
With glue
Necessary tools and accessories:
- hacksaw;
- roulette;
- pencil;
- marker;
- the glue itself.
The edges for the tabletop are usually fixed with glue, simple or silicone. Before fastening, the dimensions of the tabletop are specified and the exact number of corners and caps is determined. Then prepare the joint surface: clean, degrease and level. The plank is disassembled into 2 parts: the base and the cover (plug). The required part of the bottom strip is measured and cut off. Its surfaces are smeared with glue from the side of the table top and the wall. The plank is put in place with a slow, careful movement, after which the action is stopped for the time specified in the instructions for the glue. Then install the internal corners and repeat the work algorithm in all areas. After this, a decorative latch of suitable length is cut out. The plug is eventually mounted 5 mm under the edge of the corner element. The upper part of the plinth is squeezed so that it snaps onto the lower one. The work then moves on to other installation sites, if any.
Using self-tapping screws
For compact plastic sides this method is almost never used, although small fasteners should not damage the baseboard. The first step is to find the ideal strip for the size of the countertop. During the work, the batten is first placed against the joint and the points of attachment to the wall are marked. At this point, the ideal number of right, left, connecting and center fasteners is determined. Then the base of the plinth is installed on the gaps. Fixation is carried out using self-tapping screws - perfectly level, without the slightest slope. Then the decorative strip, connecting parts, and end caps are installed. The joints with the surfaces are additionally treated with sealant to improve the insulating qualities. The upper decorative strip can be removed if necessary, for example, to remove self-tapping screws. Thus, the base of the plinth will be mobile to the extent necessary.
Self-adhesive skirting boards
They will benefit those who want to carry out repairs as quickly as possible. The material used is soft PVC or aluminum, which allows them to be mounted on almost any surface. In this case, the baseboard looks like a roll of electrical tape. The connection of the strip to the surface is ensured by double-sided adhesive tape or mounting tape. Due to the difficulties of installing individual pieces of material, self-adhesive products are increasingly used in large rooms: kitchens of large restaurants and hotels, and if we talk about the floor version, then everywhere. The strip not only bends and fastens itself, but is also joined using fasteners. The installation location should be clearly marked, since the material has a significant disadvantage in the form of difficulty in dismantling. Self-adhesive baseboard is difficult to tear off without damaging it or the coating on which it is attached. At the same time, the strip can be wet cleaned.
Installing a baseboard for a countertop
As soon as the choice of kitchen baseboards is completed, you can begin their installation. Of course, such work requires careful preparation, one of the main points of which is the search for the necessary tools and materials.
Preparing tools
To install kitchen moldings, you need to prepare the following tools:
- hacksaw for metal;
- transparent silicone in a tube;
- carpenter's knife;
- set of self-tapping screws;
- screwdriver;
- tape measure, ruler or other measuring device.
Preparing tools for work
Prices for the popular range of miter saws
Along with skirting boards, stores sell decorative corners that can be used to hide the joints. There are end, external and internal corners. All of them are attached to the surface of the baseboard using silicone. If the corners are purchased separately from the molding, then you need to choose them in such a way that the products match perfectly in color.
Decorative corners for skirting boards
Instructions
The process of installing skirting boards in the kitchen is simple if everything is done according to the recommendations and rules. Below are step-by-step instructions, following which will greatly facilitate the work.
Step 1 . Measure the length of the tabletop and cut the required pieces of baseboard. To do this, you need to use a metal saw to make the cuts as even as possible.
Cut the skirting board to the required length
Step 2 . Divide the plinth into two parts - internal and external. You need to start working with the base of the molding, that is, with its inner part.
Dividing the baseboard into two parts
Step 3. Screw the base of the baseboard to the tabletop using a screwdriver. Instead of self-tapping screws, some craftsmen use glue, but in this case it will be impossible to carefully remove the installed baseboard. The optimal distance between screws is 15 cm.
Step 4. Once the base is screwed on all sides, proceed to install the decorative part of the baseboard. First you need to install the latch on one side, and then proceed to install the joining angle.
The joining angle is set
Step 5. When installing the joining angle, you need to remember that the front part of the plinth must extend under it by at least 5 mm. The corner itself is fixed with glue.
Glue is used to fix the corner
Step 6 . Using a tape measure, measure the desired length of the second baseboard, leaving a small gap so that part of the face latch is under the corner. If necessary, cut off the excess part of the baseboard.
The length of the second plinth is measured
Step 7 . Insert the upper part of the plinth under the decorative corner and press it against the base until a characteristic click appears. This means that the plinth is securely fixed.
The upper part of the plinth is inserted
Step 8. The edges of the plinth are closed with special plugs, which are sold complete with decorative corners. They will hide the cut area of the baseboard, thereby improving the overall appearance. The plugs are easy to install, you just need to press them.
Special decorative plug
Step 9 . This is what the finished plinth looks like. If all installation steps were correct, then the mounted molding will preserve this type of kitchen for a long time. To eliminate the possibility of water getting into the seams formed between the wall and the edge of the table top, this area must be treated with a sealant.
Installed kitchen plinth
Self-installation of kitchen plinth
The process will not cause difficulties even for a beginner, but you may need the help of a second person when marking the attachment points. If the shape of the apron has curves, you will have to measure the length of individual lines. We cut the baseboard with a regular hacksaw, and clean the free edges from roughness and protruding elements. The gap between the wall and the countertop should be pre-treated with sealant. After this, we attach the base parts, connecting and corner additional elements with fastening with self-tapping screws and using a regular screwdriver. We select the fastener spacing within 35 cm. Since most modern skirting boards consist of a base and an upper decorative part, they should be installed separately. We carefully bend the top plug, insert it into the connecting elements, press it and snap it into place.
Purpose of the plinth
There is another name for plinth - it's molding . The product is designed to perform a number of functions, for example, it closes a joint, protects the wall from moisture or debris, and also complements the kitchen design, because a countertop without molding does not look so aesthetically pleasing. Let's consider each of the functions performed separately.
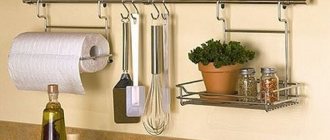
Accessories for kitchen furniture
Disguise
The resulting gap between the wall surface and the tabletop looks unsightly, so it must be covered with a decorative plinth. In addition, during installation, the ends of the tabletop may be damaged or minor defects may appear on the wall at the junction. All this can be easily eliminated by installing molding.
How to replace a baseboard
This will require dismantling the old product. In this regard, self-adhesive options and strips installed with glue will be less convenient than material attached to hardware. Removing the old baseboard begins with removing the screws. They are unscrewed after removing the decorative trim or immediately if the latter is not provided for by the design. Before installing a new frieze, you need to make sure that the material is complete and select fasteners. With the second point, everything is simple, but in the first case, you will need to calculate the straight and corner connections of the plinth itself. The upper bar is checked for compliance with the basis, even at the purchase stage. The following steps repeat the principle of conventional installation. First, the parameters of the countertop are measured, then fragments of the required length are obtained, and then gradual installation begins. With drilling holes if hardware will be used.