Despite the fact that the ceiling is not always noticeable at first glance, a sloppy and untidy ceiling can ruin even the most expensive and beautiful renovation. Therefore, you should think about its improvement in advance. There are several options for ceiling design.
Each of them has certain characteristics.
Each type of ceiling can suit a specific interior. In addition, not all are equally easy and quick to install. Let's consider several options, giving preference to the simplest and fastest way to update the ceiling.
Kinds
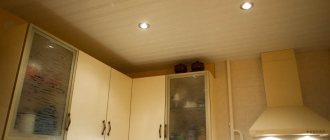
Suspended ceiling
The name itself explains the installation and design features.
As a rule, a suspended ceiling is mounted on a specially prepared metal structure. Its installation requires a sufficient amount of time and skills.
The suspended ceiling can be made of special slabs or plasterboard.
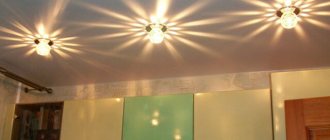
Tensioner
This type is most common in the case of designer renovations and certain design solutions.
It is made of a special polymer fabric, which is stretched onto the main ceiling using a special technology.
In this case, it is worth noting the low cost of the work, as well as the impossibility of performing the installation yourself.
False ceiling made of foam plastic
The third type is the simplest and most inexpensive.
Features of insulation
First you need to prepare the base before installing the slabs made of foam plastic. We are talking about cleaning the surface from dirt, traces of paint, wallpaper, as well as primer.
There are several ways to attach insulation (foam sheets). For example, you can use them:
- stick to the ceiling using dowels to secure it;
- plant it on glue, and then “supplement” it with umbrella dowels;
- just put it in the crate;
- glue directly to the ceiling surface;
- secure with studs, anchors or mushrooms.
Have you decided to stick foam plastic? You can easily cope with this task. The main thing is to follow some rules.
Foam ceiling slabs
There is a huge range of adhesive compositions on sale. But it is better to give preference to products without acetone.
It is necessary to glue foam plastic to a metal structure using so-called liquid nails. But before this, the surface must be cleaned of traces of paint and rust, and also degreased. The application of the adhesive composition is carried out pointwise or in thin strips.
DIY foam ceiling
For this purpose, such a universal material as foam is used. As for the result, looking at the photo of a false ceiling already finished with polystyrene foam, it can hardly be distinguished from the same drywall.
It is this type that is worth talking about in more detail. Polystyrene foam has a wide range of applications and many advantages over other finishing materials. For example:
- breathes. Due to its texture, the material does not form any films that interfere with air circulation;
- keeps warm.
This is perhaps one of the main performance properties of polystyrene foam. Indeed, by making a false ceiling, you will retain more heat; - flexibility. This material can be cut, it can be used to imitate modeling, for example;
- ease of installation. We will tell you about this in detail. However, it is worth noting that a false ceiling does not need profiles, screws and other elements.
Installation of a false ceiling made of foam plastic boards
In order to begin work on installing the slabs, it is enough to clean the base of the ceiling from grease and dust.
No special preparation is required for this method of ceiling design. This is a real saving of time and money on installation.
Foam ceiling tiles are usually produced in sizes 50x50 cm, or rectangles 16.7x100 cm.
After selecting the required slabs and preparing the surface, you can begin gluing. For this it is best to use special glue. As a rule, it is sold in the same place where the slabs are sold. After work, give a little time until everything dries.
That’s it, the false ceiling made of polystyrene foam is ready without much difficulty.
Then it can be painted with water-based paint to obtain the desired shade.
This option will allow you to create a neat ceiling without any problems, and most importantly, hide its shortcomings. Along the edges you can put a special plinth or baguette made of the same material as the slabs.
Another advantage of such a false ceiling is its operation. Firstly, polystyrene foam does not form cracks.
Secondly, due to its synthetic structure, this material is not a favorable environment for the development of mold and mildew, so ceiling tiles can be used in rooms with high humidity, for example, in bathrooms.
And thirdly, polystyrene foam is a non-flammable material, therefore it is safe and environmentally friendly.
Pros and cons of foam products
According to the type of production, foam tiles for ceilings are injection, stamped, extruded.
They are produced in different shapes, they can be square and rectangular, polygonal, diamond-shaped and even curly. The front surface of foam products can be smooth or textured and can imitate various materials. Foam tiles have many advantages. They have an excellent decorative appearance and low cost, which is often the main criterion when choosing a finishing material. But such products have many other advantages:
- have good sound insulation;
- have good thermal insulation qualities;
- designed for long service life;
- are moisture resistant and not susceptible to fungus;
- stick to almost any surface;
- allow you to carry out work even without experience.
Attention! Polystyrene foam is a fairly fragile material, so when working with it you need to act carefully so as not to break the product.
But this material also has quite significant disadvantages:
- gets dirty quite quickly;
- may fade in the sun, becoming yellow;
- due to the lack of vapor permeability, it can disrupt the microclimate in the room.
Advice. To prevent the foam from yellowing and retain its appearance longer, ceiling tiles can be painted.
Foam Types
Before you start distributing polystyrene foam, you need to become familiar with the technical issues.
Polyester columns are classified into three types: stamped, extruded, and injected. They are presented in the form of ceiling panels.
Stamped panels
Special dies are used to produce such plates.
The raw material is a piece of white foam with an increased grain size.
Polystyrene foams use paint to disperse water. Sometimes they are laminated. Such manipulations extend the service life of the material and improve its appearance. The cost of such plastic foam is quite reasonable, which is why many consumers love it.
However, these plates are not without defects.
These include:
- High deviation of measurement accuracy during production, which often leads to the creation of a gap during installation;
- The need for edges. This way, each tile will be assigned to every other tile on the ceiling;
- Increased fragility, for which the boards require careful handling and appropriate conditions of transportation and installation.
Important! Since the panel is fragile enough to clean, it is not recommended to use abrasive cleaners as this may damage it.
Extruded plates
This plan is made by extruding polystyrene.
They turn dirty white, so a special film is applied through the material.
Extruded plates have good strength. Their thickness is standard.
Thanks to the wide range of colors, you can choose a panel version that harmoniously matches all types of space.
Taking into account the disadvantages of extruded plates, it should be noted that they do not have precise geometric relationships and therefore gaps may occur after installation. Completing the ceiling with such plates means greater financial costs, unlike other coating options.
Injection plates
This coating is obtained by compressing high quality raw materials.
Foam ceiling panels
The structure of its granules is not destroyed. As a result, we get matte white plates, the thickness of which is 9-14 mm. Their advantage is good water repellency. Therefore, this material will be an ideal option for placing rooms with high humidity (kitchen). In addition, the coating has soundproofing properties and is widely used in houses with thin walls.
The tile does not need painting.
They are shaped like a relief and create one straw solution. Once installed, the slave is almost invisible. For the manufacture of discs, the material is used in the form of foamed polystyrene, which is self-extinguishing and fire-resistant.
Calculation of the amount of material and surface preparation
To ensure that the installation of polystyrene ceilings is written down before proceeding with the relevant measurements and calculations.
The length and width indicators of the space should be multiplied so that you can determine the area of the room. When choosing a roofing material, you need to know what surface is being calculated (number of entries per package). You can also multiply the size by the amount of material in one batch.
The area of the space must then be divided by this image. The result will be a number that indicates the number of packages needed. Manual errors may occur during panel installation, resulting in material wastage.
Therefore, it is advisable to buy products with a small gap so that in the future you do not have to shop in search of the same plate pack.
Calculation example
If the room length is 6 m, the width is 3.5, the area is 19.5 m2, and the panels are 0.5 to 0.5, then 86 for renovation (19.5 / 0.25 = 78 + 10% ).
How to glue ceiling tiles
Before gluing foam boards to the ceiling, many make markings. You can draw the future location of the panels directly on the ceiling, or you can simply estimate how many tiles will fit across the width of the ceiling and how many along the length. It is extremely rare that the entire ceiling is filled with whole tiles; most often, they have to be cut at the end of the row to the desired size. You need to choose in advance the side where it will be better to make a series of half panels. Very often such a row is placed above the window - firstly, the window itself distracts attention, and secondly, this row of half-panels is often covered with a cornice. In a word, look where such a row will be least noticeable.
If the foam panels have a relief pattern, immediately see how it fits together; sometimes it turns out to create the effect of a solid ceiling. You can start pasting the ceiling from one wall or from the center, diverging in a circle in all directions. If you glue from the center, then often a row of half-panels has to be made along the entire perimeter of the ceiling, but if you start from one side, then there will be only two such rows - one along the width of the room, the second along the length. In this case, you choose what is best for you.
Don't forget to turn off the electrical wiring!
The tile must be glued, pressing it tightly against the ceiling, just do not overdo it, otherwise you may get dents. Glue each new row close to the previous row. Fill the entire ceiling in this way, measuring and cutting the required size of tiles to complete the row as needed. The gap between the last row and the wall is closed with a ceiling plinth.
The seams between the tiles can be sealed with regular putty. When the ceiling is dry, you can paint it with water-based paint - this will significantly hide the defects of the work. Foam ceiling tiles can be repainted 5-7 times.
Preparatory work
Before the foam is glued to the ceiling, you must prepare the surface.
It needs to be cleaned of old remnants. The base is then leveled and ready. If there are fungal formations on the ceiling, they must be cleaned and treated with an antiseptic.
Important! If there are minor irregularities in the base on which the tile is installed, the cover will not be accurate.
Therefore, the alignment procedure must be responsible.
Before using the foam, you must leave them in a dry place for 3 days.
This must be done so that the panels can withstand moisture. Once the substrate has been leveled and the plates have been lying for the required time, it must be marked.
This level of work is very important.
Initially, places are planned where additional elements will be installed in the form of ceiling rosettes made of foam plastic.
Various methods are used to place panels on the ceiling:
- series _
This option is the simplest, such as a chessboard. - In meters . Each time the material is laid, each row moves half a tile.
- diagonal _ This type of placement is the most creative. The result is a bright and original ceiling.
Line laying mode
Placement often starts from the center of the room or from where the chandelier is located.
First, the cord is fixed in a long corner with adhesive tape, the other end should be placed on the opposite side of the room. Setting the second line first. Due to such manipulations, the space is divided diagonally.
At the point where the chip is cut, a right angle should be formed with a line from the center of the space.
From this point you need to start laying down the foam. Then you have to draw where the pencil intersects the line. It can then be canceled and continued with completion.
Roof tiles
Before plastic foam tiles are glued to the ceiling, they must be trimmed. Such actions can be performed using a mounting knife or sharp scissors. The most important thing is to correct mistakes, as this can lead to inequality.
Installation steps:
- Wiring must be disconnected before installation.
- Perform installation wearing gloves.
- The use of adhesive should be shown on the diagonals and on the periphery.
There are many 20-25 tiles on one slab. - In order for the adhesive to obtain the correct condition after applying it to the tiles, you must wait 5 minutes and only then continue laying.
- It should start from the point where the marking lines intersect.
Attach the slab so that the edges match the lines of the tags. - Then you need to move from the first tile and create two rectangular lines. However, you cannot navigate away from a tag.
- Then the remaining rows should be inserted side by side.
- Once all the rows are laid, you must attach the decorative edge.
- The angels need to get closer. You can do this with chairs.
- If necessary, the plate can be treated with sealant.
If you give it your imagination, you can recreate a stylish interior, but you don't invest large sums of money.
For example, you can create a ceiling with reduced foam.
DIY foam ceiling
In the process of carrying out repair and construction work, developers cannot do without the use of reliable and practical materials that guarantee the durability of a residential or commercial building.
As for finishing the ceiling plane, there are quite a lot of methods and options. Tension and suspension systems, wooden structures and other materials are popular.
Foam tiles are most often used to decorate the ceiling, as they have such advantages as the low price of foam ceilings, simple installation and maintenance, water resistance, thermal insulation, and environmental friendliness of the material.
Foam ceiling concept
The cheapest and simplest ceiling covering, which can be installed without the help of installers, is foam boards. Such tiles can be of any color, simply white or laminated with a transparent film.
Foam boards can be of standard size 50x50, as well as 100x16.5.
If you want to install such a ceiling in the kitchen, it must be laminated with film. Using this technology, it is possible to hide various defects and unevenness of your ceiling.
The slabs are glued to any treated surface. When creating decorative ceilings from polystyrene foam, it is correct to use special glue so that, if necessary, the tiles can be easily peeled off.
The disadvantages of such ceilings are poor moisture tolerance, they are short-lived and can turn yellow.
Making foam tiles
Polystyrene foam is an environmentally friendly product that does not emit toxic substances. That is why it is used in homes to build ceilings. It is also a thermal insulation material that will reduce your space heating costs.
The foam ceiling is suitable for the corridor, living room and bedroom.
The size of the tiles from all manufacturers is standard 50 by 50 centimeters. Tiles are made in three ways: extrusion, stamping and injection. To find out more, watch the video about foam ceilings.
Extrusion
The manufacturing material is pre-melted polystyrene foam.
Using the method of vacuum-thermal molding, tiles are formed from the molten substance. They are resistant to mechanical stress and durable.
To make the product a certain color, various dyes are added during production, which provide a clear, high-quality color.
This method requires high precision to obtain the correct geometric characteristics. Therefore, in the end you get a very expensive foam ceiling with a smooth surface.
Of all types of tiles, the material produced by stamping is the cheapest. Manufacturing is carried out using special stamps, the starting material is polystyrene foam.
The resulting materials have a high grain size and are produced in white color.
But such tiles can be laminated and coated with various substances that give a luxurious look. Provides easy installation and can be painted. Fragile, moisture-resistant tiles practically do not absorb sound.
The finished tiles are white, but can easily withstand painting with water-based paints.
It is also called tile without seams. This is an innovation in the construction market. Used in public and home spaces.
Despite its name, seams are still present, although less than 1 millimeter thick. Therefore, after installing a foam ceiling with your own hands, it is recommended to seal the seams. To do this, you need to choose a high-quality putty or grout or sealant. Never use silicone; a suitable option is acrylic.
Silicone sealant turns yellow over time, no one needs this.
Advantages of foam tiles
Foam boards, which are used to cover ceilings, have the following advantages:
- Waterproof, not moldy;
- Absolutely different designs, cheap, wear-resistant, not bad heat and sound insulation;
- Practical, easy to clean with detergents;
- The surface is waterproof, with waterproofing;
- Resistant to temperature changes;
- In case of any type of damage, they are easily replaced without the need to completely dismantle the ceiling;
- They will go well with drywall, and various coatings and patterns on the foam ceiling will give it an expensive look;
- With the help of such tiles, the appearance of a seamless structure is created.
Choosing ceiling tiles
Before purchasing this product, you need to know what it is.
Tiles are divided into three types: extruded, injection, pressed. All types are made of polystyrene foam, but in different ways.
Regardless of the type, before you attach foam to the ceiling, you should look at the corners of the material.
They, like the edges, should be smooth, and the angle should be 90 degrees. Avoid any dents or rounding. To check the edges match, stack the tiles in a column.
To check the quality and strength of the material, take the tile by the edge and shake it: good material should not break under its own weight.
When choosing tiles, buy with a margin of about 15-20%, depending on the area of the ceiling.
We have dealt with the criteria for choosing foam tiles, now let's look at the qualities of each type. Remember that extruded material is used in any room. This is the most expensive of the polystyrene foam tiles, however, despite this, it has many disadvantages: the presence in its composition of freon, which is dangerous for the ozone layer, the lack of clear geometric shapes, and the uneven surface of the reverse side.
The injection surface allows you to create the appearance of a seamless ceiling covering.
It has good waterproofing and excellent sound insulation, is resistant to temperature changes, is easy to clean, does not burn and has increased strength. Available exclusively in white, but can withstand painting with a water-based composition.
The large thickness and porosity of stamped tiles provide low noise and thermal insulation properties. Disadvantages also include its instability to water, high fragility and inaccuracy of its geometric shape.
Foam installation technology
So, you are interested in how to attach foam to the ceiling.
Remember - you can make the ceiling in the room with your own hands. Polystyrene foam is an inexpensive and very practical material. Polystyrene tiles can be laid on plasterboard, wood, concrete, in general, on any ceilings. The work is being carried out in stages.
Preparatory work
Preparatory work includes quite a lot of operations.
The first step is to stock up on the necessary tools and materials. To work independently, you will need a minimum set of tools: a knife, scissors, a spatula, a level, a tape measure and a hand brush. To purchase materials, we measure the area of the ceiling and purchase them with a reserve; you will also need glue and a framing frieze.
Before laying tiles, you should carefully prepare the surface.
It is necessary to clean the whitewash from the ceiling, level and prime the uneven areas. If there is fungus on the ceiling, then the area should be cleaned and treated with an antiseptic.
To attach foam plastic to the ceiling, “Creative”, “Akrol”, PVA and many other special adhesives are used.
Before pasting, the tiles must be kept in a dry room for 3 days to allow moisture to evaporate.
After checking the accuracy of the angles and perimeter, mark the ceiling from the center to the edges. To do this, it is convenient to use a beating cord with any dye.
When marking, take into account the type of arrangement of tiles on the ceiling (diagonal or longitudinal rows). With the help of diagonal rows you will visually increase the ceiling plane, but this is a more labor-intensive process.
It is recommended to place the panels away from the center of the room.
Ceiling paneling
The result of all your work depends on how the foam is glued to the ceiling and the quality of the pasting.
Finishing the ceiling with foam boards
Preparation for finishing
Foam and polystyrene ceiling tiles are a fairly “unpretentious” material and can be attached to almost any surface.
And yet, in order for the new ceiling to be of sufficient quality, it is necessary to perform a number of simple steps:
Ceiling primer
- A few hours before gluing the tiles, open the packaging . This allows the tiles to “get used” to the temperature and humidity in the room where the finishing will be done.
- Before gluing the tiles, we remove the old finishing from the ceiling - wallpaper, paint or whitewash (see Is it possible to glue ceiling tiles to whitewash?).
- If there are deep potholes on the ceiling, we putty the ceiling , but the tile itself will hide small defects.
- Immediately before gluing the tiles, we treat the ceiling with a primer . This will ensure reliable adhesion of the bonded surfaces.
Ceiling markings
With the help of proper placement of elements, you can significantly transform the ceiling made of foam plastic slabs, organically fitting it into the overall design of the room. That is why before you start finishing the ceiling with tiles, you need to carefully consider its markings.
One of the markup options
Ceiling tiles can be placed in the following ways:
- Rows
- Scattered - each next row is shifted by half a tile
- Diagonally.
To adjust the placement of tiles on the ceiling, you need to draw the following lines:
- Diagonals - connect opposite corners of the room
- Main lines - connect the middles of opposite walls
Ideally, the intersection points of the diagonals and the main lines should coincide (in a rectangular room), but this is not always the case. Having discovered a displacement of the intersection points, you need to shift the markings so that the change in the pattern on the ceiling is minimal (