To store jewelry, women use various organizers, boxes, drawers and other devices. Most often, small things are found in boxes.
You can buy such a storage system in a store, and it’s easy to give it an original look yourself.
You can find many original photos of the decor of the box. Simple and clear ways will help you decorate the product.
Vinyl wallpapers
After renovation, there are remains of various materials in the apartment. You don't need to get rid of them right away. Vinyl wallpaper is suitable for updating wooden boxes and cardboard products. The color of the material does not matter, since the surface will be painted.
Parts with allowances are cut out from a piece of wallpaper. You can decorate only the lid of the product or cover the entire box. It all depends on the craftswoman’s idea.
For work use PVA glue. It is applied to the parts, and then they are pressed firmly to the surface. After drying, the item can be painted in the desired shade.
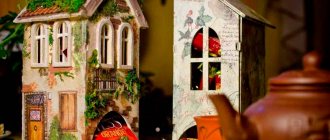
Box-book: decoupage
To decorate a box in the shape of a book, you will need a regular blank, a table fork, a palette knife, acrylic paints, brushes, decorative pine-colored putty, glue, decoupage varnish, decoupage cards, sandpaper, a foam sponge, a file, masking tape, and decorative corners.
Let's get started:
- We sand the surface and cover the top and bottom covers and the side with hinges with white acrylic.
- After the acrylic has dried, glue the decoupage card using a file (the method is described in the New Year's decoupage master class) onto the painted surfaces.
- We model the pages: apply putty to the front side edge with a three-millimeter layer and use a fork to pierce the grooves-pages.
- We tint the dried grooves using black and brown acrylic paint and add gold pigment.
- We decorate the corners of the book with carved and forged elements.
- If desired, we do the interior design (we decorate the inner surface with a decoupage napkin, fabric, text, etc.)
You can not only decorate a book box using the decoupage technique, but also give it interior decor
The book is ready!
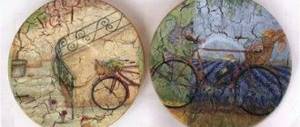
Decoupage
To attach pictures well to the product, you need to prepare the surface. If there are defects on it, they may become more noticeable.
After the preparatory stage and drying of the product, a layer of glue is applied to it and decorative elements are pressed. Smooth out the paper parts from the center to the edges.
If fabric is used for decoration, it is secured using a stapler. The item must be dried and then varnished.
You can decorate the box yourself outside and inside. To do this, use the same material or select contrasting options.
Decoupage is also made from photographs. The bottom layer on them must be removed. This will reduce the thickness of the photo and allow it to stick well to the surface.
- Staircase decor - 115 photos of examples of stylish decoration and unusual design of staircase elements
Handicrafts for the home - 130 photos of the best ideas for novice craftsmen and examples of unusual home decoration with crafts
Ideas for handicrafts - a selection of methods and original options for creating jewelry with your own hands (80 photos)
LiveInternetLiveInternet
Quote from Alisa_Kuznetsova's message
Read in full In your quotation book or community!
Drawing lessons - painting a box from Olga Ukrainskaya
Greetings to all!!! Just a little about myself... I’ve been painting for 2.5 years, I started with acrylic painting (one stroke), then I started trying my hand at oil painting, mainly based on Kemerovo painting... I really liked it. But the technique remained basically the same, everything is based on the double stroke technique, when 2 colors are immediately applied to a flat brush (on different ends of it) and, after first passing the brush back and forth across the palette so that the colors mix, the painting is done. But, not being completely bound by the dogmas of this technique, I draw as I want: this will be seen in the example of cornflowers. This is so... a short excursion)
In this MK I will show the sequence of painting, the layout of the painting using the example of this summer box. Why this one?.. Probably because the summer theme, wildflowers and even in combination with a green background is one of my weaknesses).
Specifically, using this example, I will show how daisies, leaves and cornflowers are drawn. But in general, you can trace the work from beginning to end by “watching” me. I didn’t reinvent the wheel when it came to drawing daisies, but learned from the materials of other masters (L. Novikova, E. Miroshnik, etc.), but somehow I came up with cornflowers myself..
Here she is...and soon flowers will bloom on her. The background is the most common - stretched, made with acrylic.
And here are the “tools of labor”):
I outline the drawing and elements of the painting with chalk, like this, starting with the largest ones - daisies and leaves:
I start painting with daisies, which I paint with a flat brush in white. Place white paint on the brush (if necessary, dilute it with a special thinner or linseed oil, if thick) and rub the brush over the palette so that the paint is evenly distributed on the brush.
The underpainting is first done in green for the daisies, as shown in the photo. The underpainting will add depth and volume to the petals, and will also highlight the base of the petals.
First, the petals are written in the foreground, from the center to the middle on the right, and then also from the middle on the left. The petals in the background are painted with darker paint (a little green to it and dilute the paint more so that it is thinner).
But it’s better, of course, to see everything once):
This is how all the daisies are drawn on the lid of the box:
Now you need to decorate the middle of the chamomile. To be honest, I never learned how to draw it with a double stroke. I paint it with a round brush (synthetic) No. 1. First, I use a dark brown color to mark the middle and use a stroke to go over the base of the chamomile petals in the foreground (as in the photo). Then I make a yellow stroke on the background of the middle, and then the one that is closer.
A little later I’ll make a highlight in the middle of the daisy... for beauty, I think
Next, the leaves are drawn. I like leaves in Kemerovo painting... this is how I do them). The tip of the leaf is underpainted with darker paint than the leaf itself. And then the right side of the sheet is written down and the left side is written in exactly the same way.
The leaves are drawn with a double stroke. Here's how the paint is applied and a photo for clarity:
And here are the leaves themselves:
Now it's the turn of the cornflowers. Using a flat brush in the form of drops, I paint the base of the flower. I outline the directions of the petals with a simple pencil and use a round brush No. 1 to outline the petals. Then, with the same brush, I paint two more short strokes from the tip of each petal to form a trident-shaped edge, characteristic of a cornflower (see point 2). You can choose different shades of blue, and you even need to). Having drawn all the petals, I take a zero liner brush (a round brush with long bristles) and in some places I add white color to the petals (see point 4). Now draw the center of the cornflower. Take a darker paint than for the petals and make strokes towards the center with the same brush. And in paragraph 6. white dots are placed on the stamens. That's all)
Next I will only show the stages of work as new elements are added to it - smaller flowers, berries and grass. First, how did everything turn out with the cornflowers):
The original idea was to draw daisies and cornflowers on the box... but somehow it didn’t work out).
First, orange flowers like primroses were added:
Then berries... small white flowers and grass...
On the barrel of the box, in parallel with painting the lid, I also put out a garland with the same herbs)
Here's how it happened:
And here is the work varnished and with an ornament, which I painted with white acrylic using a liner, and the dots were made with a white outline. There was a butterfly inside the box...it accidentally flew in
Source
And there are many of her works here.
Decoration in shabby chic style
For jewelry, choose a convenient storage system. Decorate the box using ready-made box decor ideas. They will help you create your own unique version. It’s not difficult to do this kind of work; even a novice craftswoman can handle it.
To create a beautiful product, take a round box. A part is cut out of paper according to the size of the bottom of the product. It is necessary to make the same circle from polystyrene foam.
Paper is glued around the product, which is usually used to decorate gifts. Then you need to make a circle from the fabric that matches the foam part.
Be sure to make a supply of material so that it is convenient for them to cover the lid of the box. Afterwards, the product is decorated with beads, ribbons, and lace.
Decoupage in different styles
Decoupage for beginners is a creative activity. Even using the instructions does not deprive the product of its originality. After this technique, the box or book will become original of its kind. Before you begin converting a product, it is worth considering all available options.
Design can be done in different styles:
- vintage;
- Provence;
- shabby chic.
vintage style decoupage . With the help of certain tricks, the box can be somewhat aged. To achieve maximum effect, experts recommend using the craquelure technique. The aging effect is created using paint, which is applied directly to the prepared surface. To begin with, dark paints are used, and lighter colors are applied on top of them.
Decoupage boxes in vintage style
Stages of decoupage in vintage style:
1. The first layer can be applied with brown paint, then wait for the surface to dry.
Related article: Original do-it-yourself photo frames (+50 photos)
2. Next, they begin to create the worn effect. To do this, apply a small amount of wax to the edges of the product. This will make the second coat of paint look somewhat worn.
2. A second layer of paint is applied, only in a lighter shade. The best option is white, light gray and beige.
3. When the paint has dried, lightly sand the areas with sandpaper. Processing is carried out until the bottom layer of paint comes out.
3. At the final stage, the product is decorated. The best option here would be retro pictures, roses and other patterns. The craquelure technique is also often used for decoration. This box made using decoupage technique will become an original decoration for any room interior.
No less popular is decoupage in Provence . The work is performed in the same sequence. Of course, there are some peculiarities here. Flower designs or rustic motifs are used for decoration. It is rational to use paint in bed shades. The aging effect is also appropriate here. Using the craquelure technique, you can create the appearance of cracking of the design.
Decoupage boxes in Provence style
Provence style is ideal for transforming a round box.
A box in the shabby chic is decorated almost the same as in previous techniques. Characteristic features are bed colors, old pictures, images of flowers, twigs and other “delicate” details. Shabby chic is used to decorate various items, regardless of their shape and size. This is especially true for products made in the form of a book.
Decoupage using the shabby chic technique and using printouts (2 videos)
Interesting ideas for decoupage boxes (41 photos)
New Year's box
New Year's surprises await children and adults. The gift can be placed in a box that you decorate yourself. For this purpose, a ready-made item is taken or a box of a suitable shape is selected.
The wooden model must be carefully prepared to obtain a smooth surface. For this, sandpaper, PVA glue and acrylic primer are used.
To decorate the New Year's box, you will need a napkin with a beautiful pattern. It needs to be glued to the lid of the box. If it does not completely cover the surface, then paint of a suitable color should be shaded along the edges.
The sides are decorated with a gold motif. Using white acrylic, snow is created by spraying it onto the product. The surface must be varnished. The finished box is decorated with a bright ribbon and placed under the New Year tree.
Decoupage boxes in patchwork style
Patchwork is a very unusual handicraft that involves making both small and large crafts from scraps of fabric. Fabric decoupage of the box is a very bold and successful solution.
Patchwork is a very unusual handicraft
What is necessary:
- wooden box;
- lace;
- linen fabric;
- padding polyester;
- lock;
- glue;
- paints;
- tassels;
- varnish;
- texture paste;
- stencil;
- palette knife;
- sandpaper;
- masking tape;
- a thread;
- needle.
Progress:
- Clean the workpiece using sandpaper.
- Cover the fabric with white paint, leaving only the edges unpainted.
- Cut out squares from a napkin and remove all the lower layers from these parts.
- Attach these elements to the fabric and coat with glue.
- Lay padding polyester on the inside of the fabric, then fold the edges.
- Secure the structure in this position using masking tape.
- Pull the edges onto the cardboard using a needle and thread.
- Fix the workpiece on the lid of a wooden box.
- Apply structural paste to the side elements using stencils and a palette knife.
- Dry the work and be sure to varnish it.
Finally, attach the lock.
Photo of the decor of the box
Help the project, share on social networks 
0