In order to correctly select the color combination of walls, ceilings and floors, you must follow certain rules. Next, the secrets of the designers will be revealed and a table will be provided on the possibility of optically changing the internal volume using a play of colors.
To select the right color, you can use the color wheel
In order to correctly and beautifully combine shades in the interior, you should adhere to certain rules
Laws for choosing floor colors - combination of house elements
The color of the floor in the interior plays a key role. Depending on the structure of the floor covering, its pattern and color, a further selection of colors is made for the finishing of walls and ceilings, as well as doors and furniture are selected.
There are 2 basic rules that must be followed.
- When purchasing flooring, baseboards, doors and furniture, you should use a maximum of 2 color schemes. To achieve a certain effect, you can use contrasting design. All interior elements should be in the same warm or cold palette.
- To avoid disharmony, when choosing wall colors, you must adhere to the trinity of shades. Namely, the surface coating should contain a maximum of 3 main colors.
To get a special effect, don’t be afraid of halftones. They contribute to the harmonious fusion of many different shades without harming the unity of style. Contrast is often used in modern design.
To get a special effect, don’t be afraid of halftones
To avoid disharmony when choosing wall colors, you must adhere to the trinity of shades
When purchasing flooring, baseboards, doors and furniture, you should use a maximum of 2 color schemes
Peculiarities
A white floor in the interior visually enlarges the space, making it lighter and lighter. This effect will be noticeable even in small rooms decorated using this design technique. Due to the reflective properties of white, light flooring is used in interiors where natural light is limited or absent.
But since a dark floor is a classic, the use of white makes the interior less expensive and luxurious. This nuance must be taken into account when decorating premises in premium and luxury style. Judging by the reviews, this coating makes the interior cozy.
It is advisable to use white color with other shades. The interior, decorated only in pale colors, looks inexpressive. The lines are blurred, which negatively affects the overall perception of the design of the entire room. To prevent this effect, one of the classic techniques used by specialists is used. Dark doors against the background of a white floor in the interior balance and dilute the monotony of the room, making it harmonious. The walls are also finished a few shades darker. Or you can choose bright accents.
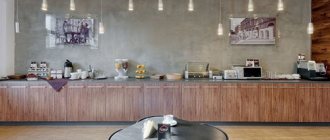
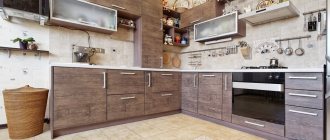
Features of choosing flooring colors in the kitchen
As a rule, in the kitchen and in the corridors they try to lay moisture-resistant linoleum, glue porcelain tiles or lay moisture-resistant laminate. The variety of patterns allows you to vary when choosing the color of walls and furniture facades.
Usually, when arranging living rooms, the furnishings are chosen closer to the color of the doors. In the kitchen, horizontal surfaces should be in harmony with each other. In such a fusion of the floor pattern and furniture, the decoration of the room will be cozy and comfortable.
Bright colors of tiles can be:
- dilute with white tiles;
- apply various types of ornaments;
- Repeat the patterns laid out on the floor on the apron set.
It is very important that the color of the floor is in harmony with the furniture and walls
Usually tiles or linoleum are laid in the kitchen
In the kitchen, the color of the floor should be in harmony with other elements
The wide variety of linoleum produced increases the variations in the choice of facades and other elements of kitchen furniture.
More austere natural laminate coatings are usually used to create a classic style. The main thing when buying material is that the color of the floor and furniture match.
When decorating a small kitchen, you need to take into account that a diagonally laid pattern of tiles or linoleum visually expands the area.
You can see the selection of colors in the table below.
Color compatibility table
Color wheels for color selection
Color combination of walls, floor and ceiling
The apartment will become comfortable to live in if the color combination of the floor and walls in the interior is correctly selected.
Looking at the color chart, you will notice the following.
- The contrast of a dark floor, bright wallpaper and a white matte ceiling can significantly change the height of the room. Furniture in such rooms is installed in pastel shades, in small quantities, so as not to clutter the floor.
- Using the same color in different tones gives harmony and peace. Mostly cream colors are used. In the classic style, this is the most common palette. It applies to any type of housing.
- Having chosen the floor color mahogany, wenge or chocolate for a small room, the remaining surfaces should be done in a light, almost white color. Soft colors will optically push back the walls and raise the ceiling. Absolutely white matte painting will make the surrounding volume faceless. It will completely lose its shape.
- Opposite surfaces attract, giving different sensations. Such tinting can be suitable for any room, depending on what result you want to get in the end. For a high apartment, a dark floor is ideal, the ceiling and cream walls match it. Low rooms will be lifted by a white glossy ceiling and a light floor with rich side planes.
The apartment will become comfortable to live in if the color combination of the floor and walls in the interior is correctly selected
The contrast of a dark floor, bright wallpaper and a white matte ceiling can significantly change the height of the room
Opposite surfaces attract, giving different sensations
Peter Bely
Last year, the author of architectural installations and engraver unexpectedly became the curator of the most vibrant art project in the city - the Luda gallery. Exhibitions of various artists, held for fifty-two weeks in a row in a small hall on Mokhovaya Street, will be brought together in the loft project “Floors”. It happened like this. One of my friends named Luda, who is interested in art, renovated and provided me with a fifty-meter space for holding exhibitions for a year. It seems to me that she showed great generosity towards the artistic life of the city, and for me the time has come to make my contribution to the subcultural life of St. Petersburg. As a result, many artists and many connections emerged.
This project was a diary of the current moment . Despite the weather and lack of money, more than forty exhibitions took place. Here is a continuation of the tradition of apartment exhibitions, and a study of what kind of art can now be found in St. Petersburg. Soil sample. I deliberately tried to alternate very young artists with stars, traditional painters with conceptualists and media artists.
There were and are no such places in the city, just as there is no museum of modern art . But there is a community of artists who know each other by sight, for which the Luda gallery existed. I had an attitude towards infantile artists and elder artists, hermit artists, clown artists. In general, those who, due to inertia or other reasons, are almost unable to make their own exhibition, find transport, tools, time. It was easier for them to resolve all these issues with me than with commercial galleries, which many are simply afraid to enter.
The event was completely no-budget . The gallery provided only water, juices and dry goods. Artists and spectators brought alcohol themselves or ran to the glass shop opposite. This was very revealing: it became clear that in order to breathe life into a certain place, you just need to create minimal conditions for artists there and give them complete freedom of action. Most likely, the most correct thing now would be to open a bar next door called “Luda” as a place for an art party.
After six months of the existence of “Lyuda”, local and visiting collectors and curators began to actively call me, so I think the project could continue to exist quite successfully in the future. But the idea of the gallery was short-term and rapid, as well as clear deadlines for completing the project.
For now I would like to take a break from gallery activities . But I’m not giving up on it completely, I just would like a little more comfortable conditions for myself and the artists in the future. And now in the premises of “Lyuda” there is a marriage agency “Amelie”.
Peter Bely. "This is Luda." Loft project “Floors”, space “Blue Floor”, from October 30 to December 13
Combination of floor and doors
An important role in the design is played by the color of the floor and the texture of the doors. It is a mistaken belief that they must be the same color. Depending on the design decision, these interior elements can be:
- in one color;
- in a contrasting solution;
- white or painted doors and any floors.
Made in contrast, the doors are framed with a platband matching the color of the floor, or skirting boards are used to match their texture. The furnishings and decoration in such rooms are selected to match the door panels. It fits perfectly into the overall layout.
The room can be done in one color scheme
Some elements can be highlighted in color
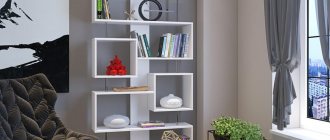
How to visually change volume using flooring?
The selection of floor colors based on other surfaces significantly affects the overall appearance of the room. Having considered the combination of colors in the interior, you can create a table on how and what color to choose for the floor, ceiling, walls and furniture in order to significantly change the area.
| Floor shade | Wall shade | Ceiling shade | Furniture shade | Change of space |
| dark | light | light | light | Increases volume |
| dark | light | dark | neutral | increases the area, reduces the height of the room |
| light | dark | light | Dark or neutral | raises the height of the room, narrows the space |
| Dark | Dark | light | light | feeling of a basement or well |
| dark | One dark wall | light | light | the walls move apart relative to the dark wall |
| light | One dark wall | light | dark | reduces the length of the room, increases space |
| light | dark | dark | neutral | compresses the area, creating a feeling of a cave |
By choosing rich tones of all surfaces, you can get a closed cube, which is absolutely not comfortable to stay in for a long time. Such options are usually used when decorating large halls using birch furniture and good lighting, as well as when decorating nightclubs and bars.
The selection of floor colors based on other surfaces significantly affects the overall appearance of the room.
Having considered the combination of colors in the interior, you can create a table on how and what color to choose the floor
A light floor raises the height of the room and narrows the space
Depending on the desired result, the color texture of the floor is selected:
- tones of red - perfectly emphasize the contrast and prevail over other surfaces, clearly indicating the horizon;
- blue colors - expand the layout, preferable for the sunny side;
- shades of yellow – solar warmth and light;
- tones of green - create comfort and peace, well suited for creating a relaxation area.
Based on the above, we can conclude that in order to bring any plane closer, it must be made darker. To increase volume - light.
The floor can be made in one color scheme
To bring any plane closer, it must be made darker
White doors, white floors in the room - practical or impractical?
Many people are quite skeptical about options such as white floors, white walls, and white furniture.
Many people say that this is inappropriate and impractical, as it quickly becomes dirty and, if not taken care of in a timely manner, looks very untidy. But is it? It’s worth considering whether you can see the dust accumulated during the day on a light-colored surface.
Of course you can! But on dark surfaces you will see dust much more clearly.
What colors does it go with?
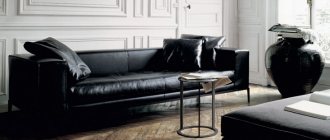
In this case, we have unlimited possibilities for interior design. This color is universal, so we can combine it with almost all shades. It goes well with classic black and brown, as well as bronze and contrasting colors, including hot pink, green or blue. You can place a bright or black sofa on a snow-white floor; this will create a very expressive and stylish contrast in the interior. Harmony also depends on other decorative elements you choose.
White floors will make the walls any color you like. Therefore, if you are wondering what wallpaper to choose for a white floor, then here is a huge field for experimentation. You can make your interior airy - in a Scandinavian or Provencal style by adding pastels.
If the living room is designed in a Provencal style, then the wallpaper can also be light with miniature flowers, or, conversely, bright photo wallpaper with lavender fields. The Provence style is characterized by white floors and white furniture with cute fittings. There can be cute little things everywhere, vases with artificial roses and lavender, artificially aged whitewashed furniture.
When choosing what color of the walls in the bedroom will look harmonious with a light floor, there are many options - from light to bright and even dark. This can also be a bedroom in red colors.
Light walls are also suitable for a Scandinavian-style living room.
The airiness of the interior will be balanced by solid wood furniture. Gray walls are also suitable for this style; they will highlight and contrast the white floor very favorably, emphasizing the beauty of each other.
It seems incredible, but a white floor in a room almost always works great, even in an exceptionally vulnerable kitchen.
We can choose different flooring options:
- light deciduous tree,
- ceramic tiles, including wood-effect floor tiles,
- porcelain stoneware,
- laminate, such as bleached oak,
- or other materials.
Manufacturers meet our expectations, so our possibilities are almost limitless.
White bathroom floor design
An interesting option is a snow-white floor in the bathroom.
Combining it with contrasting shower tiles or cabinets made of laminated veneer lumber, we get an original and modern design. Of course, nothing prevents you from placing classic furniture in the room instead of modern ones. They will complement all interesting decorative elements in the form of towels or accessories, creating an original interior. Such a coating would be a good solution for creating a marine-style bathroom design.
Selection of carpet and wallpaper
At one time, carpets went out of fashion and were rarely used in design projects. Today they are again an integral part of bedrooms, children's rooms and living rooms. The variety of patterns and pile heights allows you to use carpets and rugs in any room.
In order to achieve a good result, you need to decide not only on the shape, but also on the shade of the carpet.
- A dim room in pale colors will be decorated with a bright product. In addition to it, you can use decorative pillows made in the same color scheme.
- The classic style can be supported by a carpet with a calm pattern. The main thing is to choose a suitable shade so that it does not get lost and at the same time is combined with other elements of the decor.
- For small rooms, as a rule, large-sized carpet is chosen in calm and soft colors, preferably monochromatic. They will optically increase the size of any room.
- In large halls and bedrooms, small rugs with a three-dimensional pattern are laid to highlight any area. A voluminous flower or animal face looks great in a large space and presents itself favorably. Rich and warm colors are used in spacious living rooms to highlight a specific area.
The design of the room is made in one color scheme
The room design is made in light colors
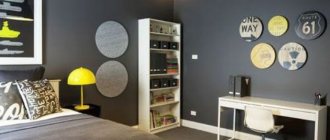
A certain role in decorating an apartment is assigned to the purchase of wallpaper.
A certain role in decorating an apartment is assigned to the purchase of wallpaper. The colors and patterns applied to the walls are of great importance in visual perception:
- horizontal stripes on the wallpaper reduce the height, make the room wide and low; if you make only one wall in a long corridor striped, it will be visually closer;
- vertical stripes lift low ceilings, the effect increases with the width of the strip;
- a large pattern brings the walls closer, so in small apartments it is not recommended to use wallpaper with such a pattern or to cover only one wall with it in an elongated room;
- a small pattern expands the walls - cream wallpaper with a small pattern applied to it optically enlarges the space;
- wallpaper with wide transverse stripes pasted onto the ceiling brings the opposite wall closer and pushes the side ones apart; this method is widely used when creating the interior of narrow halls and corridors.
Cool colors can visually increase the area of a room
Light shades are preferable to use in large rooms
Based on the above, the following conclusions can be drawn.
- Bright, rich warm and dark cool tones reduce the space, but at the same time make it original. They are unacceptable for small apartments.
- Pale pastel and light cool shades increase volume, expand walls and raise ceilings. They can be used in the design of any room.
Step-by-step instructions for pouring a self-leveling glossy white floor
The manufacturing material is dry water-soluble mixtures based on gypsum and polymers; these fillers compare favorably with other poured floor coverings.
Self-leveling floors in the apartment
Self-leveling floor:
- creates a perfectly flat surface. It doesn’t accumulate on the floor in “secluded places”, they simply don’t exist. The floor has no unevenness, cracks or gaps.
- easy to care for. Floors can be washed using plenty of water and there is absolutely no chance of leaks. The coating does not allow moisture to pass through.
- durable. Innovative additives significantly increase physical strength. The risk of scratches is minimal, the original characteristics of the coating remain unchanged for a long period of time.
Self-leveling floor structure
The thickness of the glossy white floor can vary between 3-5 mm, if necessary, several layers can be applied.
Self-leveling floor structure, mixture consumption
Floor with significant recesses, consumption
Floor with communications and pipes
For the finishing coating, fillers based on polyurethane materials or epoxy resins are used. Specific materials are selected taking into account the purpose of the premises; for residential ones, more environmentally friendly polyurethane materials are used.
Polyurethane coating
The materials used conduct heat well; due to this feature, this is one of the optimal solutions for finishing coatings when creating underfloor heating with electric or water heating.
Step 1. Preparing the base
In most cases, the base for white self-leveling floors is cement-sand screeds; you can make a rough self-leveling floor. Due to the fact that the material is quite expensive, builders are taking a set of measures to reduce its consumption by minimizing the thickness of the coating, in some cases it does not exceed 3 mm. Such a small thickness requires a high quality screed; it must be smooth, free of cracks, protrusions and depressions.
Rough base
Before you start pouring, you should very carefully check its quality using a long ruler.
Determining the flatness of the floor
Level for checking evenness
If unevenness is detected, you need to use putty and a large stainless steel spatula to level the base. At the same time, cracks and cracks are sealed.
Sealing uneven and cracked concrete floors
Concrete floor repair
After the putty has hardened, the protruding tool marks are scraped off and the screed is vacuumed. For glossy white self-leveling floors, surface cleanliness is a very important factor; even small grains of sand will be noticeable. If their number reaches a critical level, then a second layer of filling will have to be done, and this will significantly increase the cost of the floor.
Cleanliness of the screed is very important
There are options for pouring a self-leveling solution onto a base made of moisture-resistant gypsum boards. The slabs are used to level low-quality floor screeds.
Base made of gypsum sheets
Professionals do not recommend using this option for making a poured floor; the strength of plasterboard does not meet the existing requirements of users. If, due to such slabs, it is possible to save time and money on leveling the cement-sand base, then in the future these savings will be leveled out; to increase the strength of the floor, it will be necessary to increase the thickness of the pouring, and the materials are very expensive.
Important. The screed must be dry; to improve the adhesion coefficient, it is recommended to apply impregnation. Apply the primer in two layers, the moisture content of the concrete cannot exceed 4%. The primer not only firmly fixes the smallest particles of the screed together, but also makes it flexible. Priming must be done if the thickness of the fill is small; due to this operation, the adhesion coefficient of materials is significantly increased, and peeling of the top layer after sudden dynamic impacts is excluded.
Consequences of negligent installation of self-leveling floors
Step 2. Covering the walls with masking tape
To avoid marks on the walls, it is better to first cover them around the perimeter with construction paper tape. After the material has set, it is carefully removed.
Akvopol-Grunt - acrylic primer for floors
Step 3. Install the laser level
The use of a laser level while pouring white glossy floors allows you to constantly monitor the quality of the work.
Installing a laser level
You can, of course, try to fill the material without a level, but only experienced builders do this; beginners are strongly recommended to use the device. Due to the fact that the thickness can be very small, a lot depends on the correct installation of the laser beam. The main condition for normal operation of the level is to place the device in a strictly horizontal position.
Laser level (level)
Modern laser levels beep until the correct position is found. Cheaper models will have to be installed only using a bubble level. You need to use it very carefully, there is a high probability of error. If there are concerns, then it is better to mark the horizon lines in several places on the wall with a water level and use them to check the position of the laser beam.
If, while pouring the floor, small bumps appear in some places, then the beam disappears from the wall, you need to level the fill a little using special tools: a needle roller, a needle trowel or a comb spatula.
Step 4: Prepare the mixture for use
Before doing this, carefully read the instructions; each manufacturer makes its own recommendations, taking into account the characteristics of the brand. To mix, you should always use an electric stirrer; only it can break up all the smallest lumps. The presence of such lumps causes marriage.
Pour the dry mixture into cold water and stir
Practical advice. In order to completely eliminate the presence of lumps, it is recommended to prepare the mixture in two stages. After the first stirring, let it sit for 5-10 minutes, and then carefully move it again.
The amount of prepared mixture for pouring depends on the skill of the workers. It’s better to work in threes: one prepares the mixture, the second brings it to the pouring area and pours it out, and the third levels it out and removes air bubbles.
Kneading process
Step 5. Checking the mixture for fluidity
Check the mixture for fluidity; the thickness of the layer will depend on this parameter. Pour a small amount of the finished material onto a flat surface, wait a few minutes, let it spread. Next you need to measure the thickness of the layer. Too big - add water, too small - add dry mixture. Change the consistency gradually, do not rush. In the future, when preparing each new portion of the material, accurately maintain the original ratios of the components.
Check fluidity
Step 6. Preparing tools and equipment
For footwear you need to wear mountaineering or special boots with spikes. You can walk in them over the entire surface of the uncured solution.
Studded soles
Prepare tools according to the selected pour thickness. You will need a comb, a spiked roller and a spiked smoother. The length of the spikes must correspond to the thickness of the white self-leveling floor layer.
Tools for self-leveling floors
Practical advice. Do not try to work near walls with large tools; there is a possibility of material getting on the walls. In these places it is better to use a small comb; with its help all difficult places are processed.
Step 7. Filling the floor
Pour the material onto the base in a more or less uniform layer. Use a spiked roller to remove the air, paying special attention to the joints of different sections of the floor. If you find a difference in thickness, go over these areas several times with a leveler.
Do-it-yourself self-leveling floor - roll the mixture with a roller
Needle roller for self-leveling floor
It is better to control the quality of the filling using a laser beam, this is what real professionals do. They get a perfect pour the first time - significant savings in time and expensive material are achieved; in the end, the poured floor is cheaper than using amateurs or beginners. The fact is that experience in performing such work is of great importance; no article can describe all the nuances. For example, different types of cement-sand screeds absorb different amounts of moisture. The indicator depends on the density of the top layer of the screed, humidity, sand fraction size, etc.
Experienced builders can roughly determine these factors by eye and take them into account during pouring; a beginner cannot cope with such a task. He has to decide by trial and error.
Squeegee (spatula) for self-leveling floor
Wide spatula and squeegee for leveling the floor
Do not forget that the thickness of the layer depends on the height of the teeth on the combs only when the material is not too liquid. After dispersing the mass over the surface, it is recommended to go over the needle roller again. In addition to removing air bubbles, it will more accurately level the mass. Work with materials quickly enough; polymers have a short hardening time.
You can work without spiked shoes, but this is somewhat more difficult and requires increased care. Errors noticed late will not be corrected.
DIY self-leveling floor. The photo shows the pouring process in boots
Start working from the wall opposite to the exit, filling near the doorway is done last. If you see that after pouring the entire floor, the master put on spiked shoes and began to re-add the mixture to some areas, then do not use his services anymore. Such actions indicate an insufficient level of skill or little practical experience in performing this type of work.
How to fill a self-leveling floor
Step 8. Checking the quality of the fill and sanding
The next day after the mass has hardened, check the quality of the pouring with a large ruler. To better see the nervousness, the staff should be tilted to one side and looked into the light. Do the check in several places in the room. You should not hope that there will be a perfectly flat surface everywhere; a difference within one millimeter is acceptable. A mirror-smooth surface can only be achieved after grinding, and then only a professional builder should do it.
Sanding polymer floors
Step 9: Removing Masking Tape
If you used carpenter's tape, carefully cut it around the perimeter of the room, using only a special sharp knife. Keep in mind that skirting boards may not be installed on white poured glossy floors, and this requires maximum attention when performing work near the walls.
Self-leveling floors can only be made at temperatures exceeding +10°, otherwise the chemical hardening processes proceed at a slow pace, which can cause a decrease in the planned hardness and wear resistance of the coating. In addition, the mixture is more difficult to level, this process will take more time, and the solution cannot “wait” for long and begins to thicken. As a result, the quality deteriorates sharply.
Self-leveling self-leveling floor
It is important to know that on glossy white self-leveling floors all defects are visible, and they cannot be hidden in the future. You will have to accept the work in this condition or prepare the room for refilling. The result is an almost double increase in the cost of flooring work.
To ensure this, it is advisable to let the self-leveling floor sit for at least three days, only after this time can you walk on it without fear. The exact time depends on the physical characteristics of the mixture and the curing conditions.