Owning your own home, reliable and cozy, is a real dream. But most people start a grandiose construction project, which will take a lot of time and require large financial investments. So how can you become the owner of your own home or cottage? There is a way out - frame-panel houses, which you can easily build with your own hands, with minimal investment.
DIY frame-panel house
This type of house is very popular in the West; buildings are erected in a few weeks and are durable, reliable and visually attractive. In this article you can learn how to choose a place, start construction correctly and what materials are needed to build your own frame-panel house.
Frame and panel house
Choosing a site to build a house
Before construction work, it is necessary to choose the right location for the house. Since a large number of building elements made of wood are used, you should not place the building on too wet and swampy soil. Despite the strength of the structure, all parts and elements will be exposed to moisture over time, which will deteriorate their condition and appearance.
Choosing a site to build a house
It is forbidden for old and spreading trees to grow near the house. Their roots can damage a lightweight foundation, causing the structure to tilt or shrink over time.
It is advisable to build the house on a hill. Before starting work, it is necessary to check the soil for the presence of groundwater. They can cause destruction and deformation of a building due to the instability of the soil above them.
House project
Types of foundation for a frame-panel house
Since the structure of the building is light, there is no need to pour a large foundation. There are three types of supports you can use for your home.
- Screw piles.
- Pillars.
- Strip foundation, not deeply buried in the ground.
Screw piles
Stages of installation of screw piles
A screw support for a house is one of the simplest types of foundation. It is quite difficult to make screw posts with your own hands, so building elements are purchased in specialized stores. The finished piles look like hollow metal pipes of different diameters and lengths with a pointed screw at the end. You can install piles using special equipment or on your own. The number of piles depends on the size and area of the house.
Design features of foundation screw piles
Piles can be driven into any soil, and seasonality does not affect the work technology. A pile screwed in at an angle cannot be removed. It's better to leave it in the ground. A twisted pile will not perform its functions and after the foundation is erected it may skew to the side.
Screwing the pile
Columnar foundation
Columnar foundation
To create a columnar foundation, asbestos-cement pillars are purchased, which are dug a meter into the ground. Cement is poured into the middle of the posts, which strengthens their structure. The more columns, the more stable the foundation of the house is.
How to pour a columnar foundation
Strip foundation
Strip foundation - construction procedure
Creating this support requires the presence of cement and the manufacture of formwork to pour the structure. Since the house is lightweight, the foundation can be poured shallowly.
conclusions
- When building a brick house, the cost of laying the foundation accounts for about 40% of all costs. For a passenger panel house such a “fundamental foundation” is not needed, you will even save on cement.
- The lightness of the design eliminates the need to conduct additional surveys to study soil quality, groundwater levels, etc.
- Assembling a frame house with your own hands is much easier than building a brick building or log house. You will only need to install the supporting structures and mount the sheathing, and this can be done by a craftsman who is more or less capable of manual labor. Take a training course on the Internet, read a few sensible guides - and you will cope with the task.
- The construction of a frame house can be started even on a very small area.
- Panel houses do not shrink, unlike, for example, wooden houses, which must dry out before finishing work. Sometimes you have to wait about a year.
- Houses warm up quickly and maintain temperature for a long time, which allows you to save on heating costs.
- Wooden walls “breathe”, so a favorable microclimate is maintained inside the house. Natural air conditioning inside your home is much healthier than a constantly heated, cooled or humidified environment.
- Structures can be finished with any materials, both inside and outside.
- A lightweight house does not sag under its own weight, and the elements do not deform. You will be able to carry out redevelopment without fear of unbalancing the load on the foundation.
- Construction is relatively cheap. You don’t need to spend money on studying the soil; it’s quite possible to install structures “with just four hands”; the foundation is not deep and not complicated.
- If the need for repairs arises, you will carry it out without any problems. Replacing part of the frame is much easier than replacing a section of brickwork or frame.
Materials for building the box of a frame-panel house
- A beam having dimensions of at least 150 by 150 mm. With its help, horizontal lintels and vertical posts are erected in the building.
- Board or plywood for covering the frame.
- Insulation material.
- Roofing felt, with the help of which waterproofing is carried out between the embedded beam and the foundation.
- Polyurethane foam.
- Fastening materials: nails, anchors, screws.
Laying lags
Laying lags
First of all, the room is waterproofed. To do this, roofing material is laid in several layers on the foundation support pillars. The layers are held together with bitumen mastic. Then the lags are laid.
The beam, which will act as a log, is laid with its ends on the base of the foundation. The middle of the logs should lie on the fundamental supports located inside the perimeter of the building.
The surface of the timber on which the flooring will be laid in the room must be flat. To do this, it is recommended to first run the wood through a surface planer or level out uneven areas with a chainsaw.
To keep the structure level, you need to use a level. If the joists are not at the required level, you can raise them by laying down a solid board.
Flooring
Laying boards on joists
It is advisable to make the floor in the house two-level: rough and finishing. Until the walls are erected, a rough board is laid. Insulation and laying of the finished floor are carried out after the walls and roof are erected.
Floor installation
Wooden floor
For the rough version of the floor, a floorboard with a thickness of at least 35 cm is required. The board is laid on logs fixed to the foundation.
Construction of a house frame
House diagram
The connection of vertical and horizontal support beams in the structure of a house is carried out not only using fittings. When connecting, special grooves are cut out at the ends of the support beams, equal to half the thickness of the beam. These grooves are connected using wooden pins called dowels. A hole is drilled in the grooves, having a smaller diameter than the diameter of the dowel, so that the connection of the supporting elements occurs under tension.
Diagram of the walls of a frame house
The base of the frame must be made of 2 levels: beams along the perimeter of the foundation are stacked on top of each other. The top beam is used to attach the vertical posts of the frame. As many grooves are cut into it as there are racks in the structure of the house.
Bottom frame beam fastening diagram
Fastening the bottom frame beam
Fastening the bottom frame beam
Fastening the bottom frame beam
Bottom harness
Bottom harness
The racks are installed in grooves, fastened with dowels and additionally supported by special boards called jibs. The jibs will prevent the frame structure from skewing. After all the racks are installed, the upper joists are tied. The timbers laid on the racks must also have grooves cut into which the vertical racks are inserted. Before finally fixing the racks in the frame of the upper logs, it is advisable to make sure that the frame is built without distortions or defects.
Jib insert
The vertical posts are secured to the top frame of timber using long nails (hundreds of nails). The jibs are removed after the construction of the timber frame.
Upper harness
Then you need to attach horizontal jumpers made of timber between the vertical posts. Their connection is also carried out using cut grooves and long nails. The frame is thus further strengthened.
House frame
The sheathing of vertical posts can be done with plywood or boards. The material must be attached to the vertical and horizontal posts with a continuous shield, without gaps. Openings for windows and doors should remain free. They are formed during the process of covering the building.
Construction of a frame house
The process of building a frame house is slightly different from the construction of a frame-panel structure and is a more popular type due to its simplicity. Therefore, it is necessary to consider the stages of work during the construction of a frame house in more detail. Do-it-yourself frame house step-by-step instructions will help you perform all the steps correctly and build a durable structure.
Tools and materials
Any construction process is not possible without the appropriate equipment. Before starting work, you should acquire the following basic tools:
- electric saw and jigsaw;
- drill;
- a set of hammers of different sizes and types;
- screwdriver;
- level;
- roulette;
- nail puller;
- concrete mixer;
- shovel;
- fastening elements - self-tapping screws, nuts, bolts, nails, screws, anchors and others;
- chop cord and others.
An important point: when choosing a tool for construction, it is best to use a professional one, since a regular tool is weaker and cannot withstand heavy loads.
In addition, you will need the following materials:
- beam;
- frame upholstery material;
- thermal insulation materials;
- roofing material;
- roofing felt;
- depending on the type of foundation, you may need sand, cement and crushed stone for the solution;
- plywood or formwork board.
Foundation structure
When building a one-story frame house, the optimal solution is to build a columnar foundation. A do-it-yourself columnar foundation for a frame house can be made in a short time, primarily due to the fact that there is no need to carry out a large amount of earthwork. Earthworks are limited only to the preparation of wells of the required depth and diameter. In this case, it is necessary to take into account the depth of soil freezing.
First of all, you need to make markings for the location of future columns, taking into account that they should be under the intersection of load-bearing structures and located at a distance of two or three meters from each other. Wells for such a foundation must be drilled in such a way that at the end they are slightly widened. This will make the foundation stronger and more stable . Also, at the bottom of each well, you need to lay a cushion of gravel and sand, which will protect the foundation from erosion by groundwater. The pillow should be made in a layer of 10-20 centimeters and filled with cement mortar, to which you need to add a small amount of filler .
Due to the fact that, as a rule, the depth of a columnar foundation is two meters, in order to make the structure more rigid and increase the load-bearing capacity, before pouring concrete, it is necessary to make a frame from reinforcement. After the concrete has hardened at least 70 percent, and this will take at least a week, you need to start arranging a grillage from channels or a monolithic slab.
To make a concrete grillage you will need to install formwork, into which a concrete mixture is then poured. After it hardens, after two weeks, you can begin to build the walls of the structure.
Construction technology
In order to make the frame of a house, you can use not only wooden beams, but also a metal profile. However, there are some important points to consider. For example, it should be noted that the price of wooden material will be much less than that of metal, even if we take into account that processed material will be purchased with a moisture content of no more than 12 percent (if the humidity is higher, then due to shrinkage of the house, the entire structure may be warped).
Of course, metal is easier to work with, and it has a greater load-bearing capacity. However, there is also a significant problem, which is the sealing of connections where there is a possibility of cold bridges appearing, as a result of which the comfort of being in the house may decrease, and the cost of paying for utilities will also increase.
The issue of thermal insulation when constructing a frame house is one of the main ones. A good thermal insulation material for insulating such a structure is mineral wool, which has good performance properties, low thermal conductivity, durability and low cost. In addition, its advantage can be considered the presence of a large selection of material elements for insulating various structural parts of the house, taking into account their characteristics.
A good option for covering the frame is OSB board. Also, in some cases, chipboard or multilayer plywood is used for this purpose. But OSB still prevails, since it has higher performance indicators.
An important point when building a frame house is the preparation of the timber with which the walls will be erected. It must first be treated with special antiseptic solutions that will prevent the appearance of rot and mold on the material.
Stages of building a frame house
Before installing the strapping beam, you need to use a level to check how evenly and correctly the grillage has been made. If irregularities have been identified, they must be corrected. All subsequent work is performed in this way in the specified sequence:
- It is necessary to lay the first row of strapping. For it you need to select a beam whose cross-section will be larger than that of the rest of the material. This beam must be fastened to anchors and, using metal corners, is additionally fixed at the corner joints;
- The next step is to install the vertical parts of the frame and the drain. Such elements are attached to the first row of timber and connected to it. Installation begins in the corners and then along the entire perimeter. They need to be fixed using metal corners and bolts. An important point: during the installation of racks, you should periodically check the verticality, for which you need to use a plumb line. The aesthetics of the building and its reliability depend on this ;
- It is necessary to make vertical racks taking into account the openings of windows and doors. Therefore, in those places where it is planned to install windows and doors, you need to make cuts on the vertical posts and install the middle of the casing boxes in them. Then you will need to attach boxes to them;
- To make the structure stable, you need to install temporary struts diagonally. They are mounted at a certain angle to the vertical posts. Thanks to the structural struts until the entire frame is completed, the necessary strength and reliability are ensured;
- At this stage, it is necessary to install the top beam and attach it to the vertical posts. An important point: if the vertical posts and the bottom row were made level, then the top beam will also lie completely flat;
- The upper beam must be connected using metal corners and bolts. Nails can also be used for fastening, but in this case, they need to go into the beam no less than ten centimeters;
- After completing the previous stage, the house already takes on a certain appearance, so you can already remove the diagonal supports;
- Now you should install the slopes. These are the elements that are necessary to further strengthen the frame of the house. They need to be mounted on both sides of the vertical posts. The cuts are secured with long special nails;
- At this stage of the work it is necessary to install floor beams. They are attached using corners, resting them on the upper beam;
- The last stage of building a house is the construction and insulation of the roof.
Roofing device
The most common type of roof when building a frame house is a gable roof. A gable roof is distinguished by its ease of installation and structure. First of all, it is necessary to make a roof rafter system, while observing the pitch of the rafters. Then the sheathing is made from the appropriate timber. After this, you can begin covering the outside of the roof with roofing material. In this case, the sheathing and rafters must be installed at such a pitch as is necessary for installing the roofing.
You need to take care in advance about purchasing all the materials for the roofing cake. You will need thermal insulation materials, materials for waterproofing and vapor barriers.
After installing the sheathing, it is necessary to lay insulation in it. The most common material due to its high performance characteristics is mineral wool. It fits into the space of the sheathing. Then vapor barrier and waterproofing are performed, which are necessary to protect the thermal insulation material from moisture and condensation, as well as to protect the roof from the penetration of cold air.
Construction of the roof frame
Overlap
Overlapping scheme
Scheme of fastening the beam of the upper trim
Most often, a gable roof structure is used for a frame-panel house. It looks like a triangle, is easy to install, and perfectly protects the building from precipitation.
Construction of the roof frame
The roof installation process can be divided into three stages.
- Construction of a load-bearing structure made of timber.
- Installation of sheathing.
- Installation of roofing and drainage systems.
Roof scheme
To build a roof, the following material is required.
- Beams, minimum 15 by 15 cm.
- Board for sheathing.
- Fastening accessories.
- Roofing material.
It is not recommended to use heavy materials such as clay tiles to install the roof. They significantly make the structure of the house heavier, which is very dangerous for the frame and foundation.
Installation of the roof begins with the laying of load-bearing beams, which are laid on the wall structure every 40 - 50 cm. The edges of the beams should protrude from the outer walls by at least 40 cm. This is necessary to ensure that precipitation does not fall on the walls and under the roof. A board is laid on the beams, which will become the floor of the attic. The board is attached to the beams with nails or self-tapping screws.
Then the roof truss structure is installed. Triangular pediments are installed on both sides of the house. They form the height of the roof. The tops of the gables are connected by timber. Then the rafters are attached to this beam and to the supporting upper frame. They should fit snugly against the beams and not extend beyond the structure. A frame of boards is attached to the rafters, which makes the structure more reliable and stable.
Insulation is laid on the board sheathing, and vapor barrier material and waterproofing are placed on it. The roof is installed on top of the materials. After the roof is installed, it is necessary to install a drainage and storm sewer system around the perimeter of the house, which will remove moisture from the roof, from the walls and foundation of the building.
Vapor barrier
Video - How to properly install rafters in a gable roof
Types of frame house designs
Today, there are several types of frame house designs. They are based on completely different technologies. The most famous and common types are the following:
- frame-panel construction;
- frame-frame construction.
The frame-frame design is simpler to implement, so it is well suited for those who are planning to build a house with their own hands. When constructing a frame-panel house, you will need to use special equipment, without which it is impossible to carry out installation work.
Insulation of walls in a frame-panel house
Insulation of walls in a frame-panel house
After the roof of the building is ready, windows and doors are installed, it is necessary to insulate the frame of the house. Insulation can be carried out both inside the house and outside. It is optimal to use two types of insulation.
Materials for external insulation
- Expanded polystyrene in the form of plates.
- Mineral wool.
- Glass wool.
- Foam boards.
- Izolon and its analogues.
Izolon foil
Each type of insulation has certain properties. If you plan to live in the house all year round, then you can use several types of material at the same time. For example, mineral or glass wool are placed between the vertical beams of the frame. Plywood or boards are fastened on top, polystyrene foam boards are mounted on the boards and covered with isolon. Heat loss with such insulation of the building is minimal. Isolon also protects the wooden elements of the building from moisture penetration.
Insulation with mineral wool
Facade cladding is installed on top of the insulation. This could be siding, imitation rounded timber or other material that will decorate the facade of the house.
Materials for internal insulation of a house
Before insulating the walls inside the house, it is necessary to coat all wooden parts with special compounds that protect against rot, mold, and pests. Then you need to select the material with which the walls in the room will be lined.
Materials
- Glass wool in special packaging for internal insulation.
- Alabaster blocks.
- Fiberboards.
Fiberboard (Fibreboard)
The latter type of insulation is the most convenient for installation; also, its surface does not require preliminary preparation for gluing wallpaper or applying another coating. This material can be used not only for wall cladding, but also for ceilings.
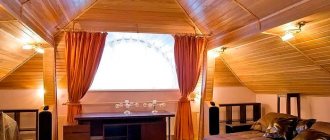
Internal lining
The last stage of building a frame-panel house is the installation of internal electrical, plumbing and gas communications.
Wiring
You can make frame panel houses with your own hands
Step-by-step instructions for insulating a frame house with your own hands
The main part of the construction activities can be considered completed if you managed to put a frame house under the roof with your own hands. Step-by-step instructions for thermal insulation take up less space. It is proposed to use mineral wool as insulation, as it has suitable characteristics.
- First, measure the distance between two posts, floor joists or rafters, depending on the situation.
- Thermal insulation material is cut to size, but 1-2 cm is added to the result obtained for a tight fit to the beams.
- The prepared pieces are inserted between the structural elements without forming gaps.
The thermal insulation must be covered with a vapor barrier membrane, after which finishing is carried out.
Thermal insulation of a building with mineral wool is demonstrated