Installing an arch in an apartment
One of the best elements that decorate a room is an arch.
It can be built both indoors and at the entrance to the house. At first, the arched structure was made of plaster. Then from wood, but at the moment the popular material is plasterboard. Finished plasterboard arch
Today there are arches of the following types:
- arch portal;
- in Art Nouveau style;
- classic design;
- semi-arch type.
Arch portal
This type of design appeared quite recently, but is already very popular. The structure looks like an ordinary rectangular doorway, only without a door. The arch is very practical and, with proper finishing, can become a beautiful element of the interior.
Arch portal
Small lanterns can be attached inside the arch. They will visually increase the space. It is better to make the design in light colors, then the opening will visually appear larger.
Arch modern
The arch is popular because it has an elegant and open appearance. The modern arch takes up little space. And if you install it opposite the window, the room seems more spacious.
Arch modern
This type of arch can be easily created from plasterboard or wood. It is used at the entrance to a bedroom or office, as the design gives solidity and richness to the room.
Classical
The classic variation of the arch is suitable for almost any room. Having chosen this type of design, there is no doubt that the decision was correct. The classic arch is suitable for both the entrance to the bedroom and the kitchen.
Classic arch
Type of semi-arch
The structure looks like a classic arch cut lengthwise. It gives the house an unusual look. Relief walls and multi-level ceilings are perfect to complement the arch. You can make a semi-arch from wood or plasterboard. It all depends on personal wishes.
Type of semi-arch
For the production of wooden arches, hard types of wood are used - pine, oak, ash, mahogany. Pine acts as the main material, as it has a beautiful pattern and color. The heartwood of the pine starts out pinkish in color and becomes darker over time. The wood not only has good density, but also high resistance to decay. In addition, pine is much cheaper than oak or ash.
Pine arch
Oak is chosen if the arch needs to be made to match the color of the room design. This material is durable, but costs a lot of money.
Oak arch
A mahogany arch can be found in rich houses made in a classical style. The material is also popular in the offices of large companies.
Before making a wooden arch, you need to decide on the types of construction. And then make a drawing.
- Oval or rounded arches are made by assembling parts. To do this, you need to make rounded wooden blanks. Which are then connected to each other. Metal staples or glue can be used as a fixation. This type of arch will have to be thoroughly cleaned and sanded so that joints and burrs are not visible.
- To make a rectangular or square arch you do not need any special skills. They are made like a regular doorway, which can be decorated with unusual carvings or equipped with lighting fixtures. Wooden arch installation diagram
- Arches can combine several types at once, for example, one side will have a right angle, and the other a rounded shape.
Arches made of plasterboard are very popular. The thing is that with the help of such inexpensive material you can create almost any shape. The main thing is to draw up the correct drawing and you can start creating.
Types of arches
This type of design is used to decorate interior doors.
A plasterboard arch can be either straight or rounded. Design depends only on imagination. But there are certain types of arched buildings.
Drywall arch
The center of the arch should be exactly in the middle of the doorway. The passage can be round, rectangular or square. You can also find triangular-shaped arches. They are all different, but they have one thing in common - the dimensions relative to the width of the doorway.
This type of structure is also called semi-arches. A doorway in this design can be made in different shapes and styles. You can dream up your imagination and come up with your own exclusive type of arch.
To decorate a plasterboard arch, you can use spotlights, candlesticks, and aromatic lamps. Flowers in pots or souvenirs look very elegant in the interior, as an addition.
MDF (finely dispersed fraction) is a board material that is made from dry wood shavings using the pressing method.
MDF arch
This material has many advantages:
- attractive appearance;
- large selection of configurations, textures and colors;
- low price;
- quick and easy installation;
- environmental friendliness.
This material is popular not only because of its appearance and properties, but also for the variety of finishes.
- An MDF arch can be laminated with PVC film, which has many textures and colors. This decoration option is inexpensive.
- MDF reacts well to high-quality varnishes. An arch made of wood, coated with a varnishing substance of the required shade, will look bright.
- The arched structure can be finished with veneer and then painted.
The product will look as if it is made of expensive wood, and only an experienced craftsman will be able to tell the difference. Veneered arches are suitable for a classic interior. Veneered arch
Before you start building an arch, you need to know what types exist. The entire structure is supported by a lateral bracing system and does not require additional support.
Wedge-shaped
In this case, the bricks are laid in a wedge shape with each other.
Full
This type of arch occurs in the form of a semicircle. In this case, the height should be the same as half of the doorway.
Onion
In this design, brickwork is made from whole brick along a truncated arc.
Brick arch
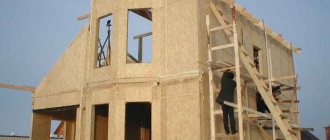
If you already have a ready-made arch frame. Its installation will not be difficult.
Sequence of work
- First of all, it is necessary to dismantle the old door frame and slightly enlarge the opening, since the arch visually slightly reduces the passage.
Removing the old door - The initial height must be at least two meters, otherwise the passage will be too low.
- Now we take the finished formwork parts and fasten them in parallel using self-tapping screws, on one side and the other.
- Now you need to take a metal profile and make a curved frame out of it.
This part closes the lower part of the arch. Profile installation - Bend a sheet of drywall that is the width of the doorway and lightly moisten it with a damp cloth. This is done so that it can be bent and given the required shape. Fix the finished frame along the very edge using self-tapping screws.
- Now you should take another strip of drywall, which is the same as the thickness of the wall, and do the same manipulations with it. The sheet should be tilted towards the wall so that it bends a little.
- Fasten all the finished parts together and give the arch the correct shape.
Fastening curved drywall to a profile structure - Finally, hide all the irregularities and attach a special corner for the arch.
The instructions describe the manufacture and installation of an arch in the form of a brace. It looks unusual and very stylish. But you can always come up with your own body shape.
For work you will need the following tools and materials:
- drywall;
- metallic profile;
- flexible arched corner;
- metal screws 15 mm; dowels – 20 pcs;
- paint and putty;
- metal scissors;
- perforator;
- brush;
- medium grit sandpaper;
We invite you to familiarize yourself with: Aubrieta: planting and care, types and varieties, photos.
Sequence of work:
- First of all, you need to draw a sketch of the future arch on paper and cut out two necessary elements from drywall.
- A metal profile must be fixed along the entire perimeter of the cutout.
- Cut the profile on both sides by 6 cm and bend it into an arch shape. Carry out similar actions with the second piece of drywall.
- Attach the blanks with dowels to the wall and ceiling using a hammer drill.
Profile fixed in drywall - Now all that remains is to close the lower part of the arch. A layer of drywall should be cut along the width of the opening and cuts should be made along the entire perimeter, every 6 cm. Place the structure against the opening and fix it.
- The final stage is the installation of arched corners.
They need to be cut to the required sizes and attached along the entire arch. Arched decorative corners
It is very difficult to answer such a question, since everything depends not only on the material, but also on the type of complexity of the work. You can find out the approximate cost before ordering the installation of the arch, and the craftsmen will tell you the exact price. After completed work.
We can say that a simple plasterboard arch will cost approximately 2 thousand rubles. If we talk about wooden or brick structures, their price is much higher - from 10 to 50 thousand rubles, and this is not the limit.
Do-it-yourself interior arches: drawings, dimensions, designs of arches made of wood, plasterboard, MDF and brick, how to install ready-made formwork, production and installation of a non-standard arched structure in an apartment, how much it costs to lay arched openings, video
In order to install this structure in a room, you need to follow some rules:
- The place where the structure will stand must be prepared very well. Be sure to remove all excess and putty the surface.
- Prepare in advance all the materials necessary for work.
- Eliminate all possible problems that could ruin your design.
So, we have the answer to the question of how to make an arch in a doorway. If you did everything correctly, then you have a structure that can play the role of a door arch.
If you decide to make a door arch with your own hands, know that the process is very complicated and requires special skills in working with wood.
You can install an incredibly beautiful arch in your home without the help of a construction team or engineering skills. It is enough to choose the arched design you like and the material with the tool to make it. If you follow the instructions below, you can avoid the most common mistakes that beginners make.
The arch structures themselves in the construction industry usually play the role of supporting elements in the construction of ceilings and walls. In our example, the doorways are not load-bearing structures. For the first case, materials are taken taking into account the serious load on the walls; decorative arched structures must only withstand their own weight.
How to make an arch in a doorway: the material of the wall dictates the technology
Each master builder approaches the work from his own point of view, and it is on this basis that he decides which technology for installing an arch in a doorway will be most optimal in a given situation. Yes, yes, you heard right, and even such a simple product can be made in different ways - at least you can count a couple of radically different technologies, which, in turn, can have different variations. It is this point that you need to familiarize yourself with first, since the choice of technology entirely depends on the material from which the partition is made.
- Concrete, gypsum and other monoliths. If the partitions in your home are made not of brick, but of some semblance of a monolith, then in some way we can say that you are lucky - arches in such openings are made quite simply, despite the fact that this process is quite dusty. In simple terms, it is simply cut out above the doorway, after which it is refined using putty, wood, MDF, and so on. Some materials, such as concrete, are difficult to cut (with a grinder and a diamond blade), and some, such as plaster, are cut with virtually no problems - even a hand saw can be used to cut such soft materials, although it will be faster and easier to cut with an electric jigsaw. easier. The most important thing here is to clearly mark the arch, and everything else, as they say, is a matter of technique. By the way, such numbers do not work with brick partitions, since after removing the lintel from above the opening, the brick begins to slide down, and cracks appear above the opening. There is another technology for such interior partitions.
Decorating doorways with an arch photo - Drywall arch in the doorway. This is exactly the case when it comes to brick walls - everything that is above the doorway must be completely removed. In construction jargon, dismantle it, thereby freeing up space for installing a plasterboard arch. You should not be afraid of this process, because in fact, if you, of course, deign to read the article to the end, it turns out that making such an arch is not so difficult.
It is about how to make a doorway into an arch, using drywall for this purpose, that the conversation will go on.
DIY door arch: detailed instructions
You can quickly make an elegant arch using plastic and laminated elements; step-by-step instructions on how to make an arch are presented below. They are cut to the required height and then attached according to the instructions in the right places. These are standard options that are made according to a single template; they do not surprise the buyer in any way, and the price is not always tempting. Yes, and choosing a model of the required size for your opening is sometimes very problematic.
To make the structural elements of the arch, you will need the following materials: fiberboard, plasterboard and plywood. How to make an arch with your own hands? If you watched how professional builders work with plasterboard boards, you probably guessed that they are best chosen for sheathing.
The arch frame is made of a bar with a cross-section of 20 x 20 mm (30 x 30 mm) or a metal profile.
An arch made of red brick, concrete or aerated concrete blocks will be bright and provocative. Red brick can be used without finishing materials. Such an arch will emphasize the solidity and material security of its owner.
Metal structures with complex shapes should be left to professional designers and engineers. It is difficult and troublesome to work with metal; these projects are very complex in their implementation and engineering documentation is prepared in advance for them.
Profiles and drywall are the simplest and most affordable things that allow you to make structures of any shape and style.
The arch fits into the interior primarily with its shape. Decor is a secondary factor here, i.e. it (and its costs) can be minimized. But in order to make an arch that is harmonious in the interior, you need to know how it is constructed and what its aesthetic effect is based on. To get started, you don’t need any special subtleties.
Arch elements
The vault of an arch is formed by arcs of curves, also called the generatrices of the arch vault or simply the generatrices of the arch. The arch can be smoothly hemmed, i.e. with a continuous coating, or composed of parts with gaps/seams between them. A smoothly hemmed vault is not necessarily completely smooth; relief decoration is possible on it. The marginal corners of the vault are often decorated with platbands.
The highest point of a vault is its top. A power and/or decorative element – the arch lock – can be located here. From it, its wings go to the sides and down, the ends of which - the heels - can be completed with decorative details or rest on load-bearing thrust bearings - the legs. The distance between the heels of the arch is its span, and the vertical height of the arc from the middle of the span to the top is the arch of the arch.
The vault of the arch can be hanging, as if extending into the walls, or resting on pilasters or blades. A pilaster is a half-column, or a 3/4 column (if the pilaster is corner), with a base and a capital. A scapula is a similar protrusion of a wall into a passage, but without a base and capital.
The design and decoration below the heels of the arch (pilasters, blades) make up the portal of the arch. As a rule, the artistic design of the vault and the portal of the arch is uniform, i.e. performed in the same style. There are also portal arches with a straight horizontal arch. But these are actual openings. One of the main topics of this article - how to create a curved vault of an arch with your own hands - is not relevant in this case, so that’s enough about portal arches.
The open opening in the wall is a very old architectural element. Designers assure that the arch zones the rooms in the best way, while visually adding volume to each room. Making the perfect door arch with your own hands is quite a feasible task. And now we will tell you how to make such an opening in accordance with the interior style and your acceptable costs. After all, it depends on the budget how high-quality and aesthetic material you can afford.
We invite you to familiarize yourself with: Children's tea with fennel: for newborns, herbal Babushkino Lukoshko and HiPP for children
A modern interior arch is made of wood, boards, plywood, brick, plasterboard, plastic, MDF or other materials. According to the types of openings, a U-shaped portal or a vaulted arch are distinguished. Arch vaults can be varied in shape:
- classical (Romanesque) in the form of a half circle;
- modern - a “flattened” circle with small corner radii;
- lancet - a pair of circles are connected, stretching upward;
- romance - a wide opening in which two arcs round the corners and are connected by a straight line in the center;
- trapezoid, prism - straight lines are connected using obtuse angles;
- ellipse - an opening, the upper part of which repeats half of the oval along the long axis;
- semi-arch - an asymmetrical design in which one corner is left straight, and the other is rounded or trimmed with unusual shapes.
In this section we describe how to make a portal-type arch based on a doorway step by step. This is the simplest type of modification of an interior transition with your own hands. In short, you will need to dismantle the door and finish the opening with wood, plastic or plasterboard. And now the whole process step by step:
- complete dismantling of the door is completed by removing the trim and door hinges;
- decide on the width of the future arch; it may be necessary to remove the old door frame;
- to expand the opening, you need to remove the door frame and level the opening on all sides with cement mortar;
- in order to narrow the arch, it is necessary to install extensions - nail long strips of chipboard along the inside of the opening with dowels to the wall or nails to a wooden door frame (if it remains); the additional strip should be a couple of centimeters shorter than the height of the opening, and the width should be a centimeter less than the thickness of the wall;
- The space from the additional strip to the wall is covered with mounting foam, and excess foam is removed.
The finishing stage depends on your aesthetic preferences and repair skills. You can use wallpaper, decorative plaster, interior stone, or a set of solid wood.
And even a more complex arch with vaults can be made a reality during home renovations. An important point is that simply placing a vault on the top of the doorway will not work for aesthetic reasons.
You will have to increase the height of the opening so that the passage between the rooms does not resemble a pirate grotto pressing on all sides. Solve the issue of expanding the wall opening or demolish the wall and install a new plasterboard structure.
Please note that it is prohibited to violate the integrity or change the load-bearing walls in any way.
And now - step-by-step instructions on how to make a vaulted arch in an interior partition:
- Option with widening of the opening. We mark the boundaries of the future opening on the existing one. To the desired width of the arch, add 4 cm in width and the same in height. Mark with serifs on the wall. Next, every 10 cm you need to punch through holes in the wall with a hammer drill and widen the opening with a circular saw. Then we will organize a base for the side panels made of plasterboard or chipboard with installation on a U-profile. You will see how the vault is made in a separate section.
- Option with an interior arch made of plasterboard on a new wall. Before installing a new plasterboard wall, apply vertical markings using a plumb line on the load-bearing wall to which the structure will be adjacent. Take a piece of profile and transfer the markings to the opposite wall. Install and secure the U-shaped CD profile with dowels according to the markings. From the sidewalls on both sides, place profile sections on the floor equal to the width of the plasterboard wall to the arched opening, and screw these elements. The ceiling profile will take up the entire width of the wall. Next, we draw two slats from the ceiling profile and connect them to the ends of the segments on the floor to form the base of the side arched panels. We install crossbars on the frame with a pitch of 20 cm, which contributes to the stable position of the gypsum boards (plasterboard sheets) that we will lay on this frame. And at the last stage we will make a vault for the arch.
Useful: Materials for a frame house
Once you have decided on the shape of the vault, it will become clear which recess for the sides of the vault to cut out of plasterboard. A pencil and a rope for rounded outlines will help in this matter. And if you plan to decorate the opening with a prismatic vault, the arch from the profile will consist of straight segments and will also be covered with straight strips of plasterboard.
The lower inner part of the vault is sheathed with a curved element made of special ceiling plasterboard of smaller thickness. Here are the basic rules for bending gypsum boards using dry and wet methods.
| How to dry bend drywall | How to bend a plasterboard sheet using a wet method |
| The method is suitable for bends with small curvature and arches of small depth | The method is applicable for creating bends with small radii |
| The sheet is cut across the bend in parallel lines every centimeter, then the sheet is bent by carefully breaking along the cuts. | On one side, the gypsum board is perforated with a needle roller, moistened with water until it can be absorbed: wait for the appearance of a glossy “mirror” surface. The transverse pitch of the frame profiles for covering the vault is reduced to 10 cm so that the material does not warp when it dries. |
| The installation of the broken sheet is done very carefully, taking into account the connection of the segments with only one cardboard layer. | When forming a bend, take into account the depth of the arch:
|
A brick arch is popular in country-style country interiors. It is most convenient to work with a special wedge brick. The strength of the vaulted structure is ensured by lateral thrust. If the bricks are laid out with a wedge and secured with a “lock” (a brick for fixation, which is tightly driven into the masonry), you will get a wedge arch, when laid along a truncated arc, a bow arch, and when a semicircle half the width of the opening is formed in the upper part, then experts say about organizing a complete arc.
The technology for constructing a brick arch is divided into stages:
- the master designs and develops a vault template from chipboard sheets and beams;
- installs the template using wooden supports and spacers;
- before laying out, puts fines to clamp the arch;
- the process of laying bricks from bottom to top in parallel on both sides is underway;
- then the structure is crimped and fixed;
- the template itself is disassembled and removed, the surface is cleaned;
- The seams are removed, as is excess mortar, and at the end the masonry is finished.
Advantages of arches in the living room. Do they exist?
When creating a modern living room interior, the arched system is most often used to decorate the doorway. Why is it so good and how does it fit perfectly into stylish designs?
The door of a standard room sometimes reduces space because doors open and close, and this requires free space. Thanks to the arch of such nuances, there will be no problem that it will no longer be possible to isolate the rooms from each other.
An arch in the living room interior of a wide shape is a win-win option if your room is large. And for designers this is generally an interesting detail, because it not only visually limits the rooms, but also completely saves space.
We also recommend:
Living room design - 200 photos of the best interiors of 2020
- Construction law in Serbia
Stripes on tulle - creating an interesting interior
And it doesn’t matter that many consider the arch to be an outdated element - that’s their right. In fact, thanks to the number of shapes, you can surprise your guests so much that spending time in your living room will become a special joy for them.
The design of arches in the living room is quite varied. Sometimes this is decor with carved details or patterns - and all these elements make the arch look a little more elegant.
Plywood arch
A plywood arch is another, but less popular variation. This option is used when an arch is really needed, but it is not possible to use wood.
Before installing this structure, you need to carry out some preparatory work:
We invite you to read: How to build a polycarbonate greenhouse with your own hands - step-by-step instructions with photos, videos and drawings
- Create a detailed project. To do this, carefully take all possible measurements.
- Prepare the installation site
- Prepare all the supplies you will need during the work process.
We will not consider this option in detail, since it is used quite rarely.
Drywall arch
Making an arch from plasterboard is possible in 2 ways. The first, as the fastest, but requiring skill, is preferred by professionals: time is money. The second one is more suitable for inexperienced amateurs. However, both of these technologies have something in common, which we will focus on first.
Any technological process for constructing a plasterboard arch necessarily includes bending (bending) gypsum boards for covering the vault. It is produced using dry or wet methods, see fig. Temporary supporting and fixing parts can be any sufficiently rigid and even long-length ones, and the arches of narrow arches bend without them, see below. There we will see which method is preferable in which case.
Methods of bending (bending) drywall
Dry, not very wide plasterboard blanks can be bent without a template, along the contour outlined on the underlying surface. The cuts (slots) are made with a mounting knife to 2/3 of the sheet thickness. They are puttied after installing the part in place. Dry bending of gypsum boards is more labor-intensive and requires skill so that the workpiece does not break, but it is done faster.
Wet (wet) bending requires a drywall needle roller and a bending template. For arches with a span of up to 2 m and a depth of up to 1.5 m, a roller with low, sparse teeth is needed (see figure on the right). Wet bending of gypsum boards does not require special skills, but technological breaks are required. It is produced like this:
- Needle roller for drywall
Prepare a support from a pair of circle templates, installed vertically and fastened with something;
- The cut flat piece is placed on a bed of polyethylene film;
- Roll with a needle roller on one side;
- Dip a thick soft brush (plaster brush, for example) or a clean foam rubber paint roller into water and moisten the gypsum board so that the spaces between the holes from the roller needles are almost dry. There is no need to over-moisten the plasterboard; the plasterboard may become limp and float;
- The wetted workpiece is kept for 5-10 minutes;
- The workpiece is laid with the unrolled side down on the circles; its ends will begin to sag under its own weight;
- When the rate of sagging is not noticeable to the eye, the ends of the workpiece are loaded with anything (on the left in the figure below) or pressed with hands to the circles. Not too much so as not to break the barely damp sheet!
- After 15-40 minutes, when the moisture on the upper side is no longer felt to the touch (in the center in the figure), the workpiece is ready for installation. There is no need to over-dry, as it may break during installation.
Bending drywall using improvised means
In this way, it is possible to bend the lining of the arches to the depth of the entire width of the sheet, on the right in Fig.
Method one
The professional technology of plasterboard arches saves not only time: the transom and/or portal can be sheathed with pieces of plasterboard, even down to scraps. The consumption of metal profiles is higher than for the “amateur” version, but since the overall waste of materials is small, the cost of the finished arch is much less. The final strength of the structure is significantly higher. The step-by-step instructions for making a “professional” arch are generally as follows:
- The transom frame without arches is assembled in the usual way for gypsum plasterboards, from thin-walled galvanized C- and U-profiles on self-tapping screws;
- If there is a door in the arch, then its frame is assembled separately from a special reinforced door profile and mounted in the door frame. It is impossible to assemble a door frame directly from a reinforced profile and fasten it tightly in the transom opening; the frame will soon begin to buckle and the casing will crack;
- A special profile for curved parts, pre-cut during manufacturing, is used for the arcs;
- They bend arcs from it according to the template and place them accordingly. transom opening, pos. 1 and 2 in Fig. below;
- Each arch is attached first at the top, and then, aligned according to a template or, with sufficient experience, by eye, attached to the main frame at the heels;
- A “crooked” special profile plays stronger than a solid one, so the wings of the arches are reinforced with jumpers from a regular profile, at least 1 in the middle of each wing, pos. 3;
- Prepare a gypsum board strip for covering the vault and bend it dry first, pos. 4, without puttying the slots. Spline pitch approx. 15% of the radius of curvature of the arch in a given location. For semicircular arches - approx. 10% of the span width; for segments with a depth of up to 60% - 15-20% of its width. There is no need for special precision here; the purpose of preliminary bending is to roughly mold the gypsum board so that it does not break during installation;
- They install the vault sheathing as usual with dry-bent gypsum board, a pair of screws on each edge of each lamella (the section of the sheet between adjacent slots);
- The facades of the portal and transom are covered, except for the faces of the pilasters facing inward;
- The internal edges of the pilasters are measured in place, pieces are cut out for their cladding and mounted;
- The grooves between the sheathing sheets, fastener heads, scratches, small gouges, etc. are puttied. Preferably acrylic putty, it adheres well to any base and transfers very little water to the drywall;
- Cover the arch with plaster mesh. The best adhesive for a gypsum board base is silicone. Over time, the mounting nitro adhesive may fall off along with a piece of gypsum board;
- They plaster, then finish and apply decor.
Method two
Preparing the metal profile for the arches of the arch
For the facades of the “for dummies” arch, you will need 2 solid pieces of gypsum board with the width of the passage and the height of the arch with the top to the ceiling. With technological allowances, of course, so it will be waste approx. 50% material. But plasterboard is inexpensive, and for amateur one-time work such an overexpenditure is justified. You will also need a strip of gypsum board that is as long as the generatrix and as wide as the depth of the arch. If the arch has a portal, then so does the material for its cladding. The “amateur” arch is developed step by step as follows, see also Fig. below:
- On the facade sheets, using a rack compass or using a template, a generatrix is drawn, pos. 1 per rice;
- Facade gypsum boards are carefully cut along the generatrix lines using a jigsaw. Handle the scraps carefully: they will be used for bending the vault skin. It’s better to fasten them together immediately (see above) and place the resulting bending template somewhere to the side;
- An “empty” one is mounted in the opening, i.e. without power jumpers, frame frame made of plasterboard profiles , pos. 2;
- The facades of the arch are sheathed with plasterboard, pos.
3; Making a plasterboard arch in a simplified way - The length of the generatrix is measured, in this case using a tape measure in circles, and cut accordingly. pieces of profile with reserve for arches;
- The arc profile is cut for bending, you can simply use metal scissors, top pos. on in fig. on the right, they measure out the circles and bend them, see below;
- Install the arches from the profile into the arch using self-tapping screws and fasten them with jumpers in increments of 15-20 cm, because facades of this design play quite a lot, pos. 4 in Fig.;
- A gypsum board strip is bent to cover the vault using the wet method. If you have already bent drywall (say, made a suspended ceiling from it), and are working with a skilled assistant, then you can moisten the workpiece more, based on experience, hold it until it sag on a stool instead of a bending template (item 5), and immediately place it on place, pos. 6;
- After at least 2 days, so that the plasterboard is completely dry - putty, plaster, finishing and decor as in paragraphs. 9-13 for prev. way.
The same can be said about a plasterboard arch. These designs are very unpopular, so we will not consider them in detail and focus special attention on them.
Tags: arch, hand, yours, make
About the author: admin4ik
« Previous entry
Materials for an arched structure in the living room
Arches can be made from different materials. For a beautiful appearance, you need to consider the shape and application.
If your future system is made of wood, then it doesn’t matter what kind of wood it is, the main thing is to process it correctly. Plasterboard panels are most in demand for making arches.
The material is cheap and ideal for the design; it is also easy to install, which allows you to create systems of different shapes.
Arched doors to the living room made of plastic are often used, since the panels bend and are easy to cut; during installation, it is enough to connect them together. It’s like a construction set from which arch systems of different shapes are made.
Brick structures have long been a thing of the past, because today there are many other materials, and they were able to replace a rather heavy system.
You may ask, how to make an arch in the living room? This is a personal question; if a person has previously trained, then there will be no problems, but a novice specialist would be better off turning to qualified builders for help.