To organize a child’s leisure time, parents have to rack their brains in search of a suitable solution. In fact, the answer is quite simple: in order for a child to spend the day in active games, it is necessary to organize his personal space. The way out of this situation would be a do-it-yourself children's house. In any yard you can allocate a small area for the construction of a playhouse. All that remains is to select a diagram, materials, tools and get to work. You can find detailed instructions in our article.
Common types
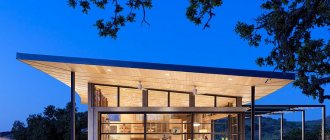
Frame house covered with a house block
In order to make a children's house, you can use a variety of materials that were left over after construction or renovation; if there are none, purchase them at a hardware store. Undoubtedly, the most popular lumber is:
- bars;
- plywood;
- boards.
Let's look at common options.
Plywood
From plywood
The construction of a playhouse from plywood begins with design, that is, they create a drawing or layout, from which it will then be possible to calculate the required amount of material and make blanks. At this stage, the places allocated for the door and windows are marked. To build the simplest summer hut, a couple of sheets of the selected material will be enough, but in general, the consumption will completely depend on the dimensions of the structure. Consider a few more important points:
- windows are located from the floor at a height of 60 cm;
- the doorway should be 15–20 cm higher than the child’s height;
- the dimensions of the future house should allow the child to feel comfortable;
- the roof is arranged at an angle of 45°;
- sheets of plywood can be cut with a regular saw and fastened with nails;
- all corners must be sanded with sandpaper so that the child does not get injured during the game;
- When choosing paints and varnishes, it is best to give preference to safe and non-toxic types.
Can be decorated with drawings
Note!
The location of the house should be advantageous for parents: it should be as visible as possible from the windows or from the porch of the house in order to constantly monitor the child.
Wooden boards
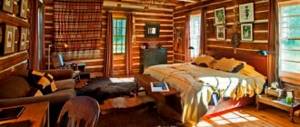
Made of wood
If you want to equip a durable and reliable house at your dacha in which your child can play all year round, then you should choose wooden boards. This material has a clear advantage - wood, when properly processed, is practically not subject to wear. The following points are taken into account:
- for the frame choose beams with a cross section of 5 cm;
- to enhance strength, the frame is covered with planks 2 cm thick;
- the finished house is covered with deck varnish;
- They approach the coloring stage creatively, choosing bright colors and drawing the child’s favorite cartoon characters.
Note!
As with any building, it is necessary to provide waterproofing for the roof in a wooden playhouse.
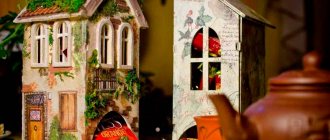
children's house made of cardboard - we make it ourselves
This is the cheapest, but not at all useless type of children's houses. Availability of material plus your creativity can make your child happy for a long time.
I'm not kidding. There are even industrially produced cardboard children's houses. But you can certainly involve a child of any age, except infant, in creating something like this with your own hands.
First of all, cut it out. It can be even elementary, in the form of a sweep.
To do this, you will need to glue together several pieces of cardboard of appropriate sizes. And windows and doors are not difficult to cut. The easiest way to connect elements together is with tape on both sides, but you can also glue them with paper tapes.
An even simpler design of a children's cardboard house is shown in the photo.
Such a house is easy to store, because when assembled it takes up practically no space. The favorite pastime of all children is the process of decorating such a house by painting.
Moreover, this process can be almost continuous. What’s easier is to cover it with a new layer of clean paper - this will only make it stronger.
We recommend other articles on the topic
How to make a laser level yourself - review of designs, assembly of a simple version
Making a pellet granulator with your own hands, main components
DIY cutting board - examples, step-by-step instructions
Do-it-yourself smoke generator for cold smoking: purpose, operating principle, manufacturing
Hut on legs
Hut
To make not a simple house, but a fancy place for playing games, it is best to choose a fairy-tale hut on legs. The important stage is the initial one. Having a drawing that is correct and calculated to the smallest detail, you can count on getting a practical and good-quality house. When choosing a material to create the most interesting element - legs, you can focus on:
- wooden blocks;
- metal pipes;
- stones.
A variety of combinations are suitable for decoration. In addition, you need to pay attention to the following points:
- The height of the legs should not exceed 70 cm.
- The base of the legs is poured with concrete for stability.
- For convenience and comfort, there should be a low staircase or open steps.
- The entire house is assembled from wooden boards: first, the frame is knocked down, which is then sheathed with boards.
Note!
Since the house is a place for active games, the legs should not be high. The structure must be safe and stable.
Step-by-step construction instructions
Let's build a house out of wood
To make a simple children's house made of wood, you will need to allocate a little of your time, collect the material with the tools and get to work.
Materials
Any construction must begin with planning. Only a clear diagram will allow you to calculate the required amount of material and make a purchase. For the described playhouse you will need the following materials:
- Board panels (180×240 cm) – 6 pcs.
- Treated timber (with a cross-section of 10×10 cm, length 180 cm) – 4 pcs.
- Treated timber (with a section of 5×10 cm, length 240 cm) – 6 pcs.
- Treated timber (section 5×7.5 cm, length 240 cm) – 2 pcs.
- Ruberoid – 1 roll.
- Screws (30 mm) – 2 packs. 500 g each
- Screws (75 mm) – 1 pack.
- Tar paper nails.
- Wood stain – 10 l.
- Thin planks.
The racks are formed from timber with a cross-section of 5×7.5 cm and a length of 240 cm. It is from these that the base for the board panels is made.
Assembly diagram of plank panels
Note!
When choosing a stain, you should choose two colors: 7 l - “light cedar” and 3 l - dark green.
Tools
Construction tools you will need:
- shovel;
- tamping;
- level;
- hammer;
- drill-driver;
- Circular Saw;
- beat;
- tassels;
- stationery knife.
You will need construction tools
Note!
It is necessary to make cuts with a circular saw from the inside of the panels so that chips do not form on the outside.
DIY house for children. Master Class
I purchased:
- Five plywood sheets 8 millimeters thick and measuring 1.5 x 1.5 meters;
- LED lights;
- varnish paint;
- self-tapping screws;
- bolts;
- nuts;
- metal corners;
- pens.
From the very beginning I decided to make the house collapsible, since I rent an apartment in which I live with my family. Due to the manufacture of such a house structure, the work process promised to be quite long. All corners and joints had to be drilled and tightened using bolts and nuts. I carried out the work in the evening after arriving from my main job.
The progress of the work was as follows:
On the first evening of working on the house, I took dimensions, measured them, and drew them on plywood sheets.
I cut out the door and window opening.
After some thought, I decided to make the shutters on the window openable.
Then I thoroughly sanded everything with sandpaper. The box of the future house is ready, the door and window open and close easily.
After some thought, the table inside the house was made reclining for easy use.
Using three LED lamps, which were purchased in advance, I made lighting inside. To install them, I drilled holes. Of course, three lamps is too much, since the light is brighter than in the room.
Therefore, I advise everyone to install one lamp.
After this, you can begin painting the house. I chose a more delicate shade of paint and got to work.
Made a locker
.
The house is ready, you can give it to your daughter.
In addition, I additionally provided LED lighting for the entire structure.
After that, I gave the house to my daughter for her birthday, she is now truly happy.
I also wanted to lay flexible tiles on the roof, but the structure turned out to be very heavy, so I didn’t do it. In the end, the house turned out to be quite nice, although I am not a professional. Another big advantage is that the structure can be easily disassembled if necessary, transported to a new location and assembled. It took me about one month to work on this house, and it cost me about 25 thousand rubles.
Completing of the work
Before you make a beautiful playhouse with your own hands, just familiarize yourself with the following algorithm of actions.
Floor and walls
- A site for the future house is selected, leveled and compacted. If desired and available funds, it is recommended to dig trenches and fill a layer of crushed stone for support beams with a cross-section of 10x10 cm.
- The length of the support beams is equal to the distance between the two outer posts of the board panels, that is, 140 cm. For convenience, you can take a beam with a cross-section of 5x7.5 cm and a length of 240 cm, attach it to one panel, and mark the locations on it. Thanks to the existing markings, you can install the logs without much difficulty.
- The soil is leveled, focusing on the lowest point. First, the first support beam is installed, which will be the front, after which it comes to the rear. They check the evenness and horizontality, and then you can install the two central ones.
- To fasten the supports together, use 2 beams with a cross-section of 5×10 cm and a length of 240 cm. They must pass between the racks of the board panel that will be the floor. They are fixed with screws. The resulting voids must be filled with soil, leaving an air gap of about 3 cm, which is necessary for normal air circulation.
- The plank panels are cut to the required sizes and the smoothest one is selected for the floor. It must be laid so that it does not come into contact with the ground anywhere. To achieve this, you can additionally use timber trim. The edges must completely coincide with the support bars.
- To cut the side panels correctly, first mark the height of the side panels, that is, 150 cm. You also need to leave a margin of 5.5 cm. Cut only from the inside.
Note!
Don't forget to leave a little extra width for the back and front panels. Thanks to this, they will be able to cover the side pillars. To ensure overlap, it is necessary to measure another 2 cm from the outer edges of the posts.
Preparing the basis
Making the floor
Installing the floor and assembling the walls
Roof
- Since the roof is the most complex element of the structure, you will have to concentrate and give all your attention. Labor intensity also lies in the need to unscrew all the rear panel posts in order to reattach them later. On the front panel, measure the distance from the top center point to the side point located below. This will allow you to decide where to place the roof panel racks.
- Please note that the post that runs along the ridge must be placed exactly 5 cm from the center line. In this case, during installation, both racks will not overlap each other.
- It is best to use beams with a cross section of 5x7.5 cm as additional racks (if any are needed). During installation, you should constantly check their perpendicularity to the top of the roof. If necessary, they are aligned along the bottom edge.
- All irregularities on the tops are successfully masked by the ridge.
Note!
Only remove and reposition the posts one at a time to maintain rigidity and strength.
Assembly of walls and roof
Veranda construction and finishing
Final stages
- For a doorway, dimensions of 60x120 cm will be quite sufficient. This size will fit perfectly into the span between the racks. But if necessary, you can choose other sizes.
- First of all, cut out the window(s), and then move on to the door. Please note that you need to be careful and attentive with the door; do not cut it completely, as the panel is not yet fully secured and the structure will lose its rigidity.
- All elements are covered with stain and varnish. Paint and varnish materials should be applied both inside and outside to form a protective layer.
- Using 75 mm screws, all elements are fixed to each other and to the support bars. Once the frame is secured, you can completely cut out the doorway and install the roof.
- The door and shutters are made, the porch is assembled and fixed.
The very last touch is the interior decoration of the house, making furniture, for example, a table and chairs.
Note!
It is not necessary to insert glass into window openings; you can do without them altogether. Plexiglas, which is safe, will also work.
Do not forget that the internal arrangement also plays a big role, especially when it comes to little princesses who imitate adults during play. Regardless of what material and design was chosen to create the play space, your baby will be happy. It is in the house that he will be able to spend hours of active recreation every day with pleasure, developing his imagination.
How to make a children's house from OSB and plywood (frame technology)
It was decided to make a house using frame technology - the base is made of boards, the cladding is made of OSB. Dimensions in plan - 3 * 2 m, wall height 1.5 m, ridge 2.2 m. 50 * 100 mm boards were purchased for the frame, inch board (100 * 12 mm) for the subfloor, 9 mm OSB for the floor and outer cladding , for the interior - polished plywood FSF 6 mm, foam for insulation 100 mm thick.
Preparatory work - assembling panels for the children's house - was carried out in the garage: it was still cold. Later, as it gets warmer, the house will move to the dacha, to a place of permanent residence.
The first stage is the manufacture of the floor frame. We knock down a rectangle with sides 3 * 2 m, nail the transverse boards (floor joists) in increments of 50 cm.
The floor frame is ready
The floor will be insulated with foam plastic. Children love to sit on the floor, so we insulate them well - with 100 mm foam plastic. We stuff thin strips underneath it from the bottom so that it doesn’t fall through. Insert foam. The gaps can be filled with polyurethane foam.
Installation of foam plastic
It's good that the building is small. We put it on its side and hem it with an inch board at the bottom. This will be the subfloor. After turning it over, we sew up OSB.
Preparing a platform for a children's playhouse
Later, when the house was taken out to the country, an OSB installation error was discovered. They nailed him close. In the humid air, the material swelled and the sheets withered in some places. Therefore, when installing sheet material, leave a gap of 8-10 mm.
Next, we assemble the wall frame. We install the racks in 1-meter increments, and double them under windows and doors. Since the top will be filled with OSB on one side and plywood on the other, the structure will be rigid. We don’t install jib beams. They are needed if the children's house will be upholstered with clapboard or other slatted material.
Assembling the wall frame
Trying out walls on the floor
The work has been moved to the dacha. Three old logs were used as the foundation. They are hewn and the tops are leveled. The logs are leveled, a board is nailed onto them, on which the platform will be installed. The width of the house is 2 meters, and the logs are 3 meters long. We will decorate the remaining part as a terrace or porch.
Foundation for a children's house
The platform was installed. It is attached to the logs with large pins that connect the log and the platform. We began to lay out the frame of the walls. They must be placed exactly vertically. To secure it, temporary cuts were used - they were nailed down with boards on the sides.
Article on the topic: Wallpaper for the corridor in the apartment photo: stone finishing, for a small narrow corridor, which one to choose, liquid in Khrushchev, for hallway walls, video
Putting up the first wall
Side view
Fixed externally (connecting brackets are visible in this photo)
Along the way, having aligned and checked whether the wall is level, we nail it to the platform with long nails. The length of the nail is such that it at least reaches the middle of the frame board.
Side walls inserted
The entire frame of the children's house is in place
Next, the assembly of the rafter system begins. First of all, we put a ridge - a board in the middle, which will form the roof slope.
We attach the horse to the house
Then the fittings begin: you need to correctly saw out the corners for the rafters so that they lie evenly on the boards. First, we cut roughly, gradually ensuring that there are no gaps.
Trying to “create” a rafter leg
Trying it on, fixing it
Another perspective
When the shape of the cuts is clear, we transfer it to other boards using a sharp pencil. We cut everything out evenly (with a jigsaw, if available, or with a handsaw). Then we nail all the boards to the frame. We fill transverse boards between the rafters - the ondulin will rest on them. It turns out to be such a house.
The roof is almost assembled
Construction of a children's house at the dacha is nearing completion
After the construction of the rafter system, only the sheathing remains - inside and outside. We fill the outside with OSB. We cut it so that the joints fall on the racks. We nail it, you can use wood screws. For whom is it more convenient?
OSB exterior cladding
Left a little
Ondulin laid on the roof
Next comes the matter of interior finishing and insulation. First, a windproof membrane is stuffed (so that it is not cold), then basalt wool is attached (10 cm thick, so that it is just the depth of the board).
The insulation of the house inside is mineral (basalt wool)
Everything is nailed on top with plywood. That's all. The job is done - paint it and you can put it into operation)))
Using the same technology you can build a tree house. It will be necessary to secure the platform, but everything else is very similar.