- 1 Tools
- 2 Choice of putty
- 3 Surface preparation
- 4 Priming
- 5 Initial (starting) layer
- 6 Subsequent layers
- 7 Features of puttying corners
- 8 Applying the finishing layer
- 9 Final stage
- 10 Volumes and costs 10.1 Financial costs
One of the most popular wall decoration options is wallpaper. This finishing material is distinguished by a variety of colors and textures, is relatively inexpensive and allows you to beautifully decorate wall surfaces. But in order for the wallpaper to last a long time and retain its presentability for a long time, it is important to carry out preliminary preparation of the walls for gluing the canvases. It is for this purpose that wall surfaces are puttied, allowing them to be leveled.
If you wish, you can putty the walls yourself; not only a professional can handle this task, but our practical recommendations and video tutorials on the technology will help with this. We will find out which putty is better to putty on walls under wallpaper, how much it costs (prices per 1 m2), how to level the wall, apply the compound and whether finishing putty is needed for drywall, brick and concrete walls.
Tools
To carry out puttying work with your own hands, you need special tools: let’s figure out which ones.
- A spatula 45 cm wide for spreading the mixture over the wall surface.
- You will also need spatulas of smaller sizes: 25, 10 and 4 cm. The first is intended for slopes, the second is for applying and then distributing the composition over the blade of a large spatula, and the third is for working in areas that are difficult to access.
- In addition to spatulas, you will need a grater - this tool is needed for grouting putty - and a replaceable coating (sandpaper, mesh with an abrasive coating).
- Also prepare containers for preparing the composition and separately for water.
- You also need narrow brushes for applying primer in places with difficult access and a roller for coating with primer.
- A spirit level will help control the leveling of surfaces.
- Be sure to prepare a stepladder, an electric drill and attachments for it, or a mixer for mixing construction mixtures.
Types and classification
The main criterion for classifying the materials under consideration is the type of binder. Depending on this they are divided into:
- cement;
- gypsum;
- polymer.
Cement
The composition of the finishing putty is as follows.
Cement (gray or white) grades M500 and M400 is used as a binder. The filler is river sand, the use of which is due to the presence of smaller fractions and the absence of various types of impurities. The main advantages of this type of composition are its increased strength and moisture resistance. That is why the cement version is used in rooms with wet conditions.
The only thing that needs to be kept in mind when forming such a coating is its susceptibility to shrinkage and, as a result, the possibility of microcracks appearing in the finishing layer.
Important!
To avoid shrinkage processes, you should strictly follow the work technology, apply the mixture to a slightly moistened surface, avoiding its premature drying.
Plaster
The use of gypsum as a binder allows us to talk about high manufacturability and environmental friendliness of the finish.
Due to its hygroscopicity, finishing gypsum putty helps maintain a favorable indoor microclimate. So, with high air humidity, a material containing gypsum reduces it, while with excessive dryness, it releases moisture back. However, the presence of this property does not allow the use of this mixture in places with high humidity.
Quartz sand or marble flour is used as a filler. As in the case of a cement analogue, the thickness of the layer and the appearance of the finish are directly influenced by the fineness of grinding of the raw materials. An inherent advantage of compositions containing gypsum is the absence of shrinkage processes during drying, as well as relatively quick drying.
Polymer
Polymer finishing putty (Knauf, Bergauf, Sheetrock, Betonit and other brands) is the most advanced option for wall finishing, combining all the positive qualities of the two previous compositions. The binder is latex, acrylic or a combination of both. The latex base gives the solution high elasticity, but at the same time reduces its vapor permeability, and therefore has limited use in residential premises. Acrylic offerings are particularly homogeneous and dense in structure; they are versatile and easy to use. All polymers are absolutely non-shrinking, do not require additional plasticizers, are easy to apply, but are expensive.
Important!
The use of each type of material must correspond to its intended purpose. It is not allowed to mix one type of mixture with another to increase its total volume.
Choice of putty
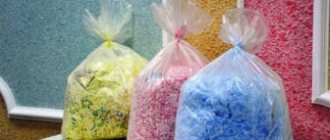
The quality and strength characteristics of the putty coating depend on the parameters of the materials used to prepare the solution. In stores that sell construction products, you can buy a ready-made mixture or a dry composition.
Let's find out what the compositions are and when they are used:
- Polymer based — characterized by increased strength characteristics and elasticity. Such compositions tolerate the influence of high and negative temperatures well. Polymer compositions are divided into several types:
- acrylic - used for finishing interiors and exterior cladding, for roughing and finishing work, they do not crack;
- latex - used for internal lining, do not shrink.
- Based on gypsum , they are used for finishing wall surfaces, do not shrink, and dry quickly. They are used exclusively in dry conditions, since gypsum is destroyed by moisture. Gypsum compounds can be used to treat concrete and brick bases, but maximum adhesion occurs with a plasterboard base.
- Cement based . They are used for internal cladding in rooms with high levels of humidity, for example, in swimming pools and saunas, and for external finishing (facade). Such mixtures are durable, but prone to shrinkage after drying, and cracks may appear.
Which putty should I choose for walls under wallpaper? Putty is divided into several varieties and according to the area of use:
- Leveling – applied as the first layer. They are used for leveling walls behind the plaster layer, as well as for finishing slopes, openings, and ceiling surfaces. In most cases, mixtures consisting of cement and sand are used for leveling.
- Decorative – applied on top of the initial coating. These compounds are intended for puttying at the finishing stage. Thanks to the fine fraction, the mixture is applied in thin layers (maximum 4 mm), due to which the surfaces acquire impeccable smoothness.
- Universal purpose . Such mixtures have the characteristics of both initial and finishing solutions. They can be used for leveling and decoration, as well as for connecting gypsum modules and filling cracks. Often used to putty walls under liquid wallpaper in one layer.
Find out which putty is best for puttingtying walls under wallpaper from the video tutorial below:
Choice of putty
Today, there are many methods that allow you to prepare almost any solution yourself. It’s just better to abandon such an idea immediately, especially if you don’t have the proper experience in this matter. The point is that you need to create a surface that will hold the wallpaper very well. You also need to take into account that many compositions absorb moisture from the air, which can also have a negative effect on the decorative layer.
Therefore, it is better to immediately opt exclusively for materials that are sold in special construction stores. This is the only way to be sure that the walls will be prepared as needed.
What is putty?
| Application area | Mixture characteristics |
| • Specialized finishing material. • Applied before wallpapering. • Removes all joining seams. • Evens out small wall defects. • Serves to create a perfectly smooth coating. | • Can be in the form of a paste mixture that does not require additional preparation. • Dry formulations require prior addition of water. • The elements that make up the material have a fine fraction. |
Accordingly, from the existing pasty and dry materials for preparing walls for wallpaper, it would be better to choose the former. They do not require additional manipulations and can be used immediately after opening. But for large volumes of work they are not very suitable in terms of savings.
Thus, drawing a conclusion about which putty is better based solely on its external characteristics will not be entirely correct. A clear understanding of this issue can only be obtained after a detailed study of the compositions of putty mixtures. And how they interact with wallpapering materials.
Surface preparation
To achieve high-quality finishing of wall surfaces with putty compounds, you should coat only surfaces prepared for cladding.
Preparatory activities must be carried out in a certain sequence.
At the first stage, the walls are processed, including the removal of old plaster layers and other finishing materials;
For this purpose, flushing compositions are used. After this, the room is dried during the day. On a note! Remains of facing materials are removed with a thin spatula or a thin knife.
At the second stage, the relief of wall surfaces is determined. You can examine the walls to identify irregularities using a rule and using a flashlight. This will make it possible to notice even small notches. The tubercles are removed with a pointed spatula, the depressions are contoured to neutralize defects.
How to choose and correctly use decorative panels for interior wall decoration: description of varieties, useful characteristics, tips for choosing wall panels for decorating walls in an apartment. You can watch a video about installing plastic window slopes with your own hands in this article.
Padding
Having completed the preparation, the walls need to be coated with a primer - this measure is necessary regardless of the base material and is indicated for concrete, brick, panel and plasterboard walls. The use of a primer increases adhesion to the base coating of the adhesive and putty, strengthens and protects surfaces from minor defects.
The type of primer is selected based on its purpose. The following types are available:
- antifungal , preventing the formation of fungus;
- deep-penetrating – optimal for plasterboard, brick and aerated concrete bases;
- strengthening – used on loose, porous surfaces.
Attention! Experts advise priming once if there are no defects on the walls.
Crumbling or peeling surfaces are treated with a primer twice, with the walls primed a second time after the first layer has dried. The composition is applied in a thin, even layer using a roller or brush. The application is done overlapping to ensure uniform coverage.
Construction stores sell concentrated compounds that can be used immediately, and dry mixtures. Dry formulations are diluted with running water in the amount indicated on the container; Mix the finished primer well and then pour it into a container.
Initial (starting) layer
The starting composition is a building material with a large grain size; it is used at the first stage of work aimed at leveling wall surfaces.
In order to apply the starting layer? you should make the mixture thicker, and for the rest - more liquid, sliding off the spatula. This is the optimal consistency, simplifying the puttying process. The thicker the mixture, the denser the layer will be.
Leveling of cracks and cracks is carried out in separate areas. Using a spatula, apply the required volume of solution to the area with the defect, then level it. In the area of the inter-slab connection, a mesh is mounted, fixed to a thin layer of putty, and another layer is placed on top by leveling the plane.
How to putty walls under wallpaper with your own hands - a useful video tutorial:
If the surface is leveled with a dense layer of mortar, it is recommended to cover the entire surface with a mesh. It is advisable to use a rigid mesh - this will make the surface more even and smooth. The mixture is applied in small portions with a density of about 1 cm, otherwise cracks will appear. The density of the starting layer should be approximately half a centimeter.
To avoid noticeable transitions and bulges, the mixture should be applied diagonally - obliquely, holding the spatula at a 30-degree angle.
Technology of puttying walls under wallpaper
To putty the surface under the wallpaper, use a wide metal spatula measuring 70-80 cm. Work should begin from the left edge. The composition is applied with a spatula in small portions. Then the composition is applied again at an angle of 30 degrees and stretched to the side. Movements should be performed sweepingly, stretching the composition in both vertical and horizontal directions.
We follow the technology of wall puttying
The next layer must be applied to the previous one “overlapping”, this will minimize sharp transitions and the formation of depressions. The thickness of the finishing layer should not exceed 2 mm. Drying time is approximately 12 hours. After this, the surface should be sanded with sandpaper, the grain size of which should be P80-120.
Actually, the technology for puttingtying walls for painting is similar, the only differences are that all work is carried out with increased responsibility, and for sanding, finer sandpaper of P150 size is used and sanding of the surface occurs with the study of each area.
Features of puttying corners
Difficulties often arise when aligning corners; for this purpose, it is recommended to use a corner model of a spatula.
The work is performed as follows:
- Using a tool tapered to the level of the angle, the mixture is first applied on one side, and after drying, the other is processed.
- A perforated corner and counter-shoulder are mounted and leaned against the structure.
- Excess putty is removed.
- After the mixture has dried, the surface is leveled with an angled spatula.
It takes a day for the coating to dry.
Applying the finishing layer
The method of applying the outer layer is identical to the formation of the starting layer, the difference being the density of the layer and the granularity of the solution.
Important! Experts advise choosing compounds with a maximum grain size of 0.8 mm - this is the best option for preparing walls for wallpapering.
After the wall surfaces have dried, they should be sanded with sandpaper. When using a composition with a grain size of 0.15 mm, it is not necessary to sand the wall, but the coating must be applied thoroughly.
The decorative mixture is applied to a previously leveled surface in a thin layer after the previous coating has completely dried. A small amount of solution is applied to a 45 cm tool using a narrowed spatula, after which it is evenly distributed over the surface. The maximum density of this layer is 0.2 cm.
Final stage
After the starting layer has completely dried, the finishing work begins. The dried surface is sanded with sandpaper or a mesh with an abrasive coating, the surface of the wall is translucent in order to eliminate small defects. Detected defects are eliminated with a liquid mixture.
For greater convenience, the surface can be divided into vertical sections and the outer putty coating can be sanded off without much effort, because the layer is not thick. Be sure to control the evenness of the plane using a spirit level.
Clearances indicate unevenness of the surface.
So, the step-by-step putty process is as follows:
- the initial leveling layer is applied;
- all layers are treated with a primer;
- in case of strong relief of the plane, additional layers are applied;
- time to dry is given;
- an external coating is applied to hide defects;
- Sanding is done with emery after drying.
Volumes and cost
The main parameter that determines the financial costs of putty is the area; The condition in which the wall surfaces are located also matters. If there is a need for leveling, more composition will be needed.
Let's calculate the required volume of material using the following example. The area of the room is 25 square meters. m, height – 3 m, one window – 2x1.5 m, door opening – 2.1x1.4 m.
There is no need for additional leveling of wall surfaces.
Calculation: the total size (total area) of the surface is: 2x5x3+2x5x3-2x1.5+2.1x1.4= 54.06 m2.
The consumed amount of a universal-purpose deep-penetrating mixture is 100-200 ml per 1 square meter. m. We take into account that the composition absorbs moisture abundantly; you will need 190 ml per 1 sq. m. m. Total: 54.06x0.19= 10.3 l.
Before applying the finish, wall surfaces will be treated with similar compounds, but in a volume of 130 ml per square meter. m. Total: 54.06x0.13=7 l.
The total amount of mixture will be 17.3 liters (the value is obtained by summing the previous two figures).
The standard amount of consumed gypsum mixture is 0.9 kg per sq. m. The density of the initial layer will be 5 mm. As a result, we get: 54.06 x 0.9 x 5 = 243.27 kg - this is approximately 13 packages weighing 20 kg.
The standard consumption of the finishing composition is 1 kg per square meter. m. The density of the finishing layer is 1.5 mm. Total quantity: 54.06x1.5x1=81.09 kg - 4 packages weighing 25 kg.
Financial expenses
Let's calculate how much it will cost to complete the putty work.
We will need 4 containers with primer at a price of 220 rubles. each, total costs will be 880 rubles.
13 packages, each costing 275 rubles - in total, the purchase of the starting mixture will cost 3575 rubles.
Putties for the finishing coating will require 4 packages, in the amount of 1280 rubles.
Total costs – 5,835 rubles. — we calculate by summing up the obtained numbers.
As for the prices for puttying walls under wallpaper in 2 layers, the cost of work per 1 m2 is on average 220 rubles. For plasterboard walls, the price of work is lower and amounts to 140 rubles/m2.
Read about the advantages of decorative bark beetle plaster: the pros and cons of the material, features of application technology, tips for use and care. The sizes and types of ceiling profiles for plasterboard are described here.
How to install a slatted ceiling in a bathroom? Read the installation instructions in the article at: https://kvartira-rf.com/obustrojstvo/remont/reechnyj-potolok-v-vannoj.html
Types of putty
Puttying walls under wallpaper is not a very complicated process from a technological point of view.
In addition, in this case, small irregularities on the surface can be allowed, but there should not be large flaws that are very noticeable to the eye. Otherwise, the wallpaper will not look as beautiful as you would like. And gluing wallpaper on perfectly flat and smooth walls is a pleasure. That is why it is better to try to level the surface as much as possible.
In order to competently carry out the puttying process (still, this option seems more logical: putty comes from the word spatula), it is necessary to choose the right type of composition.
Oil-adhesive putty
This is a fairly easy-to-use and inexpensive material. It is plastic, dries quickly (24 hours), and stays on the walls for a long time. The oil-adhesive composition has long been prepared according to the classic “recipe” based on drying oil, casein glue and chalk. It can be applied to wood, stone and concrete surfaces that have been previously plastered and primed. Perfectly corrects wall defects: cracks, depressions, potholes.
The material is a paste-like substance that must be applied in 1-2 layers using a spatula. After a day, the putty surface must be sanded with sandpaper to obtain an even and durable coating.
Oil-adhesive putty comes in different types:
- explosion-proof;
- fireproof;
- putty of increased whiteness.
The advantages of the material include its hygiene and environmental friendliness. A significant disadvantage of putty is its poor compatibility with materials that do not contain oil paint or drying oil. Therefore, such putty is not the most suitable option for wallpaper.
Gypsum putty
This is a dry mixture made on the basis of gypsum with a small addition of light filler, which increases the total volume, and modifying substances necessary for quick drying and high-quality finishing.
Gypsum putty is the most suitable material for interior work. Apply to surfaces made of concrete, brick, gypsum boards, as well as plastered surfaces. It is used for finishing only dry rooms, since gypsum absorbs moisture well. Various precipitation and excess moisture have a detrimental effect on walls puttied with this composition.
Find out what is better: wallpapering or painting the walls here!
Among the advantages of gypsum putty are:
- good adhesion (i.e. adhesion to other materials);
- no shrinkage after drying;
- quick drying;
- environmental friendliness and safety;
- reasonable cost and relatively low material consumption.
However, it is important to remember: when working with gypsum putty, sudden changes in humidity in the room should not be allowed. This is perhaps the only disadvantage of this finishing material.
Cement putty
This material is perfect for finishing damp and cold rooms. After drying it becomes a durable and hard coating. Leveling, sealing cracks on concrete and brick walls - this is its main purpose.
Find out how to apply liquid wallpaper on a wall in this article.
Cement putties are available in two types:
- coarse putty intended for initial work;
- finishing putty used at the final stage;
- decorative putty.
The difference between them lies in the fillers added to their composition.
Water-dispersion putty
Water-dispersion putties occupy a worthy place among leveling finishing materials. They appeared on the domestic building materials market relatively recently, but, due to their good performance qualities, they began to be in good demand. This type of putty can be applied to concrete, brick, wood, stone surfaces, as well as fiberboard, plastered and painted walls.
The material is a ready-to-use mixture containing an acrylic base. It has good adhesion, moisture resistance, minimal shrinkage; low flammability, affordable, does not contain organic compounds.
When thickened, the putty is diluted with water and dries quickly. Depending on the added resins, it may have improved properties. For example, putty with synthetic resins has high strength and dries faster than others.
Acrylic putty
This is a universal leveling agent used for both external and internal finishing work.
Thanks to the acrylic base, the material is perfectly applied to any surface, making it smooth and even. The putty does not need to be diluted with water; it is sold ready-made and retains its properties for a long time in a plastic container. The paste mixture is easy to apply and spread on the walls. After drying, this putty does not shrink or crack. Elastic and waterproof, it can perfectly level the wall.
What is liquid granite?
Polymer putty
One of the newest finishing materials - polymer putty - will help make walls and ceilings flawless for painting, painting under wallpaper, or wallpapering. It is used at the last stage of roughing work before finishing. This type of putty got its name due to the binder, which can be presented in it in the form of latex or acrylic.
The latex variety is suitable for both internal and external work.
As for the material made on the basis of acrylic, it is used only for finishing walls and ceilings indoors. This putty has a number of excellent properties, among which the main ones are high strength and durability of the surface treated with it. In addition, it is odorless and easy to use.
Useful tips
- Choose the type of putty based on the characteristics and condition of the walls.
- The component from which the base is made should act as a binding component of the putty mixture. To level brick walls, you should choose mixtures consisting of sand and cement.
- It is preferable to use formulations of the same brand.
- Each variety is assigned a label. Mixtures with the LR brand are intended for use in conditions of high humidity.
- Puttying work must be carried out at temperatures above 10 degrees, but not more than 25.
- For priming wall surfaces in rooms with high humidity levels, it is preferable to use moisture-resistant primers that are applied repeatedly.
- After preparing the composition, let it sit for about 15 minutes - this is necessary to remove the air.
- Mix the mixture in small portions so that the prepared solution can be used within 60 minutes.
Wall putty allows you to level the wall surfaces, thereby preparing them for wallpapering. You can do the puttying work yourself - the recommendations given in this article will help you cope with this task.
Thanks to the right choice and high-quality work on puttying the walls, the wallpaper will last longer.
What kind of putty is suitable for wallpapering?
When choosing a certain type of putty and choosing wallpaper for the kitchen, you need to understand that starting and finishing putties are used for the work.
If the walls are fairly smooth, without obvious flaws, then you can immediately use the finishing material. However, if the surface is far from flawless, then you will have to start with starting putties, preferably the gypsum variety. However, for kitchens and bathrooms it is better to purchase cement-based putty: it is moisture-resistant and durable. Between layers, including just before wallpapering, the surface must be treated with a primer.
Starting mixtures have a high degree of strength and adhesion to other types of materials, but at the same time contain coarse grains.
Used for rough leveling after plastering work. The thickness of the layer depends on the degree of unevenness and can range from 3 to 20 mm.
When purchasing putty, pay attention to the following letters:
- LR – putty mass is intended for rooms with high humidity.
- KR – only for dry rooms.
At the finishing stage, both gypsum and latex varieties are suitable. Here you can already rely on price and manufacturer. The most commonly chosen finishing mixtures are Knauf and Vetonit.
The finishing putty for walls under wallpaper has a fine grain and allows you to achieve a perfectly smooth surface. Its strength and adhesion are slightly less than the starting one. It can be easily processed with sandpaper or a grout mesh. Layer thickness - no more than 4 mm.
As you can see, the most reliable and functional putty mixtures are still gypsum. But here it is also important which type of material the master himself has adapted to.
There are also universal mixtures that combine the qualities of starting and finishing putties, but their price significantly exceeds the total cost of several types of mixtures used alternately.