29.03.2018 1
12218
Igor How to hang a chandelier on a hook if the chandelier has a strip?
During the process of replacing a chandelier, it may become clear that the old lamp hung on a hook, and the new one is mounted on a bar. Modern designs are usually equipped with a similar lock. In this case, hanging a chandelier is more difficult, but it will receive an additional layer of strength.
How to properly hang curtains over a window?
Before hanging the curtain, prepare the tools and material:
- Ladder.
- Electric drill (hammer).
- Screwdriver.
- Roulette.
- Level.
- Screws.
- Dowels corresponding to the screws.
First, the type of dowels is determined depending on the wall material, then screws are selected for them - Pencil.
- Screwdriver.
- Hammer.
- Cornice with accessories.
The curtain rod must be unpacked and assembled on the floor to ensure that the parts fit together
Note! When choosing a cornice, it is worth considering that the recommended plank is 30-40 centimeters larger than the opening! Thanks to the protrusion, the curtain will not cover the window, which will allow daylight to penetrate.
Recommended scheme for fixing a wall cornice
If you have the necessary tools and consumables, a calculation is made and future holes for the dowels are outlined.
The mounting points of the curtain rod must be leveled so that the curtains fall evenly
Curtains are attached in order, following strict step-by-step instructions:
- Before hanging the curtain, the electrical wiring plan of the room is carefully studied. Familiarization with the wire laying project will help you avoid unwanted mistakes when drilling the wall - the electrical cable will remain intact.
Important! When choosing a height, consider the placement of electrical wiring!
- The height of fixation of the bar is determined.
Professionals recommend placing it at least 10 cm from the ceiling - at the recommended distance the curtains will look proportional. The distance from the window opening to the cornice is selected individually - The center of the window is calculated and marked with a marker - the distance between the slopes is measured, the resulting number is divided by two.
Wall marking diagram for fixing the cornice - Sections to the outer brackets are measured in different directions from the central bracket. The resulting number is written down.
- From the central point marked on the wall, equal intervals are measured in both directions with a tape measure, and marks are placed in pencil.
Important! Measurements are taken from the ceiling, not from a horizontal line. Rooms often have uneven ceilings, so the plank should follow the slope of the ceiling, visually leveling it.
- Fasteners are applied to the prepared marks, and drilling locations are marked.
Mark the drilling points with a pencil - Holes are drilled using a drill or hammer drill.
Carefully drill holes - Plastic dowels are driven into the finished holes using a hammer.
Remove dust from the holes and hammer in the dowels - The strip is applied so that the holes in the brackets coincide with the prepared dowels, and the screws are screwed in.
We fix the brackets and hang the curtain rod - Curtains are hung on the mounted crossbar.
The method of hanging the curtain depends on the design of the curtain rod and the type of curtain
Before hanging the curtain on the wall, you need to call an assistant - it’s easier to fix the bar together.
How to hang a chandelier
A question that often comes up online is HOW TO HANG A CHANDELIER ? The work seems to be short and not hard, but most people simply get stuck. First of all, read the assembly instructions, everything is described there in sufficient detail. If it’s still not clear - stores usually have assembled chandeliers hanging - take pictures of them from all sides as large as possible and collect them. You must like it! It's like a construction set in childhood. The next stage is actually attaching the chandelier to the ceiling. Chandeliers are usually quite heavy, so for such types of ceilings as suspended ceilings, plasterboard, etc. fragile materials are ABSOLUTELY IMPOSSIBLE to fasten them. When installing a tension stream, you indicate the place where the chandelier will be located and the installers will make a hole in this exact place. Don’t even try it yourself - you’ll just ruin the film. In order to make a hole, a special ring is inserted into the film and the film will not “go” any further if it is cut. With a plasterboard ceiling, it’s easier - take a cutter of such a diameter that it is slightly smaller than the top cap of the chandelier by 3-4 cm. Drill a hole in the plasterboard and proceed to further steps. DO NOT HANG A CHANDELIER ON A GYPSOCARDBOARD CEILING ON ANY EVENT! The chandelier is hung on the ceiling, on which the ceiling hangs! The chandelier kit includes a special guide with a U-shaped profile with slots. Bolts are inserted into the slots to secure the entire assembled chandelier. How to attach a chandelier mount? If you have concrete floors, then insert a special hook. It is inserted into the channel and a chandelier is already suspended from it. What to do if the hole in the ceiling is simply HUGE? Bend the hook yourself from a thick rod as shown in the third picture. You can simply screw the chandelier mount into the beam, but in this case you lose the ability to position the chandelier in one plane. If your ceiling is wooden, just screw the mount to the ceiling; if the chandelier hangs slightly off-center, reinstall the mount in the right place (with a concrete ceiling this will be problematic). All that remains is to connect the chandelier to the electrical network. Because The power consumption of this type of lamp is low - use terminal blocks for connection. This will give you the opportunity to kill several birds with one stone. Quick installation, no need to additionally insulate connections, quick repair. There are usually 3 wires coming out of the ceiling, but there may be two. If there are 2 wires, simply connect the wires from the chandelier (if there are 2 of them) with the wires from the ceiling. If there are 3 wires in the chandelier and 3 wires in the ceiling, you will have to call the wires both in the ceiling and in the chandelier itself. We call the wires from the ceiling. To do this, you need a device (you can use a test lamp, but this is quite dangerous and according to safety regulations, using a test light is PROHIBITED), an indicator screwdriver (optional). We install the terminal block on the wires from the ceiling (the power must be turned off by the AUTOMATIC SWITCH !). We connect the control to any 2 terminals, turn on the machine, click the light switch with both keys alternately. Has the lamp come on? Now there will be two ways, I will describe each separately.
1) If it lights up, it means you have found one power wire and a common wire. You turn off the machine, switch ONE wire from the terminal block to another, turn on the machine - if the light comes on, it means you have found a common wire - this is the same wire that you DIDN’T DISCONNECT . If the lamp does not light up, switch the second wire from the control lamp in the terminal block to the contact from which you just removed the other wire ( AUTO TURN OFF ). We turn on the machine, the switch - does the light come on? If yes, then the last wire you connected is common. If the light DOES NOT GO ON, the wire may be faulty somewhere. If the wires are old Soviet aluminum, look for the break point near the wire exit from the ceiling, or on the switch.
2) The lamp did not light up. It is possible that you have hit two power wires but not the common wire. You transfer one wire from the control to another terminal, turn on the machine, the switch. The light should come on. If it does not light up, see point 1. We do the same with the second wire. If the lamp is on, it means you called everything correctly and found the third power wire!
Or, if you have an indicator screwdriver, the following method. With the switch turned off but the circuit breaker turned on, touch the terminal block terminals with the end of a screwdriver. If the lamp inside the screwdriver lights up on one of the three wires, while the screwdriver does not light up on the other wires, then you have found a common wire (the connection is of course incorrect, this wire should receive zero and not phase, but the screwdriver seems to indicate phase). If the screwdriver does not light when the switch is turned off, turn on the switches and check for voltage with an indicator screwdriver - 2 of the three wires should indicate the presence of voltage. These are the power wires and the wire on which the indicator screwdriver does not light is common. This is the correct connection diagram.
Mark the common wire using any available method. You can simply draw on the insulation with a pen or marker, or simply remember the location of the common wire on the terminal block. It's time to call the wires on the chandelier. BUT! Chinese consumer goods chandeliers can be disassembled altogether. Those. even the cartridges may not be screwed on. Install the cartridges, connect the wires. If you only have 2 wires coming out of the ceiling, then connect it like this: take one wire from each socket, strip it, and twist it. This will be the first connection wire. We do the same with all the second wires from the cartridges, strip them, connect them - the second wire is also ready. We hang the chandelier on a hook, or someone will hold it to connect the wires to the terminal block, screw the chandelier to the mount, screw in the lamps and turn it on. The chandelier is hung! You can regulate the number of lamps you turn on only by not screwing in or slightly tightening the lamps in the sockets.
If you want to connect a chandelier with three wires, then you need to: take one wire from each socket, strip it, and connect them to one point. This will be a common wire; you will connect it to the common wire of the terminal block. Now determine which lamps will turn on when one switch key is turned on. You take these wires from the cartridges, strip them and connect them to one point. This will be one power wire. Strip the remaining ends and twist them to the second point - the second power wire. You hang the chandelier and connect it. That's it, the chandelier is hung. If you don’t like the order in which the lamps are turned on, transfer the power wires to the terminal block from the chandelier.
If the chandelier ALREADY has three wires out, then we look for the wires according to the same pattern as on the wire from the ceiling, only someone will need to hold the chandelier and it is necessary to install the lamps in all sockets.
This is not as long as it seems and the entire installation of the chandelier will take you approximately 20-40 minutes of your time, which will save you from 1000 to 4000 rubles.
Additional tips.
Before hanging this sophisticated unit, assemble it right on your knees. This will allow you to determine what you assembled incorrectly, what elements need to be swapped, what parts are missing (this happens). If possible, tighten all the bolted connections (you can do this at the top, but you will get tired very quickly). Try screwing in the lamps and plugging this creation into the network. It is possible that some lamps will not light up. In this case, check the lamps (swap the burning lamps with the non-lit ones), the lamp sockets (it is possible that the petals inside the socket are bent, turn off the lamp from the mains and use a screwdriver to correct all the insides), the wire to the socket (if both the lamp and the petals are working). By the way, there may be a malfunction in the cartridge itself - the wire is poorly screwed to the contact plates or broken off when the bolt is tightened. Agree that repairing on a table is much easier than standing on a stepladder or table and poking around in a suspended state. Only after making sure that it is fully operational should you proceed with the installation of the lamp. It is better to take this advice as a rule when installing ANY LAMP or other complex fittings.
It is more convenient and easier to hang a chandelier without trims or any danglers. As soon as you attach the chandelier to the ceiling, hang all the “beauty”, screw in the shades, etc. This will allow the person holding the lamp not to get so tired and significantly reduces the risk of damage to the lamp elements during installation. Of course, there are devices that are not removable; here you will have to hang them with extreme caution.
Requirements for installing curtains
When installing curtains, you must adhere to the following rules:
- Dowels (screws) are selected taking into account the wall material.
Plastic dowels for light loads
Metal dowels for curtain rods with heavy curtains
Special dowel for fastening in foam concrete
- Before fixing, you need to make sure that the curtain will not interfere with the operation of the window - it will open (close) easily. The recommended distance from the curtain to the window is at least five to seven centimeters.
- For partitions lined with plasterboard, it is recommended to use longer screws. When drilling, you need to reach the brick to improve the reliability of the structure.
- Polyurethane dowels are used to securely fix the plank.
- If the wall has a loose structure, you will need large-diameter wooden plugs to make recesses for the dowels.
- The screws are securely fixed into the thin, loose partition when the hole is filled with epoxy resin.
- To prevent the curtains from touching the radiator, they are hung at a distance of more than 10 cm.
The distance of the curtain rod from the wall is determined taking into account the protruding part of the window sill (or radiator) and the depth of the curtain folds
The reliability of curtain installation depends on:
- cornice material;
- design configurations;
- installation locations;
- finishing the surface where the curtains are attached.
Before you begin installation of the structure, you need to pay attention to the following factors:
- Strength of the material (wood, string, plastic, metal).
The curtain rods must support the weight of the curtains; accordingly, they are matched to the weight of the textiles. For example, string curtain rods are designed for attaching only light curtains - Method of fixing to the wall. The total weight of the structure with curtains is taken into account, as well as the material of the partition. There are 3 types of fastening: through through holes in the plank to the wall, on supports and on brackets.
- Plank size. It should protrude beyond the side boundaries of the window opening.
- Number of tiers. The selection of a single-row, double-row or three-row system depends on this. This factor affects the width of the structure.
Single row cornice
Double row cornice
Three-row cornice
- The curtain rods are hung after the renovation is completed.
How to attach curtains step by step
Depending on the type of wall, prepare the necessary fasteners, stepladder, level, tape measure, screwdriver or hammer drill, hammer, screwdriver and pencil. The cornice itself is assembled on the floor. Next steps should be as follows:
- The level determines the direction of the fasteners and marks the locations of future screws and dowels. The distance from the ceiling is also fixed here - it is recommended that the cornice be at a level of 10 cm below the ceiling.
- The wiring diagram is being studied - the wires often run above the window.
- The distance between the slopes is measured and multiplied by 2. The center of the structure is determined - exactly in the middle of the window.
- Equal lengths are measured from the center to the end of the cornice, and marks are made on the wall.
- Fasteners are applied to the marks and the location of future drilling is marked. Using the selected tool, holes are drilled in the wall.
- Dowels are installed in the holes, screws are installed in them, and the cornice brackets are installed.
After installing the brackets, you can hang the curtains, but it is advisable to have a second assistant.
The influence of the weight and design of curtains on proper installation
The weight and design of curtains affect the installation of the device, so they must be taken into account when choosing curtain rods and curtains.
The curtain rod for heavy curtains must have a reliable design
Professionals advise:
- If the wall is made of fragile material, then the curtains are selected from simple, lightweight textiles.
- The supporting parts of the device will effectively fix dowels with a cross-section of 8 millimeters and screws.
- If the system is more than two meters, it is reinforced with auxiliary brackets, placing them taking into account the same load on the device.
- Proper installation of the curtain rod system should support heavy curtains.
- For fastenings on a plasterboard wall, it is recommended to use a butterfly dowel, which “spreads its wings” in the hole and is securely fixed.
Plastic butterfly dowel for fixing lightweight curtain rods to a plasterboard wall
Additional Information! If rotating parts are packaged with the system, then when marking the fastening lines, their dimensions are taken into account.
We hang curtains on walls, plasterboard and suspended ceilings
To properly hang a curtain on drywall with your own hands, you need to determine the type of fastening of the plasterboard structure to the concrete base. The following options are possible:
- The plasterboard is glued directly to the ceiling - powerful dowels are needed.
- The GLK is attached to a metal structure - the cornice clings to the frame.
To determine the type of fastener, simply tap the ceiling. By sound you can easily determine where exactly the emptiness is. You can also use a magnet or a special metal detector.
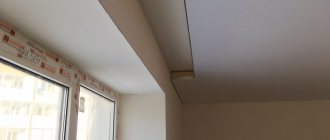
When your room has a suspended ceiling, it is very important to mark in advance the places where the curtain structure should be attached. You will need to secure support bars to the areas you marked in advance. They will serve as a support on which you will hang all your own products in the future.
Some construction experts recommend not making the suspended ceiling completely. This approach allows you to leave some distance from the window, using which you will secure the structure for hanging curtains.
If you are interested in how to properly hang a curtain rod on a wall with your own hands, you need to start with additional reinforcement. Such manipulation is only necessary if the walls are structurally weak.
Rail brackets are made in increments of 25 centimeters. The outer brackets are attached behind the window opening. First, the base plate is installed. The cup is screwed onto it. Finally, the bracket itself is mounted.
Examples and photos of correct installation of curtains
Properly executed hanging of curtains helps to better perceive the interior. The photos provided confirm this.
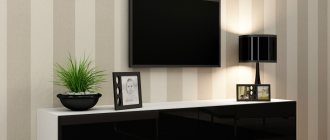
Exquisite, laconic curtains in the living room perfectly match the design, beneficially increasing the height of the window (door) opening.
To visually increase the height, fabric with vertical stripes was chosen
The kitchen will be decorated with curtains on a round system. A stylish curtain in combination with wood looks noble and elegant, combined with classic kitchen furniture. Securely attached curtains will last a long time, decorating the opening.
Cornices on forged or wooden brackets are suitable for a classic interior.
How to choose and hang a curtain for curtains on a bedroom wall is demonstrated in the following example. A metal structure is perfect for the Baroque style, giving the room an atmosphere of romance, wealth, and charm. Light, airy curtains fall down, giving the room an elegant nobility.
The cornices are highlighted in black, but their design is quite simple so as not to attract too much attention, because in Baroque the main thing is expensive furniture and rich textiles
When choosing a cornice for a bedroom, it is recommended to consider:
- cornice size;
- apartment size;
- the shape of the window system.
The examples provided above confirm that a reasonably selected system and its competent installation visually improve the perception of rooms and emphasize the originality of the curtains.
Installation of cornice
Wall curtain rods come in double-row and single-row. Which option to choose depends on the functional purpose of the product. For light tulle without heavy curtains, a single-row design is suitable.
It is important to determine the locations for the holders based on the choice of curtain installation height and the distance between them. Next, you need to unscrew the supports from the base. Then you should attach the supports to the wall and make marks with a pencil through the holes. The next step is to drill the necessary recesses in the wall and attach the holders. In this case, you should use an installation kit, which includes dowels and screws. Selecting individual options will be difficult. After securing the dowels, you need to screw in the screws using a screwdriver.
You may also be interested: How to attach a roller blind to a plastic window - installation video
By the same analogy, the second basis is established. Then you need to take an L-shaped wrench and loosen the fastening of the holder to the leg. Next, baste the bases onto the supports, carrying out manipulations clockwise. Then you should tighten them by hand.
The next step is to unpack the rings and put the hooks on them. Using an L-shaped wrench, you need to unscrew the locking screws from the head of the holders so that they do not interfere with the threading of the guides, but not completely.
If 3 clamps are used, it is recommended to divide the rings into 2 equal parts. If there are closed holders, then you must first put on the guides, rings, tips, decorative plugs, and only then carry out installation. For curtain rods with open clamps, they are secured in the bases by tightening the locking screws. Then you should insert the guides with the rings strung and the tips on into the holders. All curtain elements must be aligned with each other. The guides must be secured in the holders by tightening the locking screws in their head parts.
Next, you can put on tulle for a single-row design, and a double-row design can also be loaded with curtains. If installed correctly, the product will last for many years.
Video master class on installing a wall cornice:
Save
Save
Save