Material selection
It is permissible to use any fabric as a finishing material for walls, but it is desirable that it be thick enough. Synthetic fabrics have proven themselves well - durable, easy to work with and do not require special care.
Another possible option is fabrics used for upholstery. They are durable, resistant to mechanical damage, and moisture resistant. For drapery you will need a material that is lightweight and holds its shape well.
You can choose the material and finishing method by first studying photos of various interiors using this technique.
It is important to remember that if there is high humidity in the room, this method of finishing the walls will not work.
Fabric stretching
The technology for decorating walls with fabric is quite simple. You will need:
- wooden slats;
- dowels and screws;
- construction level (hydraulic level);
- nails and hammer;
- tape measure, pencil;
- screwdriver
A free space is created between the wall and the stretched textile, equal to the height of the used slats. If necessary, insulation or soundproofing material can be placed in this air pocket. To fix the material, special glue is used, and the joints are carefully sealed so that it does not leak onto the fabric.
When choosing a material, the properties of textiles are taken into account - for light ones, choose insulation of the same color, dark ones will be transparent.
Progress
Along the entire perimeter of the room, lines for installing the slats are drawn using a pencil, tape measure and a building level. The lines must be located at the same height from the floor and ceiling, while the distance between them must also be maintained so that the attached fabric is stretched evenly and there are no distortions.
Using dowels and self-tapping screws, wooden slats are secured to the marked line.
For further actions you will need two pairs of hands. The fabric must be pulled evenly and tightly enough. In places where it is attached to the slats, it is folded twice to prevent tears. They are nailed using small nails; a piece of leather is first placed under each nail. Another possible method of fixation is with furniture brackets.
At the final stage, the places where the textiles are attached to the slats are covered with plinths or decorative strips.
Gluing fabric
Gluing is the most popular, but quite labor-intensive process.
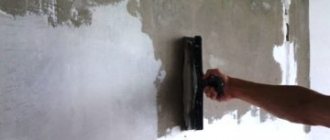
Surface preparation
Before you start decorating the walls with fabric yourself, you need to prepare the surfaces.
To do this you will need:
- putty knife;
- plaster;
- paper or newspapers;
- sandpaper;
- nitro varnish (for stains on the walls, if any).
Operating procedure:
1. Using a spatula, clean the surface of the wall. 2. All irregularities and depressions are sealed with plaster solution. Wait until it dries completely. 3. The entire surface of the wall is covered with paper or newspapers. When the glue has dried, sand the wall using sandpaper. 4. If after all these operations there are stains on the wall, they are treated with nitro varnish so that they do not appear on the fabric.
Fabric preparation
Unlike wallpaper, textiles are glued to the wall not in sections, but as a whole canvas. It is advisable to choose the widest possible cut so that there are as few joints as possible. If this is not possible, then the wall is measured, strips of material are sewn together, leaving a margin at the top and bottom. The seams are ironed from the wrong side, the finished piece is rolled into a roll.
The material is tested for shrinkage - a small piece is measured, immersed in water, and then dried. They measure again, and if its dimensions have decreased, then the entire section prepared for work is soaked, dried and ironed.
Operating procedure
For convenience, it is recommended to use furniture glue, which hardens after exposure to high temperatures. However, you can use another one (for example, casein).
Furniture glue can be applied to the entire surface of the wall at once; other adhesive compositions are applied at intervals, to individual areas, so that it does not have time to dry.
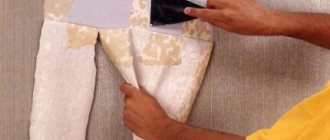
Work begins from the upper section of the wall. The fabric is applied and stretched. This operation will require 2 people - one will hold the roll, the second will glue the finishing material and carefully smooth it with a roller so that it lies evenly and tightly.
The fabric is temporarily fixed using small nails. Align and at the same time secure by ironing, moving the device from top to bottom. When heated, the glue will harden, securely fixing the textiles to the wall. It is necessary to iron the entire surface of the wall several times so that there are no missing areas.
When the work is finished, the excess fabric on the ceiling and near the floor is carefully cut off, trying to prevent the edges of the material from fraying. The cut areas are additionally coated with glue.
The process of complete hardening of the glue takes about 3 days. After this period, the fabric is carefully inspected; if air bubbles are visible on the surface, they are carefully pierced and ironed.
The final stage is to decorate the edges with molding, baseboard or baguette.
Wall decoration with fabric - design options, installation methods
You can decorate walls with fabric using different methods.:
- Partial surface finishing – we are talking about the use of natural or synthetic fabrics when finishing some parts of the walls. For example, you can use textiles to decorate exclusively the wall near the bed, or make a style accent in the living room near the mirrors/seating area.
- Full wall decoration - no frills, everything is simple, but no less effective: all walls around the perimeter of the room are covered/covered with textiles.
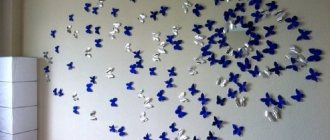
- Decorating with textile elements - you can stencil cut out some elements from fabric and paste them over the walls. This will add originality to the interior and soften the overall appearance of the room.
It is worth taking a closer look at the methods of installing fabrics on walls - you can simply stick them on, or you can use the tension method with preliminary installation of strips (similar to the principle of suspended ceilings).
Wall covering with textiles
Before starting this work, it is worth remembering some features of the process:
- Before gluing the fabric, the walls need to be prepared - cleaned of old finishing material, putty on cracks, apply a thin layer of finishing putty;
- Be sure to check the purchased fabric for shrinkage - a small piece of textile is measured, then washed and dried. After this, the dimensions are checked again and compared with the original data - if there is shrinkage, then when calculating the canvases for the walls it must be taken into account;
- It is advisable to purchase a wide fabric - this way there will be fewer seams. Then the canvas is cut into strips along a length equal to the distance between the ceiling and the floor; the strips must be sewn together to the length of the surface to be pasted;
Please note: when calculating the length of the canvas on the surface, it is necessary to take into account an additional 10-20 cm on each side around the perimeter.
- After sewing the fabric, be sure to iron the resulting fabric, carefully smoothing the seams of the strip joints.
All preparatory work has been done, you can proceed directly to the finishing process. Just be sure to invite at least one assistant - coping with this process on your own is very problematic.
Step-by-step instructions for covering walls with fabric:
- The glue is applied to the left edge of the wall, a layer 10 cm wide is applied. Then the roll of fabric is rolled out towards the right edge of the wall, an assistant should hold the roll of textile, and you yourself should smooth the fabric with a narrow roller so that it is pressed tightly against the wall onto the adhesive strip.
Please note: there must be “overlaps” at the bottom and top - these are the same 10-20 cm of reserve that were provided for when cutting the textile fabric. If the fabric is very heavy, then you can fix it on the wall with wooden slats. They are small, attached to the fabric and wall using miniature nails.
- Next, glue is applied to the upper edge of the wall with a strip of 10 cm. An assistant unwinds a roll of fabric, you press the textile to the glue, rolling these places with a roller. We remind you that for better fixation, you can secure the gluing area with a wooden strip.
- After this, you need to wait until the first two strips of glue have completely dried, and then the right edge of the wall and the bottom are glued in the same manner.
Some people prefer to start the process of gluing fabric on walls from the top edge of the wall - this is allowed, but in this case the sequence will be as follows: top edge - right side - bottom edge - left side.
All that remains is to trim off the excess fabric (those 10-20 cm of overlap) and carefully remove the wooden slats-retainers. Along the perimeter, the wall covered with textiles is covered with plastic/polyurethane skirting boards, moldings or wooden planks - the choice is made individually and depends on the chosen interior style in the room.
Covering walls with fabric
This method of wall finishing is absolutely identical to the principle of installing suspended ceilings. All components can be purchased in specialized stores - these will be different types of profiles into which the tensioned fabric is inserted. Experts recommend turning to professionals for help - the process of covering walls with textiles will be problematic for a beginner.
Designers argue that when choosing a method for finishing surfaces, it is better to give preference to covering - this will allow you not only to periodically remove the fabric and wash it, but also to change the overall design of the room, replacing the color and texture of the fabric. And besides this, it is the method of covering walls with textiles that allows you to use drapery when decorating a room, making soft/wide or narrow folds from the fabric.
Textiles in the interior are original, unusual and even luxurious. If you choose the right colors and harmoniously arrange the textile elements (in the case of partial wall decoration), you can turn even an ordinary room into a surprisingly cozy, comfortable home.
( 73 votes, average: 4.90 out of 5)
Heating cable for pipes: principles of do-it-yourself selection and installation
Which kitchen set to choose?
Related Posts
Drapery
Draping walls with fabric will require the involvement of an assistant.
For finishing you will need a large canvas, the width of which is significantly larger than the perimeter of the room - this is necessary to create folds.
The work does not involve fixing the fabric over the entire surface of the wall; most often, the textiles are fixed to a strip located near the ceiling, and below it falls freely.
Materials and tools needed for drapery:
- nails;
- wooden slats;
- screwdriver and jigsaw;
- level, tape measure and pencil;
- self-tapping screws
Preparing the walls
Before draping the wall with textiles, the surface of the wall is cleaned with a spatula and wiped with a damp cloth to remove dust. Large and small cracks are sealed with plaster. After the solution has dried, sandpaper is passed over the surface, then the dust is removed again.
Fabric preparation
In order for the material to lay in even, identical folds around the entire perimeter of the room, you need to prepare it. The easiest way is to mark the folds with pins, and then sew the entire length of the fabric along the top edge. In this case, you get a ready-to-use canvas with folds already made. Forming them at the stage of nailing the fabric to the wall is much more difficult, and the end result may not be satisfactory.
Operating procedure
Using a level, draw a line along the entire perimeter of the room on which the rail will be installed.
The canvas is folded along the edge and fixed along the intended line using nails. The slats are secured on top of the fixed textile using self-tapping screws and a screwdriver. Fasteners are placed no further than 30 cm from each other.
After installing the slats around the entire perimeter of the room, they proceed to fixing the fabric from below. To understand all the intricacies of the work, it is recommended to watch a video in which the process is filmed in detail.
Pasting
The textile fabric can also be glued to the wall surface by preparing both the fabric and the wall surface in advance. The walls are prepared as follows: first they are cleaned, then they are puttied and primed.
Walls to be covered with fabric must be clean, smooth and dry so that the textile adheres well to the surface.
Covering walls with fabric also involves preparing the fabric itself. First of all, a small piece of the material used is measured, and then soaked and dried in a warm place. If the fabric does not shrink, it is used without pre-treatment. If it shrinks, then the entire textile fabric is then wet and dried so that it does not shrink during the gluing process. In any case, before gluing the fabric, it must be ironed thoroughly.
Iron the fabric before pasting it on the wall
The fabric is cut into strips in length from the ceiling to the floor with allowances of 10-20 cm. Then these strips are sewn together into a large canvas, which should be equal to the area of the wall with allowances along each edge. It is desirable that the canvas be as wide as possible so that there are as few seams as possible. Some sew a fabric equal to the entire surface area of the walls, but working with such a large material is very difficult. Before gluing the canvas to the wall surface, it is ironed again, especially the seams, and then rolled up to the height of the wall.
Pasting walls with fabric is usually done by two people. The fabric is not glued over the entire area, but along the edges of the canvas - on top, sides and bottom. The order of gluing may be different: first one side, then the top, and at the end the second side and bottom, or first the top, then the sides and bottom.
More often, one edge of the wall is first glued, for example the right one, then fabric is applied to it along the entire height from floor to ceiling and ironed with a roller. Then the roll is unwound further and the top edge is glued.
If the fabric is too heavy, it can be additionally secured with slats so that the glue “seizes.”
After these two edges of the canvas are glued, i.e. When the glue dries, begin gluing the two remaining edges of the canvas. To do this, the fabric is stretched and glued to the left. Then the canvas is slightly stretched again and glued from below.
Once the glue has dried, you need to carefully remove the slats using pliers and holding the fabric. The stock of textiles at the edges is removed or folded and left under the baseboard. The choice of skirting boards at the edges depends on the style of the room. The advantage of this method is that in places where there were slats, or instead of a baseboard, you can use textile decor - fringe, small draperies made of the same material, etc.
Most often in modern interiors, not all walls are covered with fabric. One or two walls are selected, most often in the living room, which will be the main ones in the room - they are the ones covered with silk or velvet. Mirrors, pictures or a TV are hung on them, i.e. the textile wall becomes the center of attention in the room.
Textile wall in the living room interior