Window sill-sofa
If you have a wide and durable window sill, you can use it as a place to relax by placing a thin mattress or simply throwing pillows for warmth and softness.
If the window sill does not seem so reliable, you can put a sofa instead. A pleasant view from the window will add attractiveness to this area, and sconces will add functionality. In any case, the window sill makes one of the best places for reading. Other favorites are in the post “The Perfect Place to Read: 7 Ideas.”
Instead of a window sill, there may not even be a sofa at the window, but a bed. But in our climate this is not the best idea, because in winter even a good window can get cold.
Workplace
A window sill can become a good work desk . It is worth putting several small bedside tables under it and equipping the walls with shelves. Instead of curtains or curtains, place a canvas for the projector, which in the future will serve as a good home theater or help in the design of presentations. A cozy sofa will fit perfectly into the interior of the workspace. The view from the window will help you relax and enjoy the pleasant landscape.
Related article: Mansion of Garik Kharlamov [interior and exterior review]
Advice! When decorating your work area, use blue and green colors. They have a calming effect on the brain and help set the mood for productive work.
Window sill-table
The ideal place for a desk is by the window. There is a lot of light there, and in general it’s pleasant to work. The table top can be “extended” by a window sill, which will make the work area spacious.
If it is difficult to choose a table for such a tandem, then the tabletop can be made to order, as was done when arranging this studio in Moscow:
Other photos of the apartment are here.
Window sill decoration: shelving
Both the window sill itself and the space under it can be used as storage space. And this is not just a “flower and a book”, but a serious wardrobe. When arranging storage space under the windowsill, do not forget to leave ventilation holes for the battery.
Of course, you should not clutter the window sill, otherwise little light will enter the room. But if the walls are wide enough to make a niche with shelves in the window opening, this problem can be avoided.
With narrow walls, the shelves can be hinged. Let them be very small - each for one photograph or decorative item. This way the room will look more interesting, and light will penetrate into it unhindered.
How to choose window sills: key requirements and characteristics
The first thing you should understand is that the window sill is the most important element of the window system, and only then a convenient flower stand, an interior item.
In fact, a properly installed high-quality window sill is a reliable barrier that prevents cold air from entering the room from the street and prevents heat from escaping outside. By making the right choice of window sills, you increase the energy efficiency of your home. And this saves the family budget on heating.
The protrusion of the window sill beyond the wall into the room is of great importance. Thanks to its presence, the flows of hot air emanating from the radiator of the heating system do not rise strictly upward, but are directed into the room. It should, however, be remembered that a window sill that is too wide will prevent the creation of a warm air gap near the window and adjacent sections of the wall.
And this, in turn, will lead to cooling of the structure and the formation of condensation on the glass surface and slopes. Therefore, the window sill should protrude no more than 5-6 cm beyond the wall line. When calculating the geometric parameters, it is not the rough level that is taken into account, but the wall with planned or existing finishing (plaster, tiles, drywall, etc.).
- High strength indicators of products. Often, window sills are used as an additional shelf for flowers and house plants. The total weight of such decorations is sometimes significant. So, when choosing a large window sill width on a loggia, you should also select its optimal thickness - within 3-4 cm;
- Resistance to mechanical and chemical influences. When heavy objects fall onto the surface of the product or when using detergents, you must be sure that the window sill will not crack and the coating will not peel off;
- Moisture resistance. If you plan to use the product in rooms with high humidity, such as a bathhouse, kitchen, swimming pools, then you should choose a plastic window sill.
Plastic
Installing a plastic window sill is very simple. No special skills or abilities are required here. It is extremely important to be extremely careful in the process of sawing PVC, when you should avoid using strong pressure so that scratches and chips do not appear at the cut site.
- First, cleaning is carried out;
- Then, using the horizon level, they set up the window sill using beacons. By the way, when installing a window sill, it is tilted down 5mm so that the moisture accumulated from condensation does not linger, but flows down;
- The free space is filled with polyurethane foam, the excess of which is subsequently carefully cut off with a construction knife;
- Finally, the ends of the window sill are protected with plugs, and the window sill itself is cleaned of the protective film.
Such a window sill is secured with a special mortar or glue, but you can also use screws on mechanical supports. In order for warm air to freely rise from the radiator to the top, thereby drying the inside of the slopes and double-glazed windows when heating the room, installation of a PVC window sill requires leaving a protrusion of up to 60 mm.
Wood
Installing a wooden window sill is more difficult, so they have already begun to forget about high-quality wooden boards, although they are not only no less aesthetically pleasing and beautiful than plastic, but are also more environmentally friendly. To properly install a window sill of this type, you will need to pay attention, first of all, to the source material. The window sill board must be free of defects (such as knots and other defects), and, in addition, well dried.
- The board is carefully planed on each side,
- After this, it is given the desired look and, of course, a selection of teardrops and molds is made. By teardrops we mean gutters 7–9 mm wide and 5–6 mm deep, located at the bottom of the window sill board at a distance of 2–3 cm from its front side;
- Upon completion of processing, the board is cut to the required length and given the desired shape. It is important to place all window frames horizontally at the same level. By the way, it is also possible to create composite window sills, connected using dowels, dowels and glue. The optimal length of the window sill is 10–15 cm greater than the width of the window opening. And the optimal protrusion inward should be 5-8 cm less than the width of the window opening.
In this case, installing a window sill with your own hands is done as follows:
- Work begins with the lower section of the board placed on the wall. It is on this that the felt treated with antiseptics is attached, which is attached to the nailed board with the help of shingles;
- The prepared board is placed on a quarter of the bottom beam of the box and fastened to the box with long nails, thereby fixing it even more securely. In this case, the heads of the nails are cut off and the severed ends are hammered into the bottom of the frame block, and then the window sill board is placed on the ends of the protruding nails. If you have to deal with brick or stone walls, the window sill board will have to be fixed using a lime-gypsum mortar. The window sill should slope inward by no more than 2. If its ends need to be embedded in concrete or plaster, they must be treated with antiseptics.
Whatever you decide to turn your window sill into - a chest of drawers, a table, a tabletop, a bed or an ottoman - you will have to take care of several important points.
Firstly, the radiator is usually located under the window. Therefore, when arranging a functional window sill, you will have to solve the problem of heating the room. There are four options for solving this critical problem:
- leave the space under the countertop, seat or bed open so as not to interfere with the flow of warm air from the radiator;
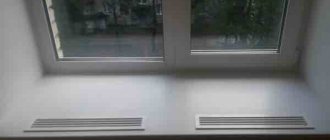
- make sure there are ventilation holes in the area covering the radiator so that the air from the battery rises freely;
- move the radiator to another place in the room, that is, redo the heating system;
- get rid of the radiator altogether, replacing it with a heated floor system.
Secondly, a double-glazed window over such a window-sill-table, ottoman or sleeping place, it is better to choose a three-chamber, reliable one, in order to be guaranteed to get rid of drafts and noise outside the window.
Thirdly, if the radiator is covered with a countertop or completely moved to another part of the room, the window may begin to sweat. This is fraught with serious problems - at a minimum, you will have to wipe up a puddle on your table or countertop every morning, at maximum, you will have to dry the mattress from the windowsill-ottoman or bed and fight mold on the wallpaper. The reasons for this phenomenon, in addition to the transfer of the radiator, may be:
- poor quality of installation work when installing double-glazed windows, resulting in insufficient insulation and access to cold air from the street;
- increased air humidity in the room itself. This indicator can be measured using a hygrometer. If the humidity exceeds 40–50%, then the likelihood of windows fogging increases many times;
- non-functioning or insufficiently functioning natural ventilation system of the room;
- poorly insulated slopes from which the cold comes;
- cheap, low-quality windows that do not cope with the function of protecting the room from the cold.
All these problems must be dealt with if you want your window sill to function not just as a shelf for flowers, but also as a place for storage or rest.
Fourthly, if there is a high and comfortable podium under the window, this will become an additional temptation for the child to open the window and catch a beautiful butterfly flying past, or see what will happen if he throws an iron car down. Locks, clamps and limiters on windows are an indispensable condition if children will use your window ottoman.
READ MORE: Law of Electromagnetic Induction - Cool Physics
Fifthly, remember that it is better to install a window sill that turns into a table or turns into a sofa at the stage of installing double-glazed windows and carrying out major renovations in the house. Otherwise, you will have to dismantle the existing window sill, refinish the slopes that were damaged during the installation of the countertop, and re-glue the wallpaper around the window.
Sixthly, the expansion of the window, inevitable in the case of creating an optimal height of the window sill-resting area, comparable to the height of a standard sofa, is associated with a change in the appearance of the facade of the house. Of course, if you live in a country house, then there is no problem - your house is your facade - change it as you want. But if you live in an apartment building, then making changes to the appearance of the facade of the house is fraught with problems with the management company and regulatory government agencies. That is why a window expanded at will in the living room on the second floor is, rather, an option for private houses.
Remodeling a window sill is no less important and large-scale task than joining one room to another. In some cases, you may need to obtain permits
The fact that a window sill can become not just a beautiful, but also a functional part of a window is beyond doubt. However, in order to turn it into a beautiful tabletop, a full-fledged table, a cozy soft ottoman or bed, you should think through each stage of the work in advance, foresee all possible problems and make the window sill-resting area as safe as possible.
rmnt.ru
08.01.17
Window sill-vegetable garden
Sometimes city dwellers also want to grow something: beautiful flowers or greens for dinner. A window sill is perfect for this. Full instructions for use in the post “Growing bed on the windowsill”.
Window sill in the kitchen
A kitchen window sill can bring a lot of benefits if combined with a work surface. Many housewives dream of having a sink by the window, in which case this idea can be realized.
The window sill can be combined with a dining table, or even used as a bar counter. This frees up space in a small kitchen. We wrote in the article “Table for a small kitchen” what other types of tables save space.
In the end, you can leave free space on the windowsill. This will make your pets very happy.
Installation algorithm for the main types of window sills
Installing a window sill using wooden pads requires a lot of time, but this method is the most reliable.
There are several methods for installing PVC products. Let's look at each of them.
- The first method, the oldest, involves fixing the element using a special composition. Nowadays, this method is used extremely rarely, as more convenient and reliable ones have appeared.
- The fastest installation of a window sill is carried out using self-tapping screws. First, holes are drilled in the window frame into which hardware is screwed. The connection point is treated with acrylic sealant, after which the edge of the window sill is placed under the glass unit and fixed with self-tapping screws. To give maximum rigidity to the slab, special pads are placed under it and the resulting space is filled with polyurethane foam.
- The next method involves installing PVC window sills using spring brackets. These fasteners are screwed to the substitution profile of the product with self-tapping screws. After this, the plate is mounted in the groove formed between the window frame and the bracket, and the product is installed.
- In the last option for installing plastic window sills, no fastening elements (screws and staples) are used. This is the most time-consuming method, but also the most reliable. Its meaning is that the wedges are driven under the slab until its edge is pressed against the frame as tightly as possible.
READ MORE: Rules for transporting children by bus - Argunovskaya School
Each method has its pros and cons. For example, it is not advisable to install a window sill using self-tapping screws near the opening sash. The installation options for PVC window sills differ only in the method of fixing the product under the frame. The remaining stages of work here are absolutely identical.
Use a special gun to blow in polyurethane foam.
As noted earlier, fixing the product can be done in several ways. We will consider the latter - using wooden spacers and polyurethane foam, since it is the most reliable and very popular recently among people doing repairs with their own hands. The procedure is as follows:
- We insert the window sill into the prepared place. In this case, we use a building level and wooden beacons, which we place in increments of no more than 80 cm.
- At the front end we install wooden support blocks under the slab. The distance between them is no more than 50 cm. In this case, the load-bearing elements should not extend beyond the plane of the wall. The distance from the blocks to the side slopes is 10 cm.
- We check the angle of the window sill again with a level. If it does not correspond to the previously specified value, then adjust the thickness of the pads.
- We fill the hole between the slab and the concrete surface with foam. But not completely, but only to fix the product.
- Place the weight evenly on the plate. This will prevent the foam from lifting the sill. Here it is important not to overload the structure, as its surface may become deformed. Often, 3-4 tanks of water with a volume of 5 liters are used as cargo.
- We blow out all the free space under the window sill with foam. Use a special gun to prevent the sealant from splashing around and getting on your clothes.
- After this, we leave the window sill alone for 2-3 days so that the foam completely hardens. We cut off the excess binder with a utility knife.
- If you subsequently find cracks under the slab, treat them with acrylic sealant.
- At the final stage, plugs are installed at the ends of the window sill. To do this, use glue for PVC products. In the end, all that remains is to remove the protective film from the product.
Place several bottles of water on the windowsill to prevent foam from lifting the slab
- The window sill is attached inside the room and at the bottom of the window opening;
- At the bottom of the window sill, a maximum of 60 mm from its edge, there is a gutter - a teardrop up to 20 mm deep, necessary for draining water;
- The final stage of installation begins only after preparing the lower plugs;
- The lower part of the solution of the side slopes is cut down to the wall. Then the wall is cleaned of debris, dust, dirt, etc.:
The window sill is placed like this:
- So that the board is in a strictly horizontal position (measured using a level), and the transverse slope of the window sill inward from the window frame is approximately 3;
- The wedges that form the basis for installation should not extend beyond the wall. Therefore, if they are installed correctly, they will require additional fixation with plaster.
- After this, they proceed to removing the window sill, wetting the wall with water and covering it with lime-gypsum mortar, so that the level of the mortar exceeds the level of the wedges by 15 mm;
- The window sill is placed in the solution and pressed forcefully onto the wedges until it stops;
- At the last stage, the excess mortar is leveled and pressed flush with the wall plaster, followed by rubbing. In this case, the window sill itself fits into a groove made on the block at the bottom of the box. In relation to the side slopes located in the lower part, the same actions are performed - covering with mortar and subsequent rubbing.
The window sill can be installed correctly, so as to prevent its subsequent bending and breaking, by placing metal strips under it and inserting the ends of the latter into the lower plug. However, most often you have to deal with plastic and wooden window sills, during the installation of which strength and reliability can be achieved in your own way for each option.
Wood
Most often, the window sill acts as a working area in the kitchen, children's room or office. You can also use it to set up a work area in the living room or bedroom, if that is where you decide to install a computer or create a permanent place for a laptop.
In the kitchen, there are two options for arranging a work area on the windowsill: with or without moving the sink and hob. The first option is more expensive, as it will require changes to the location of communications - in this case, you will have to install water supply and sewerage to the sink located under the window. Moving a gas stove is completely problematic, since such redevelopment will have to be coordinated with the relevant service.
The second option assumes that the window sill will simply become a continuation of the tabletop. In this case, the costs of money and time are not so great, and the benefits of an additional work area are numerous.
Washing dishes and admiring the landscape outside the window - this is exactly the opportunity that the window sill into which it was decided to build a sink will provide. Can be moved under the window and electric hob
The main task in the case of turning a window sill into a work area in the kitchen is to install the countertop at the same level throughout the entire area. If the window is large and the window sill is located below the tabletop, you will have to sacrifice part of the window. Or, on the contrary, expand the window opening
If you don’t want to change the size of the window at all, and the height of the window sill and the countertop do not match, you can arrange a separate dining table or bar counter under the window, which is in no way connected with the main working area of the kitchen countertop.
The choice of materials for the window sill, which has turned into part of the countertop, is very large: marble, artificial stone, metal, ceramic tiles, concrete, quartz stone, acrylic, glass, wood, laminated chipboard and MDF. It all depends on the financial capabilities of the owner and the overall design of the kitchen interior.
If the window sill-table and the tabletop are not connected to each other and are also made of different materials, they do not necessarily have to be the same height
At the wide window-sill table in the kitchen you can calmly drink tea while watching the surroundings
As for turning a window sill into a work area in an office, nursery or living room, in this case there is no need to level the height based on adjacent surfaces, as in the kitchen. However, sitting at such a table should be comfortable, and if there is no desire or opportunity to reduce or expand the height of the window opening, you will have to take care of having chairs of optimal height.
In a small living room or in a nursery for two children, a window sill table will be a real godsend, which will significantly save space.
The window sill in this small bedroom has turned into a real office. The only negative is that if this is a table in a nursery, then the child, while doing homework, may be constantly distracted by what is happening outside the window
Have you noticed how cats love window sills? It is literally impossible to drive them away from this “observation post.” Sometimes you want to follow the example of your pet and climb onto the windowsill so that, while sitting with a cup of tea, you can admire the beautiful landscape or just watch what is happening on the street.
READ MORE: Rules for the design and safe operation of steam and hot water pipelines
A window sill as a seating area differs from a window sill-table or tabletop primarily in height. Climbing onto an ordinary structural element of a window, which is traditionally located at a height of about 90 centimeters from the floor, is not very convenient. And the usual width of the window sill - 35–40 centimeters - will not allow you to sit comfortably.
Therefore, when turning a window sill into a relaxation area, you should first take care of expanding the window opening in order to lower the future ottoman or chair to a height of about 45 centimeters (the traditional height of an ordinary soft sofa). In addition, the surface of the former window sill will definitely have to be expanded in order to make sitting (or even lying) on it comfortable.
The next point is arranging a soft surface. Agree that sitting on plastic or stone will not be very comfortable. The simplest option is a mattress made to fit the extended window sill or several pillows simply thrown on a seat made of wood or laminated chipboard.
A more serious approach is to order a special soft seat, which will replace the former window sill.
In this case, the window sills of the corner windows turned into a real observation post, where there was a place for a telescope. A small thin mattress, soft pillows - even several observers will be comfortable here
In this attached loggia, benches along the semicircular windows simply suggested themselves. And for the comfort of those sitting, there are pillows and, again, a thin, removable soft mattress. In this case, due to the unusual shape, it had to be sewn to order