| https://www.skladovka.ru/ usmer air springs in the warehouse, rowan. www.skladovka.ru |
- 1 Basic information about the material 1.1 Selection of lining
Decorating premises with clapboard is becoming increasingly popular. The demand for these materials is partly explained by the wide range available for sale, and partly by the ease of finishing work.
Thus, when planning a cosmetic renovation, you will certainly select the wall and ceiling cladding that will be in harmony with the rest of the surrounding elements. In addition, you can install these finishing materials yourself without the involvement of professional installers.
So, all that remains is to find out how to decorate a house with clapboards and what this finishing material is.
The use of plastic lining in the interior
Basic information about the material
Lining is a type of finishing material that is used for cladding walls, ceilings, facades and other surfaces that are not exposed to mechanical stress.
The term “lining” comes from the first half of the last century, when railway cars were universally covered with wooden boards. Cars trimmed with natural wood are a thing of the past, and the name is firmly attached to the cladding strip.
In accordance with the specific application, the lining is divided into the following categories:
- modifications for external finishing work - made from materials that are resistant to the negative effects of the external environment;
- modifications for interior cladding are distinguished by more advanced aesthetic design, a variety of textures and colors.
In accordance with the type of production raw materials, lining is divided into the following types:
- plastic modifications - made of polyvinyl chloride (PVC) with through-painting, which ensures their resistance to abrasion;
- wooden modifications - are made using milling equipment from edged boards and are an environmentally friendly finishing material;
- modifications made from MDF - externally similar to wood counterparts, but at the same time they are more durable and less expensive;
- aluminum lining is not very common, it is not cheap, but it looks very impressive.
Selection of lining
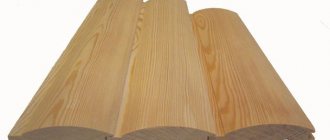
Eurolining assembled
Before we find out how lining for exterior finishing is used for its intended purpose, let’s determine the features of choosing these materials.
The choice of wooden lining is carried out in accordance with the grade.
In accordance with the type of profile, the lining is divided into the following categories:
Various lining profiles and additional elements
- “Standard” - the cross section is made in the shape of a trapezoid with a medium-sized tenon and groove;
- “Calm” is the same as “Standard”, but the corners of the trapezoid in the cross section are rounded;
- “Europrofile” (Eurolining) – characterized by a tongue and groove of an increased size (up to 8 mm);
- “American” - installed in a herringbone pattern, so that the top bar hangs over the bottom.
Important: Regardless of the profile, the finishing board on the back side must have ventilation gaps that promote effective moisture removal and prevent wood rotting.
The average price of wooden lining made from coniferous wood with natural moisture ranges from 170 to 220 rubles per 1 m². The average cost of Eurolining made from softwood with a moisture content of no more than 14% ranges from 190 to 300 rubles per 1 m².
The photo shows an assortment of colors for plastic lining
The choice of plastic lining - PVC panels is carried out in accordance with the color and texture, as well as in accordance with the standard sizes.
In accordance with the textured designs, glossy and matte PVC panels are distinguished. The color design of products can be monochromatic, with an ornament, or imitating the surfaces of other materials. For example, you can purchase panels painted to resemble wood, marble, polished metal, etc.
Cross section of PVC panels
Standard sizes and dimensions of PVC panels:
- thickness – 8 – 10 mm;
- width – 100 – 240 mm;
- length – 3 and 6 m.
On the domestic market you can find PVC panels of such brands as Aplast, Brilliant, Welltech, Alta-Profile, etc.
- The price of PVC panels of plain matte single-section starts from 50 rubles per piece.
- The price of single-section glossy PVC panels with a pattern ranges from 60 to 100 rubles per piece;
- The price of multi-section PVC panels ranges from 160 to 250 rubles per piece.
When choosing lining, do not forget to purchase moldings, including:
- starting bar;
- connecting strip;
- baseboard;
- outer corner;
- internal corner.
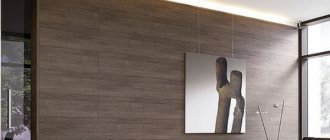
MDF panels imitating the texture of a wood surface
MDF wall panels are lining made from fine wood dust, pressed into a single whole. Externally, the panels are practically no different from wooden lining. The connection is also carried out using tongue and groove type connecting elements.
The sizes of MDF panels from different manufacturers are as follows:
- Kronospan: length - 2600 mm, width - from 153 to 325 mm, thickness - from 7 to 14 mm;
- NDM: length - from 1300 to 2600 mm, width 198 mm, thickness - 6 mm;
- Soyuz (Russia): length – 2600 mm, width 238 mm, thickness – 7 mm.
On average, the price of MDF panels ranges from 150 rubles to 235 rubles per piece.
Aluminum lining profile for facade cladding
Another category of lining is aluminum strips, which are used to assemble slatted ceilings. In fact, this is also a type of lining, but such material is in little demand, and therefore it can be purchased mainly to order.
Unlike the previously listed varieties, aluminum products are hollow on the inside and represent a curved profile with a tongue and groove designed for mounting on a special profile - a stringer.
Profile of aluminum panels for mounting slatted ceilings
The price of painted aluminum lining per linear meter from different manufacturers ranges from 180 to 250 rubles. The cost of unpainted products is on average 20% lower.
Areas of application and characteristics of plastic lining
Recently, a new facing material called plastic lining has been used in construction for finishing premises. This is a synthetic product made from polyvinyl chloride. Lining quickly became one of the popular facing materials, allowing you to quickly and inexpensively carry out minor repairs in any room. PVC panels do not accumulate dust and are easy to clean.
Main characteristics of the material
The facing material has a lot of positive qualities, among which are:
- Long service life.
- Absolutely resistant to moisture.
- External attractiveness.
- Coating resistance to fading.
- Frost and heat resistance.
- The ability to hide any uneven surfaces behind the panels.
- Contains no harmful chemicals.
- Resistance to various atmospheric influences.
In addition, the lining in the photo is valued for maintaining an attractive appearance over a long period of time. Does not require special skills for installation and surface care. By giving preference to lining, you can quickly and inexpensively update the interior and exterior of any building. During operation, PVC panels do not require special care. It is only necessary to periodically wipe the surface with a damp cloth.
PVC panels are plates with a honeycomb structure, thanks to which the material retains heat and soundproofs the room.
Despite its excellent technical characteristics, PVC material has one drawback - low resistance to mechanical damage. In other words, walls lined with clapboard cannot be hit with heavy, sharp objects.
Technical data
Plastic lining is produced in standard sizes: length - 3 or 6 meters, width - 10 cm, thickness - 1 cm.
According to the technical specifications, PVC panels can be used at temperatures ranging from -40 to +115 degrees Celsius. But practice shows that temperature changes should not exceed 30 degrees.
PVC material is made from solid polyvinyl chloride, to which a small amount of softener is added, without asbestos and cadmium.
Varieties
Lining is produced in three types:
- Regular form.
- In the form of panels.
- In the form of sheets.
Each of these varieties differs in size and type of connecting locks. Conventional lining is equipped with two types of locking joints, due to which the canvas is solid without visible connecting seams.
The panel type of lining has a width from 15 to 50 cm. However, a material whose width is 25 cm is more often used. Panel cladding has a varnish or film surface. In the first case, the finish has a shiny surface. In the second, any design is applied to the film, which allows you to decorate the interior of the room in an original way.
Sheet lining is produced in the form of plates, the dimensions of which can be 80x150 cm or 2 m x 4 m. The thickness of the product ranges from 1 to 30 mm. PVC material simplifies the finishing process in any room with any area.
Fastening of any plastic trim is carried out with a special stapler using construction brackets. Sometimes self-tapping screws are used instead of a stapler.
Where is PVC cladding used?
Due to its low price, ease of installation and long service life, plastic lining is widely used for interior and exterior cladding of buildings.
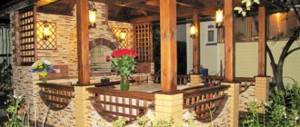
Often, lining is used to decorate the exteriors of private houses in the photo. The result is a smooth, clean and visually attractive coating. Cladding panels are produced in a variety of colors, which allows you to create a decorative finish for your home.
In apartments, plastic lining has also found wide application. Loggias, balconies, corridors, and bathrooms in the photo are often covered with PVC panels.
PVC lining can be used for finishing attics, basements, cellars, baths, saunas. This is a simple, practical and inexpensive finishing option.
Plastic finishing material is used for finishing in non-residential premises. Surely, each of us has more than once visited offices, travel agencies and shops lined with PVC panels. The use of this material in commercial premises is due to the practicality and ease of care of the coating.
Lining made from polyvinyl chloride is produced in a wide range. In the retail network, you can find material of any color, marble, wood, with patterns and ornaments.
To summarize, we note that plastic finishing material is an excellent, durable and inexpensive way to beautifully decorate any room. Due to its wide range of applications, lining can decorate both the interior and exterior of a house, apartment or office.
Installation of wooden lining
Scheme of fastening wooden planks using clamps
Finishing with wooden lining in residential premises and baths is carried out on a wooden load-bearing sheathing. To perform installation work, you will need the following tools and materials:
- water level;
- fine-toothed hacksaw and miter box;
- perforator;
- hammer;
- lining with a suitable profile;
- moldings;
- lath with a cross section of 25*50 mm for the sheathing;
- dowels with a length of at least 40 mm;
- clamps and nails 15 mm long;
- thermal insulation materials, if insulation will be installed between the wall and the finish;
- paints and varnishes and tools for their application.
Stages of installation work
In order to prepare the materials, we apply impregnations containing antiseptics and fire retardants to their surface. Lining treated in this way for the exterior decoration of a house or for interior cladding can only be used after the impregnation has been completely absorbed and dried.
At the same stage, you can coat the planks with wood finishing varnish.
Important: If wooden lining is used to decorate a bathhouse, the use of paints and varnishes is unacceptable.
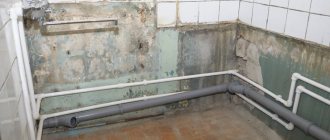
During the preparatory work, loose plaster is knocked off the mounting surface.
Using a flat strip, the area of the mounting surface that protrudes most forward is determined. In this area, we attach the sheathing directly to the surface.
In the place of the depressions, we place plywood scraps under the batten and, thus, level the position of the sheathing in accordance with the water level. The rail should be positioned strictly vertically if the walls are being finished, and strictly horizontally if the ceiling is being finished.
Lathing for vertical installation of lining
The sheathing is packed with a step between adjacent slats of no more than 60 cm. The sheathing is positioned horizontally if the lining is installed vertically. And vice versa, the slats are packed vertically if the lining will be installed horizontally.
Next, finishing the room with wooden lining involves laying insulation. To do this, we use a special self-adhesive foil roll-type material “Penofol”, which we cut according to the shape of the spaces between the slats.
We install the prepared insulation fragments into the gaps and smooth them so that they adhere to the mounting surface. If the thermal insulation does not have an adhesive layer, it should be additionally glued with tape.
We start installation from the corner. We place the bar so that it rests with its tenon in the corner. We nail the tenon to the sheathing.
Methods of fastening planks with clamps and nails
On the reverse side, where the groove is located, we fix the bar with clamps, which we nail down. Having installed the first plank, we check its position by level and only then install the subsequent planks.
Fastening with a nail driven into the groove
After the covering of the surfaces is completed, a corner plinth is attached at the junction of the walls and ceiling of the walls and floor and in the corners. The plinth is cut at the required angle using a hacksaw and a miter box, after which it is nailed with small nails, from which the head is first bitten off.
Finish options
Finishing methods may vary. Fully finishing an apartment with clapboard is rare, but in the interior of a house it is a popular option.
In a city apartment, lining is used in doses:
- for covering walls in a separate room;
- to highlight a zone in a large room;
- as panels as part of the combined decoration of living rooms or bathrooms.
We recommend: Eurolining: differences, dimensions, characteristics
Kitchen decoration with clapboard is especially popular: full (with the exception of the apron in the area of the sink and stove) or combined - wood in the dining area, tiles in the work area.
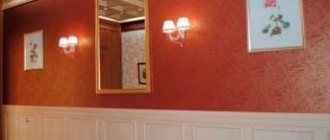
The walls of the hallway and hall can also be sheathed either from floor to ceiling, or partially - in the form of panels at the bottom.
Wooden lining in the toilet can be used for complete decorative cladding if the riser pipes are hidden in a separate plumbing box made of moisture-resistant material.
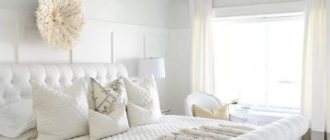
In the living room or bedroom, if the house is not made of wood, lining is used to highlight a certain area. And the texture and color are selected according to the general style - for furniture and interior doors.
The attic is a special case. Regardless of what materials the house is built from and the finishing of the remaining rooms, it can be completely covered with wood.
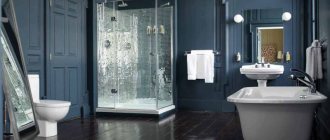
The lining for the bathroom must be made of hardwood with mandatory impregnation with hydrophobic and antiseptic compounds. And the finishing treatment should be a multi-layer coating of varnish or oil. But heat-treated boards are most resistant to humidity. This finish looks especially harmonious if the washbasin, bathtub or shower cabin is made of wood.
Installation of PVC panels
Moldings and their application diagram
If you are going to decorate the kitchen with clapboards yourself, the optimal solution would be to use PVC panels. Panels made of polyvinyl chloride are resistant to excess air humidity and temperature changes, and therefore will last a long time in the kitchen, bathroom and toilet.
Finishing premises using such material is in many ways similar to installing wooden lining. In both cases, lathing is used.
Installation of PVC panels with clamps
To install lathing under PVC panels, use:
- wooden blocks 25*50 mm;
- metal profile with a thickness of at least 2 cm;
- plastic profile 1 cm thick.
Important: If the room is cramped, in order to make the most efficient use of the free space, you should purchase a special plastic profile. If there is no need to save free space, you can use more affordable wooden blocks.
The installation instructions for PVC panels are in many ways similar to the installation of wooden lining, but are more simple, since the plastic is easy to cut, and in addition, you can do without the use of clamps.
Finishing a bathroom with PVC lining is done as follows:
- old coating, for example, peeling ceramic tiles, is removed from the mounting surfaces;
Installation of battens
- the sheathing is placed on the surface prepared in this way;
- if the sheathing is made of wooden blocks, we fasten the corresponding moldings along the perimeter with small nails: in the corners - corner strips, along the bottom and top - starting strips and plinths;
Vertical installation of PVC panels on horizontal guides
- We slide the first panel into the molding frame prepared around the perimeter, so that the side with the tenon fits into the corner strip;
- We nail the reverse side of the plank along the groove line with screws or nails to the sheathing;
Installation of PVC panels begins from the corner strip
- We insert the second into the installed first plank and do this until the wall cladding reaches the opposite corner plank;
- We slide the last panel into the opposite corner, having previously cut it to width.
Important: If the sheathing is made of wooden blocks, the lumber must be treated with antiseptic solutions. In some cases, to save money, lumber can be impregnated in several layers with waste. Such measures will prevent wood rotting and the need for premature restoration.
Decorating a bathroom with wood, what material is suitable
2014-04-03 Author:Vera Category:Bathroom Views: 23626
If we talk about the stability of the material, then covering it with ceramic tiles or plastic is somewhat more practical than finishing a bathroom with wood, given the constant humidity and temperature changes in the room. If the choice is made on wood finishing for some reason, then today there is a huge selection of various methods of protecting wood material that will effectively increase its moisture resistance. But at the end, the bathroom will be cozy, stylish and environmentally friendly.
Decorating a bathroom with wood: finishing materials
Types of wood for bathroom finishing
Wood can not only transform any room, making it more comfortable; this type of finishing is especially suitable for those who appreciate a healthy lifestyle. Thanks to modern technologies, well-processed materials and the use of paints and varnishes will transform any, even very intricate, interior. Finishing a bathroom with wood will allow you to imitate any expensive type of wood and obtain the necessary structure and color.
Taking into account the increased requirements for the room and material, it is advisable to choose special types of wood material:
- Wood must have a low deformation coefficient.
- Maximum moisture resistance.
- Resistance to the spread of microorganisms (fungus, bacteria).
Taking into account all the listed requirements, you can choose a match, these breeds include:
- ash;
- elm;
- oak.
Modern bathroom renovations (more details below) include different combined finishes from different types of wood.
Finishing the bathroom with cork wood
In areas where there is intense exposure to moisture, more moisture-resistant exotic wood species are used, such as:
- bamboo;
- merbau;
- teak;
- Cork tree;
- beech;
- larch;
- cedar and others.
Places in the bathroom remote from places of high humidity are finished from any wood species. Read on the topic “Finishing a bathroom in a wooden house.”
Attention! Regardless of the finishing location and choice of material, the wood must be dried.
In what form is the material used for finishing the walls in the bathroom?
Wood finishing in the bathroom is made using various materials.
The most popular among them:
- Glued board.
- Wooden lining.
- Solid array.
- Veneered boards.
Attention! If you do the installation yourself, then it is necessary to carry out special treatment with moisture-proofing agents.
Advice. It is recommended to use solid wood in bathroom decoration only for decorative inserts.
Glued board
Glued boards are more stable and resistant to moisture, and are less susceptible to deformation than others. The material is already produced completely ready for finishing and does not require additional processing. Thanks to the high precision of the processed material, the finish in the bathroom is almost monolithic, without additional coating or gaps. Plywood or veneered chipboard also has better moisture resistance than solid wood.
Lining
If you decide to renovate and design your bathroom using wood, then lining is the best option for finishing the walls, see photo. Read more “Bathroom finishing options, what material to choose.”
Attention! To decorate the walls with clapboard in the bathroom, you will need guidelines for independent work.
To attach wooden lining, you will need metal or wooden sheathing. Staples, nails, profile strips and plinths are used as fastening elements. When installing wooden finishing materials, it is necessary to ensure sufficient ventilation.
The ventilation duct will prevent mold from forming.
Moisture-resistant plywood is mounted a little differently. Chipboard and plywood can be installed directly on the plaster using glue or screwed with self-tapping screws to a previously installed moisture-resistant GLK. To diversify the choice of wood finishes, you can use wooden panels; they look very stylish and have recently been often used in modern renovations.
Wooden floors
In frequent cases, parquet or boards are used to finish the flooring in the bathroom. The most durable is a three-layer parquet board. The material undergoes additional processing at the factory. The three-layer board is moisture resistant, and installation is easier than laminate. But it is not always possible to purchase this material, since its price is much higher than regular parquet or floorboards. Before installing boards or parquet, be sure to treat the material with an antifungal and water-repellent agent. And after complete installation, it is necessary to additionally protect the surface from moisture with wax, paint or varnish.
If you decide to create a combined interior and combine wood with tiles or other material, it is recommended to finish the wood away from damp places. If a wooden board is chosen as the floor covering, then try to give preference to wood species that are more moisture-resistant.
Finishing a bathroom with wooden paneling: installation instructions
Installation of wooden lining is not as easy to complete as it might seem at first glance. Therefore, if you do the installation yourself, without certain skills, it is recommended to first watch the training video.
To cover a bathroom with clapboard you will need the following tools:
- Hacksaw.
- Hammer.
- Building level.
- Roulette.
- Nails.
- Electric drill.
- Screwdriver for fastening the sheathing.
How to correctly calculate the amount of lining
The procedure for installing wooden lining
At first glance, it may seem that the amount of lining you will need is exactly the same as the area of the room, but this is a mistaken opinion. The height of the walls does not always coincide with the length of the lining; some part will be used for scraps.
By placing panels lengthwise or crosswise, you can manipulate the room, making it visually wider or longer. By laying the panels vertically, it is possible to raise the room upward. Having decided how the slats will be located, you can safely calculate the material consumption. At the time of purchase, it is recommended to add 5-10% to the estimated volume.
When purchasing lining, it is recommended to immediately purchase finishing materials:
- Inner corners.
- External corners.
- Facing film for joints.
Advice. It is better to buy corners and planks wider so that all irregularities and cracks can be completely hidden.
Additional materials
Depending on how you plan to arrange the lining, you must immediately design the mounting locations for the frame and calculate the number of planks. Planks used are 20x40mm or 30x40mm. It is best to buy the longest planks that are available.
Advice. The planks for the frame must be smooth, without splitting wood or knots.
Installation to the walls is carried out using special hangers (U-shaped). From the name you can understand that they can be bent into a P-letter. If the walls and ceiling in the bathroom have radical differences, it is recommended that they be better aligned at the stage of attaching the frame. Self-tapping screws and dowels will be needed as fastening elements for the sheathing.
Sometimes the walls and ceiling in the bathroom are insulated with mineral wool, and the insulation layer is covered with a hydrobarrier using a stapler.
Order the sale of decking boards, fencing and facades made of WPC, as well as installation of any complexity here.
Installation of other types of lining
Installation of MDF panels when finishing the ceiling
MDF panels are installed according to the same principle as wooden lining. The only characteristic difference is that the first panels from the corner on the tenon side are fastened with self-tapping screws.
Installation diagram of MDF panels
At the end of the installation work, the place of fastening with self-tapping screws is covered with a corner molding, which is glued with “Liquid nails” or similar assembly adhesive.
Installation of slatted ceiling
Now let's look at how to install aluminum lining, which is most often used in the manufacture of slatted ceilings. To install a slatted ceiling, in addition to aluminum lining, you will need guide profiles - stringers, a decorative metal profile that is attached along the perimeter of the walls and self-tapping screws.
Scheme of fastening aluminum lining to supporting rails - stringers
The installation instructions are as follows:
- using a water level and strings in the upper part of the walls, a perimeter is marked along which the ceiling will be mounted;
- a decorative profile is attached along the marked line;
- guides are attached using self-tapping screws or special braces, the lower part of which should be located 5 mm above the surface of the decorative profile;
- panels are snapped onto the guides, which are pre-installed into the decorative profile;
- For lighting fixtures, holes are drilled in the lining using a cup cutter of a suitable size.
Conclusion
As you can see, despite the variety of types of lining, installing it is not so difficult. And to make the task even easier, we recommend watching the video in this article, after which you can leave a comment about what you read.
Similar articles
- Sandwich panels for interior finishing of slopes and windows: video instructions for DIY installation, photos
1 Properties of the material 1.1 What the panels are 1.2 Advantages of the coating 2 Installation of wall panels 2.1 Features of selection, installation and operation…
- Finishing a bathtub with plastic panels: video instructions on how to finish it yourself, photos, how much it costs
1 Finishing the walls and ceiling with plastic panels 1.1 Installation of the frame 1.2 Installation of PVC panels 2 Conclusion Of course, bathroom renovation in most…
- How to decorate the walls in the toilet: video instructions for do-it-yourself installation, the best way, photos
1 Existing materials 2 Sheathing with PVC panels 2.1 Features of plastic 2.2 Selection of panels 2.3 Preparatory work 2.4 Installation of panels 3 Conclusion When...