Ideas for the bathroom are very much appreciated today, because every owner wants to get an original interior in a limited space with a standard set of plumbing fixtures. You want to stand out in the best possible way, but it’s quite difficult to arrange everything so that the design is atypical and at the same time beautiful.
We will not list all the options that claim to be original; we will only note those ideas that are not encountered very often.
The main advantages of drywall
To ensure the viability of drywall, you should determine its main advantages as a blank for future niches in the bathroom:
- Niches of different parameters and shapes can be constructed from plasterboard, so such structures can be harmoniously combined even in miniature rooms, using the ceiling, walls, corners, etc. If it is impossible to install full-fledged furniture, you can use an alternative option in the form of niches supplemented with shelves.
- You can make unique and reliable barriers from drywall that allow you to hide any unevenness. There is no need to apply a thick coating of putty, which will dry in a few days. A plasterboard sheet will eliminate all unevenness, making the surface perfectly flat, even with curved walls.
- Financial question. Most people pay attention to the price of the material. That is, moisture-resistant drywall will be the optimal solution, the cost of which will be low compared to the most effective results.
Plasterboard niche
A niche in the bathroom, the photo of which is shown on the website, can serve as a stand for any items. You can additionally attach hooks, shelves or slats for towels to it. This design will also help hide the toilet tank. But do not forget that the bathroom is a room with high humidity, so you should purchase moisture-resistant drywall.
A niche in the bathroom made of plasterboard sheets will look aesthetically pleasing, comfortable and laconic. Acting as an indispensable detail in modern design, niches in the bathroom reflect the meaning (in large structures you can disguise a washing machine or shower stall) and look beautiful (small openings serve as a mirror frame).
pros
- The main function of a wall niche is to store all kinds of things. Depending on the size and location, it can be used as a rack or shelf. But, unlike these pieces of furniture, a niche in the wall looks quite fresh and original, reminiscent of the style of antiquity and classicism.
- A niche allows you to make good use of space that usually remains unused: for example, above the bathtub or above the toilet. If the room has built-in plumbing equipment, all connections to which are hidden behind a plasterboard wall, a wall niche will be an excellent solution that saves space in a small bathroom.
- If there are a large number of communications on the walls in the bathroom that spoil the appearance of the room, this problem can be easily dealt with by hiding everything behind a false plasterboard wall. And so that useful space does not go to waste, one or more niches should be organized in the wall. Even if you don't need additional storage space, niches can be used for interior decoration, such as placing candles or potted plants in them.
We invite you to read How to remove a blockage in the bathroom - an overview of cleaning methods
Making a frame for a plasterboard niche
Probably everyone knows that the frame in any drywall product is the main part. The strength and quality of the finished structure, as well as the aesthetic appearance, depend on it. The completed frame of the plasterboard niche will account for about 80% of the work done, so this work stage should be taken very seriously.
Niche in the bathroom with shelves
Basically, when making plasterboard shelves in the bathroom yourself (photos of the work are presented in the gallery), you should simultaneously cover the walls. Therefore, the problem of leveling walls should be approached as a multi-stage job.
The work begins with marking the contours of the future structure on the wall. To do this, you can use a rack or laser level.
This will require knowledge of geometry lessons and, by lining up parallel lines on the wall, you will need to draw a rectangle with the necessary parameters. In our situation, the niche in the plasterboard bathroom will be located in the horizontal plane of the wall, which will simplify the work. You will also need to draw 2 parallel horizontal lines, then use two vertical lines on the near walls and lines parallel to the wall on the ceiling and floor to mark the recess of the niche. The lines need to be reflected in full, since in the future ud profiles will be recorded on them.
Installation of profiles will be the next type of work in the manufacture of the frame. You should prepare a hammer, a hammer drill, dowels 4-6 cm long and 0.6 cm in diameter. Installing the guide profiles is a simple matter, but when doing it you should be very careful and attentive. You will need to fix the profile with one hand and make a hole in the wall for the dowel with the other. Any person can do such work without training.
After installing all the guide profiles, at the next stage of installing the plasterboard niche, you will need to give the structure real shape (rigidity and volume). In this case, you will need to twist a pair of ud-profile guides into a common system, which will serve as the corner of the niche. Two such products should be made, one of which will be attached to the bottom of the opening, and the second to the top. The corners are attached to opposite walls and fixed with load-bearing CD profiles, which are installed between the floor and the corner piece, as well as between the corners and walls. The profile fastening pitch is 400 or 600 mm, but the first indicator increases the strength and reliability of the structure. The same manipulations should be done in the upper area of the opening.
Plasterboard shelves in the bathroom
Attention! When carrying out all stages of installation work, be sure to control the location of the profile using a level.
In essence, we can talk about the readiness of the frame. Now, after studying the design of a plasterboard niche in the bathroom (photos of which are presented on the site), you will need to cover it with sheets of plasterboard. But first, attention is paid to carrying out hidden communications, for which all the required electrical cables are laid and pipeline outlets are installed in the required position. If necessary, the internal space of the frame is filled with insulation. Only after all the preparatory work has been carried out can the frame be sheathed with the final installation of a niche in the bathroom.
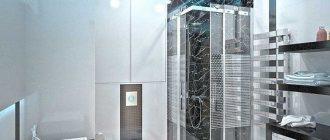
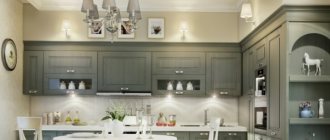
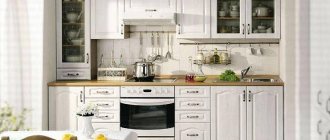
Bathroom in a minimalist style
It would seem that this is what is difficult here - minimalism involves a minimum of objects and decorative elements, which means it is extremely simple. This was not the case - most often this style is affordable only for wealthy citizens, since in the absence of details the eye stops at the walls, ceiling and floor - which means they must be ideal.
The main rule of minimalist design is the absence of unnecessary details, and if there are any, it is advisable to hide them. This means that the room should be monochromatic, without splashes, ideally light shades to expand the space. Be that as it may, disharmony is strictly prohibited; everything must be harmonious and harmonious. When looking for an original idea for a bathroom, you should definitely think about laying seamless tiles - visually you will end up with one continuous tile, which will simply be an example of minimalism.
The most common colors of the minimalist style are white, black and gray. The design does not have to be completely monochromatic, but it should be designed predominantly in one of the shades, and the second can highlight accents - for example, in a white room, mark the ceiling line with black. Bright accessories are possible, but they should be used sparingly.
Stages of covering a frame for a plasterboard niche
There are no difficulties in carrying out such work, because the completed frame accounts for 80% of all work. Plasterboard sheets should be cut into pieces of the required sizes and screwed to the frame using metal screws measuring 2.5 cm, with a diameter of 3.5 mm. Self-tapping screws need to be fastened at a distance of 10-15 cm (the smaller the step between fasteners, the better), since the drywall will have to withstand the load of the tile.
When solving the problem of installing a plasterboard niche in a bathroom, you should remember that regardless of the resulting depth of the structure, some space will need to be allocated for it. If the apartment has a small room with dimensions of 1.5 * 1.5 m, then the niche under the bathroom can only be made in the recesses for communications existing in the wall.
Plasterboard shelves in the bathroom
Procedure for making a shelf
- At the first stage, the frame is constructed. If the shelf is not intended for storing heavy objects, then standard ud and cd profiles can be used for the frame.
- The frame for the shelves will be constructed in a similar way to wall structures. A guide profile is sewn onto the wall and secured using self-tapping screws and dowels. The carrier is fixed to the guide profile with small screws called “seeds”.
- The frame is covered with plasterboard sheets. Self-tapping screws for metal measuring 25 mm are used. Communications or lighting can be installed in the resulting shelf. But such work should be carried out before attaching plasterboard sheets for sheathing.
- The surface of the shelf is puttied. In this case, all corners are covered with perforated material, and the joint areas are puttied with reinforcing tape. After the putty has dried, the surface is cleaned with an abrasive. Now the shelf can be painted or covered with mosaic.
Creating plasterboard niches in the bathroom: photo
Even those who have no construction experience can make built-in niches in a bathroom from plasterboard, because the material is easily mounted on metal profiles.
Before creating a niche in the bathroom from plasterboard, you should draw it on paper
In order to assemble the structure, you must follow the following sequence of actions:
- Apply markings. The markings should be applied to a flat wall; in this case, it is better to use a building level. The depth of the niche is displayed on the ceiling and floor.
- Install the starting profiles on the floor and ceiling using 6x40 dowels with a distance of 400 mm.
- Attach vertical guides along the markings every 60 cm.
- Install horizontal profiles at the distance at which the future niche should be located. They can be secured using self-tapping screws. If lighting is installed in the niche, then at this stage communications for the lighting system are installed.
- Cover the frame with sheets of plasterboard. To make niches in the bathroom, you should use only moisture-resistant plasterboard. First, the frame is sheathed on the sides (if the niche is protruding), then from the inside and finally from the front. In this case, the front sheets must overlap the side sheets. It is most convenient to fasten the sheets with 25 or 35 mm self-tapping screws.
- Putty the drywall and rub the dried putty to a smooth surface.
- Finish the structure according to the design idea.
For finishing niches in the bathroom, waterproof paint, tiles, PVC panels, and decorative plaster are suitable. An unusual option would be to decorate the structure with mirror or glass tiles or small mosaics.
Helpful information
You should remember about the preliminary preparation of all technological holes, which, as needed, will become necessary for maintenance of communications. For example, these could be pipelines hidden in a plasterboard niche.
Niche in the bathroom - design option
When arranging plasterboard niches with shelves, you should think about good ventilation.
Niche in the bathroom - design option
Niche in the bathroom
Niche with lighting in the bathroom Plasterboard shelves in the bathroom
Niche in the bathroom made of plasterboard Niche in the bathroom with shelves Plasterboard shelves in the bathroom
Niche in the bathroom Plasterboard niche
Recessed niche in the bathroom: advantages
A wall niche in the bathroom is a convenient, functional element that allows you to abandon standard bathroom furniture in favor of new, unusual forms.
In the recessed niche in the bathroom you can place towels
A niche as an architectural element has a lot of advantages, of which we can highlight:
- Decorative. You can decorate a niche with any material, in any color scheme. In addition, today you can make recesses of various shapes and sizes.
- Practicality. The main task of niches is to place everyday items. The openness of the design makes it easy and quick to get what you need.
- Functionality. Using niches you can hide communications on the wall and surface defects.
- Optimizing space in the bathroom. A niche is an ideal solution for small bathrooms, because it allows you to effectively use the space above the bath. At the same time, the room will not be cluttered with cabinets and cabinets.
In addition, niches can be decorated with small interior items that will create unique comfort and complement the design of the room (for example, flowers in pots, candles, incense sticks, etc.).